Table of Contents
Advertisement
Advertisement
Table of Contents

Related Manuals for Hisense RF702N4IS1


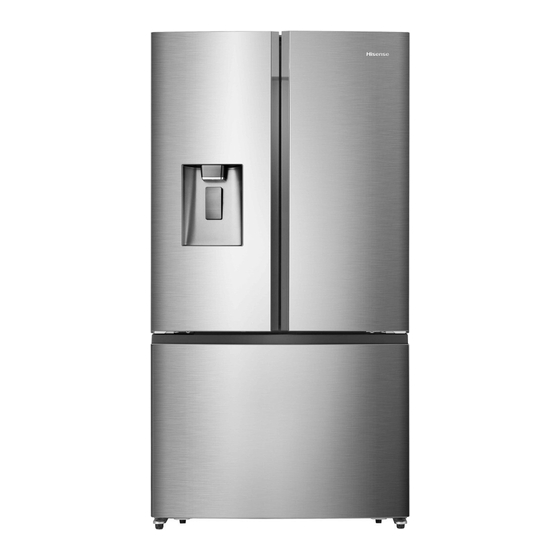
Summary of Contents for Hisense RF702N4IS1
-
Page 2: Table Of Contents
Contents Safety and warning information Cleaning and care Installing your new appliance Helpful hints and tips Description of the appliance Troubleshooting Display controls Disposal of the appliance Using your appliance This appliance is in accordance with the following EU guidelines: LVD 2014/35/EU and EMC 2014/30/EU and 2009/125/EC and EC.1060/2010 and 2002/96/EC. - Page 3 environments; If you are discarding the -catering and similar appliance, pull the plug out nonretail applications of the socket, cut the WARNING —The water connection cable (as close supply line should only be to the appliance as you can) connected to a potable water and remove the door to supply.
- Page 4 appliance, unless they are of refrigerant circuit is not the type recommended by damage prior to proper the manufacturer. disposal. WARNING — The refrigerant and insulation are Caution: risk of fire flammable. When disposing If the refrigerant circuit is of the appliance, do so only damaged: at an authorized waste -Avoid naked flames and...
- Page 5 of electric shock or fire. Do not place hot items near 6. You must not operate the the plastic components of appliance without the the fridge. interior lighting lamp cover. Do not place food products 7. The fridge is only supplied directly against the air outlet with power supply of single on the rear wall.
- Page 6 keeping food and/or appliance beverages normal disconnect the mains plug households as explained in from the mains socket. this instruction booklet The Do not clean the appliance appliance is heavy. Care with metal objects, steam should taken when cleaner, ethereal oils, moving it.
- Page 7 achieve sufficient ventilation, Make sure that the mains follow instructions plug is accessible after the relevant to installation. installation of the appliance. Wherever possible the back Service of the product should not be Any electrical work required close to a wall to avoid to do the servicing of the touching or catching warm appliance should be carried...
-
Page 8: Installing Your New Appliance
Installing your new appliance Before using the appliance for the first time, you should be informed of the following tips. Warning! For proper installation, this refrigerator must be placed on a level surface of hard material that is the same height as the rest of the flooring. - Page 9 Then pass the refrigerator laterally. If you the bottom feet may need to be adjusted. do not need to remove the appliance You can adjust them manually by hand or doors, go to ‘Installing the water lines’ on by using a suitable spanner. page 11.If you need to remove the doors, To allow the doors to self-close, tilt the continue below.
- Page 10 3. Remove the 3 screws (B) fixed on the Re-attaching the fridge doors hinges with a Wrench (8mm) and 1 ground To reattach the fridge doors after you have screws (C) attached to the hinge with moved the appliance to its final location, Philips (+) screwdriver.
- Page 11 5. Pull out the freezer door and lift it up door and lift it up in the direction of the arrow. 2. Take out the upper freezer freezer drawer (A) by lifting it up from the rail system. from the rail system. Re-assembling the freezer door assembling the freezer door To reattach the drawer after you moved...
- Page 12 and Outlet of the water filter. 3. Insert the 2 clips in the proper position as the figure shown below, and confirm that each clip holds the water line firmly. Connecting the filter inlet line to the Note : : : : The water lines must be fully inserted into water supplier the filter to prevent water leaking.
- Page 13 if the lines are fully inserted where the connector leaked. If not, please install them again, and make sure that the lines are fully inserted. Note: After connect the filter outlet line with the refrigerator(as shown in the diagram below), please dispense several cups of The initial dark discoloration of water is water to flush the lines before use.
-
Page 14: Description Of The Appliance
Description of the appliance Note ! ! ! ! Due to unceasing modification of our products, your refrigerator may be slightly different from this instruction manual, but its functions and using methods remain the same. To get the best energy efficiency of this product, please place all shelves, drawers and baskets on their original position as the illustration above. -
Page 15: Display Controls
Display Controls Use your appliance according to the following control guidelines. The control panel on the top cover shows in the diagram below, it may be different depending on the model. When the appliance is powered on for the will be illuminated, the fridge temperature first time, the backlighting of the icons on setting displays -24 ℃... - Page 16 that can be correctly used in your correctly used in your setting. refrigerator. When super cool function is on, you When super cool function is on, you can After you change a new water filter, After you change a new water filter, ensure touch the S uper Cool button again to...
-
Page 17: Using Your Appliance
Alarm 10 minutes. When the door of fridge or freezer has To save energy, please avoid keeping the been opened for over 2 minutes, the door door open for a long time when using the alarm will sound. In case of door alarm, appliance. -
Page 18: Cleaning And Care
to page 10 for disassembly instruction. Automatic Icemaker (optional) Automatic Icemaker make automatic 。 Note: Don't push the dispenser lever forward without cup, it may cause the water leak from the dispenser. Do not immediately removing your cup or glass from the dispenser after dispensing Note: water you need. - Page 19 parts before putting them back into place. Warning! The appliance must not be connected to the mains during cleaning. Danger of electrical shock! Before cleaning switch the appliance off and remove the plug from the mains socket. Exterior cleaning To maintain good appearance of your appliance, you should clean it regularly.
-
Page 20: Helpful Hints And Tips
Warning: The LED light must be replaced by a competent person. If the LED light is damaged, follow the steps below: 1. Unplug your appliance. 2. Remove light cover by rising up and pulling out the LED light. 3. Hold the LED light with one hand and pull it with the other hand while pressing the connector latch. -
Page 21: Troubleshooting
it to be rapidly and completely frozen and correctly by the food retailer to make it possible to subsequently thaw Once defrosted f ood will deteriorate , only the quantity required. rapidly and should not be re-frozen. Do not Wrap up the food in aluminum foil or exceed the storage period indicated by the polyethylene food wraps which are airtight, food manufacturer. - Page 22 The interior may need to be cleaned Odours from compartments Some food, containers or wrapping cause odours. The sounds below are quite normal: Compressor running noises. Air movement noise from the small fan motor in the freezer compartment or other compartments. Gurgling sound similar to water boiling.
-
Page 23: Disposal Of The Appliance
Did you wait for 12 hours after installation of the water supply line before making ice? If it is not sufficiently cool, it may take longer to make ice, such as when first installed. Is the water line connected and the water valve open? Did you manually stop the ice making function? Make sure you do not set the ice off mode. - Page 24 equipment. By ensuring this product is disposed of correctly, you will help prevent potential negative consequences for the environment and human health, which could otherwise be caused by the inappropriate waste handling of this product. For more detailed information about the recycling of this product, please contact your local council your household waste disposal service, or the shop where you purchased the product.
Need help?
Do you have a question about the RF702N4IS1 and is the answer not in the manual?
Questions and answers