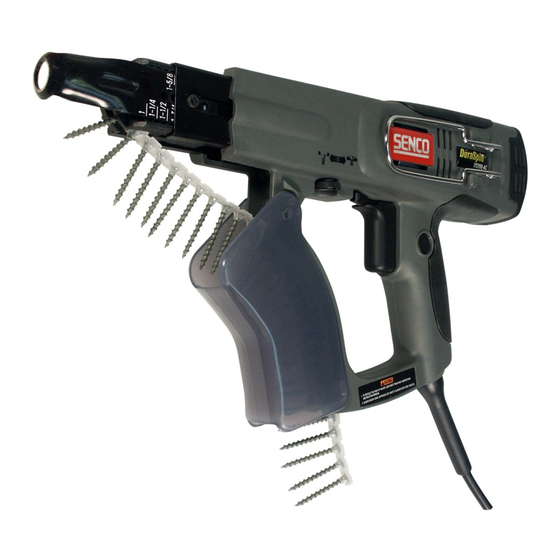
Senco DuraSpin DS200-AC Operating Instructions Manual
Screw fastening system
Hide thumbs
Also See for DuraSpin DS200-AC:
- Specification sheet (2 pages) ,
- Instruction manual (30 pages)
Summary of Contents for Senco DuraSpin DS200-AC
- Page 1 Screw Fastening System DuraSpin ô DS200-AC DS200-AC © 2002 by Senco Products, Inc. NFD81R Revised February 1, 2005 (Replaces 5/20/02)
- Page 2 TABLE OF CONTENTS Safety Warnings Tool Operation Maintenance Troubleshooting Accessories Specifications EMPLOYER’S RESPONSIBILITIES Employer must enforce compliance with the safety warnings and all other instructions contained in this manual. Keep this manual available for use by all people assigned to the use of this tool.
-
Page 3: General Safety Rules
Safety Warnings Avisos de Seguridad ● ● Read and understand all instructions. Failure to follow all instructions listed below, may result in electric shock, fire and/or serious personal injury. INSTRUCTIONS ● Keep your work area clean and well lit. Cluttered benches and dark areas invite accidents. -
Page 4: Safety Warnings
Safety Warnings Avisos de Seguridad ● ● Don’t expose power tools to rain or wet conditions. Water entering a power tool will increase the risk of electric shock. Electrical Safety ● Do not abuse the cord. Never use the cord to carry the tools or pull the plug from an outlet. - Page 5 Safety Warnings Avisos de Seguridad ● ● Remove adjusting keys or wrenches before turning the tool on . A wrench or a key that is left attached to a rotating part of the tool may result in personal injury. ● Do not overreach.
- Page 6 Entretien ● L’entretien de l’outil ne doit être assuré que par du personnel autorisé et qualifié de SENCO. De l’entretien assuré ou des réparations effectuées par du personnel non qualifié peuvent occasionner des risques d’accident.
- Page 7 Safety Warnings Avisos de Seguridad Specific Safety Rules and/or Symbol English Symbol Definition V...volts V...voltios A...amperes A...amperios Hz...hertz Hz...hertzios W...watts W...vatios min...minutes min...minutos ...alternating current ...direct current n o ...no load speed n o ...velocidad sin carga ...Class II Construction …/min...revolutions per minute …/min...revoluciones o vaivén por minuto ...earthing terminal...
-
Page 8: Functional Description
No use la herramienta sin la etiqueta de Avisos de Seguridad. Si la etiqueta esta dañada, no se puede leer o falta completamente. Comuníquese con su representante de SENCO para obtener una etiqueta nueva. Funcional Descripción English Espanol English Espanol... -
Page 9: Tool Operation
Tool Operation Operación de la Herramienta Switch tool from forward to reverse: To switch to reverse, push reverse button. Read and understand all instructions. Failure to follow all instructions listed below, may result in electric shock, fire and/or serious personal injury. SAVE THESE INSTRUCTIONS Loading the Tool:... -
Page 10: Utilisation De L'outil
Tool Operation Operación de la Herramienta (2) Press the nosepiece, with constant force, against the work surface. Do not remove the tool from the work surface until the clutch disengages and the bit stops rotating, signaling a fully driven screw. (3) Continue to allow the motor to run. - Page 11 La boca puede configurarse en seis posibles; DS200-AC DS200-AC 1st hole 25mm '' 2nd hole 32mm '' 3rd hole 38mm '' 4th hole 41mm...
-
Page 12: Maintenance
Maintenance Read section titled “Safety Warnings” before maintaining tool. With tool unplugged from electrical supply, make daily inspection to assure free movement of nosepiece and trigger. Do not use tool if nosepiece or trigger sticks or binds. Routine lubrication of the attachment is not necessary. -
Page 13: Troubleshooting
Replace “Nosepiece”. Clean mechanism. Replace return spring. Allow tool to cool and discontinue use in this application. Replace slide body. Return to Senco for service. Acción correctiva Reemplace o recargue la batería. Verifique la alimentaciûn elèctrica (fusible) Inserte una batería cargada. - Page 14 L’outil surchauffe. Repairs other than those described here should be performed only by trained, qualified personnel. Contact SENCO for information at 1-800-543-4596. Las reparaciones, fuera de aquellas descritas aquí, deben de ser llevadas a cabo solamente por personal entrenado y calificado.
-
Page 15: Especificaciones
The length of this guarantee is one year from date of purchase by the original retail purchaser. During this period, SENCO Products, Inc., will repair or replace at Senco’s option, any original part or parts for the original retail purchaser. This will be done free of charge, provided the parts are determined defective in materials or workmanship upon examination by a SENCO Authorized Warranty Service Center (exception: rubber o-rings, seals and bits).


Need help?
Do you have a question about the DuraSpin DS200-AC and is the answer not in the manual?
Questions and answers