Table of Contents
Advertisement
Quick Links
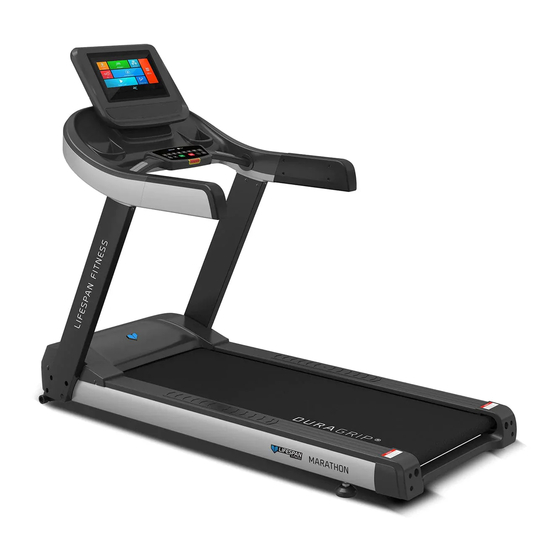
MARATHON
TREADMILL
OWNER'S MANUAL
Product may vary slightly from the item pictured due to model upgrades
Read all instructions carefully before using this product. Retain this owner's manual for future
reference.
NOTE: This manual may be subject to updates or changes. Up to date manuals are available through our website at www.lifespanfitness.com.au
Advertisement
Table of Contents

Subscribe to Our Youtube Channel
Related Manuals for LifeSpan MARATHON


Summary of Contents for LifeSpan MARATHON
- Page 1 MARATHON TREADMILL OWNER’S MANUAL Product may vary slightly from the item pictured due to model upgrades Read all instructions carefully before using this product. Retain this owner’s manual for future reference. NOTE: This manual may be subject to updates or changes. Up to date manuals are available through our website at www.lifespanfitness.com.au...
-
Page 2: Table Of Contents
TABLE OF CONTENTS IMPORTANT SAFETY INSTRUCTIONS IMPORTANT ELECTRICAL INFORMATION IMPORTANT OPERATING INSTRUCTIONS ASSEMBLY INSTRUCTIONS OPERATION GUIDE WITH PROGRAM CHART EXERCISE GUIDE MAINTENANCE INSTRUCTIONS PARTS LIST WARRANTY... -
Page 3: Important Safety Instructions
1. IMPORTANT SAFETY INSTRUCTIONS WARNING - Read all instructions before using this treadmill. It is important your treadmill receives regular maintenance to prolong its useful life. Failing to regularly maintain your treadmill may void your warranty. Danger – To reduce the risk of electric shock disconnect your treadmill from the electrical outlet prior to cleaning and/or service work. - Page 4 The pulse sensors are not medical devices. Various factors, including the user’s movement, may affect the accuracy of heart rate readings. The pulse sensors are intended only as exercise aids in determining heart rate trends in general. Use the handrails provided; they are for your safety. Wear proper shoes.
-
Page 5: Important Electrical Information
2. IMPORTANT ELECTRICAL INFORMATION WARNING! Route the power cord away from any moving part of the treadmill including the elevation mechanism and transport wheels. NEVER remove any cover without first disconnecting AC power. NEVER expose this treadmill to rain or moisture. This treadmill is not designed for use outdoors, near a pool, or in any other high humidity environment. -
Page 6: Assembly Instructions
4. ASSEMBLY INSTRUCTIONS CAUTION! Do not plug in the power cord until all assembly steps are completed. During each assembly step, ensure that ALL nuts and bolts are in place and partially threaded in before completely tightening any ONE bolt. Make sure that all parts are properly tightened before you use the treadmill. - Page 7 1. Connect Lower Meter Cable (D23) and Middle Meter Cable (D24) to Console Assembly (D). 2. Attach Console Assembly (D) to the Left and Right Uprights (B and C) with: M10*30 Allen Bolt (E04) M10 Spring Washer(E28) M10 Flat Washer (E35) using Hex Key (B11).
- Page 8 STEP 5: 1. Connect the wires of Console(E). 2. Attach Console (E) to Console Assembly (D) with M8*20 Allen Bolt (E07), M8 Spring Washer (E29) and M8 Flat Washer (E36)-using T Shape Allen Wrench (B10). STEP 6: 1. Attach Bottom Console Cover (C09) to Console Assembly (D) with ST4.2*12 Tek Screw(E24) using Wrench (B12).
- Page 9 1. Your treadmill will not start unless the safety key is placed in position. Attach the clip end securely to your clothing. This safety key is designed to cut the power to the treadmill if you should fall. 2. Removing the safety key from the card slot will stop the treadmill as will pushing the emergency stop button.
-
Page 10: Operation Guide With Program Chart
5. OPERATION GUIDE Hardware Parameters: General function: * LCD screen: 15.6-inch non-touch LCD *Human heart rate monitoring screen with 1920*1080 resolution * CPU: Cortex-A7 1.3GH quad-core processor *Indicates the current exercise speed value, users can adjust the value in real time * Memory: 1GB DDR3 RAM *Indicates the exercise distance * Hard disk: 4GB NAND FLASH... - Page 11 PAUSE BUTTON: Press this button while exercising, the treadmill slowly decelerates to a stop, the treadmill is paused, and exercise data is saved. STOP BUTTON: Press this button during exercise, the treadmill slowly decelerates to a stop, the treadmill stops, and the sports results pop up. SPEED SHORTCUT BUTTON:6km/h, 9km/h INCLINE SHORTCUT BUTTON: 3%, 6% Speed ﹀or Speed︿...
- Page 12 VOLUME+ BUTTON: Press this button to turn up the volume. VOLUME – BUTTON: Press this button to turn down the volume. PLAY/PAUSE BUTTON: Play/pause the music or video currently playing. UP BUTTON DOWN BUTTON LEFT BUTTON RIGHT BUTTON ENTER BUTTON 2.
- Page 13 Steps: Indicates the cumulative number of steps. Incline: Indicates the current incline value; unit%. Heart rate: Indicates the currently detected heart rate value; unit bpm, times/minute. Time: Indicates the current running time value; unit h:m:s (hour:minute:second). Pace: Indicates the average running pace. Distance: Indicates the current running mileage value;...
- Page 14 Cast screen: Use mobile phone for screen projection, it can be divided into mobile phone projection and video projection. Multimedia: Including local music and local video, you can readMP3 / WAV audio format and MP4 / WKV / AVI video format from U-disk (Note: whether audio or video can be played depends on the decoding method).
- Page 15 Start the treadmill again with “START” button, the speed and incline value will return to the minimum, other parameters such as time, calories will continue to accumulate. “STOP” button to stop the treadmill, the workout performance data pops up, the interface Press is as follows (this operation applies to all sports functions): “BACK”...
- Page 16 Exercise time setting range:0:05:00~10:00:00,unit (h:m:s) “QUICK START ” button to run the treadmill and start the After completing the settings, press selected program. The display interface is as follows: Program exercise: Select an appropriate program and adjust the required exercise time after start-up. Each built-in program is divided into 16 segments, each movement time = set time / 16.
- Page 17 Cross Country Segment Speed Incline Weight Loss Segment Speed Incline Segment Calorie Burn Speed Incline Segment Endurance Speed Incline Segment Power Walk Speed Incline Segment Fitness Test Speed Incline Segment Hill Run Speed Incline 5. Virtual Scene Workout “ENTER” button to enter this category, the display interface is as follows: Press “UP”, “DOWN”,...
- Page 18 speed “+” and speed “-” on the keypad, the speed of the virtual When running on the treadmill, press scene will change accordingly; in this function, the default value of incline is 0%, the user can adjust the value by himself, but the incline of the virtual scene video will not change accordingly.
- Page 19 HRC2 represents Intermittent heart rate mode “UP”, “DOWN” buttons to select the HRC section, use “LEFT”, “RIGHT” buttons to “QUICK START” select the exercise type or set the parameters. After completing the settings, press button to run the treadmill. The user can choose HRC1 or HRC2; HRC1 is divided into speed mode and incline mode, so does HRC2. HRC1 judgment: Press START button, initiate the operation and enter the warm-up stage of exercise mode after a 3 second countdown.
- Page 20 Take HRC 1 as an example for operation instruction, the display interface is as follows: 3 minutes warm-up phase HRC phase If the system fails to detect the user's heart rate for 45 seconds, the treadmill pauses and a text prompt pop up. The display interface is as follows: Pause prompt...
- Page 21 When HRC is in operation, press "BACK" button or "HOME" button and the prompt box “Exit HRC, training will stop" will pop up on the interface. Fitlink function: Open Bluetooth on the mobile phone and enter the App. The display interface is as follows: Note: This function can be selected to be enabled or disabled in the engineering mode (factory settings are required)
- Page 22 Interface 1: the user can select “pause” to stop the treadmill; Interface 2: the user can adjust speed and incline values through Fitlink APP Interface 3: Select and switch between the parameters The interface indicates the sports performance result Note: After each exercise, the system will return to the Fitlink App main page, the user can re-select "Connect" to use the Fitlink App.
- Page 23 do not support direct phone projection viewing, please exit mobile phone direct projection and use video direct projection function) The mobile phone screen will be synchronized to the treadmill screen after projection to the treadmill. “NEXT SONG” button to eliminate treadmill parameter column. Press “LAST SONG”...
- Page 24 Note: The system version, hardware performance and current network signal are the factors that could affect the implementation of the screen projection. When the screen projection is completed, content of the mobile phone will be synchronized to the treadmill screen. 8.
- Page 25 “LEFT”, “RIGHT” buttons to select the media category and use “ENTER” button to enter this function (local video). The display interface is as follows: “NEXT SONG" button to eliminate the treadmill parameter column and use "PREVIOUS SONG" button to pop up the parameter column. 9.
- Page 26 Press "ENTER" button to activate the keypad, use "UP", "DOWN", "LEFT", "RIGHT" buttons to toggle between options and characters selections, press "ENTER" button to determine the character. Enter the correct Wi-Fi password to connect to the network. Enter the connected Wi-Fi signal, perform the related operations on the above display interface “ENTER”...
- Page 27 “UP”, “DOWN” buttons to select the options, press “ENTER” button to choose online upgrade option, the display interface is as follows In case there is a new version, the interface will prompt that the current system has the latest version, and the user can update the version as needed.
- Page 28 Press "ENTER" button, the SD card will be formatted and enter the factory reset interface. Note: The system will delete the system garbage and update and restart. This process takes time. Please wait patiently until the system returns to the main page. “ENTER”...
- Page 29 This interface provides related parameters of system software and hardware. Maintenance When the exercise mileage reaches the set service mileage, a prompt will pop up after information starting the treadmill next time. The display interface is as follows: Note: This function can be selected to be enabled or disabled in the engineering mode(factory settings is required). Click this icon to indicate that the treadmill has been maintained.
- Page 30 inverter is loose. 3. If the problem has not been resolved, please contact support. Over Current 1. Power off the machine, wait 1 minute, then restart. 2. Make sure the load limit of the motor has not been exceeded. 3. Make sure that the belt is properly lubricated and in an acceptable working condition.
- Page 31 3. If the problem has not been resolved, please contact support. System Overload 1. This system feature is off by default. Motor Disconnected 1. Check connection of motor and inverter cables. 2. If the problem has not been resolved, please contact support. Dynamic Brake Unit Protection 1.
-
Page 32: Exercise Guide
any web page that the external link points to is not controlled by the system. 6. The user expressly and agrees that the risk of using the android network service will be solely borne by the user; all consequences arising from the use of the system's network services are also borne by the user, and the system assumes no responsibility for this. - Page 33 Training Zone Exercise After warming up, increase the intensity to your desired exercise program. Be sure to maintain your intensity for maximum performance. Breathe regularly and deeply as you exercise. Cool Down Finish each workout with a light jog or walk for at least 1 minute. Then complete 5 to 10 minutes of stretching to cool down.
-
Page 34: Maintenance Instructions
7. MAINTENANCE INSTRUCTIONS Reasonable cleaning/lubricating should be made to extend the life time of this unit. Performance is maximized when the belt and mat are kept as clean as possible. WARNING: THE MAT/DECK FRICTION MAY PLAY A MAJOR ROLE IN THE FUNCTION AND LIFE OF YOUR TREADMILL AND THAT IS WHY WE RECOMMEND YOU CONSTANTLY LUBRICATE THIS FRICTION POINT TO PROLONG THE USEFUL LIFE OF YOUR TREADMILL. - Page 35 3. Periodically lubricate the front and rear rollers to keep them at their peak performance. If the treadmill belt/deck/roller is kept reasonably clean it is possible to expect over 1200 hours before relubricating is necessary. Lifespan Fitness Channel: Video Tutorial Available at: http://www.youtube.com/user/treadmillsvideos...
- Page 36 If the surface is slick when touched, then no further lubrication is needed. If the surface is dry to the touch, apply a suitable silicone lubricant. We recommend that you use a silicone based spray to lubricate your Lifespan treadmill. This can be purchased directly from us or any hardware store.
- Page 37 Simply, if the belt begins to slip during use, this is an indication that the belt still needs tightening. Lifespan Fitness Channel: Video Tutorial Available at: http://www.youtube.com/user/treadmillsvideos...
-
Page 38: Parts List
8. PARTS LIST DESCRIPTION Specification QTY. No. DESCRIPTION Specification QTY. Base Frame Wrench Left Upright Power Cord Right Upright Screw M10*30 Console Assembly Screw M8*20 Console Spring Washer Safety Key Spring Washer T Shape Allen Flat Washer Wrench Hex Key Flat Washer Tools included: T Shape Allen Wrench B10... -
Page 39: Warranty
9. WARRANTY AUSTRALIAN CONSUMER LAW Many of our products come with a guarantee or warranty from the manufacturer. In addition, they come with guarantees that cannot be excluded under the Australian Consumer Law. You are entitled to a replacement or refund for a major failure and compensation for any other reasonably foreseeable loss or damage. - Page 40 This will eliminate the movement and static electricity factors. If your hands are dry, then wet them slightly (saliva works as a great conductor if this doesn’t bother you). For more information, please contact our Lifespan Technical Support Department www.lifespanfitness.com.au...
Need help?
Do you have a question about the MARATHON and is the answer not in the manual?
Questions and answers