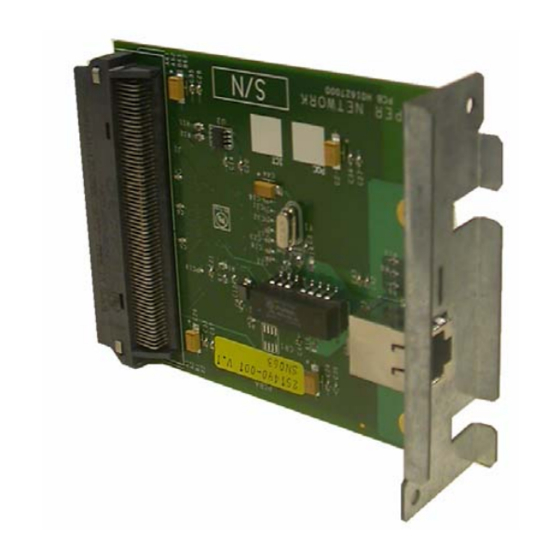
SATO GL 4xxe Series Quick Manual
Sato lan card installation guide
Hide thumbs
Also See for GL 4xxe Series:
- Operator's manual (149 pages) ,
- Operator's manual (76 pages) ,
- Configuration instructions (8 pages)
Table of Contents
Advertisement
Quick Links
Download this manual
See also:
Operator's Manual
LAN CARD INSTALLATION GUIDE
1 General
1.1 Important information
Read this Installation Guide before and during the installation
of the above accessory. Keep this Installation Guide handy for
future reference.
For printer models:
GL
This quick guide provides important information on how to setup your
new SATO product.
4xxe
Series
Advertisement
Table of Contents

Summary of Contents for SATO GL 4xxe Series
- Page 1 Read this Installation Guide before and during the installation of the above accessory. Keep this Installation Guide handy for future reference. For printer models: 4xxe This quick guide provides important information on how to setup your new SATO product. Series...
-
Page 2: Limitation Of Liability
1.2 Limitation of liability FCC WARNING Changes or modifications not expressly approved by the party responsible for compliance could void the user’s authority to operate the equipment. NOTICE Be sure to read this quick guide thoroughly before using this printer. It is an integral part of the product and should be kept in the immediate vicinity of the device and available to the operating staff. -
Page 3: Explanation Of Symbols
1.3 Explanation of symbols This instruction manual uses various warning icons to help you understand the safe operation of your printer. Explanations of the icons are below. WARNING! Indicates neglectful or erroneous use may cause irreparable damage to the product, serious injury to the operator, or worse. -
Page 4: Sato Group Of Companies
All rights reserved. No part of this document may be reproduced or issued to third parties in any form whatsoever without the express permission of SATO. The materials in this document are provided for general information and are subject to change without notice. SATO assumes no responsibilities for any errors that may appear. - Page 5 GL4exe LAN Card Installation Before installing the LAN card, make sure the printer is OFF and disconnected from the power supply. 1. Use a Phillips head screwdriver to remove the two screws that secure the Cover Plate to the LAN Card slot. Set the plate and screws aside. 2.
- Page 6 LAN CONFIGURATION FOR ETHERNET CONNECTION Once the LAN card is installed, you can access the Ethernet settings in the GL’s Interfaces Mode menu. An overview of the LAN options is listed below, followed by explanations of relevant LCD menu options in the following pages. POWER ONLINE PARL / SBPL...
-
Page 7: Ethernet Port
The following tables explain the relevant options available via the LCD screen in Interfaces Mode. Menu screen What the options mean Is the menu selection screen for the Host Interface option of the INTERFACES mode. INTERFACES Host Interface* There are only two options relative to the serial interface, ignore all others. •... -
Page 8: Ethernet Address
Menu screen What the options mean Determines the amount of time that the tcp connection will remain connected after the print job has terminated. Keep Alive Timer The allowable range is 2 to 10 minutes, and the factory default is 3 minutes. 3 minutes* This menu appears only if a 10/100Base-t Network Interface Card (NIC) is installed. - Page 9 Menu screen What the options mean Allows the Gateway Address to be set for the TCP/IP protocol in four three-digit segments (SEG1 through SEG4). If the Gateway Address is assigned by Bootp, ARP, or DHCP, it is dynamic and read only. The defaults for the SEG1 through SEG4 are 000, 000, 000, and 000.
- Page 10 LAN Card Installation Guide...


Need help?
Do you have a question about the GL 4xxe Series and is the answer not in the manual?
Questions and answers