
Subscribe to Our Youtube Channel
Related Manuals for Topcon ASC-10


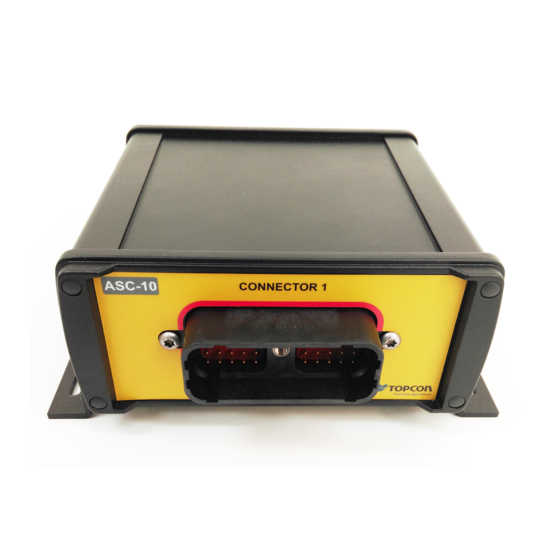
Summary of Contents for Topcon ASC-10
- Page 1 X-Family Consoles ASC-10 Sprayer Control Operator’s Manual www.topconpositioning.com...
- Page 3 © Copyright Topcon Precision Agriculture December 2016 All contents in this manual are copyrighted by Topcon. All rights reserved. The information contained herein may not be used, accessed, copied, stored, displayed, sold, modified, published or distributed, or otherwise reproduced without express written consent from Topcon.
- Page 5 - No statement contained at the website of TPA WEBSITE AND OTHER STATEMENTS or any other Topcon Group company or in any other advertisements or TPA literature or made by an employee or independent contractor of TPA modifies these Terms and Conditions.
- Page 6 defective item at no charge, and ship it back to you. You must pay the shipping and handling charges in respect of the same. Calibration of components, labor and travel expenses incurred for in-field removal and replacement of components are not covered in this warranty policy. The foregoing warranty shall NOT apply to damage or defects resulting from: (i) ...
- Page 7 Other These Terms and Conditions may be amended, modified, superseded or cancelled, at any time by TPA. These Terms and Conditions will be governed by, and construed in accordance with: the laws of South Australia if the product is sold and supplied to you in Australia (in which case the courts of South Australia or the Federal Court of Australia (Adelaide Registry) have exclusive jurisdiction in respect of any claim or dispute) or the laws of the State of California if the product is sold and supplied to you outside of Australia...
- Page 8 You can check if interference is being caused by this equipment by turning the Topcon equipment off to see if the interference stops. If the equipment is causing interference to a radio or other electronic device, try: Turning the radio antenna until the interference stops...
- Page 9 Good safety practices not only protect you, but also the people around you. Study this manual as part of your safety program. This safety information only relates to Topcon equipment and does not replace other usual safe work practices. WARNING: Ensure power is removed from the Topcon equipment prior to maintenance or repair of the vehicle or implements.
- Page 10 However, it is always advisable not to handle damaged elec- tronic equipment. This Topcon product may contain a sealed lithium battery. Always dispose of any electronic equipment thoughtfully and responsibly.
- Page 11 Topcon accepts no responsibility or liability for damages to property, personal injuries, or death resulting from the misuse or abuse of any of its products. Further, Topcon accepts no responsibility for the use of Topcon equipment or the GNSS signal for any purpose other than the intended purpose.
- Page 12 Operation and Risk of Obstacles The following list is not exhaustive or limited. To use the console for assisted steering along a defined wayline, the operator must ensure that it is used: Away from people and obstacles Away from high voltage power lines or other overhead obstructions (identify any clearance problems before activating the console) On private property without public access Within cleared fields...
- Page 13 Be aware of file format compatibility. Discuss compatible formats with the dealer. Topcon Agricultural Products are hardy and designed to work in tough conditions. However, if equipment is unused for a length of time, store away from water and direct heat sources.
-
Page 14: Table Of Contents
Table of contents Chapter 1 – Introduction 1.1. Switching between setup and operation screen Chapter 2 – Implement Setup 2.1. Setting up a new implement 2.1.1. X35, X30 and X25 consoles 2.1.2. X14 console 2.2. Setting the implement geometry 2.3. Setting up the master switch Chapter 3 –... - Page 15 5.4.2. Selecting / adding a product 5.4.3. Filling tanks 5.5. Configuring and calibrating 5.5.1. Wheel sensor calibration 5.5.2. Flow meter calibration 5.5.3. Valve balancing wizard 5.6. Setting area counters 5.7. Using the master switch Chapter 6 – Operation (X14) 6.1. Opening auto section control 6.2.
-
Page 17: Chapter 1 - Introduction
The controller can be configured to control up to 30 sections if using three ASC-10 ECUs (10 sections with one ASC-10 for the X14 console). -
Page 18: Switching Between Setup And Operation Screen
1.1. Switching between setup and operation screen 1.1. Switching between setup and operation screen The consoles have two main screens; the Setup screen and the Operation screen. X14 console X35, X30 and X25 console Use the highlighted buttons to switch between the screens. -
Page 19: Chapter 2 - Implement Setup
Chapter 2 – Implement Setup This chapter explains how to setup and configure the console for use with the Sprayer Controller and Auto Section Control features. 2.1. Setting up a new implement 2.1.1. X35, X30 and X25 consoles Creates a new implement profile for the attached implement. Note: Existing implement files can be imported from a USB. - Page 20 5. Select IMPLEMENT CONTROL, select Section Control Only or Section Control and Rate Control, confirm and select next. 6. Select ECU TYPE, select ASC-10, confirm and select next. Note: The Sprayer Controller interface described in Chapters 3 and 4 of this manual is only used to control sprayers equipped with the Topcon ASC-10 ECUs.
- Page 21 CAN line. Only one ECU can be detected at a time. Once each ECU is detected, connect the next ECU when prompted. The blue status indicator on the ASC-10 will flash three times slowly, then three times quickly to indicate normal operations.
- Page 22 2.1. Setting up a new implement 10. To add more ECUs, select Add ECU and follow the steps as prompted. When all ECUs are detected, select next. 11. Select which ECU will receive wheel sensor input, if required, confirm and select next. Note: If there is only one tank, the Rate Control for ECU 2 must be disabled.
-
Page 23: X14 Console
Guidance and Auto Steering manual. To create a new implement: 1. Ensure the ASC-10 ECU is connected to the CAN bus. If the ASC-10 is not detected during implement profile creation, the implement will not be configured for rate control. -
Page 24: Setting The Implement Geometry
2.2. Setting the implement geometry 2.2. Setting the implement geometry Sets the implement measurements so that guidance and product application can work accurately. Note: Measure the implement dimensions as accurately as possible. The recommended tolerance is +/- 5 cm. To set the implement geometry: 1. - Page 25 Chapter 2 – Implement Setup the ‘Working Area’, which is the region that product is applied over for that boom. Overlap: Measures the width of the overlap between two adjacent rows. Implement Offset: Measures the distance between the hitch point and the wheels of the implement.
-
Page 26: Setting Up The Master Switch
Enables the master switch to be operated by selecting the virtual master switch on the console Operation screen. External ECU sense Enables the master switch to be operated via an external switch (a physical switch box / master switch connected to the ASC-10 ECU). -
Page 27: Chapter 3 - Boom Setup
Chapter 3 – Boom Setup 3.1. Setting up sections The console can support up to 30 sections if using three ASC-10 ECUs (10 sections with one ASC-10 for the X14 console). An ISOBUS ECU can identify up to 32 sections automatically. Make any necessary changes on the ISOBUS ECU. - Page 28 3.1. Setting up sections 7. To set the threshold for low speed, select Low Speed Shutoff next to a section (or next to All), enter the threshold and confirm. Sections will be shut off when the system is in auto control mode and the vehicle speed drops below this speed and will turn on when the vehicle speed exceeds this speed.
-
Page 29: Setting Up Timing
Chapter 3 – Boom Setup 3.2. Setting up timing These settings set the response times for the sections when switched on or off. It is important to accurately calculate the response times to avoid overlaps or gaps in product application. To calculate the response times: 1. -
Page 30: Setting Up Section Switching
3.3. Setting up section switching 3.3. Setting up section switching The section switch can be either virtual (on the console screen) or external (a physical switch connected to the ASC-10 ECU). To configure the switches: 1. Select Implement / Boom / Section Switch 2. - Page 31 Chapter 3 – Boom Setup in Implement / Boom / Sections, but cannot be greater than the number of sections. The table on the right is used to determine which switch controls which section. Assign the required switch to each section.
-
Page 32: Setting Up Nozzles
5. Complete the following: Nozzle type: Standard or Fence jet. Note that fence jet nozzles are not applicable for the ASC-10 ECU. Actual rate: The actual rate of flow at the Reference Pressure. This value can be altered, if needed, to adjust for wear and tear. - Page 33 Reference pressure: The pressure at which the stated actual rate for the nozzle should be achieved. Check nozzle manufacturer's information. Minimum pressure: This setting is currently not applicable for the ASC-10 ECU. Assigning the nozzle To select the nozzle for the current spray line: 1. Select Implement...
- Page 34 3.4. Setting up nozzles...
-
Page 35: Chapter 4 - Sprayer Controller Setup
Chapter 4 – Sprayer Controller Setup This chapter explains how to set up the Sprayer Controller. This controls the amount of product being applied to particular sections. This option is available if the implement and ECU setup has been completed or if an existing implement file has been imported to the console. -
Page 36: Setting Up Tanks
4.1. Setting up tanks 4.1. Setting up tanks To set up a tank and its capacity: 1. Select Implement / Sprayer / Tank Use product as name: On the Operation tank panel (refer to page 40), the product is displayed as the tank name if this is enabled. If disabled, the tank name entered in the step below is used. -
Page 37: Setting Up Product Flow
Chapter 4 – Sprayer Controller Setup 4.2. Setting up product flow This section sets up the values that affect the flow of product. Check the calibration factor on the tag on the flow meter of the sprayer. Note that manually specifying the calibration factor on this screen should only be performed if the flow factor is already known or has previously been calculated via Flow meter calibration, page 50. - Page 38 4.2. Setting up product flow by the minimum nozzle flow multiplied by the number of nozzles activated. Refer to nozzle manufacturer’s information. Reverse dump valve: The dump valve releases liquid back to the tank. In some cases the valve may have been wired to work in the opposite direction.
-
Page 39: Setting Up Pressure
Chapter 4 – Sprayer Controller Setup 4.3. Setting up pressure This section sets up pressure sensors and controls. Refer to the specifications of the sprayer being used for correct settings. 1. Select Implement / Sprayer / Pressure 2. Select the tank from the tabs on the left and select SENSOR TYPE. 3. -
Page 40: Setting Up Pressure Control
4.4. Setting up pressure control 4.4. Setting up pressure control Refer to the specifications of the sprayer and an ISO standard nozzle rate chart for correct settings. The console supports Pressure Only or Pressure Fallback control. Pressure fallback control uses flow control unless the flow falls below a set flow rate. -
Page 41: Setting Up The Control Valve
Chapter 4 – Sprayer Controller Setup 4.5. Setting up the control valve The control valve is used to meter/control the volume of product discharged from the boom. 4.5.1. Regulator valve system Regulator valve systems are placed in line with the pump and adjust the flow of product to the boom by diverting excess flow back to the tank. - Page 42 4.5. Setting up the control valve Minimum on time: The minimum time that power needs to be applied to move the valve. Maximum on time: The maximum time that power can be applied to move the valve. Gain setting: This sets how quickly the controller will try to achieve the required rate.
-
Page 43: Proportional Valve System
Chapter 4 – Sprayer Controller Setup 4.5.2. Proportional valve system Proportional valve systems typically control a hydraulic valve that adjusts the speed of the pump to control the flow that is being delivered directly to the boom. 1. Select Implement / Sprayer / Control Valve 2. - Page 44 4.5. Setting up the control valve during a pulse cycle. Anything over this figure the implement (motor, valve actuator) will not respond. Controller response: This sets how quickly the controller will try to achieve the required rate. If set too high, the sprayer may pass the target rate and take time to adjust, searching for the right level.
-
Page 45: Setting Up Pump Control
Chapter 4 – Sprayer Controller Setup 4.6. Setting up pump control Some sprayers have a hydraulically driven pump and have a speed sensor fitted to monitor the driven speed of the pump. Setting up pump control allows the pump speed to be monitored during operations. -
Page 46: Setting Up Speed Source
4.7. Setting up speed source 4.7. Setting up speed source Sets the source of speed information supplied to the implement which is used to determine the application rate required. 1. Select Implement / Sprayer / Speed Source Speed source: The speed source used to determine the required application rate from the sprayer. -
Page 47: Setting Up Implement Audio
Chapter 4 – Sprayer Controller Setup 4.8. Setting up implement audio Sets the sound feedback for implement operations. 1. Select Implement / Sprayer / Audio Sound can be enabled for the following operations: turning the master switch on and off, turning a tank on and off and turning a section on and off. -
Page 48: Setting Up Alarms
4.9. Setting up alarms 4.9. Setting up alarms Alarms can be enabled for all alarms or individual alarms. Use the All Sprayer Alarms option to universally enable or disable all sprayer alarms. 1. Select System / Alarms / Sprayer 2. To enable all alarms, select All Sprayer Alarms / Alarm State and Enabled. - Page 49 Chapter 4 – Sprayer Controller Setup High Pump Speed: This alarm will sound and display when RPMs exceed the preset maximum RPMs for each tank. Low Pump Speed: This alarm will sound and display when RPMs drop below the preset minimum RPMs for each tank. Tank Low: This alarm will sound and display if the tank contents drop below the preset percentage for each tank.
-
Page 50: Enabling Section Control
4.10. Enabling section control 4.10. Enabling section control To use Auto Section Control, this must be enabled. 1. Select System / Features / Implement and set AUTO SECTION CONTROL to Enabled. Note: Only the Auto Section Control and Lock Setup Menu options are available on this screen if using an X14 console. -
Page 51: Chapter 5 - Operation (X35/X30/X25)
Chapter 5 – Operation (X35/X30/X25) Once setup is complete and auto section control and sprayer controller are enabled, the auto section control and sprayer controller icons appear on the Navigation bar (left of screen). Sprayer controller information is added to the dashboard and the sprayer master switch appears bottom right. -
Page 52: Using The Sprayer Dashboard
5.1. Using the sprayer dashboard 5.1. Using the sprayer dashboard Sprayer information is added to the dashboard when the Sprayer Controller is enabled. 1. Select anywhere on the dashboard to customize what is shown on the dashboard. 2. Press again on the particular panel to be customized and further options display. -
Page 53: Opening Auto Section Control
Chapter 5 – Operation (X35/X30/X25) 5.2. Opening auto section control Auto section control is available when an implement and ECU have been set up and Auto Section Control has been enabled in the Setup screen (System / Features / Implement). 1. -
Page 54: Opening Sprayer Controller
5.3. Opening sprayer controller 5.3. Opening sprayer controller The sprayer controller interface can appear either in a mini-view or in full screen. When the sprayer controller is in full screen, the guidance view can appear as a mini-view, so that the operator can still monitor the map. - Page 55 Chapter 5 – Operation (X35/X30/X25) Guidance mini-view Sprayer toolbar Sprayer panels 4. Select the panels to view using the Sprayer toolbar.
-
Page 56: Choosing/Changing Tanks
5.4. Choosing/changing tanks 5.4. Choosing/changing tanks 1. Select Tank on the toolbar to the right of the screen to open the panel for the tank being used. Note: If all panels are open, it may be necessary to slide some panels to the left or right to see the required information. - Page 57 Chapter 5 – Operation (X35/X30/X25) Displays two parameters related to the specific tank. Selecting opens a customize data window with a list of available parameters to be displayed. Requested application rate. Used to enter and display the application rate. The control system uses the calibration factor to adjust the product flow for the given product.
-
Page 58: Tank Colors
5.4. Choosing/changing tanks 5.4.1. Tank colors Grey tank. Red On/Off. System is on standby. Tank is turned off. Check Master Switch and tank On/Off. Red tank. Green On/Off. Tank is turned on, but empty. Blue tank. Green On/Off. Tank is on. Blue color dropping shows approximate level of product remaining. -
Page 59: Selecting / Adding A Product
Chapter 5 – Operation (X35/X30/X25) 5.4.2. Selecting / adding a product To select or add a new product: 1. Select the Product Configuration button. The Product Configuration screen displays. 2. Select PRODUCT NAME to select a product from the list, or to add a new product. - Page 60 5.4. Choosing/changing tanks Selecting New Product opens the New Product Setup wizard. Follow the wizard to add a new product. Custom Product may be selected to create a new product from scratch, or a product template may be selected from the list. Note that some of the available product templates apply only to granular products.
-
Page 61: Filling Tanks
Chapter 5 – Operation (X35/X30/X25) 5.4.3. Filling tanks To fill the sprayer tanks: 1. Select the Tank Fill button. The Tank Fill screen displays. Set volume: Set the volume of product in the tank. Volume increment: Set the volume value to be used when increasing volume in the tank by increments. - Page 62 5.4. Choosing/changing tanks Increase volume by increment: Adds product by the volume set for Volume increment. Fill all tanks to capacity: Fill all tanks to the capacity entered on the Setup screen (Implement / Sprayer / Tank). Adjust calibration This option is used to adjust the calibration factor when there is a known starting volume and a known error in the finishing volume.
-
Page 63: Configuring And Calibrating
Chapter 5 – Operation (X35/X30/X25) 5.5. Configuring and calibrating 1. Select Configuration on the toolbar to the right of the screen. The Configuration screen displays. Manual speed: Allows the user to select manual speed and override the selection made in the Setup screen Implement / Sprayer / Speed Source. - Page 64 5.5. Configuring and calibrating Note that manual overrides a number of automatic features and is not recommended for operations. It should be used for stationary testing of nozzles only. It must be changed to the correct speed source before operating the sprayer under normal conditions. Manual speed display: Enables the manual speed to be entered.
-
Page 65: Wheel Sensor Calibration
Chapter 5 – Operation (X35/X30/X25) 5.5.1. Wheel sensor calibration If Wheel Sensor is selected in the Setup screen Implement / Sprayer / Speed Source, the wheel factor must be calibrated. Wheel factor defines how many meters per pulse are received from the wheel speed sensor. -
Page 66: Flow Meter Calibration
5.5. Configuring and calibrating 5.5.2. Flow meter calibration Flow meter calibration determines the number of pulses from the flow meter per liter of liquid. To calibrate the flow meter: 1. Ensure the required tank is selected using the Tank left and right buttons. -
Page 67: Valve Balancing Wizard
Chapter 5 – Operation (X35/X30/X25) 5.5.3. Valve balancing wizard For sprayers fitted with balanced section valves, the valve balancing wizard helps you to balance the flow that returns to the tank when the section valve is turned off, to the flow that goes to the nozzles when the section valve is turned on. - Page 68 5.5. Configuring and calibrating Section valves are then turned off incrementally and the valves can be adjusted as required. Sections can be skipped if required and the next section selected. A + symbol next to the pressure reading indicates that the pressure is too low on that valve.
-
Page 69: Setting Area Counters
Chapter 5 – Operation (X35/X30/X25) 5.6. Setting area counters Area counters are used with spreaders, sprayers and seeders to record data such as treated area, product used, operating time, average rate and productivity rate. Area counters are not available when using ISO implements. - Page 70 5.6. Setting area counters Reset job area counters This option is only applicable if area counters per job is enabled. Never: The area counters must be reset manually, or they will continue to accumulate data. Prompt: When a job is erased you will be asked if area counters should be reset.
- Page 71 Chapter 5 – Operation (X35/X30/X25) Set active area counter number Reset area counter window Treated area Product used Operating time Average rate (area) Productivity time 2. To select the area counter against which the data will be stored, select Set Active Area Counter Number and select the required counter.
- Page 72 5.6. Setting area counters Data stored against the area counter is displayed in the lower half of the window. 3. Use the arrows or select the middle Area button to view data stored against each area counter. 4. Use the arrows or select the middle Tank button to view data stored against each tank.
-
Page 73: Using The Master Switch
Chapter 5 – Operation (X35/X30/X25) 5.7. Using the master switch When Virtual has been selected in the Setup screen (Implement / Master Switch), the Sprayer Master Switch on the Operation screen turns the sprayer system on. This switch does not work if External ECU Sense is selected as the Master Switch. - Page 74 5.7. Using the master switch The alarm bell button shows the number of active alarms.
-
Page 75: Chapter 6 - Operation (X14)
Chapter 6 – Operation (X14) Once setup is complete and auto section control and sprayer controller are enabled, the auto section control and sprayer controller icons appear on the Select View screen. Sprayer controller information is added to the dashboard. -
Page 76: Opening Auto Section Control
6.1. Opening auto section control 6.1. Opening auto section control Auto section control is available when an implement and ECU have been set up and Auto Section Control has been enabled in the Setup screen (System / Features / Implement). 1. -
Page 77: Opening The Sprayer Controller
Chapter 6 – Operation (X14) 6.2. Opening the sprayer controller To open the sprayer controller screens: 1. Select the Spray Rate Controller icon. The sprayer controller screen opens. The Configuration screen is available via the tab at the top of the screen. -
Page 78: Configuring Tanks And Application Rates
6.3. Configuring tanks and application rates 6.3. Configuring tanks and application rates Displays two parameters related to the tank. Selecting opens a customize data window with a list of available parameters to be displayed. Rate control mode selector. Allows you to select Auto control. Manual may also be selected. -
Page 79: Tank Colors
Chapter 6 – Operation (X14) Product configuration. Opens the product configuration window for the tank. Refer to Selecting / adding a product, page 64. Requested application rate. Used to enter and display the application rate. The control system uses the calibration factor to adjust the product flow for the given product. -
Page 80: Selecting / Adding A Product
6.3. Configuring tanks and application rates 6.3.2. Selecting / adding a product To select or add a new product: 1. Select the Product Configuration button. The Product Configuration screen displays. 2. Select PRODUCT NAME to select a product from the list, or to add a new product. - Page 81 Chapter 6 – Operation (X14) Selecting New Product opens the New Product Setup wizard. Follow the wizard to add a new product. Rate increment: Defines how much the application rate will change when the operator presses the application rate up/down button. The rate can be changed by a fixed rate or by a percentage of the rate set for Rate Preset 1.
-
Page 82: Filling Tanks
6.3. Configuring tanks and application rates 6.3.3. Filling tanks To fill the sprayer tanks: 1. Select the Tank Fill button. The Tank Fill screen displays. Set volume: Set the volume of product in the tank. Volume increment: Set the volume value to be used when increasing volume in the tank by increments. - Page 83 Chapter 6 – Operation (X14) Adjust calibration This option is used to adjust the calibration factor when there is a known starting volume and a known error in the finishing volume. It allows the calibration factor to be automatically recalculated based on the percentage difference between the calculated and actual volume remaining.
-
Page 84: Configuring And Calibrating
6.4. Configuring and calibrating 6.4. Configuring and calibrating 1. Select the Configuration tab on the sprayer controller screen. The Configuration screen displays. Manual speed: Allows the user to select manual speed and override the selection made in the Setup screen Implement / Sprayer / Speed Source. -
Page 85: Wheel Sensor Calibration
Chapter 6 – Operation (X14) 6.4.1. Wheel sensor calibration If Wheel Sensor is selected in the Setup screen Implement / Sprayer / Speed Source, the wheel factor must be calibrated. Wheel factor defines how many meters per pulse are received from the wheel speed sensor. -
Page 86: Flow Meter Calibration
6.4. Configuring and calibrating 6.4.2. Flow meter calibration Flow meter calibration determines the number of pulses from the flow meter per liter of liquid. To calibrate the flow meter: 1. Select Flow Meter from the sprayer configuration screen. The Auto Flow Cal wizard displays. 2. -
Page 87: Chapter 7 - Variable Rate Control
Importing prescription maps (shapefiles and ISO XML files) into created jobs using the VRC import wizard. Using real-time sensor data from nitrogen sensors mounted on the tractor (for example: Topcon CropSpec). Using Task Data based prescription maps. The following instructions describe the first two methods. If using task data, refer to the Guidance and Auto Steering Manual. - Page 88 7.1. If using VRC maps Shapefiles ISO XML CropSpec (if enabled) Note that shapefiles and ISO XML cannot be used at the same time. However CropSpec can be used in conjunction with shapefiles or ISO XML. If Shapefiles or ISO XML are selected at step 2, all maps previously imported to the current field are displayed so that previously used maps can be recalled.
- Page 89 Chapter 7 – Variable Rate Control Select next. 6. If ISO XML was selected in step 2, select the task that you wish to run. The file may have several tasks listed. Select the task that matches the implement that is hooked up. 7.
- Page 90 7.1. If using VRC maps Default: Defines the rate to use if the source doesn’t specify a rate for that region of the paddock, or if the GPS signal drops out. 8. Select next. 9. On the final step, you must confirm the setup. This cannot be changed for the job, so ensure it is correct before continuing.
- Page 91 Chapter 7 – Variable Rate Control...
- Page 92 7.1. If using VRC maps...
- Page 94 Avenida de la Industria 35 Tres Cantos 28760, Spain Phone: +34-91-804-92-31 Fax: +34-91-803-14-15 Topcon Corporation 75-1 Hasunuma-cho, Itabashi-ku Tokyo 174-8580 Japan Phone: +81-3-5994-0671 Fax: +81-3-5994-0672 © 2016 Topcon Precision Agriculture All rights reserved Specifications subject to change without notice AGA4372...
Need help?
Do you have a question about the ASC-10 and is the answer not in the manual?
Questions and answers