
Subscribe to Our Youtube Channel
Related Manuals for Tanco 1400 Autowrap


Summary of Contents for Tanco 1400 Autowrap
- Page 1 1400 Autowrap Innovation in Agricultural Machinery OPERATOR’S handbook 1400/V.02-10-ENG...
-
Page 2: Table Of Contents
Tanco Autowrap - 1400 Operator’s Manual Table of Contents - Section 1: Operator’s Manual - Chapter Contents Page Warning Signs / Stickers Introduction Technical Specifications Safety Precautions Bale Wrapping Machine Setup Controller Information Operational Features Electro-Hydraulics Troubleshooting Maintenance Guarantee Declaration of Conformity... -
Page 3: Tanco Autowrap
Tanco Autowrap - 1400 1. Warning Sings / Stickers Operator’s Manual 70% Prestretch on gears Application of Film Read Operators Manual Danger from rotating to Prestretcher Prior to using machine Prestretcher Danger from oil splashes Don not open or remove... -
Page 4: Introduction
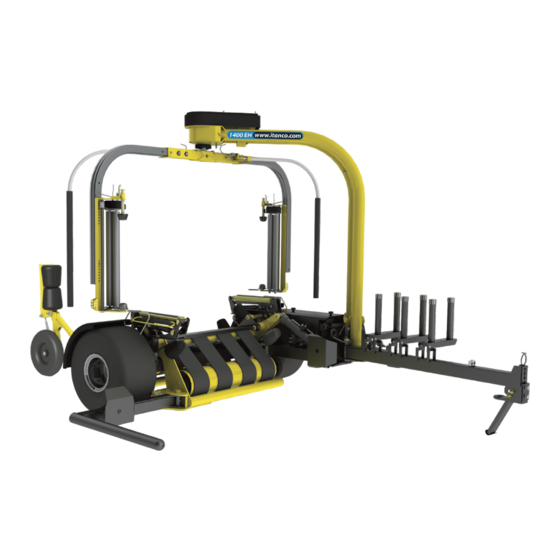
Tanco Autowrap - 1400 2. Introduction Operator’s Manual Wrapping Arm Wrapping Arm Motor Emergency Stop Arm Dispenser Idler Roller Film Cutter Chassis Film Carrier Bale Guide Drive Roller Drawbar Squeeze Arm Parking Stand Lower Linkage Bracket... - Page 5 2008, and is now a very reliable and safe machine with high security built in. This manual is meant to explain how TANCO AUTOWRAP 1400 is setup, attached to tractor, used and how it works, and shall together with the spare part's list be a reference for maintenance and troubleshooting.
-
Page 6: Technical Specifications
Tanco Autowrap - 1400 3. Technical Specifications Operator’s Manual NB: Tanco Autowrap Ltd. reserves the right to modify the Technical Specifications 1400 Autowrap construction and/or technical specifications without warning Height 2710mm and without rights to changes on already delivered products... -
Page 7: Safety Precautions
Become Familiar with the Operations of the Machine If you are unsure how to operate the machine properly, either use of or maintenance to your Tanco Autowrap, please contact your Tanco Autowrap dealer. - Page 8 16 years. Dangerous Areas Tanco Autowrap Ltd. has given the safety to the operator the highest priority, but it is still impossible to secure oneself of every danger area on the machine. Therefore we have highlighted below some of the dangers that can occur when using the 1400 Tanco Autowrap Bale Wrapper.
- Page 9 Tanco Autowrap - 1400 4. Safety Precautions Operator’s Manual Squeeze Danger Between the Stationary Arm & Wrapping Arm During the main wrapping process the wrapping arm moves around a stationary arm. Every time the wrapping arm passes the stationary arm there is a squeeze danger that can be dangerous for the fingers.
- Page 10 Tanco Autowrap - 1400 4. Safety Precautions Operator’s Manual Connecting heavy working implements often has an overall negative effect on the tractor’s driving and braking capacity. Transporting When transporting on a public road there are certain safety measures that must be taken: 1.
-
Page 11: Bale Wrapping
Tanco Autowrap - 1400 5. Bale Wrapping Operator’s Manual Bale Wrapping Principles The advantages of round bale silage are many, and include fewer feed units, a flexible harvesting system, large capacity and the possibility of selling feed units. In principle, the same fermentation processes occur whether the fodder is placed in a silo or pressed into bales and packed in plastic, i.e. - Page 12 Tanco Autowrap - 1400 5. Bale Wrapping Operator’s Manual If the bale to be wrapped is conical you must ensure that the sharp end is pointed at the tractor. It will then be easier to get the bale to lie correctly during packing. It is easy for such a bale to “turn”...
- Page 13 Tanco Autowrap - 1400 5. Bale Wrapping Operator’s Manual Storage Location Care should be taken in finding a suitable location for the storage of bales. The storage location should preferably be prepared before the bales are laid out. An elevation close to well-drained roads is recommended.
- Page 14 Tanco Autowrap - 1400 5. Bale Wrapping Operator’s Manual For Best Wrapping Results... 1. Harvest the grass early. 2. Ensure the grass is dried out to 30-40% solid content. If there is a danger of rain, bale and wrap the grass anyway.
-
Page 15: Machine Setup
Tanco Autowrap - 1400 6. Machine Setup Operator’s Manual Mounting of the Machine Be careful! There is a danger of being crushed when working implements are fitted and connected. Carry out the fitting procedures slowly and carefully, and use separate and approved lifting equipment to make the work easier. - Page 16 Tanco Autowrap - 1400 6. Machine Setup Operator’s Manual When attached to the tractor the machine should sit level, at this the squeeze arm will have 10cm approximate clearance with the ground when in the fully lowered position. Set linkage height to achieve this.
- Page 17 Tanco Autowrap - 1400 6. Machine Setup Operator’s Manual 1400 Control Box The control unit consists of the emergency stop button, a control cable, a fuse and a battery cable. The control unit should be attached to a suitable place in the tractor cab using the suction pad provided.
- Page 18 Tanco Autowrap - 1400 6. Machine Setup Operator’s Manual Hydraulic Connection The hydraulic hoses between machine and tractor are equipped with 1/2” ISO Male Quick-Couplers. Ensure the oil pressure has been discharged before you connect the oil hoses using the tractor’s hydraulic lever.
- Page 19 (Open center). Note: The TANCO AUTOWRAP 1400 is set-up for open centre on leaving the factory. Close Centre Hydraulics Some tractors (John Deere) have a hydraulic system that require the valve on the machine to allow no flow when no function is operating (Closed Center).
- Page 20 This however means that the tractor is constantly pumping and you do not get the benefit of the efficiency of your load-sensing pump. Tanco Autowrap strongly recommend that if you are running the machine on tractor with LS Hydraulics you fit the optional Load-Sensing Block (see Hydraulic Circuit). With this block fitted a Load sensing signal is transmitted in the form of hydraulic pressure via a hose for the LS Port on the LS Entry Block to the LS Connection on the tractor.
- Page 21 Tanco Autowrap - 1400 6. Machine Setup Operator’s Manual Check List: Before using the machine it is recommended to follow this check list: 1. Make it a habit to discharge the oil-pressure before connection or disconnection of the hydraulic hoses. (By operating the hydraulic control lever inside the tractor). (Use the tractors hydraulic control lever).
- Page 22 Make sure that both the male and female-couplers opens properly for the oil flow, check these carefully. The best thing to do is to exchange the quick-coupling on the return side and arrange a “free return”. Your Tanco Autowrap Bale Wrapper has been tested in practical operation in approximately 2 hours at the factory.
- Page 23 Tanco Autowrap - 1400 6. Machine Setup Operator’s Manual Emergency Stop (See Fig. 5) This machine is equipped with a safety guards on the Wrapping Arms, Wrapping Arm and its operation must be tested before work itself is started. Safety Arm...
- Page 24 Tanco Autowrap - 1400 6. Machine Setup Operator’s Manual Mounting of Plastic Film (See Fig. 6 & 7) Top Latch When loading a plastic roll, first ensure the Top Cone is pushed up to the latched position, then push back the Dispenser Insert until held in position by the Bottom Latch.
- Page 25 Tanco Autowrap - 1400 6. Machine Setup Operator’s Manual Adjusting the Height of the Dispenser The standard film dispenser is designed for 750mm film. The plastic film should hit at the middle of the bale wrapped (Fig. 8), and therefore it can be necessary to adjust the height of the pre-stretcher (See Fig.
- Page 26 Operator’s Manual Tanco Dual Stretch Dispenser Gear Bolt All Tanco Autowrap machines are supplied with a patented dual stretch gear system. This system enables a quick change of stretch levels on the Film Dispenser. If the Gear Bolt is fitted in Position 1 (See Fig. 10), the top set of gears provide Pos.
-
Page 27: Controller Information
Operator’s Manual Introduction The Tanco Autowrap Bale Wrap Controller enables the operator to monitor and control the operation of the bale wrapper at any stage of the wrapping cycle. The controller is designed for models: 1400 and 1814 table type wrappers. - Page 28 Tanco Autowrap - 1400 7. Controller Information Operator’s Manual Display; Shows in normal working mode: - Current No. of Wraps - Target No. of Wraps - Wrapping Speed (R.P.M) - Bale Total (10 Separate Stores) - Grand Total No. of Bales...
- Page 29 Tanco Autowrap - 1400 7. Controller Information Operator’s Manual In ‘M’ mode: Load Down In ‘M’ mode: Load Up In ‘A’ mode: Starts Auto Off-load (Auto Hand Cont. : ON) In ‘A’ mode: Starts Auto Load (Auto Hand Cont. : ON) In ‘M’...
- Page 30 Tanco Autowrap - 1400 7. Controller Information Operator’s Manual Operation Operation in Automatic mode The automatic sequence is made up of three sections: Loading, Wrapping and Off-loading. The controller comes initially set so one press of a button automatically loads the bale, a second press runs the complete wrapping cycle and a third press automatically off-loads the bale.
- Page 31 Tanco Autowrap - 1400 7. Controller Information Operator’s Manual 5. Press (R6) to commence the Automatic Wrapping Cycle as follows: - The wrap arm will start in slow speed and ramp up to full speed. - The Cut and Starts open twice to release the plastic.
- Page 32 Tanco Autowrap - 1400 7. Controller Information Operator’s Manual Manually Interrupting an Automatic Wrapping Cycle Press (L3) to bring the wrapper to a controlled stop. Pressing (R3) will resume the auto-wrap cycle from where it stopped. For safety reasons; if it is necessary to work on the machine (e.g. in the event of a film break or the film running out), then it is strongly recommended that you then switch the controller off via the red stop button and disengage the machine power source.
- Page 33 Tanco Autowrap - 1400 7. Controller Information Operator’s Manual - Load Arm Down (on Hand Held Controller) Pressing the Downwards button on the Hand Held Controller lowers the Load Arm. - Squeeze Arm In (on Hand Held Controller) Pressing the button with both arrows facing one another closes the Load Arm in.
- Page 34 Tanco Autowrap - 1400 7. Controller Information Operator’s Manual The Display Menu The Display menu is divided into 3 sections. At the top level are the settings used during the daily work with the machine – i.e. Store totals and No. of Wraps.
- Page 35 Tanco Autowrap - 1400 7. Controller Information Operator’s Manual NOTE: There are additional sequences selectable in the Operator Setup menu but not shown in the table. These sequences are for wrapper models to which this manual does not apply. Please refer to the Operator Setup Menu for further explanation of the Operator Setup functions given in the table above.
- Page 36 Tanco Autowrap - 1400 7. Controller Information Operator’s Manual Resetting a Store Total to Zero Stores A to J can be individually reset to zero at any time. The Grand Total store cannot be reset. First select the store to be zeroed, and then navigate the display menu as shown below.
- Page 37 Tanco Autowrap - 1400 7. Controller Information Operator’s Manual 1400 Programmable Factors - Operator Level Menu No. Operator Level Default Units Notes Target No. of Wraps 4.01 Contrast 4.02 Film Break Switches On or Off - Film Break Sensor 4.41...
- Page 38 Sets Controller Back to its’ Default Settings Operator Setup Menu The default settings for the machine are developed by Tanco for optimal operation of the machine. However, the operator can change certain parameters in the ‘Operator Setup’ menu to take account of...
-
Page 39: Operational Features
Tanco Autowrap - 1400 8. Operational Features Operator’s Manual Transport & Working Positions Working in the field the 1400 is off-set to the right had side of the tractor, for road transport the draw bar is moved in so the machine runs directly behind the tractor. - Page 40 Tanco Autowrap - 1400 8. Operational Features Operator’s Manual Setting the Speed of the Wrapping Arm The wrapping arm speed is controlled by a proportional hydraulic valve. When running in automatic mode the arm starts at slow speed, then ramps to full speed and on the last revolution ramps down to slow and stop.
- Page 41 Tanco Autowrap - 1400 8. Operational Features Operator’s Manual 3 Operational Principles The controller allows for varying degrees of operator intervention in the control of the machine. It is possible to set the controller so one press of a button will run a full automatic sequence from loading to wrapping and unloading.
- Page 42 Tanco Autowrap - 1400 8. Operational Features Operator’s Manual Wrapping Arm Sensor Wrap Arm Magnet Fig. 16 Bale Guide Load Frame Squeeze Arm Fig. 14 Fig. 15...
- Page 43 Tanco Autowrap - 1400 8. Operational Features Operator’s Manual - Wrapping The Squeeze Arm must be in the full out position for wrapping to commence. Make sure that the bale is sitting correctly on the table before starting wrapping. Pressing (R6) starts the automatic wrapping cycle.
- Page 44 Tanco Autowrap - 1400 8. Operational Features Operator’s Manual - Unloading In ‘A’ (Auto Mode) the machine will run through a full automatic wrapping sequence. One round before the required number of revolutions is obtained; the speed of the wrapping arm is reduced and the cutter opens.
- Page 45 Tanco Autowrap - 1400 8. Operational Features Operator’s Manual End Tipping The 1400 can be fitted with an optional bale End Tipping attachment (See Fig. 17) which turns the bale on to its end as it is being off-loaded (see Fig. 18 & 19). It is attached to the Table Tip Frame with bolts and rubber buffers and can be adjusted to ensure that wheel is clear of the ground during transport.
- Page 46 Tanco Autowrap - 1400 8. Operational Features Operator’s Manual To avoid damage to the bale the 1400 should be stationary when End Tipping. The operation of the end tip attachment is heavily dependant upon the terrain and the bale shape. The mounting height of the wheel is adjustable to improve operation with different bale sizes and operating conditions.
-
Page 47: Electro-Hydraulics
Tanco Autowrap - 1400 9. Electro-Hydraulics Operator’s Manual Electro-Hydraulics Note: There are 3 basics, which must ALWAYS be followed if the machine is to function correctly Free Return; Max 10 bar Working Pressure; 185 bar (Direct to Tank) Voltage; 12 V... - Page 48 Tanco Autowrap - 1400 9. Electro-Hydraulics Operator’s Manual 1400 Hydraulic Circuit...
- Page 49 Tanco Autowrap - 1400 9. Electro-Hydraulics Operator’s Manual...
- Page 50 Tanco Autowrap - 1400 9. Electro-Hydraulics Operator’s Manual 1400 Junction Box Wiring Solenoid Generic Function Cable Number AMP Pin 1400 Function C&S Open C&S Close Roller Speed Master Valve Forward Rotate Arm Speed (Prop.) OP13 Squeeze In OP14 Drawbar Out...
- Page 51 Tanco Autowrap - 1400 9. Electro-Hydraulics Operator’s Manual 1400 Junction Box Wiring (contd.) Solenoid Generic Function Cable Number AMP Pin 1400 Function Rotate Sensor Not Used Emergency Stop Not Used Squeeze Out Film Break 1 Not Used Film Break 2...
- Page 52 Roller Stop Valve Note: The TANCO AUTOWRAP 1400 is set-up for open centre on leaving the factory. Close Centre Hydraulics Some tractors (John Deere) have a hydraulic system that require the valve on the machine to allow no flow when...
- Page 53 Tanco Autowrap - 1400 9. Electro-Hydraulics Operator’s Manual Valve Functions Fig. 21 Valves 1 to 15 (See Fig. 21) are 12 V Electrical Solenoid Valves, their functions are as follows; Valve 1 (Cutter Open) & Valve 2 (Cutter Close) These valves open and close the film cutter. To prevent the Cutter creeping open, there is a load holding valve on top of the cutter section of the control valve.
- Page 54 Tanco Autowrap - 1400 9. Electro-Hydraulics Operator’s Manual Valve 3 - Roller Stop This valve is normally closed; it is pulsed open and closed to give half speed on the table rollers when the film break sensor detects that one film has broken.
- Page 55 Tanco Autowrap - 1400 9. Electro-Hydraulics Operator’s Manual Valve 11- Tip Down This poppet valve mounted on the tip port of the Control Valve lowers the rear roller frame for tipping off bale. Valve 12 - Tip Return This valve raises rear roller frame after tipping.
- Page 56 Tanco Autowrap - 1400 9. Electro-Hydraulics Operator’s Manual Valve 17 - (VMP) Cross Line Relief Valve Forward This valve limits the max. torque of the wrapping arm. If the inlet pressure exceeds the set value, it relieves the oil across to the outlet side of the motor. It is adjusted so that the pull force on the far end of the arm is approximately 35 KG.
-
Page 57: Troubleshooting
Tanco Autowrap - 1400 10. Troubleshooting Operator’s Manual Check Points Prior to Troubleshooting There are some general check points that have to be examined first if something is wrong with the machine. There are three basic assumptions that have to be fulfilled for the machine to function properly;... - Page 58 Tanco Autowrap - 1400 10. Troubleshooting Operator’s Manual Electric Power It is important to check that all functions receive enough electric power. If not, some, or all functions may fail. The controller displays a voltage reading. Battery Voltage If the voltage falls below 10 V the valves will not be able to open.
- Page 59 Tanco Autowrap - 1400 10. Troubleshooting Operator’s Manual Procedure of Troubleshooting If the machine fails to operate correctly it must be determined if the problem is Hydraulic, Mechanical or Electrical. Solenoid Valves When checking if the Solenoid valves are receiving electric power, you do this in the following way: 1.
- Page 60 Tanco Autowrap - 1400 10. Troubleshooting Operator’s Manual The Machine Does not Function - Even if the gauge shows enough pressure and there is no reaction in the machine. The reason could be that one, (or both), of the quick-couplers does not open for the oil, in this situation you should change the quick-couplers.
- Page 61 Tanco Autowrap - 1400 10. Troubleshooting Operator’s Manual - Check if the arm is attempting to drive but is under pressure, unscrew adjustment on Valve 16 - Brake Valve on Tower Block. If this does not solve problem return valve to original position.
-
Page 62: Maintenance
Tanco Autowrap - 1400 11. Maintenance Operator’s Manual Periodic Maintenance Bearings All ball-bearings are packed with grease, and do not need any more maintenance. Pre-Stretchers If the machine is in daily use, the Gears under the plastic cover on the dispenser should be greased when needed. - Page 63 Tanco Autowrap - 1400 11. Maintenance Operator’s Manual Storage The machine should be parked on a dry place during the closed season. Oil Filter The oil filter must be changed once a year. Lubrication (See Fig. 22) The table below outlines the recommended lubrication requirements for components on the 1400;...
- Page 64 Tanco Autowrap - 1400 11. Maintenance Operator’s Manual 6. Wrap Arm Drive 8. Dispenser Gears 2. Table Up Ram 1. Drawbar Ram 7. Table Roller Drive 3. Table Tip Ram 4. Squeeze Arm Ram 5. Cut & Tie Ram Fig. 22...
-
Page 65: Guarantee
Tanco Autowrap - 1400 12. Guarantee Operator’s Manual GUARANTEE Subject to hereunder provided, the sellers undertake to correct either by repair or at their election by replacement any defect of material or workmanship which occurs in any of its goods within twelve months after delivery of such goods to first user, with the exception of contractors or commercial users when warranty period is six months. - Page 66 Tanco. Please ensure all relevant information is included on this form 3: Consult with your Tanco dealer (supplier) and have them forward your claim and the damaged item to Tanco.
-
Page 67: Declaration Of Conformity
Tanco Autowrap - 1400 13. Declaration of Conformity Operator’s Manual EC DECLARATION OF CONFORMITY ACCORDING TO DIRECTIVES 8 9/392/336 /EEC AS AMENDED Manufacturer: Tanco Autowrap Ltd Bagenalstown Co. Carlow IRELAND CERTIFIES THAT THE FOLLOWING PRODUCT: TANCO AUTOWRAP MODEL: 1400EH SERIAL NO: To which this declaration relates, corresponds to the essential requirements of the Directive 89/392/336/ EEC as amended. - Page 68 3. When ordering you must give the Serial Number and Model Number of the machine. 4. All orders must go through your local Tanco Dealer, and must be either faxed or e-mailed to Tanco Autowrap.
- Page 69 Tanco Autowrap - 1400 Spare Parts Manual Table of Contents - Section 2: Spare Parts Manual - Chapter Contents Page Chassis Assembly Cut & Tie Assembly Table Assembly Tower Assembly Dispenser Assembly Controller Mounting Assembly...
-
Page 70: Chassis Assembly
Tanco Autowrap - 1400 1. Chassis Assembly Spare Parts Manual 1.1 Control Valve Mouting 1.2 Wheels & Mudguards 1.3 Chassis Bale Guide 1.4 Drawbar 1.5 Swivel Hitch 1.6 Cut & Tie / Ram Mountings... - Page 71 Tanco Autowrap - 1400 1. Chassis Assembly Spare Parts Manual 1.1 Control Valve Mouting 1.2 Wheels & Mudguards 1.3 Chassis Bale Guide 1.4 Drawbar 1.5 Swivel Hitch 1.6 Cut & Tie / Ram Mountings...
- Page 72 Tanco Autowrap - 1400 1.1 Control Valve Mounting Spare Parts Manual Item No. Part No. Description Item No. Part No. Description 1401100 Chassis 1308180 Tower Block 1401060 Valve Cover Z10-02-10 10mm Flat Washer 34251456 Handwheel (50 x 10) Z12-02-10 10mm Spring Washer...
- Page 73 Tanco Autowrap - 1400 1. Chassis Assembly Spare Parts Manual 1.1 Control Valve Mouting 1.2 Wheels & Mudguards 1.3 Chassis Bale Guide 1.4 Drawbar 1.5 Swivel Hitch 1.6 Cut & Tie / Ram Mountings...
- Page 74 Tanco Autowrap - 1400 1.2 Wheels & Mudguards Spare Parts Manual Item No Part No Description Item No Part No Description 1401100 Chassis Z05-32 Lighting Set 1402100 Mud Guard Mounting Bracket (Right) Z04-621 100 x 45 Reflector Z10-02-12 12mm Flat Washer...
- Page 75 Tanco Autowrap - 1400 1. Chassis Assembly Spare Parts Manual 1.1 Control Valve Mouting 1.2 Wheels & Mudguards 1.3 Chassis Bale Guide 1.4 Drawbar 1.5 Swivel Hitch 1.6 Cut & Tie / Ram Mountings...
- Page 76 Tanco Autowrap - 1400 1.3 Chassis Bale Guide Spare Parts Manual Item No Part No Description 1401100 Chassis 1401070 Bale Guide Z10-02-10 12mm Flat Washer Z26-084S M12 x 40mm Hex Set Z23-12 12mm Hex Set...
- Page 77 Tanco Autowrap - 1400 1. Chassis Assembly Spare Parts Manual 1.1 Control Valve Mouting 1.2 Wheels & Mudguards 1.3 Chassis Bale Guide 1.4 Drawbar 1.5 Swivel Hitch 1.6 Cut & Tie / Ram Mountings...
- Page 78 Tanco Autowrap - 1400 1.4 Drawbar Spare Parts Manual Item No Part No Description Item No Part No Description 1401100 Chassis 1408166 Drawbar Ram 1401716 Ram Mounting Pin 1401500 Drawbar Z10-02-10 M10 Flat Washer 34060800 M8 x 1.25 Grease Nipple...
- Page 79 Tanco Autowrap - 1400 1. Chassis Assembly Spare Parts Manual 1.1 Control Valve Mouting 1.2 Wheels & Mudguards 1.3 Chassis Bale Guide 1.4 Drawbar 1.5 Swivel Hitch 1.6 Cut & Tie / Ram Mountings...
- Page 80 Tanco Autowrap - 1400 1.5 Swivel Hitch Spare Parts Manual Item No Part No Description 1401500 Drawbar 1401100 Swivel Hitch Z03-22-06 7/16" Dia Linch Pin 34105716 3pt Pont Linkage Pin Z12-02-25 25mm Flat Washer 1401109 3pt Pont Linkage Nut 1401074...
- Page 81 Tanco Autowrap - 1400 1. Chassis Assembly Spare Parts Manual 1.1 Control Valve Mouting 1.2 Wheels & Mudguards 1.3 Chassis Bale Guide 1.4 Drawbar 1.5 Swivel Hitch 1.6 Cut & Tie / Ram Mountings...
- Page 82 Tanco Autowrap - 1400 1.6 Cut & Tie / Ram Mountings Spare Parts Manual Item No Part No Description Item No Part No Description 1408167 Table Loading Ram 1401100 Chassis 1401710 Ram Mounting Pin Z01-24-2618 18mm Pipe Clamp (Pair) Z10-02-10...
- Page 83 Tanco Autowrap - 1400 Spare Parts Manual...
- Page 84 Tanco Autowrap - 1400 2. Professional Cut & Tie Assembly Spare Parts Manual 2.1 Cut & Tie Base Asseembly 2.2 Cut & Tie Pressure Arm Assembly 2.3 Cut & Tie Top Arm Assembly...
-
Page 85: Cut & Tie Assembly
Tanco Autowrap - 1400 2. Professional Cut & Tie Assembly Spare Parts Manual 2.1 Cut & Tie Base Assembly 2.2 Cut & Tie Pressure Arm Assembly 2.3 Cut & Tie Top Arm Assembly... - Page 86 Tanco Autowrap - 1400 2.1 Cut & Tie Base Assembly Spare Parts Manual Item No Part No Description 1406060 Cut & Tie Base 1406080 Cut & Tie Pin (Long) 1406035 Ram Spacer Z11-02-081 8mm Mud Washer Z12-02-08 8mm Spring Washer...
- Page 87 Tanco Autowrap - 1400 2. Professional Cut & Tie Assembly Spare Parts Manual 2.1 Cut & Tie Base Assembly 2.2 Cut & Tie Pressure Arm Assembly 2.3 Cut & Tie Top Arm Assembly...
- Page 88 Tanco Autowrap - 1400 2.2 Cut & Tie Pressure Arm Assembly Spare Parts Manual Item No Part No Description 1406112 Cut & Tie Lift Arm 34060800 M8 x 1.25 Grease Nipple 1406074 Cut & Tie Balde Z03-25-05 Pop Rivet 1406075...
- Page 89 Tanco Autowrap - 1400 2. Professional Cut & Tie Assembly Spare Parts Manual 2.1 Cut & Tie Base Assembly 2.2 Cut & Tie Pressure Arm Assembly 2.3 Cut & Tie Top Arm Assembly...
- Page 90 Tanco Autowrap - 1400 2.2 Cut & Tie Top Arm Assembly Spare Parts Manual Item No Part No Description Item No Part No Description 1406113 Pull Down Arm 1406068 Film Roller 1406077 Knurled Roller Z18-08 8mm Plain Hex Nut 1406085 Cut &...
- Page 91 Tanco Autowrap - 1400 Spare Parts Manual...
- Page 92 Tanco Autowrap - 1400 3. Table Assermbly Spare Parts Manual 3.1 Chain Drive 3.2 Roller / Bearing Covers 3.3 Front Belt Guides 3.4 Rear Belt Guides 3.5 Bale Rollers 3.6 Table Pins (1) 3.7 Table Pins (2) 3.8 Loading Arm...
- Page 93 Tanco Autowrap - 1400 3. Table Assermbly Spare Parts Manual 3.1 Chain Drive 3.2 Roller / Bearing Covers 3.3 Front Belt Guides 3.4 Rear Belt Guides 3.5 Bale Rollers 3.6 Table Pins (1) 3.7 Table Pins (2) 3.8 Loading Arm...
- Page 94 Tanco Autowrap - 1400 3.1 Chain Drive Spare Parts Manual Item No Part No Description Item No Part No Description 1403100 Drive Roller 1403300 Table - Load Frame 1403041 29 Tooth 3/4" Sprocket Z01-24-2618 18mm Pipe Clamp (Pair) em No Part No...
- Page 95 Tanco Autowrap - 1400 3. Table Assermbly Spare Parts Manual 3.1 Chain Drive 3.2 Roller / Bearing Covers 3.3 Front Belt Guides 3.4 Rear Belt Guides 3.5 Bale Rollers 3.6 Table Pins (1) 3.7 Table Pins (2) 3.8 Loading Arm...
- Page 96 Tanco Autowrap - 1400 3.2 Roller / Bearing Covers Spare Parts Manual Item No Part No Description 1403450 Table - Unload Frame Z10-02-10 M10 Flat Washer Z26-065S M10 x 45mm Hex Set Z23-10 M10 Locknut 1403108 Idler Roller Z05-02-ILS 3265 X 200 (VEB) Strip Belt...
- Page 97 Tanco Autowrap - 1400 3. Table Assermbly Spare Parts Manual 3.1 Chain Drive 3.2 Roller / Bearing Covers 3.3 Front Belt Guides 3.4 Rear Belt Guides 3.5 Bale Rollers 3.6 Table Pins (1) 3.7 Table Pins (2) 3.8 Loading Arm...
- Page 98 Tanco Autowrap - 1400 3.3 Front Belt Guides Spare Parts Manual Item No Part No Description 1403300 Table - Load Frame 1403100 Drive Roller 1403561 Belt Guide Top Profile Z10-02-10 M10 Flat Washer Z26-063S M10 x 35mm Hex Set Z23-10...
- Page 99 Tanco Autowrap - 1400 3. Table Assermbly Spare Parts Manual 3.1 Chain Drive 3.2 Roller / Bearing Covers 3.3 Front Belt Guides 3.4 Rear Belt Guides 3.5 Bale Rollers 3.6 Table Pins (1) 3.7 Table Pins (2) 3.8 Loading Arm...
- Page 100 Tanco Autowrap - 1400 3.4 Rear Belt Guides Spare Parts Manual Item No Part No Description 1403450 Table - Unload Frame 1403108 Idler Roller 1403561 Belt Guide Top Profile Z10-02-10 M10 Flat Washer Z26-063S M10 x 35mm Hex Set Z23-10...
- Page 101 Tanco Autowrap - 1400 3. Table Assermbly Spare Parts Manual 3.1 Chain Drive 3.2 Roller / Bearing Covers 3.3 Front Belt Guides 3.4 Rear Belt Guides 3.5 Bale Rollers 3.6 Table Pins (1) 3.7 Table Pins (2) 3.8 Loading Arm...
- Page 102 Tanco Autowrap - 1400 3.5 Bale Rollers Spare Parts Manual Item No Part No Description 1403450 Table Unload Frame 1403300 Table - Load Frame 1403055 Bale Roller Shaft Assembly Z10-02-12 M12 Flat Washer Z26-084S M12 x 40mm Hex Set Z23-12...
- Page 103 Tanco Autowrap - 1400 3. Table Assermbly Spare Parts Manual 3.1 Chain Drive 3.2 Roller / Bearing Covers 3.3 Front Belt Guides 3.4 Rear Belt Guides 3.5 Bale Rollers 3.6 Table Pins (1) 3.7 Table Pins (2) 3.8 Loading Arm...
- Page 104 Tanco Autowrap - 1400 3.6 Table Pins (1) Spare Parts Manual Item No Part No Description Item No Part No Description 1403450 Table - Unload Frame 1408165 Unloading Damper Ram 34060800 M8 x 1.25 Grease Nipple 1401722 Ram Mounting Pin Z03-21-29 1/4"...
- Page 105 Tanco Autowrap - 1400 3. Table Assermbly Spare Parts Manual 3.1 Chain Drive 3.2 Roller / Bearing Covers 3.3 Front Belt Guides 3.4 Rear Belt Guides 3.5 Bale Rollers 3.6 Table Pins (1) 3.7 Table Pins (2) 3.8 Loading Arm...
- Page 106 Tanco Autowrap - 1400 3.7 Table Pins (2) Spare Parts Manual Item No Part No Description 1403450 Table - Unload Frame 34060800 M8 x 1.25 Grease Nipple 1403300 Table - Load Frame 34060800 M8 x 1.25 Grease Nipple 1401100 Chassis...
- Page 107 Tanco Autowrap - 1400 3. Table Assermbly Spare Parts Manual 3.1 Chain Drive 3.2 Roller / Bearing Covers 3.3 Front Belt Guides 3.4 Rear Belt Guides 3.5 Bale Rollers 3.6 Table Pins (1) 3.7 Table Pins (2) 3.8 Loading Arm...
- Page 108 Tanco Autowrap - 1400 3.8 Loading Arm Spare Parts Manual Item No Part No Description 1402110 Loading Arm 34060800 M8 x 1.25 Grease Nipple 1404055 DX Bush (35mm Bore x 30mm) 1403300 Table Load Frame 1401708 Loading Arm Pivot Pin...
- Page 109 Tanco Autowrap - 1400 Spare Parts Manual...
-
Page 110: Tower Assembly
Tanco Autowrap - 1400 4. Tower Assembly Spare Parts Manual 4.1 Tower Mounting 4.2 Wrapping Arm 4.3 Safety Arm 4.4 Tower Motor 4.5 Wrap Arm Mounting 4.6 Wrap Arm Drive... - Page 111 Tanco Autowrap - 1400 4. Tower Assembly Spare Parts Manual 4.1 Tower Mounting 4.2 Wrapping Arm 4.3 Safety Arm 4.4 Tower Motor 4.5 Wrap Arm Mounting 4.6 Wrap Arm Drive...
- Page 112 Tanco Autowrap - 1400 4.1 Tower Mounting Spare Parts Manual Item No Part No Description 1401100 Chassis 1404400 Tower Z10-02-16 16mm Flat Washer Z13B-064 5/8" x 2" UNF Hex Set...
- Page 113 Tanco Autowrap - 1400 4. Tower Assembly Spare Parts Manual 4.1 Tower Mounting 4.2 Wrapping Arm 4.3 Safety Arm 4.4 Tower Motor 4.5 Wrap Arm Mounting 4.6 Wrap Arm Drive...
- Page 114 Tanco Autowrap - 1400 4.2 Wrapping Arm Spare Parts Manual Item No Part No Description 1404220 Wrapping Arm 1304003 Magnet Mounting Bracket Z10-02-08 8mm Flat Washer Z26-040B M8 x 25mm Hex Bolt Z23-08 8mm Locknut 1309201 Sensor Magnet Z13-5-04x30 M4 x 30mm CSK AH Set...
- Page 115 Tanco Autowrap - 1400 4. Tower Assembly Spare Parts Manual 4.1 Tower Mounting 4.2 Wrapping Arm 4.3 Safety Arm 4.4 Tower Motor 4.5 Wrap Arm Mounting 4.6 Wrap Arm Drive...
- Page 116 Tanco Autowrap - 1400 4.3 Safety Arm Spare Parts Manual Item No Part No Description Item No Part No Description 1404220 Rotating Arm 34430300 Emergency Stop Arm Spring 34660111 Emergency Stop Arm S Hook 34950179 Safey Switch 34119043 Eye Bolt (M8 x 25mm)
- Page 117 Tanco Autowrap - 1400 4. Tower Assembly Spare Parts Manual 4.1 Tower Mounting 4.2 Wrapping Arm 4.3 Safety Arm 4.4 Tower Motor 4.5 Wrap Arm Mounting 4.6 Wrap Arm Drive...
- Page 118 Tanco Autowrap - 1400 4.4 Tower Motor Spare Parts Manual Item No Part No Description 1404400 Tower Z01-02-RF200 Tower Motor 1503172 Motor Spacer 1404015 16 Tooth 1" Sprocket WD623-071 1 1/2" Collar Z13-4-32 1 1/4" x 3/8"UNC Socket Cap SC...
- Page 119 Tanco Autowrap - 1400 4. Tower Assembly Spare Parts Manual 4.1 Tower Mounting 4.2 Wrapping Arm 4.3 Safety Arm 4.4 Tower Motor 4.5 Wrap Arm Mounting 4.6 Wrap Arm Drive...
- Page 120 Tanco Autowrap - 1400 4.5 Wrap Arm Mounting Spare Parts Manual Item No Part No Description 1404400 Tower 1404051 Internal Circlip (Dia 110mm) 1404052 Shaft Bearing (6014 2RS) 1404220 Rotating Arm 1404024 Key Steel 20 X 12 X 50 1404053...
- Page 121 Tanco Autowrap - 1400 4. Tower Assembly Spare Parts Manual 4.1 Tower Mounting 4.2 Wrapping Arm 4.3 Safety Arm 4.4 Tower Motor 4.5 Wrap Arm Mounting 4.6 Wrap Arm Drive...
- Page 122 Tanco Autowrap - 1400 4.6 Wrap Arm Drive Spare Parts Manual Item No Part No Description Item No Part No Description 1404220 Rotating Arm Z09-AW9 1" BS Chain 1404450 Tower Chain Guard 1404400 Tower Z10-02-10 10mm Flat Washer Z10-02-12 12mm Flat Washer...
- Page 123 Tanco Autowrap - 1400 Spare Parts Manual...
-
Page 124: Dispenser Assembly
Tanco Autowrap - 1400 5. Dispenser Assembly Spare Parts Manual 5.1 Dispenser Insert 5.2 Dispenser Complete... - Page 125 Tanco Autowrap - 1400 5. Dispenser Assembly Spare Parts Manual 5.1 Dispenser Insert 5.2 Dispenser Complete...
- Page 126 Tanco Autowrap - 1400 5.1 Dispenser Insert Spare Parts Manual Item No Part No Description 1505001 Roller Mounting Frame 1305035 Film Seperating Roller 1305120 Inner Roller 1305104 37 Tooth Gear 1305102 35 Tooth Gear 1305123 6mm Square Key Steel (15mm Long)
- Page 127 Tanco Autowrap - 1400 5. Dispenser Assembly Spare Parts Manual 5.1 Dispenser Insert 5.2 Dispenser Complete...
- Page 128 Tanco Autowrap - 1400 5.2 Dispenser Complete Spare Parts Manual Item No Part No Description Item No Part No Description 1405100 Dispenser Frame 1305022 Dispenser Top Shaft Z11-02-25 25mm Flat Washer (Light Duty) 1305100B Dispenser Insert (70/55%) 1305021 Compression Spring...
- Page 129 Tanco Autowrap - 1400 Spare Parts Manual...
-
Page 130: Controller Mounting Assembly
Tanco Autowrap - 1400 6. Controller Mounting Assembly Spare Parts Manual... - Page 131 Tanco Autowrap - 1400 6. Controller Mounting Assembly Spare Parts Manual...
- Page 132 Tanco Autowrap - 1400 6. Controller Mounitng Assembly Spare Parts Manual Item No Part No Description 1409150 1400 Expert Control Unit Z23-08 8mm Locknut 1309012 Controller Suction Cup 1309011 Sucntion Cup Mounting Bracket Z12-02-05 5mm Spring Washer Z26-017S M5 x 20mm Hex Set...
Need help?
Do you have a question about the 1400 Autowrap and is the answer not in the manual?
Questions and answers