
Subscribe to Our Youtube Channel
Related Manuals for IFM O6H7 Series


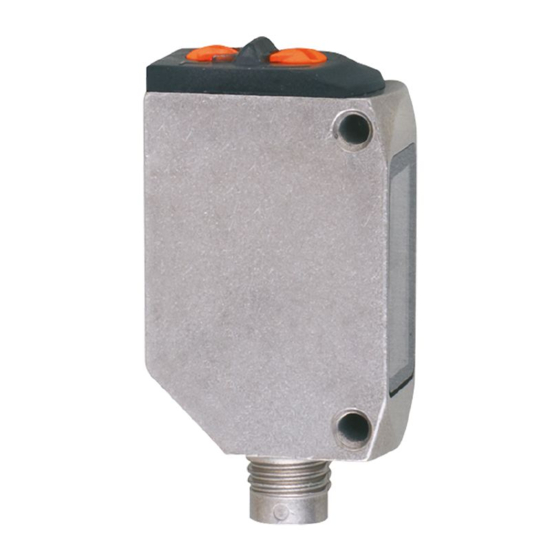
Summary of Contents for IFM O6H7 Series
- Page 1 Operating instructions Diffuse reflection sensor with background suppression O6H7xx...
-
Page 2: Table Of Contents
Contents 1 Preliminary note ���������������������������������������������������������������������������������������������������3 1�1 Symbols used ������������������������������������������������������������������������������������������������3 2 Safety instructions �����������������������������������������������������������������������������������������������3 3 Functions and features ����������������������������������������������������������������������������������������3 4 Installation������������������������������������������������������������������������������������������������������������4 5 Operating and display elements ��������������������������������������������������������������������������5 5�1 Stability indication ������������������������������������������������������������������������������������������5 6 Electrical connection ��������������������������������������������������������������������������������������������6 6�1 PNP ���������������������������������������������������������������������������������������������������������������6 6�2 NPN ���������������������������������������������������������������������������������������������������������������6 7 Settings ����������������������������������������������������������������������������������������������������������������7 7�1 Settings on the sensor �����������������������������������������������������������������������������������7 7�1�1 The sensor is to switch when the object is detected ����������������������������7... -
Page 3: Preliminary Note
1 Preliminary note 1.1 Symbols used ► Instruction > Reaction, result […] Designation of pushbuttons, buttons or indications → Cross-reference Information Supplementary note� Important note Non-compliance can result in malfunctions or interference� 2 Safety instructions According to the cULus approval Caution - Use of controls or adjustments or procedures other than those specified herein may result in hazardous radiation exposure�... -
Page 4: Installation
4 Installation ► Align the diffuse reflection sensor to the object to be detected (Fig� 1)� > For exact alignment, use the accessories for fine adjustment� ► Secure it to a bracket� Fig� 1 Note Fig� 2 The objects to be detected are to move transversely to the lens of the sensor�... -
Page 5: Operating And Display Elements
Shiny background Fig� 4 ► In case of shiny background surfaces and less shiny object surfaces the sensor should be mounted vertically to the back- ground surface� 5 Operating and display elements 1: LED green - operation, stability indication 2: OUT OFF button 3: LED yellow - switching output active 4: OUT ON button 5.1 Stability indication... -
Page 6: Electrical Connection
6 Electrical connection The unit must be connected by a qualified electrician� ► The national and international regulations for the installation of electri- cal equipment must be adhered to� ► Ensure voltage supply to EN 50178� ► Disconnect power� ► Connect the unit as follows: 6.1 PNP Connector M12 pigtail Cable... -
Page 7: Settings
7 Settings 7.1 Settings on the sensor 7.1.1 The sensor is to switch when the object is detected ► Position the object� Fig� 1 ► Press [OUT ON] for > 2 s� > The yellow LED flashes� > The setting of the range with object is made by releasing [OUT ON]�... -
Page 8: 7�1�4 Programming Unsuccessful
7.1.4 Programming unsuccessful > The LED flashes quickly, 8 Hz� • Measured value difference too small • Max� programming time (15 min�) exceeded� 7.1.5 Electronic lock Lock or unlock the buttons ► Press [OUT ON] and [OUT ] simultaneously for 10 s� >... -
Page 9: 7�2 Setting Via Io-Link
IO-Link hardware and software can be found at www�ifm�com� 7.2.1 Adjustable parameters Among others, the following parameters can be set via IO-Link� A table of all adjustable parameters can be found at www�ifm�com� Parameter name Values Description Default setting SSC1 Param�... - Page 10 Parameter name Values Description Default setting TI Result�State - Idle Teach-in state, after a successful teach N� A� - SP1 the value 'SP1 success' will be indicated� Success - Wait for command - Busy - Error - Custom Sequence - OFF OFF: Anti-Crosstalk function off modulation - AUTo...
-
Page 11: 7�2�2 Setting The Range By Means Of Background And Object
7.2.2 Setting the range by means of background and object ► Start the LR DEVICE software� ► Align the diffuse reflection sensor to the object (Fig� 1)� ► Press button [Teach SP1 TP1] in the LR DEVICE software� ► Align the diffuse reflection sensor to the background (Fig� 2)� ►... -
Page 12: 7�2�3 Setting The Range By Means Of Background
7.2.3 Setting the range by means of background If the object is not available, the range can be set using only the background� The switching characteristics of the diffuse reflection sensor are the most reliable if the range is set using the background and the object (→ 7.2.2)� ►... -
Page 13: Operation
► For cleaning do not use any solvents or cleaning agents which could damage the plastic parts� ► After use dispose of the unit in an environmentally friendly way in accordance with the applicable national regulations� Faulty sensors must only be repaired by the manufacturer� Technical data and further information at unter www�ifm�com...
Need help?
Do you have a question about the O6H7 Series and is the answer not in the manual?
Questions and answers