Table of Contents
Advertisement
Quick Links
Advertisement
Table of Contents

Subscribe to Our Youtube Channel
Related Manuals for Darfon G640


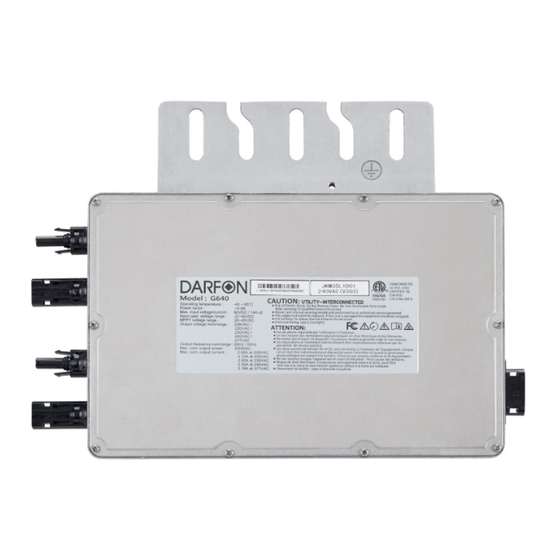
Summary of Contents for Darfon G640
- Page 1 G640 M I C R O I N V E R T E R U S E R M A N U A L...
-
Page 2: Table Of Contents
G 6 4 0 M i c r o I n v e r t e r U s e r M a n u a l ................... 11 OGGER VERVIEW TABLE OF CONTENTS PLC B ..............12 NSTALLING THE OX AND OGGER PV S... -
Page 3: Important Safety Instructions
This manual contains important instructions for the installation and maintenance during the installation or service of the device parts, connector and/or wiring. of G640 micro inverters. Before installing, please read these safety instructions • Do not stand on a wet location while doing installation and wirings. Enclose the carefully. -
Page 4: Fcc Compliance
G 6 4 0 M i c r o I n v e r t e r U s e r M a n u a l The following SPD specification is the minimum protection level that is required cause harmful interference to radio communications. However, there is no to adequately protect the micro inverter from surges that may be encountered in guarantee that interference will not occur in a particular installation. -
Page 5: Pre-Installation
24V to 60V and a maximum wattage of 350W although 320 watts is considered optimal. Please refer to the ‘Compatible PV Module • The maximum cable distance from the PLC box to the farthest G640 is 50 Calculator’ on the website at www.darfonsolar.com to verify the PV module is... -
Page 6: Ac Trunk Cable
Before ordering the PV module, make sure the connector type is compatible with equipment together. The EGC grounding process is completed via the grounding the micro inverter. connection of G640 3-wire AC cable. The PV module will still need to be grounded according to the module manufacturer’s instructions. Electrical Compatibility... -
Page 7: Surge Protection
G 6 4 0 M i c r o I n v e r t e r U s e r M a n u a l Micro Inverter Layout Using the installation map template in this manual, draw out the layout of the array and have it readily available during the installation of the micro inverters to record micro inverter location. -
Page 8: Installing The Micro Inverter
PV module frame. voltages at the electrical utility connection and at the junction box for each AC 4.4. Align the G640 so that the holes on the mounting bracket are above the slot branch circuit are within the ranges. - Page 9 G 6 4 0 M i c r o I n v e r t e r U s e r M a n u a l micro inverter and then to the junction box. After laying out the grounding 7.3.
-
Page 10: Post-Installation
If the GFDI has detected a ground fault, please contact with the installer and follow the Operation Manual to clear this condition. Or you can contact Darfon customer support at support@darfon.com. -
Page 11: Monitoring System
Data Logger Overview G 6 4 0 M i c r o I n v e r t e r U s e r M a n u a l MONITORING SYSTEM At this stage, the majority of the PV system is already installed: the PV modules and micro inverters. - Page 12 G 6 4 0 M i c r o I n v e r t e r U s e r M a n u a l LED Indication Low 3G Signal Green Steady ON: The signal strength of 3G is weak Green Steady ON: If USB device is attached Serial Port...
- Page 13 G 6 4 0 M i c r o I n v e r t e r U s e r M a n u a l Junction Box. The PLC Box will need to be placed in and secured to the AC Junction Box.
-
Page 14: Troubleshooting
TROUBLESHOOTING Troubleshooting the PLC Box If the problem persists, contact the Technical Support at support@darfon.com. If the PV system is not operating correctly, use the steps in this section to troubleshoot the problem. If the issue cannot be corrected using the steps in this section, please contact an authorized service representative. -
Page 15: Data Logger
G 6 4 0 M i c r o I n v e r t e r U s e r M a n u a l If the Signal Strength LEDs status shows 3 or 4 solid green lights, but there is no communication: Troubleshooting the Data Logger •... -
Page 16: Plc Box
Serial Port Interface 1 x RS485 (For Data Logger) Maximum Number of Devices Up to 24 Micro Inverters Maximum Transmission Distance Up to 164ft (50m) G640 MEMORY INPUT FROM PV (DC) Internal Memory Flash ROM 16K bits Number of Panels per Inverter... -
Page 17: Sample Wiring
G 6 4 0 M i c r o I n v e r t e r U s e r M a n u a l 240V 1Φ SAMPLE WIRING v1 20180928 G 6 4 0 U M d r a f t ©... - Page 18 G 6 4 0 M i c r o I n v e r t e r U s e r M a n u a l Use this map to draw the array and keep track of the micro inverters placement by serial number. Peel INSTALLATION MAP TEMPLATE off and use secondary serial number label on the micro inverter.
- Page 19 Mountain View, CA 94041 Tel: +886 3 2508800 Tel: +1.650.316.6300 ©2015 Darfon Electronics Corp. ©2015Darfon America Corp. All rights reserved. All specifications are subject to change without prior notice. v1 20180928 G 6 4 0 U M d r a f t...
Need help?
Do you have a question about the G640 and is the answer not in the manual?
Questions and answers