Table of Contents

Related Manuals for Samsung 2.0060510083255e16


Summary of Contents for Samsung 2.0060510083255e16
- Page 1 SAMSUNG ELECTRONICS CANADA, INC. HEADQUARTERS 55 Standish Court Mississauga, Ontario L5R 4B2 Canada TEL: 1-905-542-3535 www.samsung.ca SERVICE DIVISION 55 Standish Court Mississauga, Ontario L5R 4B2 Canada 1-800-SAMSUNG (1-800-726-7864) AH68-01853S...
- Page 2 Digital Surround AV Receiver System HT-AS610 Instruction Manual (AV-R610)
-
Page 3: Safety Warnings
Safety Warnings CAUTION RISK OF ELECTRIC SHOCK. DO NOT OPEN CAUTION: TO REDUCE THE RISK OF ELECTRIC SHOCK, DO NOT REMOVE REAR COVER. NO USER SERVICEABLE PARTS INSIDE. REFER SERVICING TO QUALIFIED SERVICE PERSONNEL. This symbol indicates that dangerous voltage which can cause electric shock is present inside this unit. -
Page 4: Precautions
Precautions Ensure that the AC power supply in your house complies with the identification sticker located on the back of your player. Install your player horizontally, on a suitable base (furniture), with enough space around it for ventilation (3~4inches). Make sure the ventilation slots are not covered. -
Page 5: Features
Features Digital AV Receiver This product is a pure digital AV receiver that performs digital signal processing to minimize signal distortion and loss. Dolby Pro Logic II Dolby Pro Logic II is a new form of multi-channel audio signal decoding technology that improves upon existing Dolby Pro Logic. DTS (Digital Theater Systems) DTS play backs 5.1 channel sound with less compression than Dolby Digital for richer sound. -
Page 6: Table Of Contents
Contents PREPARATION Safety Warnings ...2 Precautions...3 Features ...4 Description ...6 CONNECTIONS Connecting the Speakers ...10 Connecting External Components ...12 Connecting the FM and AM Antennas...15 OPERATION Before Using the AV Receiver ...16 Selecting Digital/Analog Input ...18 Setting the Speaker Mode ...20 Setting the Speaker Listening Distance ...22 Setting Digital Input ...24 Setting DRC (Dynamic Range Compression) ...25... -
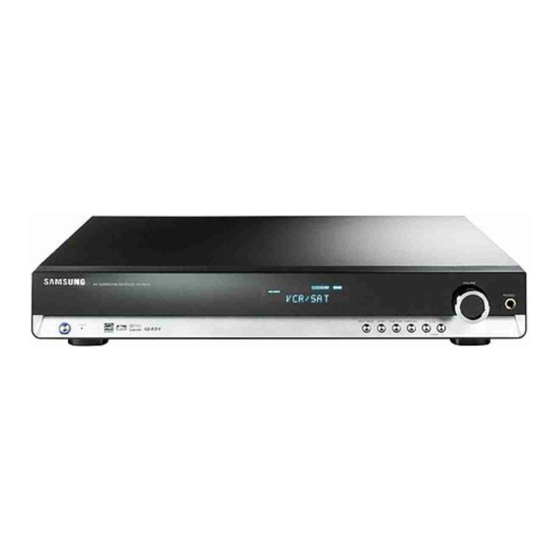
Page 7: Description
Description [ Front Panel ] POWER STANDBY Indicator POWER button [ Display ] INDICATOR DOLBY INDICATOR DOLBY DIGITAL INDICATOR DOLBY PRO LOGIC II INDICATOR INPUT MODE button LIVE SURROUND INDICATOR SPEAKER INDICATOR L.PCM INDICATOR RADIO STEREO INDICATOR RADIO BROADCASTING RECEIVING INDICATOR FRONT DISPLAY FUNCTION button SELECT (... -
Page 8: Rear Panel
[ Rear Panel ] AM ANTENNA JACK FM ANTENNA JACK DVD OPTICAL DIGITAL AUDIO INPUT JACK CD COAXIAL DIGITAL AUDIO INPUT JACK DVD AUDIO INPUT JACKS VCR/SAT AUDIO INPUT JACKS CD AUDIO INPUT JACKS √√ Accessories œœ Remote Control FM Antenna VCR/SAT VIDEO INPUT JACK VCR VIDEO OUTPUT... -
Page 9: Remote Control
Description [ Remote Control ] TV button AMP button POWER button NUMBER(0~9) buttons SLEEP button MO/ST button TUNER button EXTERNAL DEVICE PLAYBACK button MUTE button VOLUME CONTROL button MENU button CUSOR/ENTER button SUBWOOFER button INFO button STEREO button SPK DISTANCE button SPK LEVEL button SFE MODE button DVD button... - Page 10 Insert Remote Batteries Remove the battery cover in the direction of the arrow. Follow these precautions to avoid leaking or cracking batteries: • Place batteries in the remote control so they match the polarity:(+) to (+)and (–)to (–). • Use the correct type of batteries.Batteries that look similar may differ in voltage. •...
-
Page 11: Connecting The Speakers
Connecting the Speakers Before moving or installing the product, be sure to turn off the power and disconnect the power cord. Position of AV Receiver • Place AV Receiver on a dedicated stand or rack. Front Speakers • Place these speakers in front of your listening position, facing inwards (about 45°) toward you. - Page 12 ACTIVE SUBWOOFER (not supplied) • If more bass is desired, you can connect an additional active subwoofer (not supplied) to the Subwoofer 1or 2 port. Since the signal on the Subwoofer 1and 2 ports is not stereo, you will hear the same mono bass sound regardless of the port you connect to.
-
Page 13: Connecting External Components
Connecting External Components Connecting Video Component Before moving or installing the product, be sure to turn off the power and disconnect the power cord. DVD Player Video Projector • Disconnect the power plug from the outlet if you will not use this unit for a long period of time. •... - Page 14 (Settop Box) • If using VCR, connect Analog Audio Out to VCR/SAT • The Analog Audio and Video In jacks of the main unit • If there is a Digital Out for the satellite/cable STB, it • If the external component has only one Audio Output •...
- Page 15 Connecting External Components Connecting Audio Component Before moving or installing the product, be sure to turn off the power and disconnect the power cord. CD Player...
-
Page 16: Connecting The Fm And Am Antennas
Connecting the FM and AM Antennas If AM reception is poor, connect an outdoor AM antenna(not supplied). FM Antenna (supplied) FM antenna connection 1. Connect the FM antenna supplied to the FM 75 COAXIAL terminal as a temporary measure. 2. Slowly move the antenna wire around until you find a location where reception is good, then fasten it to a wall or other rigid surface. -
Page 17: Before Using The Av Receiver
Before Using the AV Receiver Turning On/Off REMOTE CONTROL Press the POWER button of the remote control. This unit will be turned on or set to Standby mode. • MAIN UNIT Connect the power plug to the outlet. Press the POWER button of the main unit. This unit will be turned on or set to Standby mode. -
Page 18: Main Unit
To Select the Function REMOTE CONTROL Method 1 Press the FUNCTION button. Each time you press the this button, FM • will be selected in turn. Method 2 Press CD, VCR/SAT, DVD or TUNER button. You can directly select CD, VCR/SAT, DVD or TUNER. •... -
Page 19: Selecting Digital/Analog Input
Selecting Digital/Analog Input You can listen to sound in Analog 2 Channels or Dolby Digital 5.1 Channel using this unit. REMOTE CONTROL For DVD Function Press the INPUT MODE DIGITAL button. DVD OPTICAL or COAXIAL will be selected. • Press the INPUT MODE ANALOG button. DVD ANALOG will be selected. - Page 20 MAIN UNIT For DVD Function Press the INPUT MODE button. DVD OPTICAL or COAXIAL and DVD ANALOG will be selected repetitively. • For CD Function Press the INPUT MODE button. CD OPTICAL or COAXIAL and CD ANALOG will be selected repetitively. •...
-
Page 21: Setting The Speaker Mode
Setting the Speaker Mode Before moving or installing the product, be sure to turn off the power and disconnect the power cord. Frequency response from the speaker will be adjusted according to your speaker configuration and whether certain speakers are used or not. √... - Page 22 Setting the Speaker • F.SPK (Front) : LARGE, SMALL • C.SPK (Center) : LARGE, SMALL, NONE • S.SPK (Surround) : LARGE, SMALL, NONE • SW SPK (Subwoofer) : YES, NO • CROVR (Crossover Frequency) : 60, 80, 100, 120, 150, 180, 200Hz MAIN UNIT Press SETUP button.
-
Page 23: Setting The Speaker Listening Distance
Setting the Speaker Listening Distance √ REMOTE CONTROL Press the SPK DISTANCE button to select the speaker you want. Each time you press this button, F.L • DIST OFF will be selected in turn. Press …† button to set the speaker distance. For F.L, CEN, F.R, S.W, S.R, S.L Speaker, you can set the distance from •... - Page 24 Setting Speaker Distance Set the distance from the speaker to listening position in intervals of 1 feet. F.L (Front-Left) : 1 feet ~ 30 feet • CEN (Center) : 1 feet ~ 30 feet • F.R (Front-Right) : 1 feet ~ 30 feet •...
-
Page 25: Setting Digital Input
Setting Digital Input You can set the digital input for a DVD/CD player to either OPTICAL or COAXIAL. MAIN UNIT Press SETUP button. “SETUP MODE” appears on the display and enters into Setup Mode. • Press FUNCTION button 3 times. “DIGITAL IN”... -
Page 26: Setting Drc (Dynamic Range Compression)
Setting DRC You can use this function to enjoy Dolby Digital sound when watching movies at low volume at night. REMOTE CONTROL Press DRC button. Each time you press this button, DRC : STD • will be selected in turn. MAIN UNIT Press SETUP button. -
Page 27: Test Tone
Test Tone Use test tone to check the speaker connection status or level. To Automatically Output Test Tone √ REMOTE CONTROL Press TEST TONE button. Test signal will be automatically output as follows; F.L • S.W. During test tone output, press …† button to adjust the speaker output level •... - Page 28 Test Tone Output F.L (Front-Left) : -10 ~ +10dB • CEN (Center) : -10 ~ +10dB • F.R (Front-Right) : -10 ~ +10dB • S.R (Surround-Right) : -10 ~ +10dB • S.L (Surround-Left): -10 ~ +10dB • S.W (Subwoofer): -10 ~ +10dB •...
-
Page 29: Setting Speaker Level
Setting Speaker Level You can set the balance and level of speakers √ Remote Control Press SPK LEVEL button to select the speaker you want. Each time you press this button, F.L • SPK LVL OFF will be selected in turn. Press …†... - Page 30 Setting Speaker Level F.L (Front-Left) : -10 ~ +10dB • CEN (Center) : -10 ~ +10dB • F.R (Front-Right) : -10 ~ +10dB • S.R (Surround-Right) : -10 ~ +10dB • S.L (Surround-Left): -10 ~ +10dB • S.W (Subwoofer): -10 ~ +10dB •...
-
Page 31: Dolby Pro Logic Ll Mode
Dolby Pro Logic ll Mode This mode provides 5.1 channel sound from 2 channel sources REMOTE CONTROL Press MODE button. Each time you press this button, CINEMA • PROLOGIC MUSIC will be selected in turn. To Exit Setup Mode Wait for about 5 seconds. •... - Page 32 Dolby Pro Logic ll Mode MUSIC : Provides 5.1 Channel Surround sound to digital, analog • or existing stereo sources such as CD, TAPE, FM, TV and Stereo VCR. CINEMA : Adds realism to the movie soundtrack. • MATRIX : You will hear 5.1 Channel Surround sound. •...
-
Page 33: Dolby Pro Logic Ll Effect
Dolby Pro Logic ll Effect This function works only in Dolby PRO LOGIC II MUSIC Mode. REMOTE CONTROL Press MODE button to select ‘MUSIC’ Mode. Press EFFECT button. Each time you press this button, C-WIDTH • DPL ll EFT OFF will be selected in turn. Press …†... - Page 34 Dolby Pro Logic llx Effect C-WIDTH : This sets the width of the center image. The higher the setting, the less • sound comes from the center speaker. DIMENSION : Incrementally adjusts the sound field (DSP)from the front or rear. •...
-
Page 35: Sfe Mode
SFE Mode Refer to the unique sound existing at specific place and you can feel live sound as if you are listening at actual site. REMOTE CONTROL Press SFE MODE button. Each time you press this button, HALL • DOME STADIUM CHURCH will be selected in turn. - Page 36 MAIN UNIT Press SURROUND button to select ‘SFE’ Mode. Each time you press this button, DPL II • in turn. Press SELECT( ) button. Each time you press Select ( ) button, HALL • CLUB DOME STADIUM ) button, CHURCH Each time you press Select ( •...
-
Page 37: Stereo Mode
Stereo Mode You can select this mode when you listen to sound through the Front Left and Right speakers and subwoofer. REMOTE CONTROL Press STEREO button. “STEREO” appears in the display and Stereo Mode is • selected. To Exit Setup Mode Wait for about 5 seconds. - Page 38 For Surround Mode and Input Signal o = active, – = inactive Surround Mode Input Signal Decoding Dolby D Surr. EX Dolby Digital 5.1 Dolby D (5.1ch) Dolby Digital 5.1 DOLBY (MUSIC, Dolby D (2ch) Pro Logic II CINEMA, MATRIX, Dolby D (2ch Surr) Pro Logic II GAME,...
-
Page 39: Listening To Radio
Listening to Radio You can listen to the chosen band (FM, AM broadcast stations) by using either the automatic or manual tuning operation. REMOTE CONTROL Press TUNER button. Each time you press this button, FM • repetitively selected. Select frequency. Automatic Tuning 1 •... -
Page 40: Presetting Radio Stations
Presetting Radio Stations You can preset up to 30 FM and AM stations. REMOTE CONTROL Ex) If you preset FM 89.10 station in 2ch Press TUNER button. Each time you press this button, FM • Press Select button and then TUNING MODE button to select 89.10. -
Page 41: Convenient Functions
Convenient Functions Sleep Timer Function You can set the time that this unit will shut itself off. REMOTE CONTROL Press the SLEEP button. SLEEP : OFF • To Check Sleep Timer Press SLEEP button. The remaining time before this unit will shut itself off is shown on the display. •... - Page 42 Reset Function REMOTE CONTROL Press the MUTE button. MUTE appears on the display. • Press “0” button five times and then press ENTER button. Press …† buttons to select “YES”. The unit will turn automatically back on in 5 seconds. •...
-
Page 43: Operating Tv With Remote Control
• Numeric buttons (0~9). The remote control may not work on some brands of TVs. Also, some operation • may not be possible depending on your brand of TV. The remote control will work with Samsung TVs by default. •... - Page 44 017, 048, 056, 060, 061, RCA/PROSCAN 018, 059, 067, 076, 077 078, 092, 093, 094 REALISTIC 003, 019 SAMPO SAMSUNG 000, 015, 016, 017, 040, 043, 046, 047, 048, 049, 054, 059, 060, 098 SANYO 019, 061, 065, 101, 102, 103, 104...
-
Page 45: Operating Your Vcr (Dvd) With Remote Control
STOP, SKIP, MENU and Numeric button (0~9). The remote control may not work on some brands of DVD (VCR)s. • Also, some operations may not be possible depending on your brand of DVD (VCR). The remote control will work with Samsung DVDs (VCRs) by default. •... - Page 46 033, 049, 051, 062, 066, 070, 091, 104 REALISTIC 001, 009, 025, 033, 044, 048, 054, 091, 101, 105 SAMSUNG 000, 006, 031, 032, 057, 058, 071, 072, 073, 074, 075, 076, 077, 078, 079, 080, 081 SANYO 008, 009, 046, 048, 050,...
-
Page 47: Before Calling For Service
Before Calling for Service Symptom Can't turn it on. It does not work when the button is pressed. Sound is not produced. Picture does not appear when the function is selected. Remote controller does not work. The sound from each device is changed during stereo playback. - Page 48 Symptom Can't select Dolby Pro • Logic ll Mode. There is no sound when • playing DTS encoded DVD and CD. Product Protection Function Heat Protection • Protection function works if the main unit is overheated or power transformer is overheated. "...
-
Page 49: Specifications
Specifications Power Supply Standby Power Consumption Power Consumption GENERAL Weight Dimensions (W x H x D) Operating Temperature Range Operating Humidity Range Frequency Response Usable Sensitivity S/N Ratio FM TUNER Distortion Stereo Separation Tuner Output Level Frequency Response S/N Ratio AM TUNER Usable Sensitivity Distortion... -
Page 50: Warranty
Samsung Limited Warranty Samsung Electronics Canada Inc. (SECA), warrants that this product is free from defective material and workmanship. SECA further warrants that if this product fails to operate properly within the specified warranty period and the failure is due to improper workmanship or defective material SECA will repair or replace the product at its option.