Table of Contents
Advertisement
Quick Links
Advertisement
Table of Contents

Subscribe to Our Youtube Channel
Related Manuals for Barco R9010010


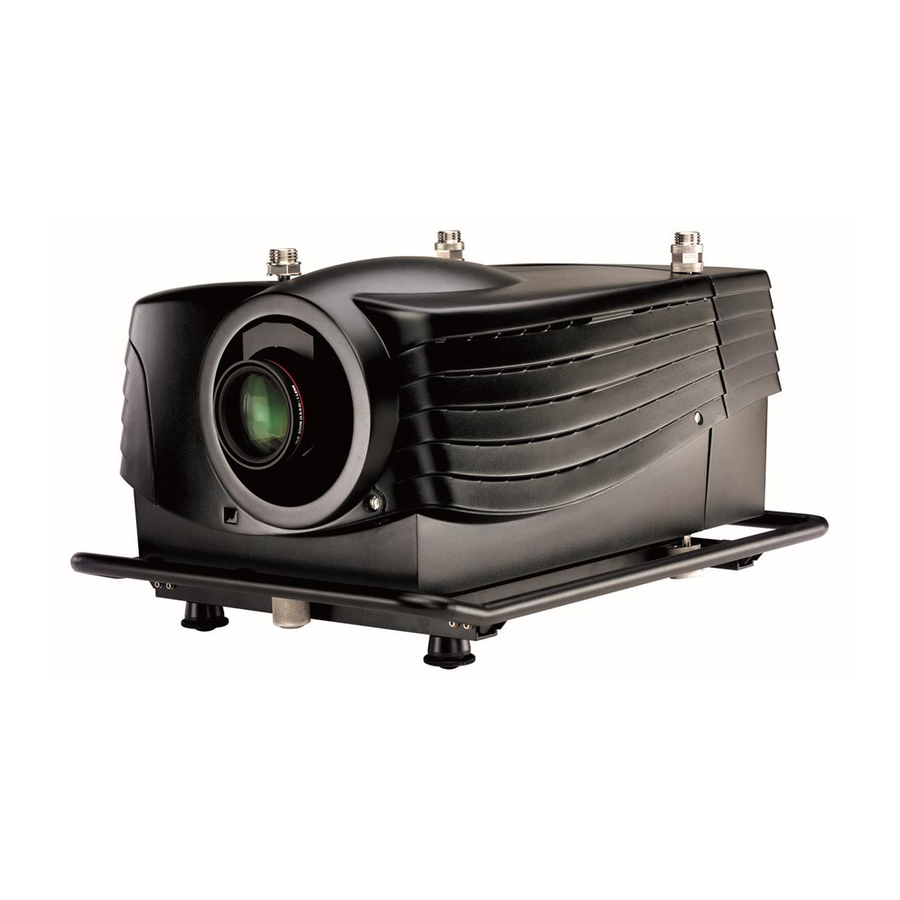
Summary of Contents for Barco R9010010
- Page 1 BarcoR10 SLM Owners Manual R9010010 R5976563/03 20/10/2004...
- Page 2 Barco nv Events Noordlaan 5, B-8520 Kuurne Phone: +32 56.36.89.70 Fax: +32 56.36.88.24 E-mail: events@barco.com Visit us at the web: www.barco.com Printed in Belgium...
-
Page 3: Federal Communications Commission (Fcc) Statement
Changes Barco provides this manual ’as is’ without warranty of any kind, either expressed or implied, including but not limited to the implied war- ranties or merchantability and fitness for a particular purpose. Barco may make improvements and/or changes to the product(s) and/or the program(s) described in this publication at any time without notice. -
Page 5: Safety Instructions
Before attempting to remove the projector’s cover, you must turn off the projector and disconnect from the wall outlet. When performing set up work at a ceiling mounted projector, to prevent injury caused by falling objects or the system, set out a keep out area. - Page 6 1. Safety Instructions Extra Safety manual Read also safety instructions in separate manual (R5976125). R5976563 BARCOR10 SLM 20/10/2004...
-
Page 7: Packaging And Dimensions
Projector Case 2.1 Projector Packaging Way of Packaging The projector is packed in a carton box. To provide protection during transportation, the projector is surrounded with foam. The package is secured with banding and fastening clips. To unpack 1. Release the fastening clips. -
Page 8: Lamp Packaging
Way of packaging As it is not allowed to transport the projector with the lamp mounted inside the projector, this lamp is packed in a separate carton box. Save this carton box , it can be used to repack the lamp when you ever have to transport your projector. - Page 9 2. Packaging and Dimensions Image 2-3 Side view dimensions R5976563 BARCOR10 SLM 20/10/2004...
- Page 10 2. Packaging and Dimensions R5976563 BARCOR10 SLM 20/10/2004...
-
Page 11: Ambient Temperature Conditions
Devices or structures to extract or shield contaminated air well away from the projector are a prerequisite, if this is not a feasible solution then measures to relocate the projector to a clean air environment should be considered. -
Page 12: Which Configuration Can Be Used
What image size? How big should the image be? The projector is designed for projecting an image size : min 1.00m (3.3ft) to max 15 m (49.2ft) (depending on the ambient light conditions), with an aspect ratio of 4 to 3. - Page 13 Table mounted configuration up side down Ceiling mounted, front projection Ceiling/Top side facing floor Projector CD = SH/2 + B - A Image 3-3 Ceiling mounted projector R5976563 BARCOR10 SLM 20/10/2004 SIDE VIEW Screen Optical axis projection lens Floor Screen...
-
Page 14: Safety Area Around Projector
Safety area Make sure the projector is located so that the air inlets and outlets for the cooling system are not obstructed. Leave a safety area A of about 1 meter on the left and the right side of the projector. - Page 15 3. Installation Guidelines Image 3-5 Safety area around the projector R5976563 BARCOR10 SLM 20/10/2004...
-
Page 16: Mounting The Projection Lamp
Consider the starting point at the lamp side (input side), the following tilting is possible : • Maximum 15° upwards • Maximum 195° downwards (indicated by the allowed projector tilting area) Forwards and backwards tilting Forwards and backwards tilting is allowed. 3.5 Mounting the projection lamp ARNING Unplug the power cord from the wall outlet before starting with the mounting procedure. -
Page 17: Access To The Lamp Unit
Pull and remove the side cover 3.5.2 Installation of the new Lamp Unit. What has to be done First remove the lock nut on each spacer screw and next slide the lamp unit into the projector frame. R5976563 BARCOR10 SLM 20/10/2004 3. Installation Guidelines... - Page 18 1. Remove the lock nut on the 3 spacer screws (A). (image 3-9) 2. Line up the lamp unit guides with the guides on the projector frame (B) and push the unit into the frame until it fits. (image 3-10) 3.
-
Page 19: Reinstalling The Side Panel
Reinstalling the side panel 1. Move the cover guides under the back cover and push the front of the cover against the projector frame lining up the cover lock screw with the speed nut (A) on the frame. (image 3-12, image 3-13) 2. -
Page 20: Re-Adjusting The Lamp Position In The Lamp Casing
A suggestion dialog box will be displayed when the projector is restarted after 100 hours and 250 hours. Once ENTER is pressed when that box is open, this box will not be displayed again till the next alert point is reached. -
Page 21: How To Readjust
Suggestion Lamp runtime is 105 hours It is advisable to adjust the Z-axis of the lamp to obtain maximum light output (see owners manual) <ENTER> to confirm Menu 3-1 The user can now adjust the Z-axis by following the next procedure. How to readjust. -
Page 22: Available Lenses
3. Installation Guidelines Image 3-16 AUTION Never turn the other screws ! These are factory aligned. 3.7 Lenses Overview • Lenses • Lens selection • Lens formulas • Lens Installation • Cleaning the lens 3.7.1 Lenses Available lenses TLD(1.6–2.0:1) TLD(2.0–2.8:1) TLD(2.8–5.0:1) TLD(1.2:1) TLD(0.8:1) -
Page 23: Lens Selection
How to select ? 1. Determine the required screen width. 2. Determine the approximate position of the projector in the projection room with regard to the screen and measure the projector- screen distance (PD). 3. Use the lens formulas to find the best corresponding PD with regard to the measured projector-screen distance for the required screen width. -
Page 24: Lens Installation
4. Push the lens, motors at the top, in the lens block gap horizontally, lining up the motor connector on the lens with the connector on the lens block (B), until the lens clicks in the lens anchor system. (image 3-18) On a table mounted projector, hold the projector when pushing the lens into the lens block to avoid sliding off from Caution: the table. -
Page 25: Battery Installation In The Rcu
How to stack? Handle as follow: 1. Put the second projector on the first one so that base plate of the second projector matches with the rigging socket of the first projector. (image 3-21) 2. Turn the rigging sockets of the second projector counter clockwise until they are free to move up and down. (image 3-22) 3. - Page 26 3. Installation Guidelines Image 3-21 Stacking two projectors Image 3-22 Closing the rigging sockets Image 3-23 Mounting the security chain Image 3-24 Mounting the security hook R5976563 BARCOR10 SLM 20/10/2004...
- Page 27 How to open a secured rigging point? 1. Push the ring (A) of the first projector downwards and hold it in that position. (image 3-26) 2. Turn the locked part (B) of the second projector a quarter counter clockwise and move it upwards.
-
Page 28: Rigging Points And Accessories
Image 3-27 Mounting the clamps ARNING When mounting the projector to the ceiling or to a rigging system, always mount security chains. How to mount the clamps? To fix the clamps to the U-profile, follow the next procedure : 1. Measure the distance, center tube as reference, between the two used support bars of a truss. - Page 29 How to mount the Overlockers to the truss? To mount the overlocker to the truss, handle as follow : 1. Open the fixation handle. (image 3-30) 2. Hook the clamp around the tube. The trigger automatically shuts the clamp. 3. Close the fixation handle and secure it by turning the hand screw. (image 3-31) Image 3-30 Opening the rigging clamp R5976563 BARCOR10 SLM 20/10/2004...
- Page 30 3. Installation Guidelines R5976563 BARCOR10 SLM 20/10/2004...
-
Page 31: Ac Power Cord Connection
4.1 Power connection AC Power cord connection Use the supplied power cord to connect your projector to the wall outlet. Plug the female power connector into the male connector at the left of the projector. The power input is 230 VAC. - Page 32 <ENTER> to continue Menu 4-1 Lamp run time is 1000 hours. Operating the lamp longer than maximum runtime hours may damage the projector. Please replace the lamp. When ENTER is pressed to go on, the warning will be repeated every 30 min.
-
Page 33: Input Source Connections
4.4 Switching off How to switch off the projector? 1. Press first Standby. 2. Let cool down the projector until the fans stop blowing, at least 15 min. 3. Switch off the projector with the power switch. 4.5 Input Source Connections 4.5.1... -
Page 34: Input Module Insertion
When using a RCVDS05, it is recommended to use a 5-cable output module in the RCVDS. The outputs of this module has to be connected to slot 1 of the projector. To switch the projector in the 5-cable mode see "Fixed slot (slot 1 & 2)", page 31. - Page 35 Slot 1 & 2 has 5 BNC input terminals for 5 cable input and a DVI plug for DVI input. Slot 1 has also an DVI output for loop through to a second projector. Within the installation mode it is possible to setup the input for 5 cable or DVI (PanelLink).
-
Page 36: How To Connect
DVI resync : DVI in signal is resyncronized with a stable clock and put on the DVI out connector When using an RCVDS 05 with a 5 cable output module, connect these 5 cables to this fixed 5-input slot (slot 1) of the projector. All sources of the RCVDS can now be accepted by the projector. 4.5.5 Serial Digital Input (slot 3 &... - Page 37 How to select the digital input? 1. Key in the corresponding slot number on the RCU or the local keypad. When a RCVDS05 is connected to the projector, the SDI input is available by keying in 83 or 84 on the RCU. 4.5.6 HD SDI Digital input (slot 3 &...
-
Page 38: Digital Video Decoder Input
How to select the digital input? 1. Key in the corresponding slot number on the RCU or the local keypad. When a RCVDS05 is connected to the projector, the SDI input is available by keying in 83 or 84 on the RCU. 4.5.7... - Page 39 Green Operation Red Stand-by Two way Hardwired hardwired remote remote CTRL 2 CTRL 3 Hardwired remote CTRL 1 Y/Vid DIGITAL VIDEO DECODER High Bandwidth 5 CABLE INPUT High Bandwidth 5 CABLE INPUT Image 4-7 Component video input Composite Video input S-Video input How to select the digital video decoder input? 1.
-
Page 40: Set Up Of The Baud Rate For Communication With A Computer
1. Use a data cable with at least 9 cores and 2 DB9 female connectors, just cross the pin 2 and pin 3 connection to make a Custom Null Modem Cable. (image 4-8) 2. Use the Custom Null Modem Cable to connect the COM 800 port of the master-projector to the ’To Switcher’ port on the frontside of the COM 800 Splitter. (image 4-9) 3. -
Page 41: Female Connector
Female Connector Pin Number Pin Number 1 2 3 Female Connector Image 4-8 Make a Custom Null Modem Cable R5976563 BARCOR10 SLM 20/10/2004 4 5 6 7 8 9 4 5 6 7 8 9 4. Connections... - Page 42 4. Connections Two Way Hardwired hardwired Green operational remote remote Red Stand-by CTRL 3 CTRL 2 Hardwired remote CTRL 1 Custom Null Modem Cable COM 800 Splitter 1 (R9827941) Two Way hardwired Hardwired Green operational remote remote Red Stand-by CTRL 3 CTRL 2 Hardwired remote...
-
Page 43: Connecting An Ir Remote Receiver To The Projector
This infrared receiver unit makes it possible to control the projector from another room. There is a communication line cable between the IR receiver and the projector or the RCVDS. The control information from the RCU can now be sent to the IR Remote Receiver. -
Page 44: Ethernet Connection
SDI DIGITAL INPUT High Bandwidth 5 CABLE INPUT High Bandwidth 5 CABLE INPUT Ethernet connection Image 4-10 Always use an Ethernet cable with ferrite core to connect the projector to the LAN. Diagnostic Code IR-Receiver Sync OK RS232/422 OUT COMM PORT... -
Page 45: Getting Started
Remote control functions. This remote control includes a battery powered infrared (IR) transmitter that allows the user to control the projector remotely. This remote control is used for source selection, control, adaptation and set up. It includes automatic storing of picture controls (Bright- ness, Sharpness...) and settings. -
Page 46: Operating The Projector
ADJUST key, to enter or exit the adjustment mode. (recessed key), to enter the address of the projector (between 0 and 9). Press the recessed address key with a pencil, followed by pressing one digit button between 0 and 9. - Page 47 Overview When the temperature of one of the DMD is too low or too high the projector will be switched automatically to standby. Before switching to standby, the following message appears for 3 seconds on the screen : ’DMD out of operating temperature range.
-
Page 48: Quick Set Up Adjustments
Quick Lens Adjustment Quick zoom/focus adjustment 1. Press the Selection key *, Barco key. The zoom/focus menu will be displayed. (image 5-3) 2. Push the cursor key ↑ or ↓ to zoom and ← or → to focus the image. -
Page 49: Quick On Screen Color Change
Image 5-3 Press the selection key * to switch to another pattern. Different patterns are available. Quick shift adjustment 1. Press the Selection key *, Barco key. The zoom/focus menu will be displayed (image 5-3). 2. Press ENTER. The shift menu will be displayed. (image 5-4) 3. -
Page 50: Pointing To The Reflective Screen
Hardwired Remote Input 1. Plug one end of the remote cable in the connector on the bottom of the RCU. 2. Plug the other end in the connector in the front panel of the projector labelled RC. (image 5-6) INSTALLATION... -
Page 51: Getting Started
Hardwired to the XLR input 1. Plug one end of the remote cable in the connector on the bottom of the RCU 2. Plug the other end in the connector in the front panel of the projector labelled Hardwired CTRL2. (image 5-7) Green Operation... -
Page 52: Projector Address
Why a projector address ? As more than one projector can be installed in a room, the separate projector should be separately addressable with an RCU or computer. There for each projector has its own address. Set up an individual Projector Address. -
Page 53: Common Address
The Pause Key When the Pause key is pressed, the image projection is stopped, a black screen will be displayed and the projector remains with full power for immediate restart. The sound is not interrupted. The display on front of the projector will show a "P". -
Page 54: The Stand-By Key
Select a source number. The Stand-by Key When the Stand-by key is pressed, the image projection is stopped and the projector goes to stand-by. This situation is used when a projection stop is planned for a longer period. R5976563 BARCOR10 SLM 20/10/2004... -
Page 55: Start Up Of The Adjustment Mode
Password protection of some items. Some items in the Adjustment mode are password protected. While selecting such an item, the projector asks to enter your password (Password protection is only available when the password strap on the controller module is ON, call an authorized service center to change the position of the password strap). -
Page 56: Menus On Local Lcd Display
The menus will be displayed line by line in the same order as they were displayed on the projection screen. Adjustments can be done while the projector is running without projecting the disturbing menus on the screen. -
Page 57: Random Access Adjustment Mode
7. RANDOM ACCESS ADJUSTMENT MODE Overview • Overview Flow • Picture Services • Picture Tuning • Geometry • ScenergiX • Picture in Picture (PiP) • Save Changes 7.1 Overview Flow Overview RANDOM ACCES ADJUSTMENT MODE Image 7-1 R5976563 BARCOR10 SLM 20/10/2004 LOAD EDIT RENAME... -
Page 58: Possible File Manipulations
Connecting a new source. Before using a new source, a correct file has to be installed. The projector’s memory contains a list of files corresponding to the most used sources. When the new source corresponds with one of these files, the file can be loaded and saved for future use. When there is a little difference, the file can also be loaded and then edited until the source specs are reached. -
Page 59: Load File
[Fit] : only the best fitting files will be displayed (with a distinction of ± 2 lines and line duration of ± 300 ns, if nothing is found within this small area, the projector continues searching until it finds something). -
Page 60: How To Start Up The Edit Menu
7. Random Access Adjustment Mode How to load a file ? 1. Push the cursor key ↑ or ↓ to select the best fitting file. (menu 7-7) 2. Press ENTER to select. A confirm Load file menu will be displayed with the newly created file and the one on which the new file is based on. (menu 7-8) 3. -
Page 61: Changing The Settings
7.2.5.2 Changing the settings Different methods The 3 different methods to change a setting will be described hereafter. These methods are: • with the numeric keys on the remote control. • with the arrow keys selecting the changing digit. • with the arrow keys counting up or down. - Page 62 7. Random Access Adjustment Mode Vertical Start number of lines between the start of the input signal and start of the image on the screen. Interlaced [On] or [Off] this selection is automatically filled when active file has to be edited. If the image is wrong due to mismeasurement, use the ENTER key to toggle between [On] and [Off].
- Page 63 Vertical refresh The way of updating the image information. Not available for PAL-NTSC-SECAM sources. This [sync/async] option will be displayed in gray. • For sources with a vertical frequency up to 60 Hz : the vertical refresh rate is the same as the vertical frequency of the incoming source.
- Page 64 7. Random Access Adjustment Mode 7.2.6 Rename Start Up To change the name of a selected file : 1. Push the cursor key ↑ or ↓ to highlight Rename. (menu 7-13) 2. Press ENTER. The Rename selection menu will be displayed. (menu 7-14) 3.
- Page 65 7.2.7 Copy Start Up To copy the name of a selected file : 1. Push the cursor key ↑ or ↓ to highlight Copy. 2. Press ENTER. The Copy selection menu will be displayed. (menu 7-17) 3. Push the cursor key ↑ or ↓ to select a file name. 4.
-
Page 66: File Options
7. Random Access Adjustment Mode 4. Press ENTER to select. If [all] is selected, your password has to be entered before all files will be deleted. A confirmation menu "Delete file ’file name’?" is displayed. (menu 7-22) 5. Press ENTER to delete the file, press EXIT if you want to keep it. Note: The active file cannot be deleted. -
Page 67: Picture Tuning
7.3 Picture Tuning Overview • Start up • • Color Temperature • Gamma • Decoding • Dynamic Color Depth • Noise Reduction • Input Balance 7.3.1 Start up Start up To improve the image quality, the items in the Picture Tuning menu can be toggled or adjusted. To start up the Picture Tuning : 1. -
Page 68: Color Temperature
G A I N R ED 2. 5 Image 7-3 7.3.4 Gamma What can be adjusted ? With the gamma correction adjustment, it is possible to accurately set the gamma of the projector image. COLOR TEMPERATURE PROJECTOR WHITE COMPUTER 9300K VIDEO 6500K FILM 5400K... -
Page 69: Dynamic Color Depth
Changing the gamma value 1. Push the cursor key ↑ or ↓ to highlight Gamma. (menu 7-30) 2. Press ENTER to select. 3. Change the gamma value by pushing the cursor key ← or → until the desired value is reached. Note: Default value of gamma : 2.2 4. -
Page 70: Why Adjusting The Input Balance
7. Random Access Adjustment Mode Changing the Dynamic Color depth value. 1. Push the cursor key ↑ or ↓ to highlight Dynamic Color Depth. (menu 7-32) 2. Press ENTER to select. 3. Change the value by pushing the cursor key ← or → until the desired dark color saturation is reached. 4. -
Page 71: Input Balance For Rgb Input Signals
Before starting the Input Balance function, generate a signal with dominant black and white areas. 7.3.8.1 Input Balance for RGB input signals Step to be taken for RGB input signals To adjust the input balance, the following steps have to be executed in the following order : Start with the black balance. -
Page 72: Returning To The Factory Defaults
7. Random Access Adjustment Mode 7.3.8.2 Input Balance for YUV signals Steps to be taken for YUV 1. Is the input balance menu already activated ? If yes, go to step 4 If no, go to step 2 2. Push the cursor key ↑ or ↓ to highlight Input Balance. (menu 7-37) 3. -
Page 73: Geometry Start Up
7.4 Geometry Overview • Introduction • Geometry start up • Shift • Size • Side Keystone • Blanking • Aspect Ratio • Geometry Options 7.4.1 Introduction Introduction An adjustment can be done as follow : Using the cursor key to adjust Entering the value with the digit keys. -
Page 74: What Can Be Done
7. Random Access Adjustment Mode Image 7-4 Shift adjustment Shift to the left Shift to the right Shift upwards Shift downwards How to shift the image ? 1. Push the cursor key ↑ or ↓ to highlight Shift. (menu 7-42) 2. -
Page 75: Side Keystone
7.4.5 Side Keystone What can be done? The side keystone adjustment is used to align the image if the projector is mounted at a non standard projection angle. R5976563 BARCOR10 SLM 20/10/2004 7. Random Access Adjustment Mode... - Page 76 7. Random Access Adjustment Mode Image 7-6 Side Keystone Side keystone adjustment 1. Push the cursor key ↑ or ↓ to highlight Side Keystone. (menu 7-44) 2. Press ENTER to select. 3. Push the cursor key ← or → to adjust the keystone of the image. When the upper part of the image is wider than the lower part of the image, push the cursor key ←.
-
Page 77: Adjusting The Blanking
7.4.7 Aspect Ratio Purpose To force the projector in a typical aspect ratio. E.g. projecting a 4:3 image in a 16:9 aspect ratio. R5976563 BARCOR10 SLM 20/10/2004 BLANKING BOTTOM LEFT RIGHT Select with ↑... -
Page 78: Geometry Options
7. Random Access Adjustment Mode How to set up the desired aspect ratio ? 1. Push the cursor key ↑ or ↓ to highlight Aspect Ratio. (menu 7-47) 2. Press ENTER to scroll between [5:4], [4:3], [16:9], [2.35], [1.88] or [1.78]. GEOMETRY SHIFT SIZE... -
Page 79: When Available
Why ScenergiX ? When working in a multichannel setup the BARCO SLM R10 and its Soft Edge possibilities enable an image blending that gives the appearance of a single view, thus achieving realistic immersion for the majority of wide screen applications. - Page 80 Scenergix set up Overlap : number of pixels that overlap Horizontal resolution of 1 projector : 1024 for Graphics versions, 1280 for Reality versions, 1400 for SLM R12+. Total horizontal screen resolution : [(horizontal resolution of 1 projector) x 2] minus overlap.
- Page 81 Scenergix overlap zone vertical Overlap : number of pixels that overlap Vertical resolution of 1 projector : 768 for Graphics versions, 1024 for Reality versions, 1050 for SLM R12+. Total vertical screen resolution : [(Vertical resolution of 1 projector) x 2] minus (overlap)
-
Page 82: Scenergix Size Adjustment
3. Use the cursor keys to move the border of the overlap area to the desired position (value between 0 and 255). Set first the width of the first projector and repeat for the second one. (image 7-13, image 7-14) - Page 83 7. Random Access Adjustment Mode Image 7-12 Width selections Image 7-13 Width set up for projector 1 R5976563 BARCOR10 SLM 20/10/2004...
-
Page 84: Adjusting The Black Level Of The Images
7. Random Access Adjustment Mode Image 7-14 Width set up for projector 2 7.5.8 Adjusting the black level of the images For dark images, the overlap zone will be brighter then the rest of the images. Therefore we can rise the black level of the remaining image (excluding the overlap zone). -
Page 85: Introduction To Pip
What are the different possibilities within the PiP mode ? The input section of the SLM projector allows a combinations of different input signals which may be projected in the 2 windows of the PiP screen. The PiP window can be placed in one of the four corners of the main window. -
Page 86: Position Of Picture In Picture Window
7. Random Access Adjustment Mode 7.6.2 Picture in Picture activation How to activate PIP? 1. Push the cursor key ↑ or ↓ to highlight PIP. (menu 7-54) 2. Press ENTER to select. The PIP menu will be displayed. (menu 7-55) 3. -
Page 87: Set Up Of The Quick Selection
How to position? 1. Push the cursor key ↑ or ↓ to highlight Position. (menu 7-57) 2. Press ENTER to toggle between Top-Left, Top-Right, Bottom-Left or Bottom-Right. STATUS [ON] SOURCE 01 POSITION [Top-Left] QUICK SELECT [OFF] Select with ↑ or ↓ then <ENTER>... - Page 88 7. Random Access Adjustment Mode R5976563 BARCOR10 SLM 20/10/2004...
-
Page 89: Start Up Of The Installation Mode
8. INSTALLATION MODE Overview • Start up of the Installation mode • Input Slots • 800 peripheral • Source Switching • No Signal • Contrast Enhancement • Convergence • Configuration • Lens Adjustment • Quick Access Keys • • Internal Patterns 8.1 Start up of the Installation mode Start up 1. -
Page 90: What If A Switcher Is Connected To The Projector
What if a switcher is connected to the projector ? If a RCVDS (switched on) or VS05 is connected to the projector, it will be also indicated on the menu by adding +800 peripheral. If no 800 peripheral indication is made on the menu, there are still two possibilities, no RCVDS or VS05 connected or RCVDS is switched off. -
Page 91: Defining The Infrared Communication Protocol
8.3.1 Defining the output module of the RCVDS05. Which module are available? When a RCVDS05 is connected to the projector, the type of output module of this RCVDS05 has to be defined in the 800 peripheral menu. • standard output module •... -
Page 92: Source Switching
8. Installation Mode 8.3.3 CLO using Comm 800 What can be done? CLO can be activated in a linked system setup using the COM800 Protocol + Ports. By using the COM800 Protocol + Ports, the RS232 Ports can be used for a RS232 linked setup, CLO is received through the COM800 Ports, general RS232 commands are received through the RS232 Ports. -
Page 93: Changing The Background Color
Image 8-1 Example of seamless switching with Fade effect. When an effect is selected within seamless source switching, wait until the effect is terminated before switch- ing to another source (± 2 seconds). 8.5 No Signal Overview • Changing the Background Color •... -
Page 94: Changing The Shutdown Setting
<ENTER> <EXIT> to return Menu 8-16 8.6 Contrast Enhancement Purpose Increases contrast for all video and data sources. Contrast enhancement will reduce the light output of the projector. NO SIGNAL COLOR [Blue] SHUTDOWN [off] Shutdown time: 5 min Select with ↑ or ↓... - Page 95 3. Push the cursor key ↑ or ↓ to highlight the desired contrast enhancement, normal or high. 4. Press ENTER to select. A timer will countdown from 45 seconds to 0. During this time, no action maybe undertaken. The projector is switching the contrast setting and has to recalculate the internal settings. (menu 8-20)
-
Page 96: Set Up The Correct Configuration
8. Installation Mode Set up the Correct Configuration 1. Push the cursor key ↑ or ↓ to highlight Configuration. (menu 8-23) 2. Press ENTER to select. The configuration menu will be displayed. INSTALLATION INPUT SLOTS 800 PERIPHERAL SOURCE SWITCHING NO SIGNAL CONTRAST ENHANCEMENT CONVERGENCE CONFIGURATION... -
Page 97: How To Shift The Image
How to Zoom/Focus ? 1. Push the cursor key ↑ or ↓ to select Zoom/Focus. (menu 8-26) 2. Push the cursor key ↑ or ↓ to zoom and ← or → to focus the image.see "Quick Set Up Adjustments", page 44 3. -
Page 98: Quick Access Keys
8. Installation Mode Options The zoom/focus and shift can be set the same for all files. 1. Push the cursor key ↑ or ↓ to highlight Options. (menu 8-28) 2. Press ENTER to select. The Lens Options menu will be displayed. (menu 8-29) 3. -
Page 99: What Can Be Done With These Internal Patterns
<EXIT> to return Menu 8-34 8.12 Internal Patterns What can be done with these internal patterns? The projector is equipped with different internal patterns which can be used for measurement purposes. R5976563 BARCOR10 SLM 20/10/2004 HIGHLIGHT ITEM COLOR [red] MENU POSITION [Default] Select with ↑... -
Page 100: Available Patterns
8. Installation Mode Available patterns Outline Hatch Color bars Multiburst Checker board Page Char Alpha numeric char How to select an internal patterns? 1. Push the cursor key ↑ or ↓ to highlight Internal Patterns. (menu 8-36) 2. Press ENTER to select. The internal patterns menu will be displayed. -
Page 101: Service Mode
When there is a difference, consult ’Change Baudrate PC’ in this chapter. • Projector Run Time: gives the total run time since the first start up. All projectors leave the factory with a run time of approxi- mately 24 hours. -
Page 102: How To Enable Or Disable The Password Function
This item is password protected when the password strap is installed. The password function is enabled when the password strap, second switch of S2 on the controller module is installed. Consult an authorized Barco service technician to change the strap position. About password types. -
Page 103: How To Change The Password
Image 9-1 Image 9-3 Metal top cover How to change the password ? 1. Push the cursor key ↑ or ↓ to highlight Change Password. (menu 9-6) 2. Press ENTER to display the Change Password menu. (menu 9-7) Note: Only possible when Owner. The old passwords are displayed. -
Page 104: Access Levels
4. Press ENTER to toggle between Y(yes) or N(no). 5. Repeat both steps if necessary. Access Levels An access level can be added to the following items: • Adjustment mode • Barco logo • Change projector address • File delete • File delete all •... -
Page 105: How To Change The Common Address
1. Push the cursor key ↑ or ↓ to highlight Change Proj Address. (menu 9-13) 2. Press ENTER. The Change Projector Address menu will be displayed and the actual address will be filled in. (menu 9-14) 3. Push the cursor key ↑ or ↓ to highlight Projector address. -
Page 106: Start Up Of The Serial Communication
<ENTER> Reprogram with ↑,↓,←,→ or numeric keys <ENTER> to confirm <EXIT> to return. Menu 9-16 SERIAL COMMUNICATION PROJECTOR ADDRESS 001 BAUDRATE [115200] INTERFACE STANDARD [RS232] RS422 TERMINATION [ON] Select with ↑ or ↓ then <ENTER> <EXIT> to return Menu 9-18... -
Page 107: Setting Up The Interface Standard
Setting up the Interface Standard Set up The communication protocol for the communication between the projector and a computer can be set on RS232 or RS422. To set up the desired protocol, handle as follow : 1. Push the cursor key ↑ or ↓ to highlight Interface Standard. (menu 9-20) The actual interface standard will be displayed. -
Page 108: Set Up The Network Configuration
RS422 Termination Set up The last projector in a line should be RS422 terminated (ON position). All others in the line should be in the OFF position. To change the termination position : 1. Push the cursor key ↑ or ↓ to highlight RS422 Termination. (menu 9-21) The actual setting will be displayed. -
Page 109: Entering The Necessary Addresses
When the CLO function is ON (projector master or slave), the projector will regulate the lamp power until the preprogrammed CLO value (number of lumens) (full line) is reached. As long as this power is below the maximum power of the lamp, the projector will gives a constant light output. - Page 110 Linked CLO, used by multiple projectors If the linked CLO function is in the OFF position, the lamp of each projector will follow its own life cycle curve (dotted lines). When in the ON position and linked as described below, all projectors will use the preprogrammed CLO value as long as no projector in the chain is using its maximum lamp power already.
- Page 111 Using the lamp longer than the maximum run time may damage the projector. number of strikes Total times the lamp is started up.
-
Page 112: What Is Possible
[OFF] fixed power, no power adaptation. [SLAVE] follows the master projector to adjust the CLO. When stand alone and the light output should be adjusted, put on slave. [MAS- master projector to control the CLO in a chain of projectors. -
Page 113: Available Settings
OFF: no key on the RCU is used to display the BARCO logo. TEXT: the TEXT key on the RCU is used to display or to remove the BARCO logo with one single push on this key (only in operational mode). -
Page 114: Preset Input Balance
Select with ↑ or ↓ then <ENTER> <EXIT> to return Menu 9-31 9.13 Preset Input Balance AUTION Changing these settings may seriously affect the performance of the projector. ADD-INS CLO [INACTIVE] SCENERGIX [INACTIVE] Select with ↑ or ↓ then <ENTER>... -
Page 115: Advanced Processing
Other formats will be displayed either unscaled and/or interlaced. This feature can be used if additional delay in the projector is not acceptable. For instance if a projector is showing the DVI loop out of another DLP or if an external scaler/de-interlacer does the processing. -
Page 116: How To Start Up The Diagnosis
Start up 1. Push the cursor key ↑ or ↓ to highlight Diagnosis. (menu 9-38) 2. Press ENTER to select. The diagnosis menu will be displayed. (menu 9-39) SERVICE BARCO LOGO ADD INS PRESET INPUT BALANCE ADVANCED PROCESSING DIAGNOSIS FACTORY DEFAULTS MORE... - Page 117 9.15.3 Formatter How to select the overview? 1. Push the cursor key ↑ or ↓ to highlight Formatter. (menu 9-42) 2. Press ENTER to select. An overview of the working of the formatter will be displayed. (menu 9-43) DIAGNOSIS FORMATTER SMPS LPS1 LPS2...
-
Page 118: How To Return To The Factory Defaults
9.16 Factory defaults What is possible ? The projector will set all settings to the factory defaults which are by default stored in the projector. All custom settings will be deleted and the custom files will be removed. How to return to the factory defaults ? 1. -
Page 119: How Can A Function Key Be Programmed
10. PROGRAMMABLE FUNCTION KEYS 10.1 Function Keys What can be done with these keys? The five function keys on top of an adapted remote control can be programmed as short cut keys (quick access) to almost any adjustment menu. How can a function key be programmed? A function key can only be programmed when in the adjustment mode. - Page 120 10. Programmable Function Keys R5976563 BARCOR10 SLM 20/10/2004...
-
Page 121: Standard Source Set Up Files
11. STANDARD SOURCE SET UP FILES 11.1 Table overview Table overview The following standard source files are pre-programmed in the projector. Name Resolu- tion 1600_48V 1600x600i 1600_60V 1600x1200 1600_65V 1600x1200 1600_70V 1600x1200 8514_A 1024x384i 640x200 COMPUSC4 1024x480i 735x480 640x350 EWS_50... - Page 122 11. Standard Source set up Files Name Resolu- tion MAC_3 512x384 MAC_4 560_384 MAC_5 512x342 MAC_6 832x624 1024x768 MAC_7 MAC_LC 640x480 MAC_POR 640x870 MUSE 1172x518i VIDEO525 1302x239i VIDEO625 1024x278i PAM500 640x400 PAM800 1120x375i PC98_1 640x400 PC98_2 1120x375i PC98_3 1120x750 S1152_66 1152x900 S1152_76 1152x900...
- Page 123 Name Resolu- tion SVGA_72V 800x600 VGA_72V 640x480 VGA_GR 640x480 VGA_TXT 720x400 VGA75ISO 640x480 XGA_60 1024x768 XGA_70 1024x768 XGA_70V 1024x768 XGA_72 1024x768 XGA_75 1024x768 XGA75_GS 1024x768 Table 11-1 R5976563 BARCOR10 SLM 20/10/2004 Fvert FHor Fpix 72,084 48,080 50,003 72,800 37,856 31,496 59,941 31,469 25,175...
- Page 124 11. Standard Source set up Files R5976563 BARCOR10 SLM 20/10/2004...
-
Page 125: What Should Be Done
When should it be done? Depending on the environment, the dust filters should be cleaned at least when replacing the lamp. When the projector operates in dusty environment, clean the dust filters earlier than when replacing the lamp. A.1 Dust filter on the front side Necessary tools •... - Page 126 A. Cleaning the dust filters Image A-1 Removing stacking sockets Image A-2 Input box slide out R5976563 BARCOR10 SLM 20/10/2004...
-
Page 127: How To Clean
Image A-3 Front screw top cover removal Image A-4 Dust filter removal How to clean 1. Clean the dust filter with a dry cloth or blow out with compressed air. Reinsert the dust filters and put the cover back on its place by following the opposite procedure. Take care to click the lens light cover into its position. -
Page 128: Dust Filter On The Back Side
A. Cleaning the dust filters A.2 Dust filter on the back side Necessary tools • Flat screwdriver • Philips screwdriver What should be done To get access to the dust filters, the back cover must be removed. How to remove 1. -
Page 129: Dust Filter On The Bottom Side
Necessary tools No tools. How to remove 1. Pull on both lips of the dust filter on the front side of the projector until the filter is completely removed. (image A-9) R5976563 BARCOR10 SLM 20/10/2004 A. Cleaning the dust filters... - Page 130 A. Cleaning the dust filters Image A-9 Dust filter bottom side How to clean 1. Clean the dust filter with a dry cloth or blow out with compressed air. 2. Reinsert the dust filter. R5976563 BARCOR10 SLM 20/10/2004...
- Page 131 Common address Default address. Projector will always execute the command coming from a RCU programmed with that common address. Color transient improvement. To improve the transition from one color to another. DHCP Dynamic host configuration protocol PiP stands for "Picture in Picture"...
- Page 132 Glossary R5976563 BARCOR10 SLM 20/10/2004...
- Page 133 Aspect ratio Blanking Options Shift Side Keystone Size start up Getting Started 41–44, 46, 49 Controlling the projector Operating the projector Quick set up RCU & local keypad Switching on Temperature error DMD Terminology overview Using the RCU Input Balance...
-
Page 134: Table Of Contents
Size adjustment Vert. overlap zone ScenergiX Introduction SDI input service mode built-up Service Mode 97–99, 101–105, 108–114 Add-Ins Advanced Processing Minimum Delay BARCO Logo Change Password Common address Change Diagnosis 112–113 Formatter C Diagnoses Start up Dimming Factory defaults Identification... - Page 135 Temperature Ambient R5976563 BARCOR10 SLM 20/10/2004 Z-axis adjustment Index...
- Page 136 Index R5976563 BARCOR10 SLM 20/10/2004...
-
Page 137: Revision Sheet
Revision Sheet Barco nv Events/Documentation Noordlaan 5, B-8520 Kuurne Phone: +32 56.36.89.70, Fax: +32 56.36.88.24 E-mail: antoon.dejaegher@barco.com, Web: www.barco.com From: Date: Please correct the following points in this documentation (R5976563/03): page wrong R5976563 B R10 SLM 20/10/2004 ARCO correct...
Need help?
Do you have a question about the R9010010 and is the answer not in the manual?
Questions and answers