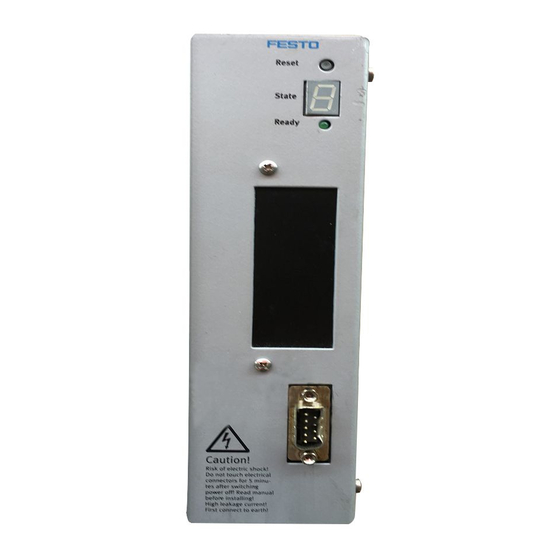
Festo SEC-AC-305 General Instructions Manual
Smart electromotor controller
Hide thumbs
Also See for SEC-AC-305:
- Description (87 pages) ,
- Fitting and installation instructions (90 pages)

Related Manuals for Festo SEC-AC-305


Summary of Contents for Festo SEC-AC-305
- Page 1 Smart Electromotor Controller Description Commissioning Type SEC−AC−305 Type SEC−AC−508 Description 192 347 en 0802c [715 641]...
- Page 3 ....... . . 192 347 © (Festo AG & Co KG., D 73726 Esslingen, Federal Republic of Germany 2008) Internet: http://www.festo.com...
- Page 4 Contents and general instructions Festo P.BE−SEC−AC−SW−EN en 0802c...
-
Page 5: Table Of Contents
........3−6 Solving problems with serial communication ......3−8 Festo P.BE−SEC−AC−SW−EN en 0802c... - Page 6 ..........6−6 Festo P.BE−SEC−AC−SW−EN en 0802c...
- Page 7 Timing the control signals for the positioning module ..8−36 8.6.5 Feedback messages from the servo controller ....8−40 Festo P.BE−SEC−AC−SW−EN en 0802c...
- Page 8 ......... . . 10−9 Festo P.BE−SEC−AC−SW−EN en 0802c...
- Page 9 ............A−1 Festo P.BE−SEC−AC−SW−EN en 0802c...
- Page 10 Contents and general instructions VIII Festo P.BE−SEC−AC−SW−EN en 0802c...
-
Page 11: Designated Use
If used in conjunction with additional commercially−available components, such as sensors and actuators, the specified maximum limits (temperatures, electrical datas, torques, etc.) must be observed. Please comply with national and local safety laws and regula tions. Festo P.BE−SEC−AC−SW−EN en 0802c... -
Page 12: Target Group
Instruction part: here you carry out the work step. In the left−hand margin you will find symbols which simplify the orientation in this manual for you during commissioning. Festo P.BE−SEC−AC−SW−EN en 0802c... -
Page 13: Trade Marks
All product names in this document may be registered trade marks. All trade marks in this document are only used for identifying the individual product. Service If you have any technical problems, please contact your local Festo Service. Festo P.BE−SEC−AC−SW−EN en 0802c... -
Page 14: Important User Instructions
This means that there is a danger of damage to property if these instructions are not observed. In addition, the following pictogram marks passages in the text which describe activities involving electrostatically sensi tive components: Electrostatically sensitive components: Incorrect handling may result in damage to the components. Festo P.BE−SEC−AC−SW−EN en 0802c... - Page 15 The following regulations apply but are not guaranteed to be complete: VDE 0100 Regulations for setting up high−voltage sys tems up to 1000 V VDE 0113 Electrical equipment in machines VDE 0160 Equipment in high−voltage systems with electronic operating methods XIII Festo P.BE−SEC−AC−SW−EN en 0802c...
- Page 16 Pictograms Information: recommendations, tips and references to other sources of information. Accessories: information on necessary or useful accessories for the Festo product. Environment: information on the environmentally−friendly use of Festo products. Text markings The bullet denotes activities which can be carried out in ·...
- Page 17 Requirements for observing the conditions of documenta SEC−AC UL when the product is operated in the USA tion UL and Canada. Software WMEMOC", Parametrizing program for the SEC−AC. type WMEMOC−3.3 Fig. 0/1: Manuals on the SEC−AC Festo P.BE−SEC−AC−SW−EN en 0802c...
- Page 18 Contents and general instructions Festo P.BE−SEC−AC−SW−EN en 0802c...
-
Page 19: Before Commissioning
Before commissioning Chapter 1 1−1 Festo P.BE−SEC−AC−SW−EN en 0802c... - Page 20 ........1−4 1−2 Festo P.BE−SEC−AC−SW−EN en 0802c...
-
Page 21: Installation And Fitting
· power electronics; that the actuators are disconnected for the first commis · sioning and that the motor is disconnected from the drive shaft. 1−3 Festo P.BE−SEC−AC−SW−EN en 0802c... -
Page 22: Check Readiness To Operate
1. Switch off the power supply. 2. Wait for five minutes to enable the intermediate circuit to discharge. 3. Check all connecting cables. 4. Check that the 24 V power supply functions correctly. 5. Switch on the power supply again. 1−4 Festo P.BE−SEC−AC−SW−EN en 0802c... - Page 23 If faults occur during commissioning, high acceleration forces may cause considerable damage. Commission the motor the first time, therefore, without a load connected, e.g. with free−running motor shaft, in order to keep the acceleration forces as low as possible. 1−5 Festo P.BE−SEC−AC−SW−EN en 0802c...
- Page 24 1. Before commissioning 1−6 Festo P.BE−SEC−AC−SW−EN en 0802c...
-
Page 25: The Parametrizing Program
The parametrizing program Chapter 2 2−1 Festo P.BE−SEC−AC−SW−EN en 0802c... - Page 26 ........2−7 2−2 Festo P.BE−SEC−AC−SW−EN en 0802c...
-
Page 27: Scope Of Delivery
Parameter sets are recorded on an external data storage device New firmware versions can be loaded Menus and helps in either German or English Online helps Oscilloscope function The use (download) of pre−optimized parameters for com plete Festo positioning axes. 2−3 Festo P.BE−SEC−AC−SW−EN en 0802c... -
Page 28: Hardware And Software Requirements
IBM−compatible PC−AT, as from 80486 processor with at least 16 MB main memory and at least 3 MB free hard disc memory Windows 95, 98, NT, 2000, XP CD ROM drive an unused serial interface 2−4 Festo P.BE−SEC−AC−SW−EN en 0802c... -
Page 29: Using The Parametrizing Program
You can actuate one of these buttons by clicking it with the left−hand mouse key. If the buttons differ in some menus from that described here, please refer to your manual or online help for more detailed information. 2−5 Festo P.BE−SEC−AC−SW−EN en 0802c... -
Page 30: Fields For Numerical Entries
The value changes in large steps (rough adjust ment). 4. Clicking the grey box and moving the mouse with the left− hand key pressed down. The value can easily be preset in the complete value range. 2−6 Festo P.BE−SEC−AC−SW−EN en 0802c... -
Page 31: Window Positions
(top right) are always open. You can reduce these windows to icons (these windows cannot be closed) and open or close others, as in WINDOWS (See figure in the chapter ’Setting communication’). 2−7 Festo P.BE−SEC−AC−SW−EN en 0802c... - Page 32 2. The parametrizing program 2−8 Festo P.BE−SEC−AC−SW−EN en 0802c...
-
Page 33: Installation, First Program Start And Communication
Installation, first program start and communication Chapter 3 3−1 Festo P.BE−SEC−AC−SW−EN en 0802c... - Page 34 ........3−6 Solving problems with serial communication ......3−8 3−2 Festo P.BE−SEC−AC−SW−EN en 0802c...
-
Page 35: Installation
The installation program now creates a new program group for you with the name "WMEMOC." It automatically copies all the necessary files onto your hard disc. If installation has been successful, this will be displayed in an appropriate win dow. 3−3 Festo P.BE−SEC−AC−SW−EN en 0802c... -
Page 36: Setting Communication
1. Connect the servo controller completely. 2. Connect an unused COM interface on the PC to the servo by means of a zero modem cable. 3. Switch on the servo controller. 4. Start the parametrizing program. 3−4 Festo P.BE−SEC−AC−SW−EN en 0802c... - Page 37 If, however, you find an error message, please read further in the chapters ’Setting the serial interface’ and/or ’Solving problems with serial communication’. Fig. 3/1: 3−5 Festo P.BE−SEC−AC−SW−EN en 0802c...
-
Page 38: Setting The Serial Interface
3. Installation, first program start and communication Setting the serial interface If the parametrizing program cannot open the serial interface, the following error window will be shown when the program starts: Fig. 3/2: 3−6 Festo P.BE−SEC−AC−SW−EN en 0802c... - Page 39 It serves simply as a preparation for desk work (see chapter ’Offline programming’). Ignore If you click Ignore", the program will become inactive and will not try to make contact with the servo or offline parame trizing. The fault will not be rectified. 3−7 Festo P.BE−SEC−AC−SW−EN en 0802c...
-
Page 40: Solving Problems With Serial Communication
3. Installation, first program start and communication Solving problems with serial communication If the parametrizing program cannot establish a connection with the servo controller, the following error window will be shown: Fig. 3/3: 3−8 Festo P.BE−SEC−AC−SW−EN en 0802c... - Page 41 Servo not switched on with old parameters. See man Connecting cable not plugged ual ’Installation and fitting’, e.g. RS232 cable" Connecting cable broken Incorrect connecting cable Fig. 3/4: Causes of faults and how to rectify them 3−9 Festo P.BE−SEC−AC−SW−EN en 0802c...
- Page 42 3. Installation, first program start and communication 3−10 Festo P.BE−SEC−AC−SW−EN en 0802c...
-
Page 43: Basic Settings
Basic settings Chapter 4 4−1 Festo P.BE−SEC−AC−SW−EN en 0802c... - Page 44 Configuring the actual value display ....... . 4−21 4−2 Festo P.BE−SEC−AC−SW−EN en 0802c...
-
Page 45: Setting The Mode Of The Parametrizing Program
All the parameters can be set, except positioning module, positioning and synchronizing (available via fast−access buttons) Advanced" All user−relevant parameters can be set Expert" Access to controller−internal parameters which cannot be modified by the user without knowledge of the device and its applications 4−3 Festo P.BE−SEC−AC−SW−EN en 0802c... - Page 46 Select the mode Expert for optimizing the sytem and for parametrizing the positioning module. Proceed as follows: 1. Select menu item [Options]/[User mode]. Fig. 4/1: 2. Click Beginner". 3. Click OK" to make the settings effective. 4−4 Festo P.BE−SEC−AC−SW−EN en 0802c...
-
Page 47: Loading Preset Parameter Sets
Loading preset parameter sets If you are using positioning axes and motors / drive packages (ATP) from Festo, you will find in this chapter the procedure for writing the tested parameter sets into the servo controller. If this is not the case, you can omit this chapter. - Page 48 You must carry out the following steps in order to transfer a parameter set to the SEC−AC: 1. Select menu item [File]/[Parameter set]/[Read from file and store into servo]. Fig. 4/2: 2. Select the desired parameter set. Parameter sets end with *.wpa. 4−6 Festo P.BE−SEC−AC−SW−EN en 0802c...
- Page 49 Fig. 4/3: The following window will be displayed if there is a fault in the data transmission: Fig. 4/4: In this case, faultless operation cannot be guaranteed. Re peat, therefore, data transmission of the parameter set. 4−7 Festo P.BE−SEC−AC−SW−EN en 0802c...
- Page 50 Save the parameter set in the menu [Parameters]/ [Save · parameters]. Reset the SEC−AC by pressing the RES button. · The complete parameter set is now in the controller which is now ready to operate. 4−8 Festo P.BE−SEC−AC−SW−EN en 0802c...
-
Page 51: Setting The Current Limit Values
Setting the current limit values The permitted current limit values for the motor must first be set. If Festo parameter sets are used, the values adapted to the drive package are already pre−set. 1. Select menu item [Parameters]/[Motor data]. The menu shown below will be displayed. - Page 52 6. In order to exit the window, click the OK" button. 7. Save the set values with [Parameters]/[ Save Parameters]. The current limit values of the motor used are now made known to the SEC−AC. 4−10 Festo P.BE−SEC−AC−SW−EN en 0802c...
-
Page 53: Setting The Regulator Enable Logic
With possibility no. 2, the and must be interpreted as logi cal and, i.e. the command over the serial interface is only effective when Dln 5 is active. 2. For thefirst commissioning select Only through digital input DIn5). 3. Click OK" . 4−11 Festo P.BE−SEC−AC−SW−EN en 0802c... -
Page 54: Setting The Offset Angle, Phase Sequence And Number Of Pole Pairs
It is therefore essential that the motor is operated in idling mode; no load may be coupled to the drive shaft. In the case of Festo parameter sets, the values adapted to the drive package have already been set. Caution Before starting the motor identification, you must set ·... - Page 55 The motor shaft begins to turn; the complete procedure takes approximately 30 seconds. Fig. 4/7: 4. If identification is successful, the following window will be displayed: Fig. 4/8: 5. Setting is then concluded. Save the settings with ]Para meters]/[Save Parameters]. 4−13 Festo P.BE−SEC−AC−SW−EN en 0802c...
-
Page 56: Setting The Current Controller
It is therefore essential that the motor is operated in idling mode; no load may be coupled to the drive shaft. In the case of Festo parameter sets, the values adapted to the drive package have already been set. 4−14... - Page 57 2. Click Auto detect". 3. After carrying out automatic determination, click OK". 4. Save the settings with [Parameters]/[Save parameters]. If the automatic parameter determination is carried out again, the current regulator can and may deliver slightly different values. 4−15 Festo P.BE−SEC−AC−SW−EN en 0802c...
-
Page 58: Pre−Setting The Speed Controller
The actual optimization takes place later in the further course of first commissioning (see chapter ’Optimizing the speed regulator’). In the case of Festo parameter sets, the values adapted to the drive package have already been set. 1. Select menu item [Parameters]/[Device para meters]/[Speed controller]. -
Page 59: Determining The Limit Switch Logic
2. Select the logic. Fig. 4/11: 3. Click OK" . 4. If the limit switch logic is set correctly, the limit switch LEDs in the status window will light up, but only when the limit switches are actuated. 4−17 Festo P.BE−SEC−AC−SW−EN en 0802c... -
Page 60: Selecting The Operating Mode
You can switch from one operating mode to the other with the mouse. Positioning and synchronization are alternative ’position−con trol modes’. Position control" and Motor speed control" must always be activated here. Only Torque control" is acti vated selectively. 4−18 Festo P.BE−SEC−AC−SW−EN en 0802c... -
Page 61: Torque Control/Speed Control
Motor speed control". 4.8.3 Additional options The additional options Setpoint ramp" to Synchronization" should not be active for the first commissioning (option not marked with a cross). By clicking the box, you can delete any crosses entered. 4−19 Festo P.BE−SEC−AC−SW−EN en 0802c... -
Page 62: Setpoint−Selectors
1. Select the menu [Setpoints]. 2. Select the menu [Setpoint−selectors]. Fig. 4/13: 3. Set Selector A" to RS232" (=serial interface). 4. Set Selector B" to Setpoint = 0". 5. Click OK". 4−20 Festo P.BE−SEC−AC−SW−EN en 0802c... -
Page 63: Configuring The Actual Value Display
(the tick will be deleted). 1. Click the menu [Actual values] in the upper menu bar. 2. Mark the entries Motorspeed" and Motor current" with a tick. The actual value display now appears as follows: Fig. 4/14: 4−21 Festo P.BE−SEC−AC−SW−EN en 0802c... - Page 64 4. Basic settings 4−22 Festo P.BE−SEC−AC−SW−EN en 0802c...
-
Page 65: First Start And Optimizing The Motor
First start and optimizing the motor Chapter 5 5−1 Festo P.BE−SEC−AC−SW−EN en 0802c... - Page 66 Carrying out optimization ....... . . 5−18 5−2 Festo P.BE−SEC−AC−SW−EN en 0802c...
-
Page 67: Testing The Controller Enable
RES button. Parameter/ Before testing the controller enable, you must save the Save parameterst parameters and reset the controller. You can do this with the menu command [Parameters]/[Save parameters]. 5−3 Festo P.BE−SEC−AC−SW−EN en 0802c... - Page 68 When the controller is enabled, the motor must begin to turn. If this is not the case, there is either a fault or the controller has been parametrized incorrectly. In the table below, you will find typical faults and how to remedy them. Fig. 5/1: 5−4 Festo P.BE−SEC−AC−SW−EN en 0802c...
- Page 69 ’Setting the offset angle and the number of pole pairs’. Please note When connecting the motor phases, note that different manufacturers of servo motors specify different phase sequences. If necessary, you must swap the phases U and W. 5−5 Festo P.BE−SEC−AC−SW−EN en 0802c...
-
Page 70: Setting The Actual Speed Value Filter
The effetive filter time constant can then be parametrized. In the case of Festo parameter sets, the values adapted to the drive package have already been pre−set. 1. Select menu item [Parameters]/[Device para meters]/[Motor speed actual value filter]. -
Page 71: Optimizing The Speed Controller
If you parametrize the speed controller when the motor shaft is in idling mode, you only have to adapt the control ampli fication, usually by increasing it, when the drive has been fitted. 5−7 Festo P.BE−SEC−AC−SW−EN en 0802c... -
Page 72: Carrying Out The Optimization
Therefore, disconnect the motor. 1. Start the oscilloscope by activating the menu item [Op tions]/[Oscilloscope]. 2. Select the register card Channels and set the configur ation as shown in the figure below. 5−8 Festo P.BE−SEC−AC−SW−EN en 0802c... - Page 73 4. Select the register card Generator and set the configur ation as shown in the diagram below. Select a low revers ing speed (less than 100 rpm). 5. Select the register card Controller and set the speed controller as shown in the diagram below. 5−9 Festo P.BE−SEC−AC−SW−EN en 0802c...
- Page 74 5. First start and optimizing the motor Fig. 5/4: Fig. 5/5: 5−10 Festo P.BE−SEC−AC−SW−EN en 0802c...
- Page 75 An addititonal criterion is the actual current value which can set itself without a limit and without os cillation. You can access the parameters of the speed controller by clicking the register card Controller". 5−11 Festo P.BE−SEC−AC−SW−EN en 0802c...
-
Page 76: Strategies For Optimizing
You must then find a compromise be tween stiffness of the drive, stability and the production of noise. 5−12 Festo P.BE−SEC−AC−SW−EN en 0802c... - Page 77 5. First start and optimizing the motor Case 1: Speed controller set too ’soft’ Wirkstrom−Istwert 0,5 A/div Fig. 5/7: Remedy Increase the amplification factor by 2 to 3 tenths of a point / reduce the time constant by 2 to 3ms. 5−13 Festo P.BE−SEC−AC−SW−EN en 0802c...
- Page 78 5. First start and optimizing the motor Case 2: Speed controller set too ’hard’ Fig. 5/8: Remedy Reduce the amplification factor by 2 to 3 tenths of a point / increase the time constant by 2 to 3ms. 5−14 Festo P.BE−SEC−AC−SW−EN en 0802c...
-
Page 79: Further Optimizations
Characteristic va lues for a positioning movement are positioning times, posi tioning accuracy and position overswing at the destination. 5−15 Festo P.BE−SEC−AC−SW−EN en 0802c... -
Page 80: Optimizing The Positioning Module
The positioning module can be parametrized in one of two methods: via the menu item [Parameters]/[Positioning control] via the menu item [Options]/[Oscilloscope], Register card Controller." Please note Do not open both menus at the same time, otherwise para metrization will be inconsistent. 5−16 Festo P.BE−SEC−AC−SW−EN en 0802c... - Page 81 Select here the operating mode P−controller". Amplification In the field Gain", you can specify the amplification factor of the controller. Time constant In the field Time constant", you can specify the time con stant (only with the PI−controller). 5−17 Festo P.BE−SEC−AC−SW−EN en 0802c...
-
Page 82: Carrying Out Optimization
The drag fault must disappear as soon as possible during the initial response, but must not tend to oscillate (see also the diagrams below). Overswing of the rotor position can be further minimized in later operation by smooth acceleration. 5−18 Festo P.BE−SEC−AC−SW−EN en 0802c... - Page 83 ON". The motor should now operate in reverse. 8. In order to optimize, evaluate the speed and the rotor position during the stop process. If the initial speed ad justment takes too long, the amplification must be in creased. 5−19 Festo P.BE−SEC−AC−SW−EN en 0802c...
- Page 84 See also the diagrams below. Case 1: Drag fault is reduced too slowly → Increase amplification of positioning module Fig. 5/11: Lower (smaller) curve: actual speed value Upper (pointed) curve: trailing error 5−20 Festo P.BE−SEC−AC−SW−EN en 0802c...
- Page 85 5. First start and optimizing the motor Case 2: Tendency of drag fault and nominal speed to oscillate → Reduce amplification of positioning module Fig. 5/12: 5−21 Festo P.BE−SEC−AC−SW−EN en 0802c...
- Page 86 5. First start and optimizing the motor Case 3: Positioning module set correctly Fig. 5/13: 5−22 Festo P.BE−SEC−AC−SW−EN en 0802c...
-
Page 87: Working With Parameter Blocks
Working with parameter blocks Chapter 6 6−1 Festo P.BE−SEC−AC−SW−EN en 0802c... - Page 88 ..........6−6 6−2 Festo P.BE−SEC−AC−SW−EN en 0802c...
-
Page 89: General Information
Read out / Mod WMEMOC/PC Load standard WPA−file Parameter window parameter set Save parameter Reset parameter serielle communication Read file and Servo controller store in servo Default− Read from servo EEPROM Parameter− and store in file Fig. 6/1: 6−3 Festo P.BE−SEC−AC−SW−EN en 0802c... - Page 90 You can activate the standard parameter set by entering the command DSP in the transfer window of the parametrizing program (see the chapter ’Functions of the parametrizing program’, section ’File/Transfer window’). The parameter set will then be copied into the EEPROM and the RAM. 6−4 Festo P.BE−SEC−AC−SW−EN en 0802c...
-
Page 91: Loading And Saving Parameter Sets
Description". We urgently recommend you to do this, in order to avoid later confusion of parameter sets. A sensible name should also be chosen for the parameter set. WPA files can be sent per diskette,CD, E−mail. 6−5 Festo P.BE−SEC−AC−SW−EN en 0802c... -
Page 92: Offline Parametrizing
(see previous chapter). Read out / Mod WMEMOC/PC Parameter WPA−file Load standard window parameter set Save parameter Reset parameter Servoregler Default− EEPROM Parameter− Fig. 6/2: Prinziple of Offline−Parametrizing 6−6 Festo P.BE−SEC−AC−SW−EN en 0802c... - Page 93 File/Parameter set the menu [File]/[Parameter set] has other submenus: [Open file] [Save file] [Save file as...] When you exit the program, you will be asked if you wish to save the parameter file just opened. 6−7 Festo P.BE−SEC−AC−SW−EN en 0802c...
- Page 94 Whether the offline or online parametrizing is active at the moment can be seen in the icon bar underneath the menu bar. Online parametrizing active Offline parametrizing active The mode currently active is shown in green. 6−8 Festo P.BE−SEC−AC−SW−EN en 0802c...
-
Page 95: Informations On The Automatic Identification
Informations on the automatic identification Chapter 7 7−1 Festo P.BE−SEC−AC−SW−EN en 0802c... - Page 96 Information on the current controller ....... 7−5 7−2 Festo P.BE−SEC−AC−SW−EN en 0802c...
-
Page 97: Information On The Offset Angle, Phase Sequence And Number Of Pole Pairs
In this case, the motor will not run smoothly. It will lock in certain positions and develop a strong holding torque. 7−3 Festo P.BE−SEC−AC−SW−EN en 0802c... -
Page 98: Automatic Identification
In order to determine the motor parameters, the motor must carry out a few test movements. It is therefore necessary for the motor to be operated in idling mode. No load may be coupled to the shaft. 7−4 Festo P.BE−SEC−AC−SW−EN en 0802c... -
Page 99: Information On The Current Controller
Current controller which are set too ’soft’ lead to the dy namics of the motor not being used. The Festo SEC−AC controller ascertains the optimum current control parameters automatically. 7−5 Festo P.BE−SEC−AC−SW−EN en 0802c... - Page 100 If a current controller is set too ’hard’, this can cause con siderable overswing of the motor current in excess of the setpoint. There is then a danger of the motor being dam aged as the permanent magnets in the motor will be de magnetized. 7−6 Festo P.BE−SEC−AC−SW−EN en 0802c...
-
Page 101: Standard Applications And Settings Of The Parametrizing Program
Standard applications and settings of the parame trizing program Chapter 8 8−1 Festo P.BE−SEC−AC−SW−EN en 0802c... - Page 102 ..8−36 8.6.5 Feedback messages from the servo controller ....8−40 8−2 Festo P.BE−SEC−AC−SW−EN en 0802c...
-
Page 103: Layout Of The Controller
PI controller. In Fig. 8/3, the id−controller is not shown for reasons of clarity. The speed controller and the positioning module have also been designed as PI con troller and can be switched on/off individually. 8−3 Festo P.BE−SEC−AC−SW−EN en 0802c... -
Page 104: Torque−Control Mode
*) If the setpoint ramp is actuated, setpoint jumps will be converted into ramp functions. For parametrizing these ramps, please refer to the chapter ’Extended functions of the parametrizing program’, section ’Parameters/ Device parameters/SWI ramp’. 8−4 Festo P.BE−SEC−AC−SW−EN en 0802c... - Page 105 The rated torque must be divided here by the rated current. Please note A torque constant of 0 Nm/A" is not permitted, if [Torques in Nm] is activated. 8−5 Festo P.BE−SEC−AC−SW−EN en 0802c...
-
Page 106: Speed−Control Mode
The adjusting variable from the speed controller is passed on to the current controller. The diagram below shows this process in simplified form. Speed controller Current controller i_nom Setpoint – – Motor i_act n_act int. Sensor [X2] Fig. 8/3: 8−6 Festo P.BE−SEC−AC−SW−EN en 0802c... - Page 107 When a specified speed is reached, it is possible to set a digi tal output which sends a reply message to a higher−order controller or which triggers other actions. See also the chapter ’Extended functions of the parametrizing program’, section ’Parameters/Device parameters/Speed signal’. 8−7 Festo P.BE−SEC−AC−SW−EN en 0802c...
-
Page 108: Positioning
In order to set the positioning mode, you must configure the command window as follows: Command window Torque control Speed control Setpoint ramp No significance Positioning module Position control Synchronization Please note The setpoint ramp is not active in the positioning mode. 8−8 Festo P.BE−SEC−AC−SW−EN en 0802c... -
Page 109: Reference Travel
This position is called the reference position an must newly der ermined each time the controller is switched on . This takes place in the so−called ’reference travel’. 8−9 Festo P.BE−SEC−AC−SW−EN en 0802c... - Page 110 During reference travel, the motor turns until the limit switch signal is activated. A maximum search path can be specified. If the limit signal is not recognized within this search path, the servo controller will send an error message. 8−10 Festo P.BE−SEC−AC−SW−EN en 0802c...
- Page 111 As in method 1, it will then move to the refer ence position via the offset specified in the field Start Posi tion",Position". The figure below explains the course of ref erence travel using the example of a linear axis. 8−11 Festo P.BE−SEC−AC−SW−EN en 0802c...
- Page 112 Limit switch responds Reference position Method 1 Move back with v_crawl Reference position Method 2 Limit switch inactive Move to position with v_move Zero pulse of puls generator Movement with v_search to limit switch Fig. 8/6: 8−12 Festo P.BE−SEC−AC−SW−EN en 0802c...
- Page 113 In this way, reference travel is not necessary after controller block and new enable. You can use the GO!" button to trigger reference travel. 8−13 Festo P.BE−SEC−AC−SW−EN en 0802c...
-
Page 114: Setting Positions
Destination, Position In the field Destination","Position you can specify the des tination position. The destination position will be interpreted differently, depending on whether absolute or relative posi tioning has been selected. (See field Positioning run") 8−14 Festo P.BE−SEC−AC−SW−EN en 0802c... - Page 115 If the times in the field Smoothing" are set to 0", this will result in linear ramps, otherwise movement will be a parabola−shaped speed function. If the setting Total time equals Smoothing", the result will be a sinus−shaped accel eration curve. 8−15 Festo P.BE−SEC−AC−SW−EN en 0802c...
- Page 116 Please note A rebound switch at the digital starting input can lead to problems, if Wait for the end or Interrupt positioning are permitted during relative positioning. The drive may move a little too far. 8−16 Festo P.BE−SEC−AC−SW−EN en 0802c...
- Page 117 the source and the destination positions. Moving to positions The following possibilies exist for moving to positions: via digital inputs with the RS232 command (serial interface) via the field bus (optional) 8−17 Festo P.BE−SEC−AC−SW−EN en 0802c...
- Page 118 A rising edge at digital input DIN8 causes the destination to be accepted and starts the positioning movement. Controllers in the SEC−AC family have 4 digital inputs (DIN0...DIN3) for selecting the destination. SEC−AC controller family DIN3 DIN2 DIN1 DIN0 Destination 8−18 Festo P.BE−SEC−AC−SW−EN en 0802c...
- Page 119 To do this, activate the menu item [Parameters]/[Position ing]/[Goto destinations]. The following window will then appear: Fig. 8/9: You can move to the relevant destination by clicking the ap propriate button. 8−19 Festo P.BE−SEC−AC−SW−EN en 0802c...
-
Page 120: Setting Digital Outputs
You can do this in menu item [Parameters]/ [Positioning]/[Messages]. The following window will appear: Fig. 8/10: Here you can set the tolerance window for the Xactual = Xdestination message. 8−20 Festo P.BE−SEC−AC−SW−EN en 0802c... -
Page 121: Master−Slave Operation
(speed control, positioning), while the slave operates in the synchronized mode. The following operating modes are possible with this con figuration: Speed−synchronous positioning Position−synchronous movement Electronic gears Special applications, e.g. flying saw" (after consultation). 8−21 Festo P.BE−SEC−AC−SW−EN en 0802c... -
Page 122: Speed−Synchronous Positioning
Speed controller n_nom i_nom – – Motor i_act n_act int. sensor [X2] ext. sensor [X10] Fig. 8/12: As can be seen in the drawing, the speed specified by the master can contain a proportionality factor. 8−22 Festo P.BE−SEC−AC−SW−EN en 0802c... - Page 123 8. Standard applications and settings of the parametrizing program Slave settings with speed−synchronous positioning 1. Settings in the command window Fig. 8/13: In most cases the setpoint ramp is switched off in this operating mode. 2. Settings of the Setpoint−selection Fig. 8/14: 8−23 Festo P.BE−SEC−AC−SW−EN en 0802c...
- Page 124 A" or Selector B" must be set to Sync input". 3. Settings of the synchronization switches Parameters/ The synchronizing menu must be configured correctly. It can Synchronization be accessed with [Parameters]/[Synchronization]. The fol lowing window will then appear: Fig. 8/15: 8−24 Festo P.BE−SEC−AC−SW−EN en 0802c...
- Page 125 Fig. 8/17: Dividend (Z2) and Divisor (N2) With the f2 button, you can enter the proportionality factor for the speed specification (see also the control circuit dia gram). The proportionality factor must be specified with counter and denominator. 8−25 Festo P.BE−SEC−AC−SW−EN en 0802c...
- Page 126 8. Standard applications and settings of the parametrizing program The externally supplied speed can also be filtered. You can set the external speed filter by clicking the button shown below. 8−26 Festo P.BE−SEC−AC−SW−EN en 0802c...
-
Page 127: Position−Synchronous Movement
(positioner) would operate very slowly, due to its very high time constant. As can be seen in the drawing, the position and speed speci fied by the master can contain a proportionality factor. 8−27 Festo P.BE−SEC−AC−SW−EN en 0802c... - Page 128 Slave settings for position−synchronous movement 1. Settings in the command window Fig. 8/19: 2. Settings of the Setpoint−selection Fig. 8/20: Setpoint/ In the menu [Setpoint]/[Setpoint−selection] either Selector Setpoint−selection A" or Selector B" must be set to Sync input". 8−28 Festo P.BE−SEC−AC−SW−EN en 0802c...
- Page 129 8. Standard applications and settings of the parametrizing program 3. Setting of the synchronization switches Parameters/ The synchronizing menu must be configured correctly. It can Synchronizing be accessed with [Parameters]/[Synchronizing]. The follow ing window will then appear: Fig. 8/21: 8−29 Festo P.BE−SEC−AC−SW−EN en 0802c...
- Page 130 Fig. 8/23: Dividend (Z2) and Divisor (N2) With the f2 button, you can enter the proportionality factor for the position specification (see also the control circuit dia gram). The proportionality factor must be specified with counter and denominator. 8−30 Festo P.BE−SEC−AC−SW−EN en 0802c...
- Page 131 8. Standard applications and settings of the parametrizing program The externally fed speed can also be filtered. You can set the external speed filter by clicking the button shown below. Further application possibilities (e.g. combination of position ing and synchronizing) on request. 8−31 Festo P.BE−SEC−AC−SW−EN en 0802c...
-
Page 132: Timing The Digital Signals
Input for final stage enable Din5 ENA_CL Input for controller enable Din6 − Din7 END−0 − END−1 Limit switch Din8 START Start positioning in positio ning mode Din9 SAMPLE Input for additional refe rence switch Fig. 8/24: 8−32 Festo P.BE−SEC−AC−SW−EN en 0802c... -
Page 133: Timing The Final Stage Enable And Controller Enable
Maximum braking delay: a (parametrizing is made via the CAN object 6510" Subindex 15"). 8−33 Festo P.BE−SEC−AC−SW−EN en 0802c... - Page 134 8. Standard applications and settings of the parametrizing program ENA−PWR ENA−Cl Fig. 8/26: Timing the final stage and controller enable: After ENA−PWR at high, a rising edge is required At ENA−CL 8−34 Festo P.BE−SEC−AC−SW−EN en 0802c...
-
Page 135: Timing The Limit Switches
This means that the axis is brought to nominal speed value 0" at maximum acceleration. Parameter Delay time Unit Description Typical Delay after actuation of limit switch Stop Delay after limit switch enable Stop ENA−PWR ENA−Cl Fig. 8/27: Timing the limit switches 8−35 Festo P.BE−SEC−AC−SW−EN en 0802c... -
Page 136: Timing The Control Signals For The Positioning Module
8.6.4 Timing the control signals for the positioning module You can carry out positioning by creating a bit combination with Din0−Din3" and then enabling the positioning with Din8" (START). The positioning controller has three modes for transferring the position Data record. 8−36 Festo P.BE−SEC−AC−SW−EN en 0802c... - Page 137 New start after positioning completed Positioning control is parametrized to "IGNORE START COMMAND" ENA−PWR ENA−Cl Fig. 8/28: Positioning by position selection and starting new positioning when previous positioning is completed: The new position cannot be preloaded by Start 8−37 Festo P.BE−SEC−AC−SW−EN en 0802c...
- Page 138 Positioning control is parametrized to "WAIT FOR END" ENA−PWR ENA−Cl Fig. 8/29: Positioning by position selection and starting new positioning if previous posi tioning is not completed. The new position can be loaded with Start. 8−38 Festo P.BE−SEC−AC−SW−EN en 0802c...
- Page 139 Delay of start after Din0−Din3 ready Create new position after start low Duration of the start signal *) Positioning control is parametrized to "INTERRUPT THIS" Fig. 8/30: Positioning by position selection and starting new positioning by interrupting current positioning. 8−39 Festo P.BE−SEC−AC−SW−EN en 0802c...
-
Page 140: Feedback Messages From The Servo Controller
Xactual=Xdestination" is configured via the tolerance window ([Parameters]/[Positioning]/[Messages]). This signal comes when the position lies within the tolerance window. It can also trigger when a load moves the motor shaft out of its position. 8−40 Festo P.BE−SEC−AC−SW−EN en 0802c... - Page 141 Unit Description Typical Delay after start high Minimum impulse duration Delay after positioning ready With a very small tolerance window or large load disturbances Fig. 8/31: Fig. 11/19 Ready messages Xnominal=Xdestination" and Xactual=Xdestination" after positioning. 8−41 Festo P.BE−SEC−AC−SW−EN en 0802c...
- Page 142 Rest time" comes when the positioning profile of the positioning controller still requires the time entered in the rest time. This signal can also be used for further switch ing the positioning data records. 8−42 Festo P.BE−SEC−AC−SW−EN en 0802c...
- Page 143 The calculations refer to the setpoints from the positioning controller, not to the actual values measured. If the measurements cannot follow the positioning profiles specified by the positioning controller, deviations may occur. Rest path Rest time Fig. 8/32: Rest path and rest time messages during positioning. 8−43 Festo P.BE−SEC−AC−SW−EN en 0802c...
- Page 144 8. Standard applications and settings of the parametrizing program 8−44 Festo P.BE−SEC−AC−SW−EN en 0802c...
-
Page 145: Extended Functions Of The Parametrizing Program
Extended functions of the parametrizing program Chapter 9 9−1 Festo P.BE−SEC−AC−SW−EN en 0802c... - Page 146 ........9−32 9−2 Festo P.BE−SEC−AC−SW−EN en 0802c...
-
Page 147: File/Transfer Window
Transfer" window if you no longer require it. The Transfer" window serves for commands which are of no interest for normal operation. Furthermore, memory locations can be read and written. This, too, is only necessary in special cases. 9−3 Festo P.BE−SEC−AC−SW−EN en 0802c... -
Page 148: File/Installation Device Files
9. Extended functions of the parametrizing program File/Installation device files Festo has the possibility of sending additional information by diskette or E−mail. This information can be: motor selection list (not yet implemented) special parametrizings if necessary, special firmware (notyet implemented) -
Page 149: Setpoints/Setpoint Specification
(in speed−control mode) or torques (in torque− control mode). Setpoints/Setpoint specifi In order to specify the setpoint via the parametrizing pro cation gram, activate menu item [Setpoints]/[Setpoint specifica tion]. The following window will appear: Fig. 9/1: 9−5 Festo P.BE−SEC−AC−SW−EN en 0802c... - Page 150 STOP" icon. Transfer In order to implement setpoint jumps, you must delete the tick in the checkbox Transfer immediately" by clicking it. The new setpoint will not be transferred until you click the Transfer" button. 9−6 Festo P.BE−SEC−AC−SW−EN en 0802c...
-
Page 151: Analogue Monitor
[Analogue monitor], and the appropriate chan nel as sub−menu. Fig. 9/2: Select the appropriate variable which is to be output by the analogue monitor. Freely set address The option Freely adjustable address" is reserved for special applications. 9−7 Festo P.BE−SEC−AC−SW−EN en 0802c... -
Page 152: Parameters/Device Parameters/Setpoint Scaling
The following window will ap Setpoint scaling pear: Fig. 9/3: The ’conversion factor’ between the input voltage and the setpoint is specified with the upper value. The lower value is the zero point reference of the setpoint. 9−8 Festo P.BE−SEC−AC−SW−EN en 0802c... -
Page 153: Parameters/Device Parameters/Setpoint Integrator Ramp
The ramp function is available when the box Setpoint ramp in the command" window is marked with a tick. Parameters/Device para The menu itself can be activated with [Parameters]/[Device meters/SPI−ramp parameters]/[SPI−ramp]. The following window will then ap (Setpoint integrator) pear: 9−9 Festo P.BE−SEC−AC−SW−EN en 0802c... - Page 154 The ramps can be set separately for clockwise and anti−clock wise running, also for rising and falling speeds/torques. If the ramp times are almost the same, the entry procedure can be shortened if the checkboxes (t1=t3; t2=t4; t1=t2=t3=t4) are used. 9−10 Festo P.BE−SEC−AC−SW−EN en 0802c...
- Page 155 In practice, a time value is used corresponding to a deceleration of 10 m/s (Menu [Parameters]/[Setpoint scaling]). Please note The times set do not become effective until there is a new controller enable. 9−11 Festo P.BE−SEC−AC−SW−EN en 0802c...
-
Page 156: Parameters/Device Parameters/Speed Message
If the hysteresis is too small, it will cause a wobbling output signal. The status of the bit for the speed message can be shown on a digital output, if this is configured accordingly. See also the following chapter. 9−12 Festo P.BE−SEC−AC−SW−EN en 0802c... -
Page 157: Parameters/Device Parameters/Digital Outputs
All status messages which can be shown on the digital out puts can be set in the appropriate menu of the parametrizing program. With the settings On (output is high) and Off (output is low)" you can assign a certain value to the output. 9−13 Festo P.BE−SEC−AC−SW−EN en 0802c... -
Page 158: Parameters/Device Parameters/Intermediate Circuit Voltage
The flag, which is set in the controller, can be read by vari meters/Digital outputs ous status interrogations, e.g. a digital output can be parametrized so that it displays the event Undervoltage in the intermediate circuit". (See also the section ’Parameters/ Device parameters/Digital outputs’). 9−14 Festo P.BE−SEC−AC−SW−EN en 0802c... -
Page 159: Parameters/Device Parameters/Automatic Brake
The brake is always switched as soon as the controller enable is switched on. The servo controller also has an automatic brake, for which various times can be parame trized. These times are only effective when the automatic brake mode is activated. 9−15 Festo P.BE−SEC−AC−SW−EN en 0802c... - Page 160 This delay time is provided to enable you to switch off the final stage in the case of axes under load, if positioning does not take place for long periods. 9−16 Festo P.BE−SEC−AC−SW−EN en 0802c...
-
Page 161: Error Window
As soon as a fault occurs, two changes take place in the user interface of the parametrizing program: 1. The error window becomes larger and is shown full−size. 2. The fault is shown in red in the lower bar. Fig. 9/10: Error messages 9−17 Festo P.BE−SEC−AC−SW−EN en 0802c... - Page 162 Abort You can minimize the window by clicking the Cancel" button. Any error messages which still exist will remain in the error window of the status bar. The Cancel" button does not rectify the fault. 9−18 Festo P.BE−SEC−AC−SW−EN en 0802c...
-
Page 163: Options/German − English
The language of the parametrizing program can be set with a click on the menu item [Options]/[Deutsch] or [Options]/[Eng lish]. 9.14 Options/User mode The setting of the user mode is described in the chapter ’Basic settings’, section ’Setting the mode of the parametriz ing program’. 9−19 Festo P.BE−SEC−AC−SW−EN en 0802c... -
Page 164: Options/Window For Rs232 Transmission
When this menu item is accessed, a window is generated in which communication via the serial interface can be ob served. This window serves mainly for debugging purposes and is not of interest for the normal user". Fig. 9/11: 9−20 Festo P.BE−SEC−AC−SW−EN en 0802c... -
Page 165: Options/Torque In Nm
The oscilloscope can be activated with menu item [Options]/[Oscilloscope]. After an initialization phase, the following window will be shown: Fig. 9/12: 9−21 Festo P.BE−SEC−AC−SW−EN en 0802c... -
Page 166: Register Card Channel Representation
A click on the box resets the offset to 0". Clear You can delete the representation of the two curves by click ing the Clear" button. 9−22 Festo P.BE−SEC−AC−SW−EN en 0802c... -
Page 167: Register Card Trigger
Delay". A delay value of 0" indicates that the trigger event is re corded at the left−hand edge of the oscilloscope screen. A negative delay value shifts the trigger event to the right. 9−23 Festo P.BE−SEC−AC−SW−EN en 0802c... - Page 168 You can specify the moment of triggering. See the table below. Rising edge Falling edge Digital trigger: event occurs Digital trigger: event disappears Analogue trigger: threshold is Analogue trigger: threshold not exceeded reached Fig. 9/14: 9−24 Festo P.BE−SEC−AC−SW−EN en 0802c...
- Page 169 The status is then switched inactive. Please note The trigger mode and the oscilloscope are only active when the checkbox Run in the box Mode is marked with a cross. 9−25 Festo P.BE−SEC−AC−SW−EN en 0802c...
-
Page 170: Register Card Generator
The reversing generator is handled with low priority in the firmware. This can lead to delays in operation. Fig. 9/15: The reversing mode can be switched on and off. Caution Before exiting the reversing mode, you must switch it off. 9−26 Festo P.BE−SEC−AC−SW−EN en 0802c... -
Page 171: Register Card Controller
The button Restore will only be visible if you have modified the controller settings. Notes on setting the speed controller can be found in the chapter ’First start and optimizing the motor’, section ’Opti mizing the speed controller’. 9−27 Festo P.BE−SEC−AC−SW−EN en 0802c... -
Page 172: Lower Status Bar
Oscilloscope is activated and waits for the trigger trigger event. The trigger event is not found. Triggered Trigger event is found; recording begins. Reading Read data are transferred to the parametrizing pro gram by the servo controller. Recording is ready. Fig. 9/16: 9−28 Festo P.BE−SEC−AC−SW−EN en 0802c... - Page 173 To do this, you must press down the left−hand mouse key and mark the field in the oscilloscope window which is to be enlarged. You can return to the original size by clicking the oscilloscope window with the right−hand mouse key. 9−29 Festo P.BE−SEC−AC−SW−EN en 0802c...
-
Page 174: Help/Using Help
9. Extended functions of the parametrizing program 9.18 Help/Using help Under the menu item [Help]/[Help for help] you will find a general Windows help. 9.19 Help/Themes See the chapter Online helps". 9−30 Festo P.BE−SEC−AC−SW−EN en 0802c... -
Page 175: Helps/Information
(if available) firmware: version and specifications for angle sensors copyright note. 9−31 Festo P.BE−SEC−AC−SW−EN en 0802c... -
Page 176: Fast Access Via The Icon Bar
Some of the functions of the parametrizing program can be accessed directly in the icon bar underneath the menu bar: Symbols Function Set German Set English Search for communication Online parametrizing Offline parametrizing Oscilloscope Motor data menu Current controller Speed controller Reference travel 9−32 Festo P.BE−SEC−AC−SW−EN en 0802c... - Page 177 9. Extended functions of the parametrizing program Symbols Function Set positions Move to positions Fig. 9/18: 9−33 Festo P.BE−SEC−AC−SW−EN en 0802c...
- Page 178 9. Extended functions of the parametrizing program 9−34 Festo P.BE−SEC−AC−SW−EN en 0802c...
-
Page 179: Diagnosis And Error Treatment
Diagnosis and error treatment Chapter 10 10−1 Festo P.BE−SEC−AC−SW−EN en 0802c... - Page 180 ......... . . 10−9 10−2 Festo P.BE−SEC−AC−SW−EN en 0802c...
-
Page 181: Status Display
In addition to hardware faults, the servo controller can also recognize faults in the control circuit. This includes, e.g. faults in communication or in the positioning procedure. 10−3 Festo P.BE−SEC−AC−SW−EN en 0802c... -
Page 182: Outputting Faults
If a PC with a parametrizing program is connected, the fault together with its error number will be shown in the error window and in the status bar. See also the chapter ’Extended functions of the parametrizing program’, sec tion Error window". 10−4 Festo P.BE−SEC−AC−SW−EN en 0802c... -
Page 183: Error List
Overtemperature of Check the fitting dimensions of the SEC−AC: · power output stage If necessary use a fan Failure in the electronic You cannot rectify this fault. operating voltage supply Please contact the Festo Service. 10−5 Festo P.BE−SEC−AC−SW−EN en 0802c... - Page 184 Bus fault The bus system used is not active or there is no bus · master. The bus master was activated too late. · Baud rates or cables defective. · 10−6 Festo P.BE−SEC−AC−SW−EN en 0802c...
- Page 185 Fault in the firmware. Load the firmware again. · Possible fault parametrizing of the gear factors. · Program faulty. Please contact the Festo Service. Drag error The positioning deviation is too high. · (position deviation too The load of the drive is too large.
- Page 186 Load the default parameter set. · Missing user parameter If the fault still exists contact the Festo Service. This fault only occurs if you switch off the servo con troller within 3 seconds of issuing the command [Save parameter]/[parameter set] or if you press the reset button during this period.
-
Page 187: Warning: Old Firmware
V6 or older is found, the following warning will appear on the screen: Fig. 10/3: Helps/About You can find out the version of the current firmware by select ing [Helps]/[About] in the menu bar. You will then see the following menu: Fig. 10/4: 10−9 Festo P.BE−SEC−AC−SW−EN en 0802c... - Page 188 If the firmware download is not successful, this will be download shown by the message Fault in firmware download". The cause is usually a communication fault in transferring the data to the servo controller. Repeat the procedure described above with a lower baud rate. 10−10 Festo P.BE−SEC−AC−SW−EN en 0802c...
-
Page 189: List Of The Rs232 Commands
List of the RS232 commands Chapter 11 11−1 Festo P.BE−SEC−AC−SW−EN en 0802c... - Page 190 ........11−16 11−2 Festo P.BE−SEC−AC−SW−EN en 0802c...
-
Page 191: Rs232 Test Possibilities
The RS232 commands listed can be transmitted to the SEC−AC with any commercially−available terminal program. A simple terminal window has been included in the Wmemoc software for test purposes. The following window appears when you access the function under [File]/[Transfer]: Fig. 11/1: 11−3 Festo P.BE−SEC−AC−SW−EN en 0802c... - Page 192 The controller can then only be operated via this window until the Transfer" window is deactivated. The commands listed are implemented in the controllers as from firmware version 5c. Please contact Festo if you require an update. 11−4 Festo P.BE−SEC−AC−SW−EN en 0802c...
-
Page 193: General Commands/Messages
Command unknown xxxx:ERR! Buffer overrun xxxx:OVL! Information on the integrated flash *) FLASH? xxxx:FLASH:SSSS:BBBBBBBB :PPPPPPPP:ZZZZZZZZ Read firmware version *) VERSSOFT? xxxx:VERSSOFT:RRRR:VVVV Read MDC version *) VERSMDC? xxxx:VERSMDC:VVVV *) As from firmware version 8d Fig. 11/2: 11−5 Festo P.BE−SEC−AC−SW−EN en 0802c... - Page 194 The following abbreviations are used with the gene ral commands (hexadecimal): SSSS: Size of FLASH−IC in kB BBBBBBBB: Checksum boot code PPPPPPPP: Checksum Program ZZZZZZZZ: Checksum variable range RRRR: Revision VVVV: Version xxxx: Internal status word 11−6 Festo P.BE−SEC−AC−SW−EN en 0802c...
-
Page 195: Selecting The Operating Mode
(A or B) must first be set to RS232 in the menu Nominal values" with the parametrizing program. Command Syntax Reply Speed specification in SN4:HHHH xxxx:CN4:HHHH Read unfiltered actual RNI? xxxx:RNI:HHHH speed in rev./min. Read filtered actual RNIF? xxxx:RNIF:HHHH speed in rev./min. Fig. 11/4: 11−7 Festo P.BE−SEC−AC−SW−EN en 0802c... -
Page 196: Reference Travel/Position Control
VVVVVVVV: Speed in increments per min (hexadecimal) XXXXXXXX: Path in increments (hexadecimal) (65536 increments are 1 revolution) MMMM: Each functionality corresponds to 1 bit. The individual expressions must be OR−linked to form the total functionality. 11−8 Festo P.BE−SEC−AC−SW−EN en 0802c... - Page 197 0008 Synchronization on (for flying saw) SS: Status after SPSTART/after SPSELPOS Positioning started or controller ready for pos. Positioning control is off Final output stage is off Reference travel active Current positioning cannot be aborted 11−9 Festo P.BE−SEC−AC−SW−EN en 0802c...
- Page 198 Fig. 11/5: The commands SPVMAX and SPVEND are special cases. You can receive either 16−bit pre−decimal values or complete 32−bit values. To remain compatible with current applications, 16−bit replies are sent for 16−bit transfer parameters. 11−10 Festo P.BE−SEC−AC−SW−EN en 0802c...
- Page 199 Read rest path trigger RPXTRG:PP:XXXXXXXX xxxx:CPXTRG:PP:XXXXXXXX Read target selector for external RPSELPOS:PP xxxx:CPSELPOS:SS start Read positioning type RPMODE:PP xxxx:CPMODE:PP:MMMM All read commands for positioning control are available as from firmware version 8d. Fig. 11/6: 11−11 Festo P.BE−SEC−AC−SW−EN en 0802c...
-
Page 200: Synchronization Unit
Sets status of synchronization SETSYNC:aabbccdd xxxx:DONE unit Fig. 11/7: Some addresses must be directly described to modify other parameters, such as the resolution of the external transducer. If necessary, contact your dealer. 11−12 Festo P.BE−SEC−AC−SW−EN en 0802c... -
Page 201: Parking Brake
Switches the parking brake on SBR+ xxxx:CBR+ (pull immediately, until next SBR− no positioning possible) Switches the parking brake off SBR− xxxx:CBR− (release immediately, but auto matic brake is active again after next positioning) Fig. 11/8: 11−13 Festo P.BE−SEC−AC−SW−EN en 0802c... -
Page 202: Commissioning/Calibrating
Decrement/increment offset analogue input 2 GND2−/GND2+ xxxx:OK! Automatic offset calibration of analogue input 1 AOFF1 xxxx:DONE Automatic offset calibration of analogue input 2 AOFF2 xxxx:DONE Automatic offset calibration of ADU−16 AOFF3 xxxx:DONE Fig. 11/9: 11−14 Festo P.BE−SEC−AC−SW−EN en 0802c... -
Page 203: Parameter Commands
Command Syntax Reply Read parameter RIP:ooo xxxx:CIP:aaaa:HHHH Read LONG parameter RIPL:ooo xxxx:CIPL:aaaa:HHHHHHHH Write parameter SIP:ooo:HHHH xxxx:CIP:aaaa:HHHH? Write LONG parameter SIPL:ooo:HHHHHHHH xxxx:CIPL:aaaa:HHHHHHHH? Write confirmation for commands SIP xxxx:DONE and SIPL Fig. 11/10: 11−15 Festo P.BE−SEC−AC−SW−EN en 0802c... -
Page 204: Example Of Parametrizing
SYNC+/SYNC− xxxx:CSYNC+/CSYNC− Nominal value integrator on/off SHL+/SHL− xxxx:CHL+/CHL− Quit error SQT+ xxxx:CQT+ SQT− xxxx:CQT− Controller enable on: SRF− xxxx:CRF− Functions only when controller SRF+ xxxx:CRF+ enable logic is set to Din5 and RS232 Fig. 11/11: 11−16 Festo P.BE−SEC−AC−SW−EN en 0802c... - Page 205 Rest time trigger off SPTTRG:03:0000 xxxx:CPTTRG:03:0000 Rest path trigger off SPXTRG:03:00000000 xxxx:CPXTRG:03:00000000 Positioning path 1.5 rev. SPX:03:00018000 xxxx:CPX:03:00018000 Start positioning SPSTART:03 xxxx:CPSTART:00 Positioning path −2.2 rev. SPX:03:FFFDCCCD xxxx:CPX:03:FFFDCCCD Start positioning SPSTART:03 xxxx:CPST Fig. 11/12: 11−17 Festo P.BE−SEC−AC−SW−EN en 0802c...
- Page 206 11. List of the RS232 commands Set current position to 1.5 rev. Command Syntax Reply Current position 1.5 rev. SPSETX:00018000 xxxx:CPSETX:XXXXXXXX Interrogate actual position SPXIST? xxxx:CPXIST:00018000 Interrogate nominal position SPXSOLL? xxxx:CPXSOLL:00018000 Fig. 11/13: 11−18 Festo P.BE−SEC−AC−SW−EN en 0802c...
- Page 207 Index Appendix A A−1 Festo P.BE−SEC−AC−SW−EN en 0802c...
-
Page 208: A. Index
A. Index A−2 Festo P.BE−SEC−AC−SW−EN en 0802c... - Page 209 ........4−3 A−3 Festo P.BE−SEC−AC−SW−EN en 0802c...
- Page 210 ........3−7 A−4 Festo P.BE−SEC−AC−SW−EN en 0802c...
- Page 211 ........1−4 A−5 Festo P.BE−SEC−AC−SW−EN en 0802c...
- Page 212 ......4−12 Motor speed message ......9−12 A−6 Festo P.BE−SEC−AC−SW−EN en 0802c...
- Page 213 ......9−16 proportionality factor ... . 8−22 , 8−25 , 8−27 , 8−30 A−7 Festo P.BE−SEC−AC−SW−EN en 0802c...
- Page 214 ....... . 5−15 A−8 Festo P.BE−SEC−AC−SW−EN en 0802c...
- Page 215 6−4 , 9−3 transferring modes ......8−36 A−9 Festo P.BE−SEC−AC−SW−EN en 0802c...
- Page 216 ........10−9 A−10 Festo P.BE−SEC−AC−SW−EN en 0802c...
Need help?
Do you have a question about the SEC-AC-305 and is the answer not in the manual?
Questions and answers