
Summary of Contents for Tokyo Boeki Medisys BIOLIS 30I
- Page 1 Automated Clinical Analyzer Operator’s Manual Ver.1.00 T T OKYO BOEKI MEDISYS INC. Original Instructions...
- Page 2 Status of the trouble including estimated cause of the trouble Also if you have any question regarding analyzer function, or if you want to have technical training information, please contact one of our offices . Manufactured by Tokyo Boeki Medisys Inc. 1-14-21, Higashitoyoda, Hino-shi, Tokyo 191-0052, Japan Tel: (81)-42-587-7777...
- Page 3 The contents of this operation manual and software specification may change without notice. If you find any defects or mistakes in this manual, please let us know. © Copyright 2011 Tokyo Boeki Medisys Inc. Original Instructions Registered trademark Windows is a registered trademark of Microsoft USA.
- Page 4 Before the software installation, which is supplied from TOKYO BOEKI MEDISYS INC (TMS), please read the following Software license agreement carefully. Software installation to a computer is considered your agreement to the all items of Software license agreement. If you find any objection, please let us know before installation.
- Page 5 4 4 Reproduction prohibition Any customer cannot copy the consented software, even though partly. 5 Guarantee and responsibility limit 5.1 TMS does not guarantee, no defect on consented software, and also we do not guarantee that our analyzer system fits customer’s special needs, or useful for the needs.
- Page 6 this agreement without any notification. Other than that, TMS can demand on the loss, caused by the violation. 8.2 The customer can cancel this agreement by the abandonment of the consented software. 9 9 The action after the agreement has over When this agreement is cancelled based on the article 8, customer should abandon the consented software and notify to TMS.
- Page 7 O O perator’s Manual V1.00 Contents Preface Alarm code, guarantee, safety and caution for operation. Chapter1 [Specifications and structure of the System] To understand general view, analyzer construction is explained. Chapter2 [Functions and principles] Various functions, operating principle and operation method are explained. Chapter3 [Explanation of each screen and operating condition] Start-up operation and routine operation are explained.
-
Page 8: Table Of Contents
Preface O O perator’s Manual Preface Introduction ---------------------------------------------------------------------- 0-2 Expression of Warning and Notice ------------------------------------ 0-3 Safety Caution Caution in Operation ------------------------------ 0-7 Warranty ---------------------------------------------------------------------- 0-10 Storage and Transportation Requirements ----------------------------- 0-12 Usage environment ---------------------------------------------------------- 0-12 Installation and Servicing ------------------------------------------------- 0-13 Cleaning and disinfection procedure ------------------------------------- 0-13 Position of the nameplate ------------------------------------------------- 0-13... -
Page 9: Introduction
V1.00 I I ntroduction This Automated Clinical Analyzer is an IVD medical equipment for indoor use and is based on the colorimetric and turbidimetric measurement. Its main application is expected to be colorimetric measurement, clinical chemistry testing, immuno-serological testing, hematological testing and urine testing in hospitals, clinical laboratories and other research laboratories. -
Page 10: Expression Of Warning And Notice
Preface O O perator’s Manual 1. Expression of Warning and Notice In this manual, the items you have to be careful for safety are indicated by the following levels. Classification of display Caution If ignored, the accident may cause personal injury or heavy damage on the instrument. - Page 11 V1.00 E E xplanation of caution and warning seal The following seal are stuck on the analyzer body as warning. If this mark is attached to the analyzer, read the corresponding caution of the operation manual. Never remove these seals for safety protection. 1) Warning label of top cover Revolution, vertical movement hazard Some units rotate and move up and down.
- Page 12 Preface O O perator’s Manual A: Lamp house High temperature hazard Scald by high temperature If you operate the parts, turn off the main breaker of the machine and disconnect the cable. Location : Lamp house (Lamp) B: CWS Revolution, vertical movement hazard Some units rotate and move up and down.
- Page 13 V1.00 F: Reagent tray Injury hazard Never open this cover while analyzer is in operation. Only Access cover when green tray replace light is on. G: Sample tray Injury hazard Never open this cover while analyzer is in operation. Only Access cover when green tray replace light is on.
-
Page 14: Safety Caution Caution In Operation
Preface O O perator’s Manual 2. Safety Caution Caution in Operation Warning 1) Electric shock prevention When electrically charged, never open rear cover nor covers of both sides. It may cause electrical shock. 2) Usage Mainly used for clinical chemistry electrolyte tests and immuno-serological test of water soluble samples. - Page 15 V1.00 5) Accuracy of measured data During the operation, please check the system condition by measuring control samples. Inaccurate test results may lead wrong diagnosis and improper patient treatment. 6) Inflammable substance Do not use inflammable substance around the system. It might cause fire or explosion.
- Page 16 Preface O O perator’s Manual 15) Treatment on reagents and others Reaction cuvette, sample cup and waste liquid line are not sufficiently tolerant to organic solvents. Do not use solvents. Do not use sticky substance on sample probe, reagent probe nor reaction cuvette.
-
Page 17: Warranty
V1.00 3. Warranty Warranty period Twelve months after the installation date or fourteen months from shipment date from Japan, whichever comes earlier. Warranty and remedy - We warrant that, during the warranty period, the analyzer operates in accordance with our standard technical specifications (failure to operate is called as “Defect”). - When a Defect is found and your written claim fully describing the details of the same is accepted by the end of the warranty period, we will, at our expense and sole option, provide either of the following remedies:... - Page 18 Preface O O perator’s Manual reagents); 12. A defect or nonconformance that you found or could have found at the time of receipt of the analyzer such as loss of or apparent damage to the analyzer and that you failed to promptly notify to us in writing; 13.
-
Page 19: Storage And Transportation Requirements
V1.00 4. Storage and Transportation Requirements 1) Indoor. 2) No direct sunlight. 3) No dust. 4) Ambient temperature should be 1 ~ 45 Celsius degrees. 5) Ambient humidity should be 10 ~ 85% (no condensation). 6) No dropping. 7) No throwing down. 8) No upper load. -
Page 20: Installation And Servicing
Preface O O perator’s Manual 6. Installation and Servicing 1) Installation Installation and checking of deliveries or transport condition will be performed by our serviceman. Prepare a receptacle with earth terminal (3 terminals) and be sure the earth resistance of terminal is less than 100 ohm. When moving the system, consult our serviceman. - Page 21 Chapter 1 O O perator’s Manual Chapter 1 Specifications and structure of the System General Specifications ----------------------------------------------------------- 2 Structure of the System --------------------------------------------------------- 5 1.2.1 Over All Structure ------------------------------------------------------------ 5 1.2.2 Plan of the System Section ------------------------------------------------- 6 1.2.3 Rear view ----------------------------------------------------------------------- 6 1.2.4 Left Side Elevation of the System ---------------------------------------- 7 1.2.5 Right Side Elevation of the System -------------------------------------- 8 1.2.6 Reservoirs----------------------------------------------------------------------- 9...
-
Page 22: General Specifications
V1.00 1.1. General Specifications Item Contents Discrete, Single line random access, multi-tests Method analysis Test items on board 36 items 24 items Option)+ ISE 3 items 270 tests/hr. Throughput MAX 450tests/hr. (in case of loading ISE) 90 test/hr. (HbA1c Item Only) End point method, Rate method Analysis method... - Page 23 Chapter 1 O O perator’s Manual Item Contents Dispensation R1 ;140-300 L (1μL steps) volume R2 ;20 -260 L (1μL steps) Number of R1,R2 ;36position (Option R1,R2 24 position) bottles on board Reagent Reagents are cooled at 5 – 15 Celsius degrees. Storage The reagent cooling becomes room temperature minus when the room temperature is over 25...
- Page 24 V1.00 Item Contents Equipment Class Class Over voltage Category Category Pollution Degree Pollution Degree 2 Power supply AC100V/115V/ 220V/230 V plus-minus 10 % Frequency 50/60 Hz Electric consumption 600 VA Grounding Resistive less than 100 ohm 15 – 30 Celsius degrees Ambient temperature (During operation Plus-minus 2 Celsius degrees/hour) Ambient humidity...
-
Page 25: Structure Of The System
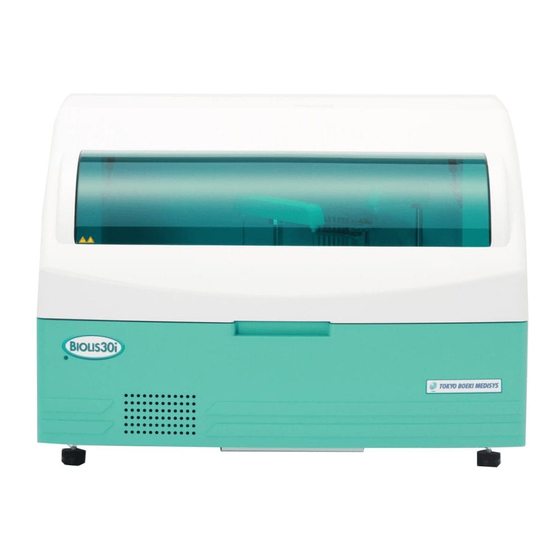
Chapter 1 O O perator’s Manual 1.2. Structure of the System The instrument is consisted with sampler (sample tray), sampling mechanism, reagent tray, reagent transfer mechanism, reaction tray (with reaction cell), mixing unit, reaction cell washing station and spectrophotometer. 1.2.1. Over All Structure A Instrument B Personal computer C ISE drainage reservoir... -
Page 26: Plan Of The System Section
V1.00 1.2.2. Plan of the System Section A Sample tray B Sample probe C Reagent tray D Reagent probe E Reaction tray F Mixing G Cuvette washing station H Lamp house The plan when the top cover is removed 1.2.3. Rear view I Nameplate J,K,L Fan Rear view... -
Page 27: Left Side Elevation Of The System
Chapter 1 O O perator’s Manual 1.2.4. Left Side Elevation of the System Left Side A:Main power switch panel B:LAN Connect to the PC C: Main power switch I ON The reagent cooler is working ○ OFF All the functions stop D:Main Fuse Time lag fuse (AC250V 6.3A) C: AC power supply... -
Page 28: Right Side Elevation Of The System
V1.00 1.2.5. Right Side Elevation of the System A:ISE module (Inside the door) B:Water supply/drain panel Right Side B: Water supply/drain panel Upper : Cable line (SW-1 Connect each sensor cables Lower : Piping line Connect each tubes C Drainage reservoir SW-1, WASTE-1 Water supply/drain panel D Separate collection reservoir (option) -
Page 29: Reservoirs
Chapter 1 O O perator’s Manual 1.2.6. Reservoirs Separate Collection Reservoir, Drainage Reservoir and Water Reservoir must be set below the instrument level. Both Acidic and Alkaline Cleaning Solution Reservoirs must be set the same level of the instrument or below the instrument. Water Supply Reservoir (10L) A Tube blue B Cable... -
Page 30: Alkaline And Acidic Cleaning Sol. Reservoir (3L)
V1.00 3 3 . Alkaline and Acidic Cleaning Sol. Reservoir (3L) A Cable B Float switch C Tube (thin) D To water supply/drain panel “ALKALIN” or “ACID” E To water supply/drain panel “ALKALIN-“SW 4” “ACID “SW - 5” Alkaline Cleaning Sol. Reservoir Acidic Cleaning Sol. -
Page 31: Personal Computer
Chapter 1 O O perator’s Manual 1.2.7. Personal computer By the personal computer to be used, it depends on the placement of each terminal. The personal computer instruction manual well we read, should be connected with the device. In addition, the handling on the PC alone, please refer to the PC instruction manual for operations. -
Page 32: Functions And Principles
Chapter 2 O O perator’s Manual Functions and principles Chapter 2 System overview ....................... 3 2.1.1 System structure ....................... 3 Principle of measurement ....................4 2.2.1 Analysis flow chart ....................4 2.2.2 Analysis process and optical measurement point ............5 2.2.3 Peiciple of measurement and flow ................ - Page 33 V1.00 2.6.1 ISE calibration ......................33 2.6.2 ISE concentration calculation .................. 33 Linearity check ......................34 Prozone check ........................ 35 Serum information (L-H-I) .................... 36 2.10 Carryocer avoidance ......................37 2.10.1 Kinds of caryyover avoidances ................. 37 2.11 Automatic start-up, shut down and automatic maintenance .......... 38 2.11.1 Automatic start-up and shut down ................
-
Page 34: System Overview
Chapter 2 O O perator’s Manual 2.1 System overview 2.1.1 System structure Sample pump Mixing pump Mixing pump Cell washing Cell washing pump pump Reagent pump Reagent pump A/D converter A/D converter Drainage pump Drainage pump Probe washing Probe washing pump pump INTERFACE... -
Page 35: Principle Of Measurement
V1.00 2.2 Principle of measurement 2.2.1 Analysis flow chart START REACTION CELL CLEANING WATER BLANK 2.4 min EVACUATION R1 DISPENSATION 0.4 min SAMPLE DISPENSATION MIXING 2 STAGES 5 .1min Reaction R2 DISPENSATION 10.6 min MIXING 2 STAGES 5.1min Reaction END OF MEASUREMENT CUVETTE CLEANING 2.4min AUTO-STOP... -
Page 36: Analysis Process And Optical Measurement Point
Chapter 2 O O perator’s Manual 2.2.2 Analysis process and optical measurement point 1 Analysis process Measuring point19,37 8sec 54 24sec Other=13sec Explanation : Sample dispensation : R1 dispensation : R2 dispensation : Mixing 2 Optical Measurement Point Cycle after start Function Optical measurement 6, 7, 8... - Page 37 V1.00 2.2.3 Principle of measurement and flow 1) Measurement principle The optical absorption is measured every one cycle. When the reaction tray rotates and the reaction cell passes the optical measurement position, light absorption data are measured. 2) Measurement flow (1) When the start button is clicked, the cuvette washing unit starts cleaning from the start cuvette.
-
Page 38: Ise (Option) Principle Of Measurement And Flow
Chapter 2 O O perator’s Manual (17) R2 is dispensed by R2 probe, which has the same function as R1 probe. (18) The R2 probe goes up and moves to the probe washing pot and both inside and outside are washed by de-ionized water there. (19) The reaction tray rotates and the reaction cell (R1, sample, R2) moves to mixing position. -
Page 39: Units And Functions
V1.00 2.3 Units and functions 2.3.1 Plane of the main units The system is composed sampler, sample transfer mechanism, reagent tray, reagent transfer mechanism, reaction tray, mixing units, cell washing unit, spectrophotometer and so on. 2.3.2 Sample tray A sample tray holds cups and tubes. Sampler rotates a sample tray and transfers samples to the sampling position. -
Page 40: Reagent Transfer Mechanism
Chapter 2 O O perator’s Manual 2.3.5 Reagent transfer mechanism Reagent probe aspirates the designated volume of reagent from a reagent bottle and RTM carries the reagent probe to the cuvette position and the reagent is dispensed into a reaction cuvette. There are two reagent probes. -
Page 41: Cell Washing Station
V1.00 2.3.8 Cell washing station Reaction cell washing mechanism Perform reaction cell washing before start the measurement. The reaction drainage after the test is removed and the cell is washed with cleaning solution. The washing solutions are pre-heated. 1) Washing nozzle location For reaction drainage aspiration --------- 1 nozzle (Nozzle No.1 For cleaning sol. -
Page 42: Specto-Photometer And Measurement Method
Chapter 2 O O perator’s Manual 2.3.9 Spectrophotometer and measurement method Measures optical absorption of 13 wavelengths of pure water and reaction liquid in cuvettes while the reaction tray rotating. 1) General view of optical system Measurement method (1) White light emitted from the light source lamp is converged to a light beam. (2) The light goes through the reaction cuvette. -
Page 43: Ise Module (Option)
V1.00 2.3.10 ISE Module (Option) ISE module is used for measurement of ion concentration (Na+, K+, Cl+) in the sample. ISE Module ISE piping diagram 2 2 -12... -
Page 44: Hba1C Sample Preparation
Chapter 2 O O perator’s Manual 2.3.11 HbA1c Sample preparation c sample preparation(Hemolysis) is performed automatically. HbA1c sample preparation flow (Hemolysis) Set the centrifugalized tube on the sample tray. (Fig Aspirates the red blood cell sample from the blood cell layer by sample probe. -
Page 45: Sample Clot Detection
V1.00 2.3.12 Sample clot detection When the sample probe detects the clot by fibrin, perform the washing automatically. The error flag “c” is attached to related result. Solution flow after clot detection (Sample probe) Sample aspiration Clot detection Automatic-cleaning Sample probe moves to the trough and wash 2 times. -
Page 46: Probe Crash Detection
Chapter 2 O O perator’s Manual 2.3.13 Probe crash detection When the probe detects the clash, the movement stops immediately to protecting the probe. The probe crash detection is effect when the probe is down. The probe movement stops by liquid level error instead of crash error in next case. -
Page 47: Analysis Type
V1.00 2.4 Analysis type 2.4.1 Kinds of analysis types End assay Rate assay One point end assay One point rate assay Two points end assay 1 Two points rate assay 1 Two points end assay 2 Two points rate assay 2 Measure the optical absorbance at the fixed time. -
Page 48: One Point End Assay
Chapter 2 O O perator’s Manual 2.4.2 One point end assay Measure the optical absorbance at the fixed time after mixing the reagent and the sample. Sample dispensation 1st reagent dispensation 2ndreagent dispensation R1+S + Sample 1st reagent Optical absorbance MAIN Main-measurement interval... -
Page 49: Two Points End Assay 1
V1.00 2.4.3 Two points end assay 1 Calculate the absorbance difference of the two different intervals, sub- and main-intervals. : Sample dispensation : 1st reagent dispensation : 2nd reagent dispensation R1+S + Sample : 1st reagent ABS : Optical absorbance MAIN : Main-measurement interval SUB : Sub-measurement interval Two points end assay 1... - Page 50 Chapter 2 O O perator’s Manual 2.4.4 Two points end assay 2 Calculate the absorbance difference of two different intervals, sub- and main-intervals. : Sample dispensation : 1st reagent dispensation : 2nd reagent dispensation R1+S + Sample : 1st reagent ABS : Optical absorbance MAIN : Main-measurement interval SUB : Sub-measurement interval...
-
Page 51: One Point Rate Assay
V1.00 2.4.5 One point rate assay Concentration or activity is calculated from the rate of absorption change. : Sample dispensation : 1st reagent dispensation : 2nd reagent dispensation R1+S + Sample : 1st reagent ABS : Optical absorbance MAIN: Main-measurement interval One point rate assay Optical measurement points input MAIN: 11... - Page 52 Chapter 2 O O perator’s Manual 2.4.6 Two points rate assay 1 Calculate the absorbance rate of two different intervals, sub-interval and main-interval, and calculate concentration or activity from the difference between these two rates. : Sample dispensation : 1st reagent dispensation : 2nd reagent dispensation R1+S + Sample...
-
Page 53: Two Points Rate Assay 1
V1.00 2.4.7 Two points rate assay 2 Calculate the absorbance rate of two different intervals, sub-interval and main-interval, and calculate concentration or activity from the difference between these two rates. : Sample dispensation : 1st reagent dispensation : 2nd reagent dispensation R1+S + Sample : 1st reagent... -
Page 54: Kinds Of Calibrations
Chapter 2 O O perator’s Manual 2.5 Kinds of calibrations Linear 1 (Two points linear) Linear 2 (Multi-points linear) Factor Non-linear Logit 1 Logit 2 Spline Exponential Polynomial Linear 1 (Two points linear) Linear1 Logit 2 Linear 2 (Multi-points linear) Linear2 Spline Factor Exponential... -
Page 55: Linear 1 (Two Points Linear)
V1.00 2.5.1 Linear 1 (Two points linear) One standard sample and a blank sample make a linear calibration line. The “Linear 1 calibration” is applicable. Optical absorbance Conc. Concentration Reagent blank Absorbance of reagent blank Concentration of reagent blank Absorbance of unknown sample Concentration of unknown sample Standard sample... -
Page 56: Linear 2 (Multi-Points Linear)
Chapter 2 O O perator’s Manual 2.5.2 Linear 2 (Multi-points linear) Multiple standard samples (2-6) and a blank sample make a linear calibration line. The “Linear 2 calibration” is applicable. ABS : Absorbance Conc. : Concentration : Reagent blank : Absorbance of reagent blank : Concentration of reagent blank : Absorbance of unknown... - Page 57 V1.00 (4) As3 (Cs4 Cs3) Cx (Ax As3)×――――――― (As4 As3) (5) As4 (Cs5 Cs4) Cx (Ax As4)×――――――― (As5 As4) (6) As5 (Cs6 Cs5) Cx (Ax As5)×――――――― (As6 As5) 2 2 -26...
-
Page 58: Factor
Chapter 2 O O perator’s Manual 2.5.3 Factor A blank sample and a given factor make a linear calibration line. ABS : Optical absorbance Conc. : Concentration : Reagent blank : Absorbance of reagent blank : Concentration of reagent blank : Absorbance of unknown sample : Concentration of unknown... -
Page 59: Non-Linear
V1.00 2.5.4 Non-linear This logic makes the approximate curve using 2-6 standard sample s including a blank sample, as a calibration curve. There are the following five types. 4-1. Logit 1 This logic is used for the calibration curve in which the absorbance converges to the increase of concentration. -
Page 60: Logit 2
Chapter 2 O O perator’s Manual 4-2. Logit 2 This logic is used for the calibration curve in which the absorbance converges to the increase of concentration. As this logic uses more parameters than logit.log 1, better approximation may be expected. : Absorbance Conc. -
Page 61: Spline
V1.00 4-3. Spline Connect absorption data of #I to #I+1 standard samples (I = 1 - n), taking into the account of the data of #I-1 and #I+2 and adjust to make a smooth calibration curve. ABS : Absorbance Conc. : Concentration : Reagent blank : Absorbance of reagent blank : Concentration of reagent... -
Page 62: Exponential
Chapter 2 O O perator’s Manual 4-4. Exponential For being different from 4-1,4-2,4-3 above, this logic is used for the calibration curve in which the absorbance diverges to the increase of concentration. ABS : Absorbance Conc. : Concentration : Reagent blank : Absorbance of reagent blank : Concentration of reagent... -
Page 63: Polynomial
V1.00 4-5. Polynomial This calibration curve is used for the case which optical absorbance decreases as concentration increases. : Absorbance Conc. : Concentration : Reagent blank : Absorbance of reagent blank : Concentration of reagent blank : Absorbance of unknown sample : Concentration of unknown sample... -
Page 64: Ise Module (Option)
Chapter 2 O O perator’s Manual 2.6 ISE Module (Option) ISE (ion selective electrode) measures electro-motive force (mV), induced by ion concentration in the sample. Four kinds of electrodes are used for the system. electrode : Sensitive only for Na ion in the sample. electrode : Sensitive only for K ion in the sample. -
Page 65: Linearity Check
V1.00 2.7 Linearity check To determine if a curve is linear, a linearity check will be calculated after each rate assay. The “L” flag appears when that check exceeds the preset value. : Main wavelength : Sub wavelength A1 : The slope of measuring range 1 A2 : The slope of measuring range 2... -
Page 66: Prozone Check
Chapter 2 O O perator’s Manual 2.8 Prozone check This function checks if there is a Prozone phenomenon in immunoassay. Based on the registered parameter, this function checks the curvature of reaction diagram up to 2 zones, and if Prozone is detected, puts the data message flag “P”... -
Page 67: Serum Information (L-H-I)
V1.00 2.9 Serum information (L-H-I) The Lipemia, Hemoglobin and bilirubin which included in serum sample is influenced the result. The serum information measures the Lipemia, Hemoglobin, Bilirubin (L-H-I), and judges the level of it. The serum information result makes the judgement based on the information results. Affect the measurement result. -
Page 68: Carryocer Avoidance
Chapter 2 O O perator’s Manual 2.10 Carryover avoidance As sample probe, reagent probes and reaction cells contact with different kinds liquid and sometimes built-in cleaning process is not sufficient. It may cause carryover. To avoid these kinds of carryover, it is possible to do special cleaning by carryover protection function. -
Page 69: Automatic Start-Up, Shut Down And Automatic Maintenance
V1.00 2.11 Automatic start-up, shut down and automatic maintenance By the combination of automatic start-up, shut down and maintenance, shorten the performance time when start-up and shut down the analyzer. 2.11.1 Automatic start-up and shut down By using the auto-start and shut down setting, analyzer power switch is ON or OFF automatically at the time, which is set by the timer for weekly day. -
Page 70: Explanation Of Each Screen And Operating Condition
Chapter 3 O O perator’s Manual Chapter 3 Explanation of each screen and operating condition Software program installation ..................3-2 3.2.1 PC specification ...................... 3-2 3.1.2 Install CD information ..................... 3-2 3.1.3 Installation procedure ....................3-2 Routine operation flow ....................3-3 3.3.1 Start-up inspection .................... -
Page 71: Software Program Installation
V V .1.00 3.1 Software program installation The analyzer is used exclusive software program. Please install the program by attached CD. 3.1.1 PC specification Refer to Chapter 1, 1.2.7. PC (LAN cable) for PC specification. 3.1.2 Install CD information Install the database and system program by install CDs. 3.1.3 Installation procedure 1) Insert the CD to PC driver. -
Page 72: Routine Operation Flow
Chapter 3 O O perator’s Manual 3.2 Routine operation flow Routine operation (from start up to shutdown) follows the procedure steps. The operation flow includes unnecessary settings on each time. Please operate according to the requirement. “QC Start” button shows in QC screen instead of “Start”... - Page 73 V V .1.00 Step Button & Screen Operation Confirmation of QC sample results. Order Order entry of patient sample. Set the patient sample on the sample tray. Start Start the patient sample measurement. Result Confirmation of patient sample results. ― Shutdown inspection and analyzer maintenance.
-
Page 74: Start-Up Inspection
Chapter 3 O O perator’s Manual 3.2.1 Start-up inspection Confirmation of the following points before starting the analyzer. Perform the reagent refill or other requirement. Step Inspection No obstruction for analyzer movement (Sample probe and Reagent probes)? Confirmation of water supply. Is de-ionized water enough in the water reservoir? Open the water supply line on the water purification system? Confirmation of cleaning solution reservoir. -
Page 75: Start-Up Analyzer Power Switch On
V V .1.00 3.2.2 Start-up Analyzer power switch ON Start up the analyzer. Analyzer stand-by after power on follows the procedure steps. Analyzer “stand-by” means? The reaction tray temperature reaches 37 Celsius degrees. Main screen Step Button & Screen Operation & Display Turns on the analyzer main switch. -
Page 76: Analyzer Initialization Ready
Chapter 3 O O perator’s Manual 3.2.3 Analyzer initialization Ready Initialize (Ready) the analyzer. For analyzer stand-by (Ready), follows the procedure steps. Analyzer initialization means? All the analyzer units move to home position (start position). Analyzer stand-by (Ready) means? All the analyzer units stay at home position (start position). -
Page 77: Measurement Condition (Item Parameter) Setting
V V .1.00 3.2.4 Measurement condition (Item parameter) setting For measurement setting (Item parameter) follows the procedure steps. Please refer to Chapter 4, 4.6 Item screen of the other Item screen (except Optical screen). Item screen – Optical Item screen Step Button &... -
Page 78: Reagent Bottle Position Setting
Chapter 3 O O perator’s Manual 3.2.5 Reagent bottle position setting When using the reagent barcode, please refer to “Reagent barcode manual”. Please refer to Chapter 4, 4.6 Reagent screen for details. Reagent bottle setting in “Reagent Setting” screen follows the procedure steps. Reagent screen - Reagent Setting screen Step Button &... -
Page 79: Reagent Bottle Setting
V V .1.00 3.2.6 Reagent bottle setting Please refer to Chapter 4, 4.6 Reagent screen for details. Reagent bottle setting in “Bottle Info” screen follows the procedure steps. Reagent screen – Bottle Info screen Step Button & Screen Operation & Display Reagent Click “Reagent”... -
Page 80: Calibration Setting (Standard Sample Position, Concentration)
Chapter 3 O O perator’s Manual 3.2.7 Calibration setting (Standard sample position, concentration) Input calibration measurement condition (Standard sample position, concentration) in ”CAL -Calib . Settings” screen. Setting of the ISE Items are unnecessary. Tray and standard positions are fixed. CAL screen Display of Calibration setting screen follows 1-4 steps. - Page 81 V V .1.00 Setting of Calibration measurement in Calib. Settings screen follows the procedure steps. Step Button & Screen Operation & Display Item name Select “Item name”. Specimen: Select “Specimen”. Select using calibration tray for measurement. Tray ISE calibration tray is fixed to C1. Setting of calibrator position and concentration.
-
Page 82: Calibration Order Entry
Chapter 3 O O perator’s Manual 3.2.8 Calibration order entry Calibration order entry in “CAL” screen follows the procedure steps. CAL screen Step Button & Screen Operation & Display Click “CAL” button. (PC screen) CAL screen is shown. Specimen ▼ Select “Specimen”. -
Page 83: Calibration Sample Setting (Blank, Standard) And Measurement
V V .1.00 3.2.9 Calibration sample setting (Blank, Standard) and measurement Calibration blank and standard sample setting and measurement follows the procedure steps. For ISE item, refer to Chapter 3, 3.2.10 ISE calibration sample setting and measurement. CAL screen Main screen CAL tray selection 3-14... - Page 84 Chapter 3 O O perator’s Manual Step Button & Screen Operation & Display Click “CAL” button. (PC screen) CAL screen is shown. Specimen: Select “Specimen”. Confirmation of calibration order entry. Blank order/Order Order status turns to dark blue for blank and standard sample or blue for blank sample in Item Tray Tray number.
-
Page 85: Ise Calibration Sample Setting And Measurement
V V .1.00 3.2.10 ISE Calibration sample setting and measurement ISE calibration for plasma sample is unnecessary. Serum sample calibration is used. ISE calibration sample setting and measurement follows the procedure steps. CAL screen Main screen CAL tray selection 3-16... - Page 86 Chapter 3 O O perator’s Manual Step Button & Screen Operation & Display Click “CAL” button. (PC screen) CAL screen is shown. Specimen: Select “Specimen”. Confirmation of calibration order entry. Order status turns to blue. Main Click “Main” button. (PC screen) Main screen is shown.
-
Page 87: Calibration Result Confirmation
V V .1.00 3.2.11 Calibration result confirmation Confirmation of Calibration result in CAL screen. Please refer to Chapter 4, 4.4 CAL screen for details. CAL screen CAL screen ― Display of former Calibration results Step Button & Screen Operation & Display Click “CAL”... - Page 88 Chapter 3 O O perator’s Manual Please refer to Chapter 4, 4.4 CAL screen for calibration graph and results. CAL screen―Graph screen CAL screen―ISE Graph screen (When result is out of range, the graph is not displayed.) CAL screen―Cal Data screen 3-19...
-
Page 89: Qc Measurement Condition Setting (Control Setting)
V V .1.00 3.2.12 QC measurement condition setting (Control setting) Setting of QC measurement (QC sample name, measurement position, mean) follows the procedure steps. Please refer to Chapter 4, 4.5 QC screen for details. QC screen―Controls Settings screen Step Button & Screen Operation &... -
Page 90: Qc Sample Order Entry
Chapter 3 O O perator’s Manual 3.2.13 QC sample order entry Order entry of QC sample in Order QC screen follows the procedure steps. QC screen― Order QC screen Step Button & Screen Operation & Display Click “QC” button. (PC screen) QC screen is shown. -
Page 91: Qc Sample Setting And Measurement
V V .1.00 3.2.14 QC sample setting and measurement QC sample setting on the sample tray and measurement follows the procedure steps QC screen― Order QC screen Step Button & Screen Operation & Display Click “QC” button. (PC screen) QC screen is shown. Order QC Click “Order QC”... - Page 92 Chapter 3 O O perator’s Manual Step Button & Screen Operation & Display Select tray number which confirmed in step 5 by clicking button. Tray Icon Patient tray 1 50 Calibration tray C1 C6 QC sample tray Q1 Q3 Back color of ordered sample turns to blue in tray position.
-
Page 93: Qc Sample Result Confirmation
V V .1.00 3.2.15 QC sample result confirmation QC sample results are shown in next screens. Current QC screen : Latest QC measurement result list is shown. QC History screen : QC measurement result graph and list are shown for each Items. When QC result is out of range or error occurred, confirm the reagent and QC sample. - Page 94 Chapter 3 O O perator’s Manual Please refer to Chapter 6 for details. Step Button & Screen Operation & Display (Approve) The Approved result is reflected to QC History. Rerun order procedure of QC sample Button & screen Step Operation & Display When the QC result is out of range or error occurred, perform the reagent and QC sample check include expire date.
-
Page 95: Qc History Screen
V V .1.00 2. QC History screen QC results are shown by graph or list. Two QC sample results are able to display for one Item. QC screen- QC History screen (Graph) QC History screen (List) Step Button & Screen Operation &... - Page 96 Chapter 3 O O perator’s Manual Step Button & Screen Operation & Display Lot No.: ▼ Select QC sample Lot number. Run date: ▼ Select date. Display of the QC history graph or list. Display of the statistical results for each sample.
-
Page 97: Patient Sample Order Entry
V V .1.00 3.2.16 Patient sample order entry The order entry of patient sample in “Order “ screen. When position mode is selected, order entry of patient sample in “Order” screen follows the procedure steps. When barcode mode is selected, please refer to Chapter4, 4.2 Order screen. (Patient sample order) Order screen Step... - Page 98 Chapter 3 O O perator’s Manual Step Button & Screen Operation & Display Click “Item select” button. Item selection When sample dilution is required, select Dilution selection dilution button and dilution ratio. Select Item name. Back color of selected Item turns to blue. Item name When sample dilution selected, display the dilution ratio under the Item name.
-
Page 99: Patient Sample Setting And Measurement
V V .1.00 3.2.17 Patient sample setting and measurement Patient sample order confirmation in “Order” screen before sample setting on the tray follows the procedure 1-4 steps. Sample setting on the tray and measurement start follow the procedure 5-13 steps. Order screen Main screen –... - Page 100 Chapter 3 O O perator’s Manual Step Button & Screen Operation & Display Tray: ▼ Confirmation of patient sample order (Position) Position : Confirm the tray number and measurement position. Main Click “Main” button. (PC screen) Main screen is shown. Tray Icon Select “Patient tray (Gray) Icon”.
-
Page 101: Patient Result Confirmation
V V .1.00 3.2.18 Patient result confirmation Patient sample results are shown in next 4 screens. Result screen Patient results are shown for each sample. Result Log screen Result list is shown. Patient Result screen Results of measurement day are shown for each sample. Data List screen Display of results, patient history and print out of patient report. -
Page 102: Result Log Screen
Chapter 3 O O perator’s Manual 2. Result Log screen Display of Result Log list (Within last 3 months). Please refer to Chapter 4, 4.1 Main screen 1.Result log screen. Result Log screen Step Button & Screen Operation & Display Icon Click Icon. -
Page 103: Patient Result Screen
V V .1.00 3. Patient Result screen Results of measurement day display by each sample order. Please refer to Chapter 4, 4.1 Main screen14. Result screen. Main screen –Patient Result screen Step Button & Screen Operation & Display Main Click “Main” button. (PC screen) Main screen is shown. -
Page 104: Data List Screen
Chapter 3 O O perator’s Manual 4. Data List screen When using the Data List (Patient report), the patient ID input in order screen is necessary. Display of Results, Patient History and print out the Single Report. Please refer to Chapter 4, 4.3.1 Data List screen. Data list screen - Result screen Data list screen - Patient History screen Data list screen –... -
Page 105: Inspection And Maintenance At The End Of Operation
V V .1.00 3.2.19 Inspection and maintenance at the end of operation Please perform the following check and maintenance at the end of operation. Caution Please read and secure the Preface in operation manual for Safety caution- Caution in operation . When you do the maintenance operation, wear protective globes, mask and glasses to avoid the infection. -
Page 106: Shutdown
Chapter 3 O O perator’s Manual 3.2.20 Shutdown Please refer to Chapter 4, 4.10 “Exit” screen when perform the shutdown for automatic start up and after automatic maintenance. (Pop up screen) Exit screen Main screen Step Button & Screen Operation & Display Click system power switch Icon. -
Page 107: Explanation Of Each Screen And Operating Condition
Chapter 4 O O perator’s Manual Chapter 4 Explanation of each screen and operating condition Main screen ........................4 4.1.1 The content of Main screen ..................4 Result Log screen ......................7 Error list screen ......................9 Help screen ......................... 10 Lamp screen ....................... - Page 108 V1.00 12. ISE graph screen ......................57 13. Calibration profile, Order all and cancel button ............58 QC screen........................59 4.5.1 QC screen contents .....................59 4.5.2 Order QC screen ......................60 4.5.3 Current QC screen ......................62 4.5.4 QC History screen .......................64 4.5.5 Control settings screen QC sample setting screen ..........67 Reagent screen .......................69 4.6.1 Reagent screen ......................69...
- Page 109 Chapter 4 O O perator’s Manual 13. DP ..........................136 14. Alarm ........................137 15. Level ......................... 138 16. ISE ..........................139 4.9.11 Temperature screen ....................141 4.9.12 Initialization screen ....................143 4.9.13 Authority Settings screen ..................144 4.9.14 Version screen ......................145 4.9.15 Log in screen ......................
-
Page 110: Main Screen
V1.00 4.1 Main screen The following informations are shown in Main screen. 4.1.1 The content of Main screen Main screen Result log screen is open. Error list screen is open. Help screen is open. When lamp is ON, turns to yellow. Display of remain time of lamp life. - Page 111 Chapter 4 O O perator’s Manual System System menu screen Exit Ending operation screen Operation control button Start Test starting button, both for patient sample and Calibration sample QC Start Test starting button, for QC sample in QC screen. Ready Analyzer initializing E.Stop Emergency stop...
- Page 112 V1.00 Test status information request button Screen changes by clicking each buttons. Order info. Order entry status Reaction info. Test status Reagent info. Reagent information Patient Result The test results of each sample. Detailed information screen display When you choose one of the buttons of , detailed information are shown.
-
Page 113: Result Log Screen
Chapter 4 O O perator’s Manual Result Log screen Result Log Icon displays at the upper part in operation screen. Result log screen is able to open when analyzer is under operation. Display the result log list of running date. The list is shown by selected date, specimen and Item. - Page 114 V1.00 Search Click search button, test results are shown in area. Display of the result and information. Contents Date /Time Tested date and time RC No. Reaction monitor number Pos. Tray number - Position number PatientID/ Control Name Patient ID/ QC samle name Displays ID by selected mode.
-
Page 115: Error List Screen
Chapter 4 O O perator’s Manual Error list screen Error list Icon displays at the upper part in operation screen. Error list screen is able to open when analyzer is under operation. Display the error list of the day. The list is able to show by selected date. Clicking button, Error list screen opens. -
Page 116: Help Screen
V1.00 Help screen Help screen Icon displays at the upper part in operation screen. Help screen is able to open when analyzer is under operation. Clicking button, Help screen opens. 4 4 -10... -
Page 117: Lamp Screen
Chapter 4 O O perator’s Manual Lamp screen Lamp Icon displays at upper part in operation screen. Lamp screen is able to open when analyzer is under operation. Clicking Lamp button. Main screen Lamp screen Lamp screen opens. Contents Display of remain time of lamp life. Time Left for Lamp (Maximun 1200 hours) Select when changing the lamp... -
Page 118: Tank Error Screen
V1.00 Tank error screen Tank Icon displays at the upper part in operation screen. Tank creen is able to open when analyzer is undr operation. When tank error occurred, tank Icon turns to red. (supply water, drainage, detergent and separate drainage tanks) When tank error solved, the Icon turns to blue. -
Page 119: Analyzer Status Monitor, Temperature Control Status Monitor And System Power Switch
Chapter 4 O O perator’s Manual Analyzer status monitor, temperature control status monitor and System power switch Analyzer status monitor, temperature control status monitor and system power switch button display at the upper part in operation screen. Main screen [Analyzer status monitor] The analyzer status is shown. Notation Analyzer status OFF LINE... -
Page 120: Operation Control Button. (Start, Qc Start, Ready, Stop)
V1.00 Operation control button. (Start, QC start, Ready, Stop) Operation control buttons (Start, QC start, Ready, Stop) display at the right lower part in operation screen. The button changes to inactive depending on the analyzer status. The color turns to gray. ’... -
Page 121: Sample Tray Monitor Screen
Chapter 4 O O perator’s Manual Sample tray monitor screen Sample order status is shown by tray Icon in main screen. Main screen The selected tray is shown on a central area. The order status displays by the color. The number in Icon shows tray number. The tray number is changed by keys. -
Page 122: Stat Button
V1.00 STAT button Clicking “STAT” button, STAT sample measurement is possible. STAT button displays when patient tray is selected in main screen. STAT button is able to use when analyzer is under operation. STAT sample is performed cut in between the measuring sample. Main screen- STAT sample position setting screen Main button : Main screen is shown. -
Page 123: Add Sample
Chapter 4 O O perator’s Manual Add sample Clicking “Add sample” button under operation (sampling), the sampling stops. Add button displays when patient tray is selected in main screen. Main screen Main button : Main screen is shown. Patient tray Icon : Patient tray displays in center area. -
Page 124: Reagent Tray Monitor Screen
V1.00 Reagent tray monitor screen Reagnet tray information displays in main screen. Main screen Main button : Main screen is shown. Reagent tray Icon : Reagent residual volume is shown by color. The number in Icon is shown bottle position number. -
Page 125: Order Information Screen
Chapter 4 O O perator’s Manual Order information screen Order information list displays. Clicking “Order info.” button in main screen, displays “Order info.” screen. Select order entry status line in order info. screen. Result screen Main button Main screen is shown. Order info. -
Page 126: Reaction Information Screen
V1.00 Reaction information screen Real reaction information displays. Clicking “Reaction info.” button in main screen, displays “Reaction info.” screen. Under operation ― Reaction info.screen Main button : Main screen is shown. Reaction info. : Real time display of test status Back color display Back color Contents... -
Page 127: Reagent Information Screen
Chapter 4 O O perator’s Manual Reagent information screen Reagent information list (Item name, residual reagent) is shown. Clicking “Reagent info.” button in main screen, displays “Reagent info.” screen. Main screen Main button Main screen is shown. Reagent info. button Residual reagent test number display. -
Page 128: Patient Result Screen
V1.00 Patient result screen Results of measurement day display by each sample order. Clicking Patient result button in main screen, displays patient result screen. Main screen Pstient Result screen Main button Main screen is shown. Patient Result button Patient results of the day are shown by each sample order. -
Page 129: Order (Patient Sample Order Entry) Screen
Chapter 4 O O perator’s Manual 4.2 Order (Patient sample order entry) screen This screen is used for order entry of patient samples. There are two kinds of order entry screen, one is used for position mode and the other is used for barcode * mode. The sample mode can be selected in System screen. Default mode is Position mode. -
Page 130: Test Condition Input And Display
V1.00 Test condition input and display Order screen Order button : Order screen is shown. Test conditions (tray, position number) input and display. Input and display of test conditions are different depending on the sample mode. The sample mode can be selected in System screen. Default mode is Position mode. - Page 131 Chapter 4 O O perator’s Manual Barcode mode order screen Display of sample barcode contents, and input or read by barcode reader automatically. Display contents, input condition, contents of the selection Tray Fixed as tray number 1. Cannot be changed. Pos.
-
Page 132: Sample Information (Patient Information) Input And Display
V1.00 Sample information (Patient information) input and display Order screen Order button : Order screen is shown. Sample information (Patient information) input and display. Input and display of test conditions are different depending on the sample mode. The sample mode can be selected in System screen. Default mode is Position mode. - Page 133 Chapter 4 O O perator’s Manual Display contents, input condition Input the date of birth, by input a check mark into a box or select Date of birth the date out of the calendar by clicking mark. Displayed automatically. Input the date by input a check mark into a box or Default is Draw date select the date out of the calendar by clicking...
- Page 134 V1.00 Display contents, input condition Patient input displays barcode information. Less than 20 Patient ID When using of result screen data list letters (patient report), input is necessary. To input Name – Age, Patient ID input is necessary. Input patient name or display of Name Less than 30 characters barcode information..
-
Page 135: Test Item Display And Selection
Chapter 4 O O perator’s Manual Test item display and selection During Reagent screen selection, registered reagent Items, ISE Items and calculation Items are shown in Round. By specimen selection, only the Items, suitable for the specimen, are shown. Order entry by Item selection. Order screen Order button : Order screen is shown. -
Page 136: Profile List Display And Selection
V1.00 Profile list display and selection Profile list displays. Group order entry can be set by profile name selection. Profile setting or modification is done in System screen. Please refer to Chapter 4, 4.9.4 Profile screen. Order screen Order button Order screen is shown. -
Page 137: Order Setting (Group Order) Button
Chapter 4 O O perator’s Manual Order setting (Group order) button This button is used for order setting. Order screen Order button : Order screen is shown. Buttons Contents Clear If there is a order, cancel them. Delete Delete the test order of displayed position number. Order Register the contents of displayed position number. -
Page 138: Work List Screen
V1.00 Work list screen Clicking of work list button, work list screen is shown. This is used for order entry status confirmation. Work list screen Order button : Order screen is shown. Work list button : Order entry status list is shown. Work list screen Contents Select one out of All, Patients,... - Page 139 Chapter 4 O O perator’s Manual Print (External printer) : Printout of displayed contents. 4-33...
-
Page 140: Order Screen Switching Button
V1.00 Order screen switching button Order screen switching buttons are shown. Displays when position mode is selected. Under barcode mode, this screen is ignored. Under barcode mode, select Barcode ▼, for screen switching. Order screen-Position setting screen Order button : Order screen is shown. Order screen switching buttons and functions Contents Displays the first position of shown round. -
Page 141: Result Screen
Chapter 4 O O perator’s Manual 4.3 Result screen Test result of each sample is shown. Depending on the sample mode setting, (Position mode/Barcode mode) display contents are different. Sample mode setting can be changed in System screen. Default is Position mode. Rerun order is possible. -
Page 142: Test Results Condition Display
V1.00 Test results condition display Test result of the day is shown. Display order entry when the test incomplete. Former test results are also shown if date of interest is given. Result screen Result button : Result screen is shown. Result screen and functions Display contents, selection contents Tray No. -
Page 143: Result And Sample Information (Patient Information) Display
Chapter 4 O O perator’s Manual Result and sample information (patient information) display Display the information of order entry. Result screen Result button : Result screen is shown. Sample information (Patient information) displays. Contents (Rerun condition input) Barcode Displays barcode character string. Repeat Display sampling repetition number. - Page 144 V1.00 Contents (Rerun condition input) Serum information (Lipemic, Hmolysis, Icteric) display Comment Display comment Clear (No order entry) Order Sample status Display sample state Complete Error (Error has detected) Order (First test) Ordering status Display order state Re-run order Auto-rerun order 4 4 -38...
-
Page 145: Test Results Display, Rerun Order, Reaction Monitor Screen Display Button
Chapter 4 O O perator’s Manual Test results display, Rerun order, Reaction monitor screen display button Test results are shown. Display order entry when the test incomplete. Rerun order is possible by check the rerun box. Clicking RC button, displays reaction monitor screen. Result screen Result button : Result screen is shown. -
Page 146: Data List
V1.00 Data list Displays Data list (Patient report) screen Data list (Patient report) screen Display, search, print setting, and print for test result of Data list (Patient report) are done in this screen.. To use Data list (Patient report), Patient ID input in Order screen is necessary. Data list menu screen Result button : Result screen is shown. - Page 147 Chapter 4 O O perator’s Manual 4-1. Data list – Result screen Test result of Data list (patient report) display, list, search and print. To use Data list (Patient report), Patient ID input in Order screen is necessary. Result screen Data list –...
- Page 148 V1.00 Search button Searched screen is popup. Pop-up screen. Seach screen Input search condition. Search condition input Sample Tray ▼ Sample tray number selection Sanple Position Sample position number selection From ▼ to ▼ Barcode ID Bar code ID input From Patient Name Patient name input...
- Page 149 Chapter 4 O O perator’s Manual 4-2. Data List - Patient History screen Test result history display, search, and print for individual patient To use Patient history, Patient ID input is necessary, in order screen. Result screen Data list – Patient History screen Search screen Search screen Result button...
- Page 150 V1.00 Contents (File date) Display test results. Dilution ratio display. If the test result is out of normal range or panic range, displays error flag. As for check flag, refer chapter 6 Alarm function. Search button Searched screen is popup. Pop-up screen Search screen Input search condition.
- Page 151 Chapter 4 O O perator’s Manual 4-3. Data List - Single Report screen Patient report print contents (profile) setting, search and print To use Single report, Patient ID input, in Order screen, is necessary Result screen Data list – Single Report screen Result button Result screen is shown.
- Page 152 V1.00 Single report screen: Search Setting, search condition input Date: Select the date to search. From ▼ to ▼ Patient ID Input is essencial. Search From to Input Patient ID to search Barcode ID Input Barcode ID to search. From to Print (External printer) Print test results which are currently displayed.
- Page 153 Chapter 4 O O perator’s Manual 4-4. Data List – Header Footer screen Header and footer setting for Data list (Patient report) screen. Header/Footer screen Result button Result screen is shown. Data List button Data list menu screen is popup. Pop-up screen Data list menu screen Header/Footer button.
-
Page 154: Test Result Screen Switching Button
V1.00 Test result screen switching button Test result screen switching button Under Barcode mode, this button is not shown. The sample mode can be selected in System screen. Default mode is Position mode. If Barcode mode is used, screen switching can be done by clicking Barcode Result screen Result button : Result screen is shown. -
Page 155: Calibration Screen
Chapter 4 O O perator’s Manual 4.4 Calibration screen Clicking CAL button, calibration screen opens. CAL screen Display of the Calibration results. Standard button Display setting screen for calibration samples (position, repetition) including standard sample concentration. Cal Data button Display of calibration result details. 4.4.1 The contens of CAL screen CAL screen... -
Page 156: Cal Screen -Item Order, Results
V1.00 CAL screen -Item order, results Clicking of CAL button, display of the calibration setting, order and results. CALscreen – Old calibration result screen (Except ISE) CAL button Display calibration screen. Specimen ▼ Select Specimen Display calibration Item order, results. Contents Round Display reagent round name... -
Page 157: Cal Screen - Graph Screen
Chapter 4 O O perator’s Manual CAL screen ― Graph screen Clicking Grap button,display of the calibration graph CALscreen CALscreen – Graph screen CAL button Display calibration screen. Graph button Display of the selected Item graph screen. Graphscreen Contents Item ▼... -
Page 158: Calibration Order
V1.00 Calibration order Order entry of calibration in this screen. CAL screen CAL button Display calibration screen. Specimen: ▼ Select Specimen. Chek the Item box for calibration order. The order status is shown by color in Blk.Odr. blue and Order dark blue. Save button Save the orderd Item in box. -
Page 159: Calib. Settings Screen
Chapter 4 O O perator’s Manual Calib. settings screen Setting of calibration ( sample position and repetition), and input standard sample concentration. CALscreen – Standardscreen CAL button Display calibration screen. Standard button Display standard screen. Screen and functions Contents Item Select Item name from the Item list. -
Page 160: Cal Data Screen
V1.00 Cal Data screen Display of the calibration result list. The calibration results list is shown by date. CALscreen – Cal Datascreen CAL button Display calibration screen. Cal Data button Display of Cal Data screen Cal Data Screen Contents Test date ▼... - Page 161 Chapter 4 O O perator’s Manual Cal Data screen details Select the Item in the list. Display of the details of calibration result and calculation result. Contents Date/Time Display of calibration date and time. Result Display of the calibration result (Absorbance) Calculation results Mean Display the value of Absorbance (Abs.) average.
-
Page 162: Ise Cal Screen - Order And Result Display
V1.00 ISE CAL screen - Order and result display Calibration order and result for the ISE Items. CAL screen CAL button Display calibration screen. Specimen Select Specimen. ▼ ISE Cal screen Display of the ISE calibration results. Contents Chek the ISE Item box for calibration order. -
Page 163: Ise Graph Screen
Chapter 4 O O perator’s Manual ISE graph screen Clicking of ISE graph button, ISE calibration graph is shown. CAL screen CAL screen – ISE graph screen CAL button Display calibration screen. ISE graph button Display of ISE calibration graph. ISE graph screen Contents Specimen... -
Page 164: Calibration Profile, Order All And Cancel Button
V1.00 Calibration profile, Order all and cancel button Perform the calibration order entry by profile, order all or cancel in one time. Please refer to Chapter 4. 4.9 Profile setting. The ISE Items can not order or cancel in one time. CAL screen CAL button Display calibration screen. -
Page 165: Qc Screen
Chapter 4 O O perator’s Manual 4.5 QC screen QC sample measurement setting screen (parameter setting, order entry, measurement and results) displays. QC is controlled by WESTGARD MULTI-RULECHART method. 4.5.1 QC screen contents Display Controls (Order QC, Current QC, QC History, and Control setting). Display each screen by clicking buttons.. -
Page 166: Order Qc Screen
V1.00 4.5.2 Order QC screen Display of order entry screen for QC sample. QC. screen―Order QC. Screen QC button Display QC screen Order QC button Order entry for QC sample. Display of profile information for QC sample. . Profile of QC sample is set in Control settings screen. Contents Round Display of reagent round. - Page 167 Chapter 4 O O perator’s Manual Order QC button : Order entry by clicking Order QC button after Item selection. Contents Clear Invalidate the input. Delete Delete the order entry of QC sample. Order Order entry of QC sample. Tray Icon : Confirmation of QC sample position.
-
Page 168: Current Qc Screen
V1.00 4.5.3 Current QC screen Display of QC results. The latest test results of selected QC samples are shown. QC. screen ―Current QC. screen QC button Display of QC screen Current QC button The latest test results of selected QC samples are shown. - Page 169 Chapter 4 O O perator’s Manual Print External printer Print latest results of QC sample. 4-63...
-
Page 170: Qc History Screen
V1.00 4.5.4 QC History screen Display of day to day QC results by graph and list. Display of the results which is approved in currect QC screen. Two QC sample results are shown in one screen. QC History (Graph) screen QC History (List) screen QC button Display QC screen... - Page 171 Chapter 4 O O perator’s Manual Contents Lot No. ▼ Display of QC sample lot number. Run date: From ▼ to ▼ Select the starting date and ending date. Display of Statistical calculation result Contents Test Test number display in the set range. Mean Mean display in the set range.
- Page 172 V1.00 Systematic error =The QC result shows partiality from the true value. It happens by improper standard sample and reagent, influence of interference substance and incomplete tuning of the analyzer. List Contents Date / Time Display of tested date and time. Result Display of QC sample result.
-
Page 173: Control Settings Screen Qc Sample Setting Screen
Chapter 4 O O perator’s Manual 4.5.5 Control settings screen QC sample setting screen QC sample setting screen display. Control name and setting of control. Setting of measurement position. QC parameter setting. (Mean SD Min Max) Setting of QC profile. Q.C.screen―Control settings screen QC button Display QC screen... - Page 174 V1.00 Setting of Item and parameters: Input Item and control value. Contents Item Display of Item name Profile Select the Item by clicking check box for QC profile entry. Mean Input mean value for result check. Input standard deviation. Minimum value is inputted automatically. Mean 2SD Maximum value is inputted automatically.
-
Page 175: Reagent Screen
Chapter 4 O O perator’s Manual 4.6 Reagent screen Display of setting for reagent bolltle and confirmation of bottle information. 1) Bottle info. Screen : Input reagent round, bottle information (tray), renewal bottle and expire date. 2) Reagent settings screen : Setting for reagent bottle (Reagent tray round,bottle position. - Page 176 V1.00 4.6.2 Bottle Info. screen Reagent bottle information screen Setting for reagent round, bolltle information (tray), renewal and expire date. Reagent screen―Bottle Info screen Reagent button : Display reagent screen. Bottle Info. button : “Bottle Info.” screen is shown. Screen and functions : Display of bottle information, reagent remain and expire date.
- Page 177 Chapter 4 O O perator’s Manual Contents Exp.Date Reagent expire date is shown. Exp. date(open) Reagent expire date after open is shown. Back color of over expired date changes to red. Reagent barcode information is shown after reading of reagent barcode. Lot No.
-
Page 178: Reagent Settings Screen Reagent Bottle Setting Screen
V1.00 4.6.3 Reagent settings screen Reagent bottle setting screen Reagent settings screen displays. Reagent screen Reagent setings screen Reagent button : Display reagent screen. Reagent Settings button : Display of reagent bottle setting screen. Reagent tray position screen : Display of reagent tray position and Item name Select tray position and register the Item from Item list. - Page 179 Chapter 4 O O perator’s Manual Contents Clear bottles Reagent bottle information is deleted. Clear round Reagent round information is deleted. Save Displayed reagent informations are registered. 4-73...
-
Page 180: Item Screen
V1.00 4.7 Item screen Item parameter information screen is shown. This screen is used for setting of analysis condition depending on each Item. Note: Item parameter is necessary for setting of each specimen by different Item No. 4.7.1 Item screen contents The following selection buttons are shown. -
Page 181: Optical Screen
Chapter 4 O O perator’s Manual 4.7.2 Optical screen Item parameter input screen. Item parameter needs to set for each specimen. Note: Item parameter is necessary for setting of each specimen by different Item No. Item screen―Optical screen Item button : Item screen is shown. - Page 182 V1.00 Contents Blank value Water○Reagent Select “Water” normally Default=Water Calibration Calibration setting Type Select calibration kind. Factor,Liner1,Liner2,Exponential,Spline,Polynomial, Logit1,Logit2 In case of Factor Input for Factor calibration. Factor Input “Factor value” Input calculculated value of light pass length 10 mm. Add – (minus) for decrease reaction. In case of Linear1 Display for Liner1 calibration.
- Page 183 Chapter 4 O O perator’s Manual Contents Input data process condition. Data Process Read Input reading range. Main start Input starting test point for main reading. Main end Input ending test point for main reading. Input starting test point for sub reading. Sub start Sub end Input ending test point for sub reading.
-
Page 184: Condition Setting Of Concentration Result Transforms To Qualitative Result
V1.00 Contents Reference Interval Input for reference interval. Male low high Input of lower and upper limit of male. Female low high Input of lower and upper limit of female. Panic Range Input panic range. Male low high Input of lower and upper limit of male. Female low high Input of lower and upper limit of female. - Page 185 Chapter 4 O O perator’s Manual Contents Auto rerun condition Set auto-rerun condition by Abs.. (Abs.) If select on, the result Abs. lower or higher than Abs. Lower/Higher limit proceed the auto-rerun automatically. ○ON Select dilution ratio. Lower /Higher Dil. 0.5, 6,10,20,30,40,50,60,70,80,90,100, The blank coloum proceeds auto-rerun without dilution.
-
Page 186: Ise Screen
V1.00 4.7.3 ISE screen ISE parameter screen displays. Item parameter needs to set for each specimen. Item screen―ISE screen Item button : Item screen is shown. ISE button : ISE screen is shown. Screen and functions : Input conditions. Contents No.78 Na No.79 K No.80 Cl Item No. - Page 187 Chapter 4 O O perator’s Manual Display and input contents Auto rerun range (conc.) ○ON OFF Select “ON” for setting of the auto-rerun. Following settings are essential for auto-rerun. Auto rerun switch set to ON in System screen. Set diluent bottle for dilution rerun in reagent screen. Auto rerun range Auto-rerun by using concentration.
-
Page 188: Hba1C Screen
V1.00 4.7.4 HbA1c screen HbA1c Item parameter screen displays. Select Item parameter based on the reagent specification. Item No.101 or No.102 is used for Latex method. Item No.106 is used for enzymatic method. HbA1c screen For Latex reagent Item No.101,102) Ratex method Item parameter screen displays. - Page 189 Chapter 4 O O perator’s Manual Contents Analysis Select analysis type END method or RATE method Type Select main wavelength Select from following Main wave Select sub wavelength wavelength both main and sub Sub wave wavelength. (340,380,405,450,480,505,546, 570,600,660,700,750,800nm) Correlation (Y=AX+B) Input correlation value.
- Page 190 V1.00 Contents Bottle(mL) Input reagent 1 and regant 2 bottle volumes. Reagent remain is calculated reffering inputtrd volume. Reagent1 36 Item tray Reagent2 24 Item tray Data Process Input data process condition. Read Input reading range. Main start Input starting test point for main reading. Main end Input ending test point for main reading.
- Page 191 Chapter 4 O O perator’s Manual Contents Minimum Abs. Input no prozone check conditions. Mean Input the minimum Abs. average value of main wavelength. Variate Input the minimum slope value of main wave length. The valiation is calculated by the least square method. No prozone check is done if the value below the input value.
-
Page 192: Hba1C Screen For Enzymatic Reagent Item No.106)
V1.00 HbA1c screen For enzymatic reagent Item No.106) Enzymatic method Item parameter screen displays. Item screen―HbA1c (Enzymatic method) screen Item button Item screen is shown. HbA1c button HbA1c input screen is shown. HbA1c screen Select Item No.106. Display of parameter input screen for HbA1c enzymatic method. - Page 193 Chapter 4 O O perator’s Manual Contents Calibration Calibration setting Type Select calibration kind. Factor,Liner1,Liner2,Exponential,Spline,Polynomial, Logit1,Logit2 In case of Factor Input for Factor calibration. Factor Input “Factor value” Input calculculated value of light pass length 10 mm. Add – (minus) for decrease reaction. In case of Input for Liner1 calibration.
- Page 194 V1.00 Contents Prozone check Prozone phenomenon check parameter input area, for immuno-reaction. First start/end Input starting and ending test points of basic test interval. (Input range 54 points) Second Start/End Input starting and ending test points of reference test interval. (Input range 34 54 points) Limit(%) Input comparison limit value(%).
- Page 195 Chapter 4 O O perator’s Manual Contents Reagent1 Input R1 volume 140 300μL(1μL step) Reagent2 Input R2 volume 20 260μL(1μL step) Bottle(mL) Input reagent 1 and regant 2 bottle volumes. Reagent remain is calculated reffering inputtrd volume. Reagent1 36 Item tray Reagent2 24Item tray Input for reference range.
-
Page 196: Calculation Screen
V1.00 4.7.5 Calculation Screen Calculation Item parameter screen displays. Item screen―Caluculation screen Item button : Item screen is shown. : Calculation input screen is shown. Caluculation button Screen and functions : Setting for Item and calculation formula. Contents Item No. Select Item number Selection No.81 95 Item name... - Page 197 Chapter 4 O O perator’s Manual Print button, Save button Print External printer) : Print out the Item screen to the external printer. CSV button : Save the displayed information to CSV file. Save button : Register the displayed information. 4-91...
-
Page 198: Other Serun Information, Detergent, Diluent, Lysing Solution Screen
V1.00 4.7.6 Other Serun information, detergent, diluent, lysing solution screen Serun information, detergent, diluent, lysing solution screen display. Parameters are set default. Item screen―Other screen Item button : Item screen is shown. Other button Display of Serum information(L-H-I), Deterent(wash 1-3), Diluent, Lyzing screen. Item parameters and Intem number. - Page 199 Chapter 4 O O perator’s Manual Contents Bottle(mL) Input bottle volums for serum information Item. Residual reagent is calculated by inputted volume. 36 Item tray 24 Item tray (option) Please change the setting if the result is shown Qualitative value difference between analyzer andvisual results.
- Page 200 V1.00 Lysing Lysing solution screen Input Lyzing bottle volume to using HbA1c measurement. Contents Bottle(mL) Lysing Residual reagent is calculated by inputted volume. 36 Item tray 24 Item tray (option) Print button, Save button Print External printer) : Print out the Item screen to the external printer. 4 4 -94...
-
Page 201: Maintenance
Chapter 4 O O perator’s Manual 4.8 Maintenance Maintenance information displays. 4.8.1 Maint.screen Mainte screen Maint. button Maintenance screen is shown. When the causor is pointed the button, maintenance information displays. When Auto-gain measurement displays gain values for details. Maintenance Item Buttons Contents All the filling lines are filled... - Page 202 V1.00 Contents Each probe washing is performed. Sample,Reagent 1 and 2 probes) Probe Wash 2 Set detergent tube at tray position 30 on the sample (For HbA1c Item tray. (Pour the detergent till 40 mm hight.) probe washing) Set the Wash1 bottle to the reagent tray. Wash time is about 9 minutes.
- Page 203 Chapter 4 O O perator’s Manual Contents Fill the ISE line by calibrator1. ISE Purge Perform after ISE maintenance when change the electrode. : The CRS measurement is used for the ISE correlation. ISE CRS button Please refer to Chapter 4, 4.8.2. ISE CRS screen. (ISE correlation measurement) 4-97...
-
Page 204: Ise Crs Screen (Ise Correlation Measurenment)
V1.00 4.8.2 ISE CRS screen (ISE correlation measurenment) The correlation measurement is recommended for ISE sample by usig CRS sample. CRS is a standard sample for ISE method. Maintenance screen CRS parameter screen Maint. button Maintenance screen is shown. ISE CRS button CRS parameter screen is shown. - Page 205 Chapter 4 O O perator’s Manual CRS Sanple positions are fixed in program. 31 = Low conc. sample 32 = Middle conc. sample 33 = High conc. sample. 5) Click Start button, and start the CRS measurement. CRS running is shown in state culoum. CRS success CRS failure is shown after measurement.
-
Page 206: Auto Gain Screen Information
V1.00 4.8.3 Auto gain screen information Autogain information screen displays. Please refer to Chapter 5 Auto gain. Maint. screen Maint. button Maintenance screen is shown. Auto Gain control button Ayto gain screen is shown. Auto gain screen and functions. (Setting is unnecessary) Contents [CH] Display of channel number. -
Page 207: System Screen
Chapter 4 O O perator’s Manual 4.9 System screen System setting screen displays for system parameter setting 4.9.1 System buttons System parameter is indicated as follows. System screen― Menu button System button Display of menu screen in System screen. System menu screen and functions. Buttons Contents Maintenance List... - Page 208 V1.00 Buttons Contents Display of operator level setting. Authority Settings Display when the login by service engineer level. Display of the version information on the system Version program. Display of Log off screen. Log off Use for change the operator level. 4 4 -102...
-
Page 209: Maintenance List Screen
Chapter 4 O O perator’s Manual 4.9.2 Maintenance List screen Maintenance list screen displays. Confirm the maintenance performaince. Maintenance List screen System button Display of menu screen in System screen. Maintenance List button Display of Maintenance List screen. Screen and functions Contents Update the performed date. - Page 210 V1.00 Contents (Last date) Display of the last performed date. Display of the next date. Chek the box, and update the date by clicking Save (Limit) button. If the date is not updated within period, the back color of related button is change to red. Save button Update the performed date and next operation date.
-
Page 211: Reaction Monitoy Screen
Chapter 4 O O perator’s Manual 4.9.3 Reaction monitoy screen All the Reaction Abs. of each reading point and reaction graph are displayed. The Abs. of Main, sub wavelength, main – sub wavelength and measurement result. The reaction screen can be open form the result screen. Reaction screen (reaction monitor screen) Reaction monitor save screen 4-105... - Page 212 V1.00 System button Display of menu buttons in System screen. Reaction button Display of Reaction monitor screen. Reaction monitor information Contents Main Wave length Used mainand sub wavelengths display / Sub wave length Cell Blank/ Cell Blank Cell blank for main and sub wavelengths display Main - Sub wave length (Display Abs.
-
Page 213: Profile Screen
Chapter 4 O O perator’s Manual 4.9.4 Profile screen Profile entry screen for patient and calibration sample displays. Profile screen System button System menu screen is shown. Profile button Profile screen is shown. Buttons and functions Contents Sample Select for patient or calibration. Select profile number and input profile name. - Page 214 V1.00 Contents Display of Item names which registerd in Item screen. Select registration Item. The back color chages to light after registration. Delete button : Delete the profile registration. Save button : Save the profile registration. 4 4 -108...
-
Page 215: Cell Blank Screen
Chapter 4 O O perator’s Manual 4.9.5 Cell Blank screen All reaction cell Abs. of warer blank are displayed for each wavelength. The Abs. value is updated by each measurement. Confirm the cell condition. Cell Blank screen System button Display of menu button in Systemscreen. Cell Blank button Display of Cell Checkscreen. - Page 216 V1.00 Contents Cell blank is abnormal.(Abs. is too light) Level 1 If the value below than level 1, back color is chaged to orange. Please perform the auto-gain. The time for exchange is coming soon. If the value above than level 2, back color is changed to Level 2 yellow.
-
Page 217: System Parameter Screen
Chapter 4 O O perator’s Manual 4.9.6 System Parameter screen Setting of measurement sequence, reagent tray and reagent remain. Parameters are set by the user requirement. Parameter screen System button Display of menu screen in System screen. Parameter button Display of Parameter screen. Screen and functions Contents Default... - Page 218 V1.00 Contents Default Selection for using sample position or sample barcode. Display of order screen and result screen Sample Mode Position change by selected mode. Select Position or by Barcode. System date setting. Date Selection from calendar Language selection. Language Japanese Select English or Japanese Selection for measurement timing of control...
- Page 219 Chapter 4 O O perator’s Manual Contents Default Display of reaction cell position number for next measurement Initialize cell No. start. (Start cell No.) Input reaction cell position number. Start reaction cell position can be set after ready. Setting of warning level for reagent remaining. Alarm: Input alarm level of test count.
- Page 220 V1.00 Display of LIS communicartion Refer to bi-directional communication specification. Select the LIS communication. Select ON or OFF.(Default OFF) Host LAN settings Setting for LANcommunication condition. HOST IPv4 Address Setting of Host IP address (IPv4). Test orders Test results Patien information Test reults inquiry Test orders inquiry Analysis name...
-
Page 221: Samlpe Confirmation Screen
Chapter 4 O O perator’s Manual 4.9.7 Samlpe confirmation screen Popup screen displays after clicking Start button. Start the mensurement after sample existing. Display when sample confirmation is On in system screen.the The screen changes depending on the LIS setting and sample probe wash setting. - Page 222 V1.00 Contents In case of the LIS communication setting is ON. Request the sample barcode information. If the barcode reading is failed or error occurred, Request correct manually first. Then click Request button for corrected information. OK button : Start the measurement. 4 4 -116...
-
Page 223: Wash Settings Screen Carry Over Avoidance
Chapter 4 O O perator’s Manual 4.9.8 Wash Settings screen Carry over avoidance Setting screen of wash configuration screen dispalys. Setting for Sampl probe (between Item and specimen), reagent probe and reaction cell. Wash Settings screen System button Display of System menu screen. Wash Configuration button Display of Wash Configuration screen. - Page 224 V1.00 Contents Select of cleaning solution (Wash1-3) or water to avoid Detergent carryover. Count Select washing time (1-10). Setting of the selected line is deleted. Delete a line Delete All All the settings are deleted. When select the [Water], detergent bottle setting is unnecessary. Cell Wash screen Contents Select of carryover effecting test Item.
-
Page 225: Reagent Barcode Screen
Chapter 4 O O perator’s Manual 4.9.9 Reagent Barcode screen Reagent barcode is set in this screen. ReagentBarcode is displayed by the user level. Input the reagent barcode format and maker code. Please refer to reagent barcode specification. Reagent Barcode screen System button Display of System menu screen. -
Page 226: Manual Operation Screen
V1.00 4.9.10 Manual Operation screen Unit movement operates manually. Confirm the analyzer condition. Manual Operation screen System button Display of System menu screen. Manual Function button Display of Manual Function screen. Unit Display of unit name for manual function. Unit Unit name Movements (abbreviations) - Page 227 Chapter 4 O O perator’s Manual Unit Unit name Movements (abbreviations) Reagent tray Rotation of reagent tray Rotation of reagent probe Reagent probe Up/Down movement of reagent probe Aspiration/Dispensation movement of Reagent pump reagent pump Reaction tray Rotation of reaction tray Mixing unit Up/Down movement of mixing unit Mixing pump...
-
Page 228: Stf
V1.00 STF screen Functions Movements INIT To move to the home position. OFFSET ADJUST To input the angle to move by value, and to select the direction of CW/CCW rotation. CW 1PITCH (OUT) To move the outside cups clockwise by one pitch. To move the outside cups counter-clockwise by one CCW 1PITCH (OUT) pitch. -
Page 229: Stm
Chapter 4 O O perator’s Manual STM screen Functions Movements ROTATE INIT To move to the home position. OFFSET ROTATE ADJUST To input the angle to move by value, and to select the direction of CW/CCW rotation. ROTATE REACTION CELL To move the reaction cell position. - Page 230 V1.00 Movements To move the down position to the dilution sample DOWN Dilution cell aspiration position at reaction cell. DOWN CUP Level) To move the down position of cup by level sensor. To move the down position of primary tube by level DOWN Primary tube Level) sensor.
- Page 231 Chapter 4 O O perator’s Manual SP screen Functions Movements The washing side of pump; To move to the home WASH INIT position The washing side of pump; Aspiration movement WASH PULL (1000uL) (1000uL). The washing side of pump; Dispensation movement WASH PUSH (1000uL) (1000uL).
-
Page 232: Rgt
V1.00 RGT screen Functions Movements To move to the home position. INIT OFFSET ADJUST To input the angle to move by value, and to select the direction of CW/CCW rotation. To move the clockwise by one bottle. CW 1PITCH To move the counter clockwise by one bottle CCW 1PITCH POSITION Selected bottle to move the aspiration position. -
Page 233: Rtm
Chapter 4 O O perator’s Manual RTM screen Functions Movements ROTATE INIT To move to the home position.( on the reaction cell) ROTATE OFFSET ROTATE ADJUST To input the angle to move by value, and to select the direction of CW/CCW rotation. R1 ROTATE REACTION To move R1 probe to the reaction cell. - Page 234 V1.00 Movements R1 DOWN To move the down position of R1 probe by level BOTTLE(LEVEL) sensor. To move the down position R2 probe to the washing R2 DOWN WASH trough. R2 DOWN REACTION To move the down position R2 probe to the reaction CELL cell position.
- Page 235 Chapter 4 O O perator’s Manual RP screen Functions Movements The washing side of pump; To move to the home WASH INIT position The washing side of pump; Aspiration movement WASH PULL (1000uL) (1000uL). The washing side of pump; Dispensation movement WASH PUSH (1000uL) (1000uL).
-
Page 236: Rct
V1.00 RCT screen Functions Movements INIT To move to the home position. OFFSET N Pitch To move by inputted pitch. ADJUST To input the angle to move by value, and to select the direction of CW/CCW rotation. CW 1/2 PITCH To move clockwise by 1/2 pitch. - Page 237 Chapter 4 O O perator’s Manual MU screen Functions Movements INIT To move to the home position. ADJUST To input the distance to move by value,and select the direction of Up or Down. Up by setting pulse from the reaction cell. DOWN Down by setting pulse from the reaction cell.
- Page 238 V1.00 MP screen Functions Movements MP1INIT MP1 To move to the home position MP1 CW To move to one cycle turn (Stops after one cycle turn). MP1 Stop Stop the turn. MP2 INIT MP2 To move to the home position MP2 CW To move to one cycle turn (Stops after one cycle turn).
-
Page 239: Cws
Chapter 4 O O perator’s Manual CWS screen Functions Movements INIT To move to the home position ADJUST To input the distance to move by value and select the direction of Up or Down.. DOWN BOTTOM To move the CWS to bottom position POSITION UP DISCHARGE To move the CWS to dispensation position... -
Page 240: Cwp
V1.00 CWP screen Function Movement One Cycle Aspiration and dispensation Each sensor condition shows ON or OFF. Perform the function by clicking button. Movements Cancel Safety Select when operating with “NO Safety”. Perform selected function. 4 4 -134... -
Page 241: Pwp
Chapter 4 O O perator’s Manual PWP screen Functions Movements INIT To move to the home position. PULL (1000 uL) Aspiration movement (1000 uL) PUSH (1000 uL) Dispensation movement(1000 uL) SV4 ON Electromagnetic valve EV-4 ON SV4 OFF Electromagnetic valve EV-4 OFF Each sensor condition shows ON or OFF. - Page 242 V1.00 DP screen Functions Movements DP1 ON DP1 movement ON DP1 OFF DP1 movement OFF DP2 ON DP2 movement ON DP2 OFF DP2 movement OFF SV5 ON Electromagnetic valve EV-5 ON SV5 OFF Electromagnetic valve EV-5 OFF SV6 ON Electromagnetic valve EV-6 ON SV6 OFF Electromagnetic valve EV-6 OFF Each sensor condition shows ON or OFF.
-
Page 243: Alarm
Chapter 4 O O perator’s Manual Alarm Alarm screen Display of the error condition. (exp. Tank error) ON means error occurred. 4-137... - Page 244 V1.00 Level Level screen Display of the liqud level conditions for sample probe, reagent1 and reagent 2 probes. Contents Sample Start Start data reading. Stop Stop data reading. Sampling Rate( s) Select interval of liquid level information. Set count Select repitation count ( in case 0).
-
Page 245: Ise
Chapter 4 O O perator’s Manual When select CRS Start, Popup screen appears. ISE screen Functions Movement and display contents Purge Cal-1 is sent to the sample pot and electrodeline. Maint The liquid is discharged from the electrode line. Wash to clean up the ISE unit. ISE Wash Set a sample cup with ISE wash solution brfore start. - Page 246 V1.00 Movement Perform selected function 4 4 -140...
-
Page 247: Temperature Screen
Chapter 4 O O perator’s Manual 4.9.11 Temperature screen RCT and WSH temperature screen are shown. When intallation set up or changes the PC, input the temperature values to sensor agjust by attached parameter sheet. Temperature screen System button Display of System menuscreen Temperature button Display of Temperature screen. - Page 248 V1.00 PID Factor is shown by user level. Contents PID Factor Display of the controls. Kp 12,Ki 12 Kd 1000,Ti 5,Td 2 Display of the RCT temperature and humidity. Display of WSH (Washing water of pre-heater) temperature graph. . Temperature screen is shown by user level. Contents Temp.
-
Page 249: Initialization Screen
Chapter 4 O O perator’s Manual 4.9.12 Initialization screen Input of offset parameter screen is shown. Initialyze screen is shown by the user level. Initializetion screen System button Display of System menu screen. Initializetion button Display of Initializetion screen. Display of offset values for each unit. 4-143... -
Page 250: Authority Settings Screen
V1.00 4.9.13 Authority Settings screen Setting of operation level for each user. The screen is shown after Login by sevice engineer level. Authority Settings screen System button Display of System menu screen. Authority Settings button Display of Authority settings screen Set the operation level for each user. -
Page 251: Version Screen
Chapter 4 O O perator’s Manual 4.9.14 Version screen Version information of system program is shown. Version Information screen System butto Display of System menu screen. Version button Display of Version Information screen. Display of pop-up screen Version Information Contents User Interface Display of system program version number on the PC. -
Page 252: Log In Screen
V1.00 4.9.15 Log in screen The use level changing screen is shown. Log in screen System button Display of System menu screen. Log off button Log in screen is popup. Popup screen Log off screen. Input and display contents User Name Inputthe user level name. -
Page 253: Exit Screen
Chapter 4 O O perator’s Manual 4.10 Exit screen Shut down of system program and automatic maintenance setting screen is shown. 4.10.1 Exit button Main screen Exit screen Exit button Display of Exit screen. Display of pop-up screen Buttons and functions Contents Display of the setting screen for automatic start up and Setup schedule start... -
Page 254: Setup Schedule Start Screen
V1.00 4.10.2 Setup schedule start screen Auto-start, shut down time and automatic mentenance setting screen displays. Setup schedule start screen Exit button Display of Exit screen (End of Application). Display of pop-up screen Exit screen Select the Setup schedule start. Setup schedule buttons and functions. - Page 255 Chapter 4 O O perator’s Manual Contents Schedule Set the auto-start and maintenance procedure after start Sunday Saturday Set the maintenance for each week day. ON/OFF Select on, if the analyzer is st auto-start and maintenance. Start time Select the maintenance start time. End time Display of the maintenance end time automatically.
- Page 256 Chapter 5 O O perator’s Manual Chapter 5 Maintenance S S afety caution ......................... 2 P P reparation of maintenance list and update the date..........2 M M aintenance list ......................3 5.3.1 Periodic check and Periodic exchange ..............3 M M aintenance procedure ....................
- Page 257 V1.00 Safety caution Please follow the warning and safety caution which informed in “Chapter Preface” of operation manual. When do maintenance operation, wear protective globes, mask and glasses to avoid infection. Preparation of maintenance list and update the date. Please prepare “Maintenance list” for analyzer maintenance and parts exchange. Manage the list by updating the date.
- Page 258 Chapter 5 O O perator’s Manual Maintenance list 5.3.1 Periodic check and Periodic exchange Periodic check list (for customer) Contents Cleaning of sample probe Cleaning of reagent probe Check of the SP water leak Check of the RP water leak Check of the PWP water leak Check of the water supply tank volume Check of the volume and purity of pure...
-
Page 259: M M Aintenance Procedure
V1.00 Maintenance procedure 5.4.1 Sample probe check and cleaning Confirmation of sample probe bending. Remove the dirt (protein) of probe tip. Inspection period Everyday Necessary parts Gloves, KIMWIPE, DI water, Nylon wire 1) Turn off the PC and analyzer system power switch before starting the maintenance operation. -
Page 260: Reagent Probe Check And Cleaning
Chapter 5 O O perator’s Manual 5.4.2 Reagent probe check and cleaning Confirmation of reagent probe bending. Remove the dirt (protein) of probe tip. Inspection period Everyday Necessary parts Gloves, KIMWIPE, DI water 1) Turn off PC and the analyzer system power switch before starting the maintenance operation. -
Page 261: Leakage Of Pumps (Sp, Rp, Pwp)
V1.00 5.4.3 Leakage of pumps (SP, RP, PWP) Confirmation of water leakage. Inspection period Everyday Necessary parts None 5.4.4 Confirmation of the water supply tank volume Check the water tank volume. Inspection period Everyday Necessary parts None 5.4.5 Confirmation of the water purification system and purity of pure water machine Check the water supply system. -
Page 262: Drainage Reservoir
Chapter 5 O O perator’s Manual 5.4.7 Drainage reservoir Confirmation of drainage reservoir volume. Clean up the dirt of float sensor which can’t detect the liquid level correctly. Inspection period Everyday In case of confirmation: No Necessary parts In case of waste: Gloves, KIMWIPE 1) Loosing cap of the reservoir and pull up the float switch unit. -
Page 263: Cleaning Of Cooling Filter
V1.00 5 5 .4.8 Cleaning and confirmation of the strain on the cell cover Clean up the cell cover if necessary. Inspection period Everyday Necessary parts Gloves, KIMWIPE, DI water 5.4.9 Cleaning of cooling filter Clean up the reagent tray cooling filter. Inspection period If necessary Necessary parts... -
Page 264: Special Wash
Chapter 5 O O perator’s Manual 5.4.10 Special wash The dirt of reaction cells, sample probe and reagent probes are influenced to the measurement results. Clean up by using special wash program. Use 6% diluted solution of detergent. Inspection period If necessary. -
Page 265: Cleaning Of Ise Sample Pot
V1.00 5 5 .4.11 Cleaning of ISE sample pot Clean up the sample pot to avoiding the clot for ISE sample line. Inspection period Everyday Necessary parts Gloves, Cotton swab (narrow type), DI water 1) Open the ISE door on the right panel of the system at right angles to the system for ISE storage facing front. -
Page 266: Ise Wash (Cleaning Of Ise Sample Line)
Chapter 5 O O perator’s Manual 5.4.12 ISE Wash (Cleaning of ISE sample line) Clean up the ISE sample line. After ISE wash, calibration is necessary before starting ISE test. Inspection period Everyday Gloves, Necessary parts Cleaning Solution ( 25ml ) (Code 20-27-0479F) As necessary use ISE Cleaner 1% (25ml) (Code 50-27-0781) Wash time About 6 minutes... -
Page 267: Reaction Cell Exchange
V1.00 5.4.13 Reaction cell exchange The dirty cells are influenced to the measurement results. Please exchange the reaction cells when the cell condition of back color shows red in cell check screen. Change all the 60 cells at once. Exchange interval If necessary Gloves, Hexagonal wrench (2.5mm) Necessary parts... -
Page 268: Exchange Of Lamp
Chapter 5 O O perator’s Manual 5.4.14 Exchange of lamp The lamp deterioration is influenced to the measurement results. Please exchange the lamp if the life time is over (about 1200 hours). After finishing the lamp exchange, adjust the gain and update the remaining time. - Page 269 V1.00 5) Turn the lamp holding plate counter clockwise, and remove it. 6) Pull up the lamp from lamp hol ding ring by pressing both side fixing pins on the white connecto 7) Holding the wiring by fingers, pull up the lamp. Note Don’t touch the lamp which rises high temperature.
-
Page 270: Auto Gain (Gain Adjustment)
Chapter 5 O O perator’s Manual 5.4.15 Auto gain (Gain adjustment) When finishing the lamp exchange, perform to adjust the gain (Adjustment of the intensity of light). Inspection period After lamp exchange Necessary parts Gloves, Hexagonal wrench (2.5mm) Note Please perform the gain adjustment with stable lamp. 1) Turn on the PC and system power switch and wait for 20 –... -
Page 271: Exchange Of Reagent Probe
V1.00 5 5 .4.16 Exchange of sample probe Please exchange the sample probe to keeping the accuracy and precision when required. Exchange interval If necessary Gloves, Necessary parts Sample probe (Code 60-02-0020) 5.4.17 Exchange of reagent probe Please exchange the reagent probe to keeping the accuracy and precision when required. -
Page 272: Exchange Of Water Filter
Chapter 5 O O perator’s Manual 5.4.18 Exchange of Water filter Please exchange the water filter to avoiding the influence of measurement results. Exchange interval Every 6 months. Gloves, KIMWIPE, Necessary parts Water filter (Code SP2058) 1) Loosen the cap of the water reservoir and pull up the filter and the float switch unit. -
Page 273: Exchange Of Calibrator 1 (Cal-1)
V1.00 5.4.19 Exchange of Calibrator 1 (Cal-1) The ISE unit is filling the sample line and electrodes by Calibrator 1 automatically. Please change the Calibrator 1 to avoiding the dryness. Exchange interval One month after open or when necessary Gloves, Necessary parts Calibrator 1 F( 420ml ) (Code 20-27-0477F) 1) Clicking Maint. -
Page 274: Exchange Of Electrode
Chapter 5 O O perator’s Manual 5.4.20 Exchange of electrode The deterioration of electrode reduces the slope value. The slope error or drift error occurs. Please change the electrode if the error can’t solved after ISE maintenance. Exchange interval If necessary Gloves, Na Electrode F (Code 20-27-0474F) Necessary parts... - Page 275 V1.00 5 5 .4.21 Exchange of roller pump tube The deterioration of roller pump tube influences the liquid flow. Please change it periodically. Please exchange the pump tubes both calibrator and waste simultaneously. Exchange interval Every 3 months Gloves, Screw driver Necessary parts Roller Pump Tube B (2 pieces of tubes) (Code 20-30-0610) Roller Pump Tube Grease (Code 20-30-0581)
-
Page 276: Exchange Of Pinch Valve (Pv) Tube
Chapter 5 O O perator’s Manual 5.4.22 Exchange of pinch valve (PV) tube The deterioration of pinch valve tube influences the liquid flow. Please change it periodically. Please exchange the PV tubes both front and rear side simultaneously. Exchange interval Every one year Gloves, Screw driver Necessary parts... - Page 277 V1.00 11) Assemble the front PV tube The front tube is connecting the tube. 12) Insert the fitting. 13) Hang Cal-1 pack on the hook. 14) Perform ISE Purge order and refill the line. 15) Repeat ISE Purge order till no bubble comes out from the tube and the liquid is sucked up.
-
Page 278: Removal Of Bubbles At Electrode
Chapter 5 O O perator’s Manual 5.4.23 Removal of bubbles at electrode The ISE unit can’t detect the ions if the electrode has a bubble inside. When exchange the electrode, removal of bubbles is essential. The explanation is given for Ref electrode, but keep other electrodes likewise. Inspection period When exchange the electrode, if necessary Necessary parts... -
Page 279: Storage Of Electrodes
V1.00 5.4.24 Storage of electrodes In case of turning off the power of ISE unit more than four days, keep the electrodes as follows. The explanation is given for Ref electrode, but keep other electrodes likewise. Inspection period When storage the electrode Gloves, Syringe (with tip) Necessary parts Calibrator A (20mL) + Calibrator B (20mL) set... - Page 280 V1.00 2016/03/01 Consumables List Code No. Parts Name Qty. Memo 20-22-0391 Sample Cup 1000 pieces 60-00-0001 Halogen lamp SP2058 Water filter 5 Pieces 23-07-0055 Cuvette -8U 60 Pieces 23-30-0676 Drying Nozzle Tip 2 Pieces Washing Solution Alkaline 500ML X5 SP2208 (Fast Detergent 1) Pieces Washing Solution Acid...
- Page 282 Operator’s Manual, Ver1.00 Published: May 10, 2016 Printed in Japan...
Need help?
Do you have a question about the BIOLIS 30I and is the answer not in the manual?
Questions and answers