Roadstar CLR-2615 User Manual
Hide thumbs
Also See for CLR-2615:
- Instruction manual (27 pages) ,
- Instruction manual (20 pages) ,
- User manual (35 pages)

Subscribe to Our Youtube Channel
Related Manuals for Roadstar CLR-2615


Summary of Contents for Roadstar CLR-2615
- Page 1 CLR-2615 User manual Bedienungsanleitung Manuel d’instructions Manuale d’istruzioni Manual de instrucciones Manual de instruções Gebruiksaanwijzing www.roadstar.com...
- Page 2 étant soumis aux nombreaux tests assemblato sotto lo stretto controllo di qualità ROADSTAR. Nous espérons ROADSTAR. Vi ringraziamo di aver acquistato appareil vous donnera entière satisfaction. un nostro prodotto per il vostro piacere Avant de vous adonner à ces activités, d’ascolto. Prima...
- Page 3 CLR-2615...
-
Page 4: Power Supply
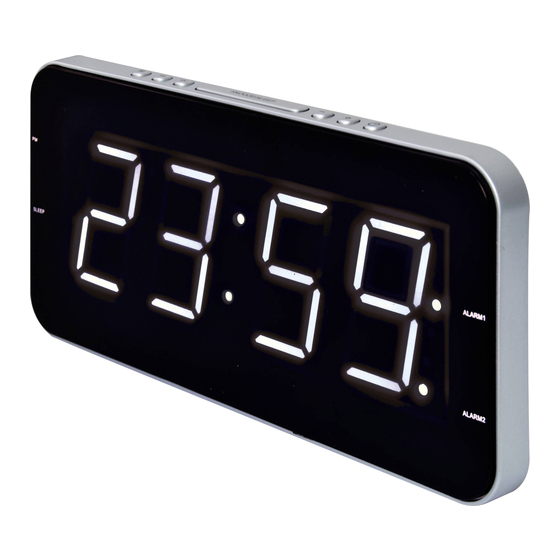
English LOCATION OF CONTROLS 1. M BUTTON 2. TUNING DOWN 3. TUNING UP 4. SNOOZE/SLEEP BUTTON 5. VOLUME - 6. VOLUME + 7. CLOCK - RADIO ON/OFF BUTTON 8. PM LED 9. LED DISPLAY 10.ALARM 1 LED 11.ALARM 2 LED 12.LOUDSPEAKER 13.ANTENNA 14.BATTERY FOR MEMORY BACK-UP... - Page 5 English and alarm settings. When power is restored the clock will display the correct time and alarm settings, and no adjustment is necessary. DISPLAY Normally the LED DISPLAY indicates the TIME. Press M BUTTON (1) to show DAY OF THE WEEK. ...
-
Page 6: Listening To The Radio
English (5) (ALARM 1) or VOLUME + (6) (ALARM 2) until you see bb (buzzer), radio or OFF. LISTENING TO THE RADIO 1. Press shortly CLOCK/RADIO ON/OFF BUTTON (7) to switch the Radio (FM/AM) ON manually. 2. Press 3 seconds the TUNING DOWN (2) OR TUNING UP (3) button to start the Radio auto-tuning function (the unit will search automatically the strongest stations). -
Page 7: Dimmer Function
English wires, pins, or other objects into the venlilation holes or openings on the clock radio. DIMMER FUNCTION Press the SNOOZE/SLEEP BUTTON (4) to adjust the display intensity. AC POWER (EXTERNAL AC ADAPTER) For your own safety read following instructions carefully before attempting to connect this clock radio to the mains with external power transformer. -
Page 8: Lage Der Bedienungselemente
Deutsch LAGE DER BEDIENUNGSELEMENTE 1. M-TASTE 2. TUNING-DOWN 3. TUNING-UP 4. SNOOZE/SLEEP-TASTE 5. LAUTSTÄRKEREGLER - 6. LAUTSTÄRKEREGLER + 7. RADIO EIN/AUS-UHR-TASTE 8. PM LED 9. LED-ANZEIGE 10.ALARM 1-LED 11.ALARM 2-LED 12.LAUTSPRECHER 13.ANTENNE 14.BATTERIESPEICHERFACH 15.STROMWANDLER-EINGANG SPANNUNGSVERSORGUNG Dieses Gerät funktioniert mit Netzstrom-Adapter von 230V ~ 50Hz / 9V mit externer netz-adapter. - Page 9 Deutsch ANZEIGE Normalerweise wird die LED-Anzeige zeigt das Uhrzeit. 1. Drücken Sie M-TASTE (1) um zeigen Wochentag. 2. Drücken Sie TUNING-DOWN (2) um zeigen Tag, Monat. 3. Drücken Sie TUNING-UP (3) um zeigen Jahr. LED-ANZEIGEEINSTELLEN 1. Im normalen Anzeigemodus, um die Zeit einzustellen, gedrückt halten M -TASTE (1), bis die Hour blinkt.
- Page 10 Deutsch auszuwählen. 4. Wiederholen Sie den Vorgang, um "ALARM 2" einzustellen. 5. Drücken Sie erneut RADIO EIN/AUS-UHR-TASTE (7), um den Vorgang abzuschließen. 6. Um den BUZZER oder RADIO Alarm-Modus eingestellt, Presse sequentiell VOLUME - (5) (ALARM 1) oder VOLUME + (6) (ALARM 2) bis Sie sehen bb (buzzer), radio oder OFF.
-
Page 11: Wartung Und Pflege
Deutsch WARTUNG UND PFLEGE Um Bränden oder elektrischen Schlägen vorzubeugen, setzen Sie dieses Weckradio nicht Regen oder Feuchtigkeit aus. Dieses Weckradio sollte nicht dem direkten Sonnenlicht, sehr hohen oder sehr niedrigen Temperaturen, Feuchtigkeit oder Schwingungen ausgesetzt werden. Stellen Sie es nicht in einer staubigen Umgebung auf. Verwenden Sie keine scharfen Reinigungsmittel, Benzin, Verdünner oder andere Lösungsmittel, um das Gehäuse des Weckradios zu reinigen. -
Page 12: Sources D'alimentation
Français POSITIONNEMENT DES COMMANDES 1. TOUCHE M 2. SINTONIE - 3. SINTONIE + 4. TOUCHE SNOOZE/SLEEP 5. TOUCHE VOLUME - 6. TOUCHE VOLUME+ 7. TOUCHE HORLOGE-RADIO ON / OFF 8. PM LED 9. AFFICHAGE LED 10.ALARME 1-LED 11.ALARME 2-LED 12.HAUT-PARLEUR 13.ANTENNE 14.COMPARTIMENTE DE BATTERIE MEMOIRE 15.ENTRÉETRANSFORMATEUR D’ALIMENTATION... - Page 13 Français Quand l’alimentation électrique est rétablie, l’horloge affichera l’horaire correct et les programmations du réveil. Aucun réglage n’est nécessaire. AFFICHEUR Normalement l'afficheur LED montre le l'horaire avec le mois, la date le jour et l'année. Pour montrer le jour de la semaine, presser TOUCHE M (1). ...
-
Page 14: Ecoute De La Radio
Français semaine. 4. Pour régler l'Alarme Radio ou Sonnerie presser TOUCHE VOLUME - (5) (ALARM 1) ou TOUCHE VOLUME + (6) (ALARM 2) pour régler entre bb (Buzzer) ou Radio FM ou OFF. ECOUTE DE LA RADIO 1. Appuyez brièvement sur la touche TOUCHE HORLOGE-RADIO(FM/ AM) ON/OFF (7) pour allumer la radio. -
Page 15: Entretien
Français sur le bouton pendant trois secondes TOUCHE HORLOGE-RADIO ON/ OFF (7). ENTRETIEN Pour éviter tout risque de décharge électrique, n'exposer ce radio-réveil ni à la pluie, ni à l'humidité. L'appareil ne devrait être exposé ni dans un endroit en plein soleil, ni à des températures très élévées ou très basses, ni à... - Page 16 Italiano LOCALIZZAZIONE DEI CONTROLLI 1. TASTO M 2. SINTONIA GIU 3. SINTONIA SU 4. TASTO SNOOZE/SLEEP 5. TASTO VOLUME - 6. TASTO VOLUME + 7. TASTO OROLOGIO/RADIO ON-OFF 8. LED PM 9. DISPLAY LED 10.LED ALLARME 1 11.LED ALLARME 2 12.ALTOPARLANTE 13.ANTENNA 14.COMPARTIMENTO BATTERIE MEMORIA...
- Page 17 Italiano riserva continuerà a mantenere le impostazione dell’orario e della sveglia. Quando verrà ripristinata la corrente elettrica, l’orologio visualizzerà l’orario corretto e l’impostazione della sveglia, e non sarà necessario effettuare ulteriori impostazioni. DISPLAY Normalmente lo schermo indica l’ora. Premere TASTO M (1) per visualizzare il giorno della settimana. ...
-
Page 18: Ascolto Della Radio
Italiano minuti. 3. Per impostare i giorni, premere il tasto TASTO OROLOGIO/RADIO ON-OFF (7) e le cifre 1-5 lampeggeranno. Premere SINTONIA GIU (2)/SINTONIA SU (3) per regolare tra 1-5 (Lunedi a Venerdì), 1-7 (tutta la settimana), 6-7 (Sabato e Domenica) o 1-1 un giorno alla settimana. 4. -
Page 19: Cura E Manutenzione
Italiano prescelta. 4. Per spegnere la radio in qualsiasi momento durante il periodo sleep, premere per tre secondi TASTO OROLOGIO/RADIO ON-OFF (7). CURA E MANUTENZIONE Per prevenire il rischio d'incendio o di scossa elettrica, non lasciare che questa radiosveglia venga esposta alla pioggia o all'umidità. Questa radiosveglia non dovrà... - Page 20 Este aparato funciona con una fuente de alimentación de 230V-50Hz a través del transformador incluido.. Conectar el cable alimentación DC 9V a la toma de corriente de CLR-2615 y enchufe el transformador a la toma de corriente CA doméstica. Asegurarse de que el voltaje sea igual a aquel indicado en la placa de los datos característicos colocada en la parte...
- Page 21 Español PANTALLA Normalmente, la pantalla LED indica la hora. Presione BOTÓN M (1) para mostrar el día de la semana. Presione BOTÓN SINTONIZACIÓNARRIBA (2) para mostrar el día y el mes. Presione BOTÓN SINTONIZACIÓNABAJO (3) para mostrar el año. ...
-
Page 22: Escuchar La Radio
Español (2)/BOTÓN SINTONIZACIÓNABAJO (3) para ajustar entre 1 a 5 (de lunes a viernes), 1-7 (toda la semana), 6-7 (sábado y domingo) o de 1-1 de un día de semana. 4. Repetición para alarma 2. 5. Presione BOTÓN RELOJ / RADIO ON / OFF (7) para concluir el ajuste. 6. - Page 23 Español 4. Para apagar la radio en cualquier momento durante el modo de SLEEP, pulse BOTÓN RELOJ / RADIO ON / OFF (7). FUNCIÓN ILUMINACIÓN PANTALLA Pulse BOTÓN SNOOZE/SLEEP (4) para variar la intensidad de la pantalla. CUIDADO Y MANUTENCIÓN Para prevenir el riesgo de incendio o de descarga eléctrica, no dejar que este radio despertador se exponga a la lluvia o a la humedad.
-
Page 24: Localização Dos Controles
Português LOCALIZAÇÃO DOS CONTROLES 1. BOTÃO M 2. BOTÃO TUNE - 3. BOTÃO TUNE + 4. BOTÃO SNOOZE/SLEEP 5. BOTÃO VOLUME - 6. BOTÃO VOLUME + 7. INTERRUPTOR RELÓGIO E RADIO ON / OFF 8. LED PM 9. ESPECTADOR LED 10.ALARME 1 LED 11.ALARME 2 LED 12.ALTO-FALANTE... - Page 25 Português Imprensa o botão BOTÃO TUNE + (3) para mostrar o ano. AJUSTE DA TELA LED 1. No modo normal de exibição, para definir o tempo, mantenha pressionado BOTÃO M (1) até que os dígitos da hora pisca. Prima BOTÃO TUNE - (2)/BOTÃO TUNE + (3) para ajustar os dígitos da hora.
-
Page 26: Função Snooze
Português 5. Pressione INTERRUPTOR RELÓGIO/RADIO ON/OFF (7) para concluir a configuração. 6. Para definir a campainha ou o Modo Alarme Rádio, imprensa BOTÃO VOLUME - (5) (alarme1) ou BOTÃO VOLUME + (6) (alarme2) para ajustar entre bb (campainha) ou frequência ou OFF. FUNÇÃO RÁDIO 1. - Page 27 Português espera, pressione o botão para três INTERRUPTOR RELÓGIO/ RADIO ON/OFF (7). CUIDADOS E MANUTENÇÃO Para prevenir choques ou fogo, não posicionar o aparelho em lugares úmidos com chuva, com a luz do sól, altas temperaturas e poeira. Não usar produtos químicos, para a limpeza. Somente um pano macio e um produto não abrasivo.
- Page 28 Nederlands PLAATS VAN DE CONTROLES 1. M BUTTON 2. TUNING DOWN 3. TUNING UP 4. SNOOZE / SLEEP KNOP 5. VOLUME CONTROL - 6. VOLUME CONTROL + 7. RADIO ON / OFF KLOKTOETS 8. PM LED 9. LED-DISPLAY 10.ALARM 1 LED 11.ALARM 2 LED 12.SPEAKER 13.ANTENNA...
- Page 29 Nederlands DISPLAY Normaal gesproken zal de LED-display van de tijd te laten zien. Druk op M-toets (1) om de week te laten zien. Druk op TUNING DOWN (2) om de dag te laten zien, maand. Druk op TUNING UP (3) jaar te laten zien. ...
- Page 30 Nederlands zondag) of 1-1 een dag selecteer een week. 4. Herhaal het proces om '2 ALARM "aan te passen. 5. Druk nogmaals op RADIO ON / OFF KLOK-toets (7), om het proces te voltooien. 6. Om BUZZER of RADIO alarmmodus set, drukt u achtereenvolgens VOLUME - (5) (ALARM 1) of VOLUME + (6) (ALARM 2) om te kijken naar bb (zoemer), radio of UIT.
-
Page 31: Zorg En Onderhoud
Nederlands automatisch uit na de geselecteerde sleep timer. 4. Naar de radio op elk moment uit te schakelen tijdens de slaap, drukt u op de RADIO ON / OFF KLOK-toets (7). ZORG EN ONDERHOUD Om brand of een elektrische schok te voorkomen, mag deze klokradio aan regen of vocht worden blootgesteld. - Page 32 The full text of the EU declaration of conformity is available at the following internet address: http://roadstar.com/images/ce/CLR- 2615.pdf. VER.2 Roadstar Management SA, via Passeggiata 7 CH 6883 Novazzano (Switzerland) is a registered Trademark of Roadstar S.A. - Switzerland. All rights reserved.
Need help?
Do you have a question about the CLR-2615 and is the answer not in the manual?
Questions and answers