Table of Contents
Advertisement
Quick Links
Advertisement
Table of Contents

Summary of Contents for General Music S2 Turbo
- Page 2 EXPLANATION OF GRAPHIC SYMBOLS: The lightning flash with arrowhead symbol, CAUTION within an equilateral triangle, is intended to RISK OF ELECTRIC SHOCK alert the user to the presence of uninsulated DO NOT OPEN “dangerous voltage” within the product’s enclosure that may be of sufficient magnitude CAUTION: TO REDUCE THE RISK OF to constitute a risk of electric shock to persons.
- Page 3 MUSICPROCESSORS OWNER’S MANUAL...
- Page 4 Registered trademarks cited in this publication Amiga is a registered trademark of Commodore/Amiga, Inc. Akai and Akai S1000 are registered trademarks of Akai Professional. Apple File Exchange and Macintosh are registered trademarks of Apple Computer, Inc. Atari and Atari ST are registered trademarks of the Atari Corporation.
- Page 5 SUBJECT INDEX This index lists all the subjects discussed in the manual. Each subject shows the section and relative chapter where the subject appears. Abbreviations User Interface/Selection Practical guide Reference SampleTranslator For example, “Song-load from disk, P2, R11” shows that the description of the procedure to load a Song from disk is described in the Practical Guide section, chapter 2 and also in the Reference section, chapter 11.
-
Page 6: Table Of Contents
GENERAL INDEX 1. INTRODUCTION ................1 INTRODUCTION ............................2 About the S Series instruments ............................2 How to use this manual ..............................3 Convention used in the manual ............................4 2. LAYOUTS ..................5 FRONT PANEL S2/S3 ..........................6 REAR PANEL S2/S3 ..........................9 FRONT PANEL S2R .......................... - Page 7 OVERVIEW OF THE EDIT/HANDLING ENVIRONMENTS ..............21 Edit, handling, utility environments ..........................21 The pages ..................................21 The menus ..................................22 The structure and selection of the menus .......................... 22 Commands/options ............................... 22 Parameters ................................... 22 Simple parameter ................................22 Main menu and secondary menus .............................
- Page 8 Load the contents of “Demo Disk 02” in Ram ......................... 36 Playback the “Demo Disk 02” demo song ........................36 Cancel the “Demo Disk 02” demo song from the Music Processor’s memory ..............36 5. USER INTERFACE / SELECTION ..........37 DATA ENTRY COMMANDS ........................
- Page 9 6. PRACTICAL GUIDE ..............51 1 PREPARE A WORK DISK WITH THE S SERIES DISK DRIVE ............52 2 LOAD THE CONTENTS OF A DISK INTO MEMORY ................. 53 Load all the instrument’s data from disk ........................... 53 Load a Group of Bank/Songs ............................54 Load a Single Bank/Song ..............................
- Page 10 How to assign the Sounds to the tracks ........................76 Select the Sounds from the main display ........................... 76 Select the Sounds from the Sound Library ........................76 Set the tracks to Play or Mute ............................77 Track volumes ................................77 How to vary the track Volumes with the Function Controllers ..................
- Page 11 Escape from edit sound ..............................95 Escape edit sound and cancel the modifications ....................... 95 Escape from edit sound saving the Sound in the Sound Library ..................95 Save the Sound Library to disk ............................95 12 SELECTING THE SOUNDS VIA MIDI ....................96 Selecting the Sounds with Bank Select and Program Change ..................
- Page 12 8. REFERENCE GUIDE ..............125 1 THE SOURCE SECTION ........................126 The buttons in the Source section ............................ 126 Local Source ..................................126 i The Set split command ..............................127 Midi in Source ................................. 127 Song Source ..................................128 Option Source .................................. 128 The solo button ................................
- Page 13 Page 1 Waveform (Dual Oscillator Sound) ........................148 Page 2 Oscillator Balance (Dual Oscillator Sound) ...................... 148 Volume ..................................149 Page 1 Volume ................................. 149 Page 2 Volume Tracking ..............................149 Amplitude envelope ..............................150 Page 1 Amplitude Envelope Control ..........................150 Page 2 Amplitude Key On ...............................
- Page 14 Notes and suggestions ..............................178 8 SEQUENCER AND SONG ........................ 179 What is a Sequencer – The S Series Sequencer ....................... 179 Playback and Record ..............................179 The Song and the Performance Bank ..........................179 The sequencer controls ..............................180 Creating a Song ................................
- Page 15 Commands/options ................................198 “Undo” ................................... 199 Notes and suggestions ..............................200 10 EDIT GENERAL ..........................201 Tuning/Scale ................................201 Page 1: Tuning/Scale ..............................201 Page 2: Edit Keyboard Scale ............................202 Footswitch controls ..............................203 MIDI ............................... 203 Page 1: Midi (1) ................................204 Page 2: Midi (2) ................................
- Page 16 14 EDIT EFFECT ..........................227 How to access the effect edit ............................227 How to escape from the effect edit ..........................227 How the edit effect environment is organised ......................... 227 How to Programme the Effects of Library 1 ........................ 228 Reverbs without programmable early-reflections ......................
-
Page 17: Introduction
INTRODUCTION INTRODUCTION INTRODUCTION... -
Page 18: Introduction
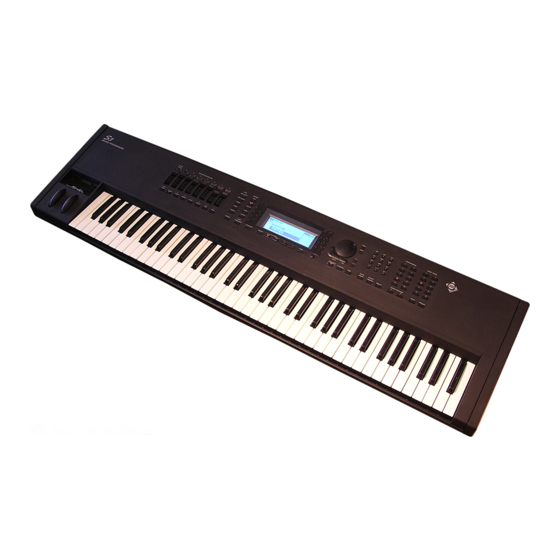
About the S Series instruments S2 Turbo and S3 Turbo Music Processors are keyboard synthesizers with 61 keys and 76 keys respectively. This manual also refers to the previous models upgraded with the “Turbokit” board. S2 and S3 also operate as Master Keyboards, thanks to the integrated controls (Wheels, Function Controllers) and extensive MIDI programmability. -
Page 19: How To Use This Manual
mental and creative effects (reverbs and modulations). The Effects Libraries house the Effects and they can store up to 64 reverbs and 64 modulations. • Sequencer The multi-track sequencer can memorise 250.000 events in the 2 Megabyte Operative- . This 16 track sequencer has a very extensive Event Edit facility, including the functions Master Track, Copy, Insert/Delete Events, Quantize, Microscope and others. -
Page 20: Convention Used In The Manual
the instrument via MIDI. Sample Translator is the practical guide to the Sample Translator 2.0. Reference guide lists all the edit environment parameters and describes the instrument and all its functions in detail. Appendix contains schematic information (standard Sound Library, M tables, technical specifications...). -
Page 21: Layouts
LAYOUTS LAYOUTS - S2/S3 Front panel - S2/S3 Rear panel - S2R Front panel - S2R Rear panel... - Page 22 S2/S3 RONT PANEL FUNCTION CONTROLLERS EDIT SOURCE MASTER VOLUME PERF. CONTR. SOLO PERF. TRACKS LOCAL MUSIC PROCESSOR SOUND MIDI IN SONG SONG OPTION OPTION USER TRACK PANEL VOLUME ATTACK RELEASE FILTER 1 FILTER 2 SHOW GENERAL TRANSPOSER EFF. BYPASS RECORD 1.
- Page 23 PERFORMANCE BANK / SONG PANIC UNDO ’ - / > & ( ) / < ENTER EXIT SOUND EFFECTS MASTER TRANSPOSE STOP PLAY << >> CLOCK NORMAL CLIPBOARD DISK LIBRARY LIBRARIES MIDI OFF UTILITY PRELOAD are the origins of M which control the sound generation: (Performance or Sounds).
- Page 24 – the is used to specify absolute 16. DISK. Gains access to all the data handling procedures on ALPHANUMERIC KEYPAD numeric data or alphabetic data. For numeric data entry, floppy disk and Ram-disk. The operations are Load, Save, Erase confirmation with is always required.
- Page 25 S2/S3 EAR PANEL 1. POWER SWITCH. Small rocker switch with On/Off positions. 4. PEDAL / FOOTSWITCH 1 & 2. Connections for continuous control Pedals (to control parameters such as Volume, Expres- 2. MAINS SOCKET. Connect the supplied power cable to this sion, etc.), or Footswitch pedals (switch control pedals) to control socket.
- Page 26 RONT PANEL EDIT SOURCE PERF. CONTR. SOLO PERF. TRACKS LOCAL SOUND MIDI IN SONG SONG OPTION OPTION TRACK GENERAL TRANSPOSER EFF. BYPASS RECORD STOP PLAY << >> CLOCK PHONES VOLUME M U S I C P R O C E S S O R ®...
- Page 27 The Data Entry section also makes use of the function. UNDO UNDO undoes or reverses the most recent action or restores the last PANIC saved situation. There is also an specific to the sequencer. UNDO 7. PANIC. Emergency button which sends an “All Note Off”, a UNDO “Reset Controls”...
- Page 28 EAR PANEL LAYOUTS...
- Page 29 OVERVIEW OF THE INSTRUMENT EDITING & DATA HANDLING CAPACITY OVERVIEW OF THE INSTRUMENT - The Music Processor concept - Sound synthesis - Sources and Destinations - Tracks, Performances, Bank/Songs INTERNAL MEMORY AND DISKS OPERATING MODES OVERVIEW OF THE EDITING & DATA HANDLING ENVIRONMENTS...
-
Page 30: Overview Of The Instrument
VERVIEW OF THE INSTRUMENT The Music Processor concept The S Series instruments are so called because they are, situations (as in workstations), they incorporate a so- as the name suggests, processors of music, a long step phisticated MIDI implementation, which allow them to away from synthesizer workstations. -
Page 31: Waveforms
technique, which is the sampling of 8 minute fragments The harmonic band is called the “timbre”. The timbre of of the sustain phase. a double bass differs to that of a trombone, because their respective harmonic bands are different. If some har- In sounds generated by two paired oscillators, the S monics are removed, or their intensity altered, the tim- Series reads the loops alternately with increasing fading... -
Page 32: Bank/Song And Performance
Bank/Songs and Performances The Sounds can be combined to form “Performances”, controlled by data received at MIDI In. and stored in slots called “Bank/Songs”. The Performance, therefore, is a “global setting” corre- Up to 10 Banks of 10 Performances each can be memo- sponding to a complex instrumental setup, recalled in- rised in the Music Processor’s RAM, a total of 100 stantly while playing or while recording a Song. -
Page 33: Track Configuration
The MIDI data are also processed by a MIDI Delay of the buttons, the main display will change to show the which retards the sending of the data to the Destina- track playing mode for the selected Source. tions, creating a situation of “postponed playing”, used to generate replay effects between the tracks. -
Page 34: Sources And Destinations
Sources and Destinations MIDI events Music Processor’s internal sequencer (which is pre- cisely a MIDI data recorder). A master keyboard or a sequencer sends a string of MIDI data, or “events”, are generated by the Sources, MIDI data to the Music Processor’s computer; these are they are controlled by the Tracks and, finally, they are instructions on the way in which the Sounds must be sent to the Destinations: (Fig. -
Page 35: Internal Memory And Disks
NTERNAL MEMORY AND DISKS Overview of the data and the memorising The data are organised in memory and in the disks facilities (floppy disk and R -disk) according to the type and order of hierarchy. The structure of the disk data is as follows: As in any computer, the Music Processor is an elabora- tor of data, which consist of Sounds, Songs and any other element or parameter used during the elaboration... -
Page 36: Normal Operative Mode
NORMAL EDIT HANDLING ODES OF OPERATION The instrument has two operating modes: normal, which Edit/Data Handling mode is the operating mode dedicated to playing, and edit/ The Edit/Data Handling mode is activated by pressing handling, which permits the modification of data, its one of the buttons of the “Edit”... -
Page 37: Overview Of The Edit/Handling Environments
VERVIEW OF THE EDIT HANDLING ENVIRONMENTS HANDLING UTILITY ENVIRONMENTS When you press one of the buttons of the “Edit” group The structure and constituting elements are common to ) or PERF CONTR PERF TRACKS SONG SOUND GENERAL all the edit/handling displays. The common elements one of the handling or utility buttons ( SOUND LIBRARY are the pages, the menus and the commands/options. -
Page 38: The Menus
The menus The structure and selection of the menus Main menu and secondary menus The list of parameters, functions, procedures, etc. shown Some environments consist of several pages, without at the centre of a page is called the menu. The following secondary menu levels (example: Disk). -
Page 39: Multiple Parameter
Multiple parameter To modify the first part, rotate the ; or specify the new DIAL value on the NUMERIC KEYPAD This consists of several editable parts: Press to gain access to the edit of the next part: ENTER Press enter repeatedly to access each following part of To modify the second part, rotate the ;... -
Page 40: The "Are You Sure?" Display
Escape from EDIT HANDLING The “Are you sure?” display Two possibilities are available: (1) possibility of escap- ing without confirmation, (2) necessity of escaping with As a security measure, before the instrument memorizes confirmation or cancellation of the modification. or cancel the changes, confirmation of the operation is To escape from Edit Performance, Edit Song, Disk, always requested. - Page 41 Analysis of the ‘ ’ handling environment DISK does not have any main menus: the relative functions are grouped in four pages according to homogeneous criteria: Disk, page 3 (“Erase”) Disk, page 1 (“Load”) Disk, page 4 (“Utility”) Access to a function is gained the instant it is selected. To escape Disk mode, press D or N ORMAL...
- Page 42 OVERVIEW...
-
Page 43: Installation, Power Up, Demo
INSTALLATION, POWER UP, DEMO CONNECTING THE MAINS CABLE CONNECTING THE AUDIO CABLES S2R: MIDI CONNECTIONS POWER UP S2R: “SOUND TEST” DEMO... -
Page 44: Connecting The Power Cable
Connecting the power cable Connect the power cable to the appropriate socket on the instrument’s rear panel. Insert the plug into an A.C. mains outlet of the correct voltage. Warning: The voltage of the instrument is shown on the small plate close to the power socket on the rear panel. Make sure that the voltage indicated corresponds to your mains supply voltage. -
Page 45: S2R: Connecting To A Master Keyboard Or To An External Sequencer
S2R: CONNECTING TO A MASTER KEYBOARD OR TO AN EXTERNAL SEQUENCER Connecting to a Master keyboard Connect the M IDI PORTS Connect the master keyboard’s M to the S2R’s M For normal use, connect the S2R’s 1 ports. The 2 and 2 ports require MIDI IN MIDI OUT... -
Page 46: Connecting To An External Sequencer
Deactivated (Off) OMMON Source MIDI IN Connecting to an external sequencer The external sequencer can be a hardware sequencer or a computer, fitted with a Midi interface, which runs a sequencing programme. Connecting the M ports To control S2R with the external sequencer, connect the sequencer’s Midi Out to the S2R Midi In. To exchange songs (in both directions) between both units, connect the sequencer’s Midi In to the S2R’s Midi Out. - Page 47 How to deactivate the M channel OMMON 1. Enter Edit General by pressing the General button in the Edit section: 4. To deactivate M specify 0 (off) and OMMON press ENTER 5. To confirm the new status, press three times: ENTER 2.
- Page 48 Save the M status to the R OMMON disk 1. Press the D button to gain access to the disk handling procedure: 7. Press to confirm (or to interrupt the format- ENTER EXIT ting procedure). “Wait please..” appears for the entire duration of the formatting process: 2.
-
Page 49: Power Up
OWER UP Powering up with an empty disk drive and Powering up with a floppy disk inserted in RAM-disk the drive Press the power switch to turn on the instrument. If you power up when a floppy disk is inserted in the drive, the data contained in the disk will be automati- When the Music Processor powers up with no disk inserted in cally loaded into the instrument’s Ram (operative... -
Page 50: Sound Test In The Main Display
S2R: “S ” OUND In the main display (set to “Sounds” mode) and in the Sample Translator, pressing activates the Sound Test, ENTER which allows you to listen to the Sound and check the M connection, regardless of the status of the keyboard (even if not connected). -
Page 51: Demo
The ROM demonstration Song The non-volatile memory of the instrument (R ) contains a demonstration Song, which is inserted to the “Bank/ Song 1” slot automatically after powering up. To listen to the playback of the Demo Song, simply press the button. -
Page 52: Load The Contents Of "Demo Disk 02" In Ram
Load the contents of “Demo Disk 02” in Ram The first method consists in turning off the instrument, replacing the floppy “Demo Disk 01” with “Demo Disk 02” and repeating the procedure already explained for “Demo Disk 01”. The second method consists in replacing the floppy “Demo 01” with “Demo 02” and using the Load All procedure, which loads the contents of the floppy disk in R After changing disk and inserting “Demo Disk 02”... -
Page 53: User Interface / Selection
USER INTERFACE / SELECTION DATA ENTRY DISPLAY AND ASSOCIATED CONTROLS MAIN DISPLAY / “SAVE PERFORMANCE” SELECTION - Select the Bank/Songs - Select the Performances - Select the Sounds CORRECT VIEW OF THE TRACKS TRACK PLAYING MODE PLAY, MUTE, SOLO... -
Page 54: Data Entry Commands
NTRY OMMANDS The Data Entry commands permit the insertion of numerical and alpha- betical data, the change of sound as well as various navigating tasks within the edit/data handling pages. The Data Entry group consists of two distinct parts: the cursor controls , +1/>... -
Page 55: How To Enter Alphabetic Characters
Numeric data is inserted in an edit zone which activates the instant you specify the first entry: In some cases, the number specified requires confirmation with , in other instances, ENTER confirmation is not necessary. When Sounds are selected with the NUMERIC KEYPAD (Program Change), confirmation with is always required. -
Page 56: Use Of The Numeric Keypad To Navigate In The Menus
Edit Sound, secondary menu (or editor) “Filter 1” Use of the numeric keypad to navigate in the menus In all menus, specify the number of the item or parameter that requires selection on the alphanumeric keypad. Access is instant. USER INTERFACE / SELECTION... -
Page 57: Emergency" Buttons
«Emergency» buttons These buttons provide a means of escaping from “locked” situations or to carry out a “quick check” of MIDI connections and sounds without effects, and they are available at all times. PANIC MIDI communications can sometimes “lock” the instrument due to the transmission of an excessive quantity of data, or by an incorrect message. -
Page 58: Display And Associated Controls
ISPLAY AND ASSOCIATED CONTROLS The display is surrounded by controls which allow the user to navigate within the area - the display and associated controls is the principal means of communication between the user and machine. 1. Track select keys A track is selected when it is shown in reverse- highlight. -
Page 59: Main Display / Save Performance
AIN DISPLAY ERFORMANCE The main display can be shown in two different viewing modes: “Performance” or “Sounds”. In the first mode, the Performance is displayed in large type, useful for rapid selection during a concert. In the second mode, the Sounds assigned to the tracks are shown, to allow complete control of the situation in Sound changing situations and Sound edit access. -
Page 60: Save Performance" In S2/S3
“Save Performance” ( SAVE The main display shows the command, selected with the SAVE RIGHT MULTIFUNCTION * The “Save Performance” *. The command saves all modifications made to the Performance. BUTTON command is disabled when the led on the “record” button is The modifications saved by the Performance: track playing mode (for LOCAL MIDI... -
Page 61: Bank/Song And Performance Selection
ONG AND ERFORMANCE SELECTION Selecting the Bank/Songs and Performances in S2/S3 Selecting with the buttons of the Bank/Song Selecting in “Performance” mode and Performance sections In the main display of the Performance mode, one of the This method can be used regardless of the current oper- 10 Performances of the currently active Bank/Song can ating mode of the instrument. -
Page 62: Selecting Sounds
ELECTING OUNDS If modifications have been made to the current Performance, selecting the same Performance, a different Performance, or one of the sequencer control buttons ( , <<, >>) will restore the original Performance. To conserve the newly RECORD PLAY STOP assigned Sounds to the tracks, save the Performance to memory ( s. -
Page 63: Correct Track Visualisation
ORRECT TRACK VISUALISATION The tracks which appear in the main display differ according to the button selected in the Source section. The instrument powers up with the button selected by default. The Source corresponds to the keyboard LOCAL LOCAL or the master keyboard connected via M . -
Page 64: Track Playing Mode
RACK PLAYING MODE If modifications have been made to the current track playing mode, selecting the same Performance, a different Performance, or one of the sequencer control buttons ( , <<, >>) will restore the original track playing mode. To conserve RECORD PLAY STOP... -
Page 65: I How To Set A Split Point For The Split Track Playing Mode
Multi Activates all the tracks of the Performance. The configuration of the tracks will vary accord- ing to the Performance: some track will be in “mute” and will not play (“x” symbol in the track column), others may be cancelled. The individual track extensions for the LOCAL , page 3 ( s. -
Page 66: Play
MUTE SOLO The track status can be set to “play”, “mute” and “solo”. track (if not already shown in reverse-highlight) and press the corresponding a second TRACK SELECTION KEY The play and mute status can be memorised to the time. Performance. -
Page 67: Practical Guide
PRACTICAL GUIDE PREPARE A WORK DISK WITH THE S SERIES DISK DRIVE LOAD THE CONTENTS OF A DISK INTO RAM - Load all - Load a Group - Load a Bank/Song - Load a Setup SAVE THE CONTENTS OF RAM TO DISK - Save all - Save a Group - Save a Bank/Song... - Page 68 REPARE A WORK DISK WITH THE ERIES DISK DRIVE Before saving any data to a new floppy disk, you must format it (or initialize it) in order that the S Series instrument can recognise and use it. The floppy disk should be a 3,5” HD type, in perfect condition. Press the button to gain access to the operations.
-
Page 69: Load The Contents Of A Disk Into Memory
OAD THE CONTENTS OF A DISK INTO MEMORY Load all the instrument’s data from disk It is possible to load, in a single operation, all the data required by the instrument to make it work. The data necessary is the following: Setup General, Sound Library, Effects Libraries, Clipboard. -
Page 70: Load A Group Of Bank/Songs
Load a Group of Bank/Songs A disk can contain up to 10 Groups of 10 Bank/Songs each. It is possible to load only one Group (10 Bank/Songs) into the instrument’s memory. If you are loading from floppy disk, insert the disk into the disk drive. Press the button to access the environment. -
Page 71: Load A Setup
Select the required Bank/Song Group, by pressing the corresponding FUNCTION SELECT repeatedly. If at least one Bank/Song is present on disk, the number of the relative Group will appear next to the name of the selected element. To navigate in the menus, you can (1) specify the Specify number 5, corresponding to the “Load single Bank/Song”... - Page 72 Specify number 3, corresponding to the “Load single Setup” operation. A list of the Setups contained in the disk appears: Specify the number corresponding to the required source Setup. “Are you sure?” is shown: Press to confirm (or to cancel). The incoming Setup cancels and substitutes ENTER EXIT the existing Setup in memory.
-
Page 73: Save The Contents Of Memory To Disk
3 Save the contents of memory to disk Save all the instrument’s data to disk It is possible to save, in a single operation, all the data required by the instrument to make it work. The data necessary is the following: Setup General, Sound Library, Effects Libraries, Clipboard. -
Page 74: Save All The Bank/Songs In A Group
Save all the Bank/Songs in a Group A disk can contain up to 10 Groups of 10 Bank/Song each. The 10 Bank/Songs contained in memory is saved to one of the Groups present on disk. The empty Groups are identi- fied by an asterisk (*) after the Group number. -
Page 75: Save A Single Setup
Select the destination Group where the Bank/Song is to be saved by pressing the corresponding repeatedly, until the number of the required Group FUNCTION SELECT KEY appears next to the name of the selected element. The asterisk (*) shows a completely empty Group. - Page 76 Select the destination element to save to (disk = -disk = FUNCTION SELECT A FUNCTION SELECT B Specify number 3, corresponding to the “Save single Setup” operation. A list of the Setups contained in memory is shown: Specify the number corresponding to the Setup to save. Confirmation is requested with “Are you sure?”: Press to confirm (or...
-
Page 77: Activation Of The General Midi/Gs Compatibility
OAD AND SAVE A FILE Memory format and M -files Each instrument equipped with a disk drive uses its own format for the disks and Songs. This format is not directly legible by other musical instruments. For example, an S Series instrument is not able to read a Song created and memorised to a disk by a WX Series instrument. - Page 78 Specify 6 to access the “General Midi” parameter: Specify 1 (or press ) to place the “General Midi” parameter in edit: ENTER Specify 1 (or rotate the ) to set the parameter to On: DIAL Press to confirm. Escape from the edit with ENTER NORMAL If the new status is required in all situations, save the parameter status to the battery-...
- Page 79 Select the required M -file and confirm. The list of the Bank/Songs contained in memory appears: Select a memory destination where the file will be loaded and confirm with . If ENTER you select an occupied location, the existing Bank/Song will be cancelled and substi- tuted by the M -file.
- Page 80 Select the Song to save as a M -file and confirm. The disk’s main directory is displayed where M -files contained in the disk may be shown (files with the exten- sion “.MID”): You can save the M -file in a sub-directory (item identified by the symbol ).
-
Page 81: Overview Of The Disks Supplied With The Instrument
VERVIEW OF THE DISKS SUPPLIED WITH THE INSTRUMENT Your instrument is supplied with three floppy disks. The floppies “Demo Disk 01” and “Demo Disk 02” contain new Sounds, new Waveforms and some demonstration Songs. The floppy called “Freeware Disk” contains User Programs which implement some useful functions. -
Page 82: The Setup Directory
The Performance directory It is also possible to see the Performances contained in each Bank/Song. Select the Bank/Song that you’re interested in with the , then pass to page 2 with the DIAL RIGHT MULTIFUNCTION BUTTON Directory of the Performances contained in a Bank/Song. You can return to the Bank/Song directory with the left multifunction button. -
Page 83: Load The Bank/Songs And Setups From Demo Disk 01
Escape from the “Directory” with EXIT Check the R -Sounds contained in Demo Disk 01 Press the button to access the SOUND LIBRARY SOUND LIBRARY Select the “Imp_disk” (=import from floppy disk) command to display the R Sounds contained in Demo Disk 01. While the internal Sound Library shows the R and Ram-Sounds, the Disk Sound Library shows only the R -Sounds: Ram-Sounds contained in Demo Disk 01. -
Page 84: Demo Disk 02
“Demo Disk 02” This disk contains a demonstration song (“Classic”) and a piano Sound (“Piano ”) based on a new Waveform. You can load the contents of the disk using the “Load all” procedure. If you are only interested in the new piano Sound, you can use the “Load single setup” procedure, selecting the Sound Library. -
Page 85: Freeware Disk
“Freeware Disk” This disk contains three User Programs which add new functions to the instrument’s operating system. You can load these programs (one at a time) using the “Load user program” procedure. The “Hardcopy” program Hardcopy allows you to capture and save any display image in “.IMG” format (Ventura Image) to a floppy disk (M format). -
Page 86: Load A Song Using The Standard Procedure
LAYBACK EQUENCER CONTROLS Load a Song using the standard procedure Before playing back a Song contained in a disk you must load the relative Bank/Song. You can load a single Song (procedure [ ) or all ten Bank/Songs DISK LOAD SINGLE BANK SONG that can be stored in memory (procedure [ DISK... -
Page 87: Song Playback / The Sequencer Controls
The Sequencer Control the Song playback with the Sequencer controls: << >> RECORD STOP PLAY CLOCK Activates the Song “record” mode. RECORD Stops the Song playback or the recording. STOP Starts the playback (or the recording). PLAY << high velocity “rewind”. Tapping on the button takes the Song back one bar at a time. Held pressed, it rewinds the Song at high speed. -
Page 88: Cancel Song 1 (Demo)
REATE OR MODIFY THE ONGS The 10 Bank/Songs of the Music Processor are already programmed to suit many “stand- ard” playing situations. The Bank/Songs can, however, be modified to meet particular needs by changing the Performances, or by recording Songs. The Song contained in a Bank/Song exploits the Performances of the same Bank/Song. -
Page 89: Create Or Modify The Bank/Songs
Go to the second page ( Save ) with the MULTIFUNCTION BUTTONS Select the disk where you intend to save the start-up settings ( FUNCTION SELECT A floppy disk, -disk). FUNCTION SELECT B Specify 1 (or press ) to save the entire contents of memory to disk. ENTER If the start-up disk chosen is the R -disk, turn on the instrument with no floppy disk... -
Page 90: Create A New Bank/Song
Create a new Bank/Song You can create a new Bank/Song in two ways: (a) create a completely new Bank/Song, or (b) modify an existing Bank/Song. You can then save the new Bank/Song to disk, for future use. Cancel one of the 10 default Bank/Songs present in memory Select the Bank/Song that you wish to cancel. -
Page 91: Editing The Performances
DITING THE ERFORMANCES This chapter takes a look at Performance editing, allowing the creation of a completely new Performance by modifying an existing one. Although the 100 Performances residing in Rom may cover a wide range of musical tastes, it is often necessary to create a com- pletely new set of Performances that adapt themselves to a particular situation or personal need. -
Page 92: Copy A Track To Another
Copy a track to another 1. Access the environment by pressing the button in EDIT PERFORMANCE TRACKS PERF TRACKS the Edit section: (s. display above). Select the track to copy. Select “Copy”. A selection window opens where you can select the destination track: 4. -
Page 93: Set The Tracks To Play Or Mute
Set the tracks to Play or Mute The tracks of a Performance can be set to “play” or can be temporarily deactivated - “mute”. The “play”’ and “mute” track situations are related to the currently selected Source. Each Source will require separate track “play/mute” settings. For example, track 1 can be set to “play”... -
Page 94: Transpose
How to vary the Volumes in EDIT PERFORMANCE TRACKS Access by pressing the button in the Edit section, and EDIT PERFORMANCE TRACKS PERF TRACKS go to the second page: Edit Performance/Tracks, page 2: Select the Volume parameter and enter into the edit of the parameter. Select the first track to modify and specify the volume level required with the DIAL NUMERIC KEYPAD... -
Page 95: Effects
How to vary the track transposition in EDIT PERFORMANCE TRACKS Access by pressing the button in the Edit section, and EDIT PERFORMANCE TRACKS PERF TRACKS go to the second page: Edit Performance/Tracks, page 2 Activate the edit of the Transpose parameter. Select the first track to modify and enter the required transposition with the or the DIAL... -
Page 96: How To Engage The Effects To The Tracks
b) open the Effects Libraries by means of the button: EFFECTS LIBRARIES Select one of the Effects with the . Press to assign the DIAL NUMERIC KEYPAD ENTER Effect to the Performance. Repeat the operation for the second Effects Library. Return by pressing EDIT PERFORMANCE CONTROLS... -
Page 97: How To Activate/Deactivate The Pedals And Wheels For The Tracks
Activate the “Wheel”, “Pedal” or “Footswitch” parameters. In the keyboard models, the first part of the multiple parameter can determine which Pedal/Footswitch input will receive one or the other type of Foot controllers: Select the second part of the parameter, which represents the M message generated by the pedal/footswitch or by the wheel: Pedal 1 controls Main Volume (controller 7) -
Page 98: The Song Tracks
OW TO ECORD A What is a Song? A Song is a recorded musical piece made up of several instrumental “parts”. Each Bank/ Song consists of a Song (or an empty slot where a Song can be recorded) which exploits the Performances of the Bank/Song to which it belongs. -
Page 99: Activate Record Mode And Select The Recording Options
After configuring the Sources, save the modifications in the current Performance with the “Save Performance” command in the main display ( [ ). If you omit this SAVE ENTER ENTER important step, activating Record mode recalls the original settings of the Performance, cancelling the newly configured status. -
Page 100: Select The Parameters Of The Song
Select the parameters of the Song Rotate the to select one of the displayed parameters in the central part of the “Record DIAL pending” display, and press to activate the edit of the selected parameter. ENTER Select the required Quantize (auto-correct) value. “Free” will record your events exactly as played;... -
Page 101: Now Record The Song
Now record the Song With the “Record pending” display showing, press and start to play. The tracks PLAY shown with the “R” symbol will be recorded (provided that they are active in LOCAL MIDI IN End your recording with . If you have programmed the “Edit Stop to Bar” param- STOP eter, the recording stops automatically at the end of the selected bar of the Song pointer. -
Page 102: The S2/S3 Hardware Function Controllers
10 R EAL TIME OUND EDITING This chapter explains how to tweak (rapidly edit) some Sound parameters while perform- ing, for example, a concert. The modifications described could be required for creative purposes as well as for reasons of rendering the musing being played more suitable on stage, otherwise considered perfect in the studio. -
Page 103: Real Time Sound Editing
mode ANEL In this mode, each cursor affects one of the seven tracks currently shown in the display. Both cursors and tracks are identified by a letter of the alphabet (A-G). The tracks can be scrolled but the correspondence between cursors and tracks is shown at all times be these letters. -
Page 104: The S2R Function Controller
SER MODE In this mode, both cursors (A-G) and keys (1-7) operate as programmed in the currently selected Performance. The Function Controllers can be programmed in EDIT PERFORMANCE , pages 3 and 4: CONTROLS Keys Sliders The Function Controllers (sliders and keys) are independently programmable for each Performance. -
Page 105: Save The Modifications To The Performance
Select a track that requires the modification. Rotate the or specify the parameter value with the DIAL NUMERIC KEYPAD Select another track, as required, and repeat the operation. Select another parameter, as required, and carry out the modifications. Example: How to modify the track Volumes 1. -
Page 106: Types Of Sound
11 E DITING OUNDS IN THE STUDIO The S Series instruments are equipped with very powerful Sound editing facilities. Sounds can be modified or created by means of a highly refined editing system. The general techniques of synthesis are discussed in the first part of this manual. To access the environment, you must (a) assign the Sound you want to edit to EDIT SOUND... -
Page 107: Editing Sounds In The Studio
-Sound, R -Sound, R Sound The S Series houses over 500 permanent Sounds, called R -Sounds. These Sounds cannot be cancelled or modified, but, starting from a Rom-Sound copy, you can apply one or more modifications to produce R -Sounds. -Sounds are user-created Sounds, which can be saved to disk as a Setup Sound Library. -
Page 108: The Filter Envelopes
The filter envelopes The DC and DO Sounds can be affected by dynamic filters which can be made to vary over time. The variation is programmed by means of an Envelope (s.). The Filter Enve- lope is extremely useful to render a sound “live”. Envelopes Types of Envelopes The envelopes vary the quality of the Sound over time. -
Page 109: Tracking
Use the following procedure to modify the envelopes: Press repeatedly to select one of the parameters: “Segment”, “Time”, “Level”. ENTER Rotate the to select a “Segment”, modify its relative “Time” or “Level” value. DIAL The “Time” and “Level” values can be inserted with the NUMERIC KEYPAD Press to select the next parameter. -
Page 110: Pitch
Use the following procedure to modify the Tracking: Press repeatedly to select one of the parameters: “Point”, “Key”, “Level”. ENTER Rotate the to select a “Point”, modify its relative “Key” or “Level” value. The DIAL “Key” and “Level” values can be inserted with the . -
Page 111: Memorising The Sound In The Sound Library
Memorising the Sound in the Sound Library Escape from EDIT SOUND After having created or modified a Sound, it is possible to escape from , saving EDIT SOUND it or cancelling the modifications made. Escape and cancel the modifications EDIT SOUND Select the “Abort”... -
Page 112: Selecting The Sounds With Bank Select And Program Change
12 S ELECTING THE OUNDS VIA Selecting the Sounds with Bank Select and Program Change The Sounds assigned to each track can be selected via M with appropriate Program Change and Bank Select* messages. *Note: Each Sound is identified by a Program Change number and a Bank Select number, dis- The Bank Select message played near the name of the Sound (in Sound mode): does not refer to the S2R... - Page 113 For example, the Steinberg Cubase™ sequencer can send this message in various differ- ent ways. In order to be received correctly by the S Series, it must be assigned to the track of the Song (in Cubase the song is called, Arrangement). The Bank Select is in- serted before the Program Change.
-
Page 114: Select The Sounds Via The Performance Change Event
Select the Sounds via the Performance Change event If the sequencer or master keyboard that you are using is not able to transmit the Bank Select message (Control Change 0), it will not be possible to select Sounds with Program Change numbers other than the type XXX-1 and, therefore, not the “variation”... - Page 115 Bank-Perf PC Bank-Perf Bank-Perf Bank-Perf Bank-Perf 1-10 2-10 3-10 4-10 5-10 Bank-Perf Bank-Perf PC Bank-Perf Bank-Perf PC Bank-Perf 10-1 10-2 10-3 10-4 10-95 10-6 10-7 10-8 10-9 6-10 7-10 8-10 9-10 100 10-10 Warning: The Performance Program Change table shows numbers based on the range 1 ~ 128. Some M controlling devices (master keyboard, sequencer) will be based on the range 0 ~ 127.
- Page 116 13 S ELECTING THE FFECTS VIA The Effects assigned to the two DSPs (digital signal processors), and their Effects Vol- umes, can be selected via M . Owing to the fact the Effects are elements that relate to the Performances and not to the individual tracks, it is not possible to activate or deacti- vate an effect for each track via M Effect 1 is a reverberation, Effect 2 is a modulation (delay, chorus, flanger, phaser, rotary).
-
Page 117: Editing Sounds Via Midi
14 E DITING OUNDS VIA It is possible to modify the following Sound parameters via M : Attack, Release, Cutoff of Filter 1, Cutoff of Filter 2. Each parameter can be controlled via M by an appropri- ate M Controller, received by the track to which the Sound in edit is assigned. The tracks which receive this kind of data must be assigned a M channel that is not the OMMON... - Page 118 15 P ROGRAMMING WITH AN EXTERNAL SEQUENCER — P ERFORMANCE PERFORMANCE SEQUENCER "LOCAL OFF" TRACK 1 IN Chann. 1 Songs can be recorded on an external TRACK 2 IN Chann. 2 sequencer in a simplified manner by TRACK 3 exploiting Perfomance 10 of Bank/Song 1 IN Chann.
- Page 119 After powering up the instrument in default conditions (no floppy disk in the drive and no data in R -disk), select Performance 10 of Bank/Song 1. Set the viewing mode for the Source (and activate “Sounds” mode). If this LOCAL Source does not appear in the display, press the button in the Source section: LOCAL...
- Page 120 PRACTICAL GUIDE...
-
Page 121: Sample Translator
SAMPLE TRANSLATOR SAMPLE TRANSLATOR 2.0 - Waveform theory - Conversion of Akai Samples and Programs into Waveform - Sample edit - Creating a Waveform and a Sound... -
Page 122: Sample Translator 2.0
Sample Translator 2.0 The Edit Sound menu includes the Sample Translator command, giving access to the Sample import and edit program. About Sample Translator The Sample Translator program enables you to: • read samples from Ms-Dos/Atari floppy disks, in Avalon, Sound Designer, Sample Vision and Wave formats;... -
Page 123: Accessing Sample Translator
Accessing Sample Translator When the Sample Translator command is selected from the menu, the Sound EDIT SOUND currently in edit will be cancelled. Once you have entered the Sample Translator environment, one of the following situa- tions may be found: Access from a Sound that does not contain imported samples (e.g. -
Page 124: The "Waveform" Display
The “Waveform” display The main Waveform display contains a list of the 16 samples that can compose the Waveform. Locations without samples are shown as “EMPTY”. The commands in the right-hand column are shown on 2 pages. Note: When the instrument is played in Local or Common, a small square may appear before the... -
Page 125: Loading Samples ("Load")
Loading samples (“Load”) There are four possible ways of loading one or more samples into Sample Translator: • Access Sample Translator from a R -Sound based on a Waveform created with Sample Translator (many of the Sounds with the symbol). If this is a DO Sound, the sample will be the sound produced by the first oscillator. - Page 126 2. Use the to select MMA_sds and press . The Music Processor requests the DIAL ENTER * Samplers that operate on number* of the sample to be received from the external device (0~255): the MMA_sds standard (Sample Dump Standard) identify the memorized sample with a number (0~255).
-
Page 127: Loading Samples From Ms-Dos/Atari Floppy Disks
3. Loading samples from Ms-Dos/Atari floppy disks If you have a computer and a sample editing program that can save data in Avalon, Sound * The Wave format (.WAV) Designer, Sample Vision or Wave* formats, the Music Processor can read samples is the standard format of sounds under Windows. -
Page 128: Loading Samples And Programs From An Akai S1000 Floppy Disk
4. Loading Samples and Programs from an Akai S1000 floppy disk • Akai S1000™ Samples and Programs Akai samplers compatible with S1000 save two types of data on floppy disks: Samples (equivalent to the S Series samples) and Programs (similar to the S Series Waveforms). A Program organizes the Samples by defining the keyboard ranges to which they are assigned. - Page 129 • Loading a Sample or Program 1. From the Waveform display, after having selected a location for the sample, choose the Load command: 2. Press and use the to select “Akai”: ENTER DIAL 3. Press ; the directory of the Akai S1000 floppy disk appears. The Samples show ENTER the letter “S”...
-
Page 130: Cut End"
Empty Levels Levels without Samples are recognized by Sample Translator as being empty and indicated, therefore, by a bar and cannot be selected. Some Akai Programs may contain Levels that contain no samples, but nevertheless are shown as present, and are therefore recognized by Sample Translator as capable of being loaded. -
Page 131: Cancelling Assignments ("Unassign")
You can listen to the sample to help you decide in what keyboard area you can obtain the best results. Use the Assign command to define the keyboard range to which the selected sample will be assigned. Once the Assign operation has been carried out, the sample will play to- gether with the other saamples assigned to the keyboard range: Only assigned samples become a part of the Waveform. -
Page 132: Play Single" Display
“Play Single” display The “Play Single” command gives access to a display where you can: • listen to the individual samples already assigned to a keyboard range (these can also be heard in Waveform, but only together with the other samples assigned to the keyboard range);... -
Page 133: Gain
4. The display will show a “close-up” of the section selected: Return to full vision of the sample with the UnZoom command. “Gain” This allows you to modify the volume of the sample with respect to the other samples of the Waveform. -
Page 134: Exit
Transmission errors If the connections have not been made correctly or if the external device is unable to receive the sample in MMA_sds format, the following error message will appear: Check the connections. If no fault is discovered, check the reception channel of the external device (the Music Processor transmits on channel 1). -
Page 135: Length" (Cannot Be Modified)
“SR” “SR” stands for “Sampling Rate” - the frequency with which the Sample is read. If the Sampling Rate is modified, the sample pitch is also proportionally modified. For exam- ple, if the “SR” value is raised, the sample pitch will also become higher. Basically, this function provides a fine tuning for the sample, avoiding dissonance between the samples that make up the Waveform. -
Page 136: Loop Type
Deactivating Detune With some samples, changes made to the “Start Loop” point cause Detune to be deactivated: The Detune parameter will still be shown in the Waveset editor, but it will act as Fine Pitch. These Sounds cannot be converted in SO or DO: “Loop Type”... -
Page 137: Commands In The Right-Hand Column
Commands in the right-hand column Tuning: Provides a reference for the sample pitch, producing the exact note played on the S2/S3 (or master keyboard) with a sinusoidal. Loop nr.:(x): Allows you to select one of the eight loops of the sample. Only the first loop is used by the Music Processor, but the others can be modified so that the sample can be sent to an external sampler. -
Page 138: Saving A Waveform ("Save")
Saving a Waveform (“Save”) The Waveform created with Sample Translator must be saved as a standard S Series R Waveform. In the Waveform, all the samples assigned to a keyboard range are saved *Note: (unassigned samples are lost). Avoid giving two different Waveforms of your sound 1. -
Page 139: Escape From Sample Translator
Escape from Sample Translator To escape from Sample Translator, select the Exit command on the first page of the Waveform display. If a Waveform has been created, Sample Translator asks if you want to lose or save it: If you press , the Waveform will be lost. - Page 140 SAMPLE TRANSLATOR...
-
Page 141: Reference Guide
REFERENCE GUIDE SOURCE buttons TRACK TRANSPOSER / MASTER TRANSPOSER EDIT PERFORMANCE/CONTROLS EDIT PERFORMANCE/TRACKS EDIT SOUND SAMPLE TRANSLATOR EDIT SOUND PATCH SEQUENCER & SONG - The Sequencer controls - Recording a Song EDIT SONG EDIT GENERAL DISK SOUND LIBRARY EFFECTS LIBRARIES CLIPBOARD UTILITY - Bank/Song and Performance name... -
Page 142: The Source Section
SOURCE section The buttons in the Source section The Performance tracks have a different configuration for each Source. For exam- ple, while Source is set to layer, the Sources can be set to LOCAL MIDI IN SONG multi. The main display shows the track configuration relating to the currently active Source (shown by the button with the led ON in the section). -
Page 143: Midi In Source
The keyboard or the master keyboard (connected via M ) can play up to MULTI OMMON sixteen tracks which can coexist over the entire keyboard extension or share the extension and the dynamic zones ( s. EDIT Performance/Tracks, page 3). The number of tracks that the keyboard will actually play depends (a) on the number of tracks memorised in the Performance, (b) on the number of tracks set to play ( ). -
Page 144: Song Source
– The track is disconnected from the Source. For instructions on how to connect the MIDI IN track to Source see. EDIT Performance/Tracks on page 1. i The track is connected to the Destination (internal sound generation). To GENERATION disconnect the track from this Destination see. EDIT Performance/Tracks on page 1. e The track is connected to the Destination. -
Page 145: Track Transposer / Master Transposer
RACK RANSPOSER ASTER RANSPOSER The tracks can be individually transposed in the environment EDIT TRACK TRANSPOSER (figure 1). They can be globally transposed (the instrument as a whole) by means of button (only S2/S3) or in the “Master Transpose” window MASTER TRANSPOSER of the environment (figure 2). - Page 146 If a negative transposition is active (pitch lowered), the led on the flat button is shown ON. Conversely, if a positive transposition is active (pitch increased), the led on the sharp button is shown ON. To restore the standard pitch of the instrument, you can press the deactivated button repeatedly until the led on the active button goes off, or you can regulate the setting in the “Master Transpose”...
-
Page 147: Edit Performance/Controls
3 EDIT P ERFORMANCE ONTROLS environment is where you can programme the EDIT PERFORMANCE CONTROLS The modifications made to a Performance must be stored in general parameters of the Performance. A Performance can memorise: the two memory with [ SAVE PERFORMANCE effects assigned to the DSPs, the maximum Pitch Bend excursion, the effect of the The Performance stored in Wheels and Pedals and how the Function Controllers operate. -
Page 148: Page 3: User Keys (S2/S3)
Rotary Initial velocity of Rotary modulation. When the DSP receives the MIDI Control Change 90 message, the Rotary velocity passes gradually from slow to fast or vice versa. Value range: Slow or Fast. Wheel 1 MIDI message generated by Wheel 1 (left). Wheel 1 is spring loaded and returns automati- cally to its central position after use, and it is therefore advisable to assign parameters with neutral values at the centre (Pitch Bend, Pan). -
Page 149: Assignable Midi Messages
Assignable MIDI messages Only the messages shown in reverse highlight affect the sound generation of the S Series. The notes shown in brackets [] indicate a special implementation of the message in the S Series. The messages indentified with an asterisk (*) are transmitted to the M on the Common Channel and not on the channel assigned to the track. -
Page 150: General Commands
4 EDIT P ERFORMANCE RACKS The modifications made to a section allows you to individually and independently EDIT PERFORMANCE TRACKS Performance must be stored in edit each track of a Performance. For each track you can define; the Sources and memory with [ SAVE PERFORMANCE Destinations, the M... -
Page 151: Edit Performance/Tracks
1. Press Create. The following dialogue window will appear: 2. Enter the track number you wish to create (1 ... 16). The option “All” appears after the number 16. “All” creates all the tracks (resetting the values of the existing tracks to default settings). -
Page 152: Page 2: Common
Enter the number of the M channel. Press to confirm the setting of the ENTER MIDI IN Source and return to the icon selection mode. Destination. When the arrow is shown the track is connected to the internal GENERATION sound generator. Select the icon and press to connect or disconnect the Destination. -
Page 153: Page 3: Local (S2/S3)
Master Transpose Enables/disables the Master Transpose function. Tracks disabled for Transpose are automatically tuned to play the “Equal Intonation Scale” ( s. ). Disable Master Transpose for the drumkit track to prevent the drum configuration from being altered. Value range: Enable/Disable (---). Page 3: Local (S2/S3) Parameter for the “local”... -
Page 154: Page 3: Local (S2R)
Page 3: Local (S2R) Parameters valid for L OCAL OMMON Page 3: Local (S2R) Aftertouch Activates/deactivates the Aftertouch for the track. Aftertouch is the pressure applied to the note while you hold it down. Aftertouch can affect both the track and the corresponding channel ( Channel or Mono Touch ) or affect only the note which is pressed ( Poly Touch ). -
Page 155: Page 4: Internal Sound
Page 4: Internal Sound Selects the polyphonic/monophonic mode of the track. A track is said to be polyphonic Mode when it plays more than one note simultaneously and monophonic when it plays one note only (regardless of how many notes are pressed simultaneously - typical of many synthesiz- ers produced in the 70’s). -
Page 156: Midi Messages Assignable To The Midi Filters (In & Out)
Hint: If you are controlling an instrument which does not conform to General Music stand- ards with the Music Processor, it is advisable to filter the Program Change messages from each track, because the same Program Change numbers will very probably correspond to different sounds on the two instruments. -
Page 157: Notes And Suggestions
Notes and suggestions Delete Track If you cannot cancel a track from a Performance because the same track is exploited by the Song in the same Bank/Song, use the following “trick”: 1. Save the Performance to another Bank/Song. 2. Cancel the track. 3. -
Page 158: Edit Sound
5 EDIT S OUND The elements which make up a Sound can be modified in the environ- EDIT SOUND All the operations can EDIT SOUND ment. Press the button to activate the edit of the sound assigned to the be cancelled by pressing the SOUND button before carrying out UNDO... -
Page 159: Polyphony Obtained With Different Types Of Sounds
Polyphony obtained with different types of sounds The maximum permitted polyphony of the Music Processor depends (1) on the current track playing mode and (2) on the type of Sounds assigned to the tracks. Maximum polyphony obtainable in the various track playing modes Note : The Sound Patches and Drumkits behave as the DC Sounds. -
Page 160: The Options Of The Main Menu And Of The Editors
The options of the main menu and of the editors The options of the main menu Save Allows you to save the modified or created Sound to the Sound Library. Abort Cancels. Escapes from the edit without saving the modifications or the created Sound. Activates the program which acquires and edits the Sample Translator samples ( s. -
Page 161: Possible Error Messages During The Sound Save Task
number and Family. The name of the Sound to memorise is shown in a small window: 2. Select an empty location where the Sound* can be memorised. The selected * If you have modified a Ram- location is defined by a Program Change number and a Bank Select number, Sound, you can save the modified messages with which the Sound can be recalled via Midi or from the control Sound to the same location you... -
Page 162: Converting A Sound To A Different Type
Converting a Sound to a different type The options required to transform the Sound currently in edit into a Single Oscilla- tor (SO), Dual Oscillator (DO) or Dual Crossfade (DC) type appear in the options column of the Waveset editor: The Sound currently in edit can be converted into either of the two remaining Sound types. -
Page 163: Waveset
Waveset The Waveset editor provides access to the principal control parameters of the Waveform, that is, the basic waveform of the Sound. Waveform (Sound Dual Crossfade) Waveform Basic waveform of the Sound. Here you can select one of the 209 Rom Waveforms, or a Waveform loaded in memory with a Ram-Sound, or one created with the S AMPLE RANSLATOR... -
Page 164: Page 1 Waveform (Dual Oscillator Sound)
Fine pitch Fine pitch of the Waveform in steps of 1/64th of a semitone. Value range: -64 ... +64. Pitch touch sensitivity Sensitivity of Pitch to Aftertouch variations. The Pitch of the Sound can be varied by apply- ing pressure on the notes of the keyboard after key on . Positive values increase the Pitch while negative ones have the inverse effect. -
Page 165: Volume
Volume The Volume editor gains access to the Sound volume controls. The volume pro- grammed on these pages relates to the Sound’s basic volume, which interacts with the track and instrument volume settings. In any case, it is the maximum level available of the Sound in any situation. -
Page 166: Amplitude Envelope
Carry out the following steps to access and edit the Tracking Detailed procedure parameters: 1. Tap to select one of the parameters “Point”, “Key” (if possible) or ENTER “Level”. 2. Rotate the to select a P , to change the K note or modify the L DIAL OINT... -
Page 167: Page 2 Amplitude Key On
Segment 1 rate dynamic sens. Response of Segment 1 of the Key On Envelope to dynamic variations. Segment 1 corre- sponds to the Attack phase. This parameter ties the Attack of the Sound to dynamics. Positive values increase the Attack rate with increased dynamics while negative values give the inverse effect with increased dynamics. -
Page 168: Page 3 Amplitude Key Off
Page 3: Amplitude Key Off Commands The option/command column shows specific options for this page. add segm Adds a segment. Inserts a new segment in the envelope curve immediately after the currently selected segment. N.B .: a maximum of up to 10 segments is permitted. del segm Cancels the segment selected. - Page 169 Follow the steps set out below to access and edit the Tracking Detailed procedure parameters: 1. Tap to select one of the parameters “Point”, “Key” (if possible), or ENTER “Level”. 2. Rotate the to select a P , to change the K note or modify the L DIAL OINT...
-
Page 170: Filter 1/2
Amplitude Applies Lfo to the Amplitude to produce Tremolo effects. You can programme both the first and the second parts of this multiple parameter, which interact. Amplitude Determines the modulation depth of the Lfo on the Amplitude (the output level). The positive and negative values indicate an opposed sense of increase/decrease of the Tremolo output level (the choice between positive or negative values give perfectly equivalent results). - Page 171 The filters are 2 pole filters with rolloff curves at 12 dB per octave. If both filters 4-pole Filter: are programmed with identical parameter values, they become a single 4 pole filter Programme identicali parameter with a rolloff at 24 dB per octave, perfect for those classic analog synth sounds. values for the “Filter 1”...
-
Page 172: Page 3 Filter 1 Tracking
2. Press the button to open the Clipboard: CLIPBOARD 3. Select one of the six Clipboard locations and copy the “Filter 1” page by selecting the “Save” command. The “Filter 1” page is copied as a “clip” in the Clipboard: 4. -
Page 173: Filter Envelope (Dc And Do Sounds)
Filter Envelope (DC and DO sounds) DC and DO Sounds have dynamic filters which modify the harmonic content of the 4-pole Filter: sound with respect to time. SO Sounds have static filters and consequently do not Programme identicali parameter values for the “Filter 1” and “Filter have the Filter Envelope editor in the main edit sound menu. -
Page 174: Page 3 Filter Key Off Envelope
Parameters to access the three parameters displayed under the Filter Key On Envelope ENTER curve. Edit the selected parameter with the (“Time” and “Level” also with the DIAL NUMERIC KEYPAD segment One of the envelope segments (1 - 10), whose end point is selected. time Duration of the Segment. -
Page 175: Page 4 Filter Envelope Tracking
Detailed procedure…Follow these steps to access and modify the parameters: 1. Tap to select one of the parameters “Segment”, “Time”, “Level”. ENTER 2. Rotate the to select a segment or to modify its duration or level. You can DIAL enter a “Time” and “Level” value on the NUMERIC KEYPAD 3. -
Page 176: Pitch Envelope
Pitch Envelope The tuning (pitch) of the Oscillators can vary over time, thanks to Pitch Envelope which is divided into two parts: the “Pitch Key On Envelope”, that regulates pitch variations while the note is pressed and the “Pitch Key Off Envelope”, that regu- lates pitch variations when the note is released (Release phase). -
Page 177: Page 3: Pitch Key Off Envelope
zoom in Enlarges the field of vision of the envelope up to 4 times. zoom out Reduces the field of vision of the envelope; it also cancels a zoom in . Reduces the envelope up to three times its standard size. Parameters to access the three parameters under the Pitch Key On Envelope symbol. -
Page 178: Page 4 Filter Envelope Tracking
Detailed procedure Follow these steps to access and modify the parameters: 1. Tap to select one of the parameters “Segment”, “Time”, “Level”. ENTER 2. Rotate the to select a segment or to modify its duration or level. You can DIAL enter a “Time”... -
Page 179: Page 1 Pan Envelope Control (Dc And Do Sounds)
In DC and DO sounds, the position of the sound in the “stereo panorama” (Pan) can be controlled dynamically by means of an envelope divided in two parts: the “Pan Key On Envelope”, that regulates the pan during the period that the key is pressed, and the “Pan Key Off Envelope”, that regulates the pan after releasing the keys (Release phase). -
Page 180: Page 3 Pan Key Off Envelope (Sound Dc And Do)
Parameters to enter the three parameters under the Pan Key On Envelope symbol. Edit the ENTER selected parameter with the (“Time” and “Level” also with the DIAL NUMERIC KEYPAD segment One of the envelope segments (1 - 10), whose end point is selected. time Duration of the Segment. -
Page 181: Page 4 Pan Tracking (Dc And Do Sounds)
Detailed procedure Follow these steps to access and modify the parameters: 1. Tap to select one of the parameters “Segment”, “Time”, “Level”. ENTER 2. Rotate the to select a segment or to modify its duration or level. You can DIAL enter a “Time”... -
Page 182: Rom-Waveforms With Separate Pitch Envelopes For The Two Oscillatori Even When Detune=0
Pan dynamic sensitivity Sensitivity of the Pan to dynamics. Positive values move the sound further right by increas- ing the dynamic force while negative values act inversely. Pan touch sensitivity Sensitivity of the Pan to Aftertouch. Positive values move the sound further right by increas- ing the Aftertouch pressure, while negative values act inversely. -
Page 183: Notes And Suggestions
Notes and suggestions Waveform Not all Waveforms cover the entire extension of the keyboard. This becomes particularly evident when you use an 88 note master keyboard on which you can reach the extremes of the extension. The problem is due to a lack of samples at the extremes of the keyboard. During the creating phase of a Waveform, considerations are made for the quality of the sound and the amount of memory necessary to store all the samples which consitute the Waveform;... - Page 184 Parametric Boost (enhances the frequencies around the Cutoff Frequency) Parametric Cut (attenuates the frequencies around the Cutoff Frequency) The slope of these curves is determined by the attraction capacity of the “poles”. The S Series can have two 2-pole filters or one 4-pole filter. The 4-pole filter creates a clearer slope and consequently a fuller and more aggressive sound.
-
Page 185: Sample Translator
AMPLE RANSLATOR Sample Translator is a Waveform creator and editor incorporated in the S Series. Its principal functions are as follows:: • the reading of samples from Ms-Dos/Atari floppy disks, in Avalon, Sound Designer, Sample Vision and Wave formats; • the reading of samples from Akai S1000 floppy disks;... -
Page 186: The Instrument Status During The Sample Translator Tasks
type, the Waveform will enter edit only if it is the Waveform of the first oscilla- tor. “Load the Waveform ‘Hit’?” Waveform, page 1. (A sample loaded to slot 00). The instrument status during the Sample Translator tasks The “Solo” mode is activated automatically when you enter EDIT SOUND However, in you can exclude the “solo”... -
Page 187: The Waveform Display
The Waveform display Sample location (00-15) Dimension of the Waveform Page number (1 or 2) Lowest note, original sample Comands/options note, highest note Load Loads a sample from Akai S1000 or Atari/Ms-Dos floppy disks, or sets the instrument to receive samples in MMA/sds format via Midi. The sample received is loaded to the currently selected location, replacing the existing sample, if present. -
Page 188: Save
Save Saves the Waveform created in a new Sound. Only samples which have been assigned an extension limit with the “Assign” command are saved in the Waveform. The new Waveform is added at the end of the list of Waveforms (accessed in from EDIT SOUND the W... -
Page 189: Play Single
Play Single Opens the Play Single display where you will find the graphical representation of the waveform relating to the sample selected in the Waveform display. In this page you can play back the sample on its own (even if has been “assigned”), modify its level and transmit it via Midi to an external device (sampler, computer). -
Page 190: Exit
Commands/options tuning Provides a reference for the sample pitch, producing the exact note played on the keyboard with a sinusoidal wave. loop nr. (x) Permits the selection of one of the eight loops of the sample. Only the first loop is used by the S Series , but it is also possible to modify the other loops. note link This option appears only when the “Note”... -
Page 191: Delete
Cut End An option which can be selected or de-selected. If selected, the section following the Loop End is “cut away” after loading the sample. Delete Erases the currently selected sample from memory. Copy Copies the currently selected sample to a “clipboard”. Paste (This function appears after a Copy operation). -
Page 192: Sound Patch And Drumkit
7 Sound Patch and Drumkit Two or more Sounds can be combined to form S or D with the OUND ATCHES RUMKITS advantage that you can obtain a variety of sounds which occupy only one location in the Sound Library. Sound Patches and Drumkits allow the use of only one Midi channel to control complex sounds which would otherwise require the use of several tracks. -
Page 193: Parameters
Set dynamic switch The dynamic threshold that divides the two levels. This sets the maximum dynamic level of the first level. 126 and 127 exclude the second level. Value range: 0 ... 127. Copy to level (x) Copies the entire programmed status of level 1 to level 2, or vice versa. Suggestion: Use this command to differentiate just a few notes between the two levels;... -
Page 194: Notes And Suggestions
Position of edited note in the stereo panorama. Value range: -32 (All Left) ... +32 (All Right). Transpose/Tuning transpose Transposes the edited note by semitones. Value range: -88 ... +88. tuning Fine tunes the transposition in steps of 1/64th of a semitone. Value range: -64 ... -
Page 195: What Is A Sequencer – The S Series Sequencer
EQUENCER AND What is a Sequencer – The S Series Sequencer The Sequencer (or M recorder) is a recorder of M events (notes, pitch bend, modulation...), capable of creating multi-timbral songs (tracks) and reproducing them using the internal sound generator of the instrument or the sound generator of other instruments connected to M The Sequencer of the S Series can record songs consisting of 16 tracks, modifying the events recorded with the general commands or single event-edit procedures. -
Page 196: The Sequencer Controls
The sequencer controls The buttons situated directly below the display control the recording or playback of a song: record Places the Song selected in “record” mode. play Starts the playback and the recording of the Song . << and >> Fast forward and rewind of the Song. Holding them down increase the velocity of the forward and rewinding action. -
Page 197: Cancelling The Song
2. Use the to select “All” and press twice to create 16 tracks with default values DIAL ENTER (Sound = GrandPiano, Volume = 127, Transpose = 0 ...) Cancelling the Song You can cancel a Song and maintain the Performance Bank intact in the following manner: 1. -
Page 198: Undo
free memory A non-modifiable indicator showing the current space available for the Song being recorded. The maximum space available for a Song is 400 kb. 5. Select the recording options. replace/overdub Replace cancels existing events and replaces them with those you are recording. - Page 199 Recording via When you exchange a Song between two sequencers remember to MIDI synchronise their Clocks. The recording Start and Play command must be controlled by only one sequencer so that the start is perfectly synchronised. The Clock of the controlling sequencer must be on “Internal”, while the Clock of the controlled sequencer must be on “External”.
-
Page 200: Edit Song Mode
9 EDIT Song mode Accessing Edit Song mode You can gain access to E in the following manner: 1. Press song in the Edit section. This may open the Playback display or the E environment. 2. If the Playback display appears, select “Edit”. The main menu editors of edit song Erase events Cancels the currently specified M... -
Page 201: Selecting The Tracks In Edit
Selecting the Tracks in Edit All the operations are carried out on the currently selected track. You can select a different track at any time, without escaping from the current edit page. The track is displayed on the first line of the display. Selection Screen The selection of the events to be edited takes place on two axes;... -
Page 202: Erase Events
Erase events This operation erases all MIDI events of a specified type from a specified range of bars. You can perform this operation on the currently selected Track (page 1) as well as the Master Track (page 2). Page 1: Erase from track Event Determines type of M event to erase from the specified locator range. -
Page 203: Move Events
Move events This operation moves all the events within a specified locator range in a track to a specified destination Locator. The data occupying the range being moved are completely erased. The data being moved merges with the data, if any, at the destination locator. -
Page 204: Insert/Delete Bars
Insert/delete bars This operation inserts a specified number of empty bars of a specified Time Signature into all the recorded tracks at the specified starting point (page 1), OR, deletes a specified number of bars from all the tracks of the Song (page 2). “Insert bars”... -
Page 205: Dynamic
Dynamic This operation modifies the Note on Dynamic values (keystrike velocities) for all This is a great option if, for note events within the specified bars of the currently selected track. example, you want to open the Filters of a sound that is sensitive There are two ways of correcting the values: to dynamic variations, otherwise not possible unless you repeat the... -
Page 206: Quantize
Quantize This operation adjusts the timing of each event to the nearest interval (quantisation) of the specified value. You can quantize the Note on events (the attack phase) as well as those relating to Note off (the release phase, hence the duration of the note [Gate time]). -
Page 207: Page 2: Quantize Key Off
Default: Free (no correction). Value range: 1/4, 1/8, 1/12, 1/16, 1/12, 1/32, 1/48, 1/64, 1/96 and Free. “Free” returns tracks precisely to their real time recorded status, cancelling the Quantize value used (if any). Note range from... to... Determines the range of notes which will be affected by the Quantize procedure. To select one note only, enter the same value in “from”... -
Page 208: Page 1: Copy From Single Track
Page 1: Copy from single track The data to copy are taken from a single track (the currently selected track shown in the track column). Copy mode Provides two copying alternatives. Replace: the copied data substitutes the data already present at destination. Merge: the copied data is combined with the data already present at destination. -
Page 209: Microscope
Microscope The Microscope operations permit you to edit every event recorded in the currently selected Track. It also permits the insertion of new events without actually playing them on the keyboard, by means of the Insert function. The events recorded in the track are shown in the Event List shown at the centre of the display. -
Page 210: Selecting An Event With Catch Locator
2. Specify the bar number on the and press to confirm: NUMERIC KEYPAD ENTER Selecting an event with Catch Locator You can select an event automatically. 1. Play the Song by pressing PLAY 2. When you hear the note (or another event) that you want to see displayed, select “Catch Locator”... -
Page 211: The Command/Options Column
The Command/Options Column The command/options of Microscope are different to those of the other modes. Commands/options Menu Returns to the main menu of EDIT SONG Rec/Play Opens the Playback display (from which you can enter Record). Mask Opens a window where you can select the events to view in the Event List. 1. -
Page 212: Undo
“Undo” If you have modified a series of events, you can press to restore them to their UNDO original value. Press again to recover the modifications cancelled with undo. UNDO This is an excellent means of comparing the “previous” and “new” status. Utility Contains some useful Song controlling functions. -
Page 213: Master Track
Master Track The Master Track editor allows you to modify the value and position of each event recorded in the Master Track - the “ghost” track where the events recorded can be Performance changes, Effect and Scale changes, the Volume variations performed with the Volume Pedal (S2/S3) or the Common Volume (S2R), the Effect Volume and Tempo changes, the Rotary control. -
Page 214: Selecting An Event With Catch Locator
Selecting an event with Catch Locator You can select an event automatically. 1. Play the Song by pressing PLAY 2. When you hear the note (or another event) that you want to see displayed, select “Catch Locator” in the command/options column. The event closest to the current Locator of the Song is selected and appears in the Event List. -
Page 215: Undo
Ins: (x) Specifies the type of event to insert manually with I NSERT 1. Select the command Ins: (x). A window with a list of the events which can be inserted appears: 2. Select the type of event to insert with or with the DIAL ENTER... -
Page 216: Notes And Suggestions
Notes and suggestions The “Merge” mode, which does not destroy data at the destination, can be exploited to programme the percussion instruments separately then copy all of them to a single track. The Append function is used to copy any other Song present in Ram to the “tail” of PPEND the Song currently in edit. -
Page 217: Edit General
10 EDIT G ENERAL The General section is a Setup; a set of data and settings that influence the way the instrument works. The General section groups together the pitch and tuning set- tings, the footswitch polarity status, Midi setup, the date and time, the dynamic and aftertouch (S2/S3) sensitivity setting and General Midi compatibility switch. -
Page 218: Page 2: Edit Keyboard Scale
Page 2: Edit Keyboard Scale This is where you can programme one of the four User Scales: Previous note Note in edit Next note At the centre of the display are the parameters of the note before the one currently in edit, the note in edit and the note immediately after. -
Page 219: Footswitch Controls
OOTSWITCH CONTROLS Here you can define the polarity of the Footswitches and assign them a function. The possibility of programming the polarity of the footswitches allows you to use footswitches of other manufacturers available on the market. The footswitch polarity can be set either to Normally Open (N.O., open at rest) or Normally Closed (N.C., closed at rest). -
Page 220: Page 1: Midi (1)
Page 1: Midi (1) Midi Common Activates/Deactivates the M , and assigns it a M channel. OMMON ch The Midi channel assigned to the Midi-Common. This channel cannot be used to control a single track in standard M mode. If it is “Off”, the Midi-Common is deactivated. Value range: Off, 1 ... -
Page 221: Page 2: Midi (2)
Page 2: Midi (2) Assigning Midi channels to the tracks programmed in this page overrides the programming of each individual Performance if the “Midi Channel lock” function (on the previous page) is set to “On”. Rotate the to select the track to programme. DIAL ch M Channel assigned to the track. -
Page 222: Sound Test
OUND TEST Given that S2R does not have a keyboard, and that it is possible to use it without connecting it to a master keyboard or other controlling device, the S OUND allows you to play a note of the currently selected track (in S mode). -
Page 223: General Midi
General Midi General Midi Activates/deactivates the compatibility with the GS Program Changes for the selection of the Drumkits. If the compatibility is active, the following situation will be in force: • during Midi communications, the Music Processor transmits and receives the correct Program Change for the selection of the Drumkits on M channel 10;... -
Page 224: Notes And Suggestions
Notes and suggestions Keyboard Scale The scales included in the S Series Rom are temperaments of historic origin and non-European scales. The following is a list of the scales available. (0) Equal: Used since the times of Bach to our times. (1) Pure Major C: Scale based on the formula F=f+n, where F is the frequency to calculate, f the previous frequency and n a constant. -
Page 225: Disk
11 D The floppy disk and the Ram-disk (if installed) are data storage systems which store data contained in the instrument’s Ram. Owing to the fact that Ram is volatile (the contents are cancelled when you switch off your instrument), it is necessary to store your data on disk. -
Page 226: The Ram-Disk
The Ram-disk Some models of the S Series incorporate 512 kb of static Ram that implement the Ram-disk. All the models in the S Series are designed to be fitted with 512 kb or 2 Mb of static Ram. The operations that can be performed on the Ram-disk are identical to those that can be carried on a floppy disk. -
Page 227: Organisation Of The Disk Environment
Displaying the Groups In the Save operations you can select all the Groups from 1 to 0 (10). In the Load and Erase operations, only the Groups containing at least one Bank/Song are displayed. For example: if there are Bank/Songs only in Groups 2 and 5, only the numbers 2 - 5 are shown in the relative Load and Erase pages. - Page 228 2. Select the “Directory” command. The contents of the currently selected device are shown (floppy disk, Ram-disk, operative Ram): 3. Escape from the Directory display by pressing EXIT Directory An example of a “Directory” display: Device selected Type of directory Device selectors and Group indicators Space remaining in...
- Page 229 dir bank/song Displays the names of the Bank/Songs stored. (To select a different Group you must escape from the “Directory” display). The second page displays the Performances contained in the Bank/Songs highlighted by the cursor: Data displayed in the directories dir all setup Displays the presence or absence of the Setups: General, Sound Library, Effects Libraries, Clipboard.
-
Page 230: The Disk Environment Pages (Load, Save, Erase, Utility)
The Disk environment pages (Load, Save, Erase, Utility) environment consists of four pages (Load, Save, Erase, Utility), each with DISK similar functions. Load Commands/options Standard commands/options (disk, ramdisk, new disk, directory). Load all Loads the entire contents of the disk. Loads the Bank/Songs of the Group selected. Important: the contents of the memory will be cancelled and replaced by the data being loaded. -
Page 231: Save
Save Commands/options The standard commands/options (disk, ramdisk, new disk, directory) also include the option “S.compr.” (= Sample compression ). s. compr. Compresses the samples during the Save procedure. A compressed sample occupies less space on the disk, meaning that the 2 Megabytes of Sample-Ram can be stored on one floppy disk. -
Page 232: Erase
Erase Command/options Standard commands/options (disk, ramdisk, new disk, directory). Erase all Cancels the entire contents of the disk. Erase all setup Cancels all the Setups (General, Sound Library, Effects Libraries, Clipboard). Erase single setup Cancels one of the Setups. 1. Select “Erase single setup”. The directory of the Setups in the disk selected is displayed: “Erase single setup”. - Page 233 Format Ms-Dos (1.44 Mb) Formats a 3.5” HD floppy disk in Ms-Dos format for the exchanging of Midi-files. The formatted disk has a capacity of 1.44 Megabytes. The procedure is identical to the one described above. Format Ms-Dos/Atari (720 Kb) Formats a 3.5”...
- Page 234 2. Insert the floppy disk and press . The directory of the Songs in the memory is dis- ENTER played: 3. Select the Song to convert into a Midi-file and confirm. Directory of the Ms-Dos or Ms-Dos/Atari floppy disk. 4. Select “New” to create a new file on the disk: 5.
-
Page 235: Possible Error Messages During Disk Operations
Possible error messages during disk operations Errors which occur during disk operations may be caused by incorrect procedures, interference with other functions in current use on the instrument (edit of a Sound or Effect), by a bad quality floppy disk or insufficient memory space. Errors common to all operations Ram-disk not installed. -
Page 236: Formats Of The Magnetic Supports Used
Notes and suggestions Formats of the magnetic supports used 3,5 HD 1,62 Mb “work disk” format . To save and/or load S Series data (Bank/Song, Setup, User Program). 1,44 Mb Ms-Dos format. To save and/or load Midi File to exchange with an Ms-dos compu- ter (also Macintosh or Amiga). -
Page 237: Sound Library
12 S OUND IBRARY The Sound Library is where the Sounds are stored. Organised in family groups with a simple “search” system available, finding and selecting Sounds is a simple task. A Sound Library can be saved and loaded as a Setup-Sound Library. The standard Sound Library has 518 Rom-Sounds. -
Page 238: Selecting Sounds By Entering The Program Change And Bank Select Number
Selecting Sounds by entering the Program Change and Bank Select number 1. Enter (a) the Program Change number, (b) the dash, (c) the Bank Select number. 2. Confirm your entries by pressing ENTER 3. Press again to assign the Sound selected to the currently selected track. ENTER Selecting Sounds with the search function The “Search”... - Page 239 3. Select “Execute” with . The Sound Library display shows only the Sound type FUNCTION KEY D selected . For example. 4. To return to the normal viewing mode (all Sounds) or to view other Sound types, repeat steps (1), (2) and (3). Move Procedure to moves a Sound to a different location.
-
Page 240: Types Of Sounds And Their Identification Symbols
3. Select the Sound and select the “Import” command. The internal Sound Library is dis- played showing the empty locations (-- -- -- --). Select an empty location in which to load the Sound: 4. If necessary you can change the name of the imported Sound with the “Name” command. 5. -
Page 241: Effects Libraries
13 E FFECTS IBRARIES The Effects Libraries are two archives for the Effects (one for each of the two Digital Signal Processors, DSP). Library 1 contains the Reverbs and Library 2 contains the Modulations. Library 1 Reverb. Library 2 Delay, Chorus, Flanger, Phaser, Rotary, etc. The Effects Libraries can be saved and loaded (always coupled) as an Effects Libraries–Setup. -
Page 242: Command/Options
Command/options Edit Gains access to the environment. The Effect with which you enter edit is is the EFFECT EDIT one highlighted by the cursor. Move Procedure to move the Effect to a different location within its own Library. 1. Select the Effect to move and press “Move”: 2. -
Page 243: Edit Effect
14 E FFECT How to access the E FFECT 1. Select the Effect to modify in the effects libraries. 2. Press “Edit”. How to escape from the E FFECT Select “Save” (saves your edits) or “Abort” (cancels your edits). How the E environment is organised FFECT Effect in edit... -
Page 244: How To Programme The Effects Of Library 1
How to Programme the Effects of Library 1 Library 1 contains Reverbs with or without programmable early-reflections. Programmable early-reflections permit the best determination of the position of the sound source with respect to the wall, specifying the quantity of the initial reflec- tions (early reflections) before the reverb halo. -
Page 245: How To Programme The Effects Of Library 2
Attenuation Reverb attenuation. Value range: 0 [-63.50 dB] ... 127 [0.0 dB]. Diffusion Diffusion. Inserts a halo in the final part of the reverb. Value range: 0 ... 60. Filter type Type of equalisation (High Pass or Low Pass). This is associated to the next parameter. Filter frequency Equalisation frequency (associated to the previous parameter). -
Page 246: Flanger
Frequency modulation Modulation speed of Chorus. Value range: 0 [0.3 khz] ... 28 [6.0 khz]. Depth Modulation depth. Value range: 0 [-63.50 dB] ... 127 [0.0 dB]. Filter Static equalisation. Modifies the high frequencies, which modify the timbric quality of Chorus. -
Page 247: Rotary
Rotary Effect type Type of Rotary. Rotary is always pseudo-stereophonic and affects only the Stereo Left+Right outputs. Value range: Rotary1, Rotary2. Level Level of the effect. Value range: 0 [-63.50 dB] ... 127 [0.0 dB]. Feedback Automodulation of the Rotary. Enriches the harmonic contents of the effect. Value range: 0 [0%] ... -
Page 248: Notes And Suggestions
Notes and suggestions Reverb Reverberation consists of a series of “waves”, called reflections, which comprise early-reflections and tail reflections. In the diagram, the early reflections are shown by the letters a and b while the tail reflections are between c and d: y = Amplitude x, y = 0 x = Time... - Page 249 Flanger Similar to Chorus, dynamically enriches and reduces the harmonic content of the sound. Phaser Similar to Flanger, but with a faster modulation. Ensemble Similar to Phaser, accentuates the sensation of multiplication of the sound sources. Rotary Simulates the rotating speakers featured by many electric organs. The rotation speed varies dynamically from slow to fast.
-
Page 250: Clipboard
15 C LIPBOARD EDIT PERFORMANCE CONTROLS EDIT PERFORMANCE TRACKS EDIT SOUND EDIT EFFECT you can “copy” a page of parameter settings and place the copy in the Clipboard. The Clipboard has six locations. It can be saved or loaded as a Clipboard-Setup. The Clipboard is particularly useful for the creation of four-pole Filters in EDIT (s.). -
Page 251: Utility
16 U TILITY section includes functions to rename, erase and copy Bank/Songs and UTILITY Performances. It also contains the function to cancel the Clipboard–Setup from the internal memory. “Juke_box” This command chains the Song stored in the memory without interruptions, starting from the currently selected Song. - Page 252 Copy Bank/Song Copies the Bank/Song selected to another Bank/Song (both the Performance Bank and the Song). 1. Select the Bank/Song to copy. 2. Select the “Copy Bank/Song” function: 3. Select a location in which to copy the Bank/Song. If the location selected is not empty, the previous Bank/Song is replaced by the Bank/Song you are copying.
-
Page 253: Preload
17 P RELOAD Preload is a background loading facility which permits the loading of a Bank/Song The Auto-Preload function is not operative when a Sound or an while the sequencer is in playback mode (Song play). By choosing an appropriate Effect is currently in edit. - Page 254 Confirm the Preload operation and, depending on the selected Preloading status, the following will occur: • If the “Auto” option is not selected the Bank/Song being preloaded will be loaded to the selected destination. If the destination is already occupied, the old Bank/Song will be replaced by the one being loaded.
- Page 255 APPENDIX MIDI - MIDI Implementation Chart - MIDI Messages / MIDI Controllers - MIDI System Exclusive Code Interface ROM-WAVEFORMS, SOUNDS, PERFORMANCES DRUMKITS & PERCUSSION SAMPLES TECHNICAL SPECIFICATIONS...
- Page 256 APPENDIX...
- Page 257 MIDI IMPLEMENTATION CHART, MIDI CONTROLLERS, SYSTEM EXCLUSIVE...
- Page 258 MIDI I MPLEMENTATION HART DATE: 25.10.1993 MIDI IMPLEMENTATION CHART MODEL S2/S3/S2R VERSION: 1.0 Function Transmitted Recognised Remarks Basic Default 2 MIDI IN/OUT/THRU Channel Changed EXTRA COMMON CH. Default MULTI MODE MULTI MODE FOR MIDI: Mode Messages SINGLE MODE can be Altered memorized Note...
- Page 259 / MIDI C ESSAGES ONTROLLERS The M messages transmitted and received by the S Series (and by the more (06) Data Entry recent M instruments) are: (07) Main Volume (08) Balance [Osc 1/2] : Note data, consisting of four values: note name, velocity on, velocity (09) Control 9 off, gate (note duration).
- Page 260 The user can access many resources contained in GENERALMUSIC devices (files, edit structures, glo- bal structures). midi system exclusive identifier GENERAL MUSIC exclusive code MSECI permits the programmer to write software for f = function number (0-7) c=channel(0-F) many features, such as Machine Backup, Host Edit Interface, etc..
- Page 261 FILE Example 1: 8 to 7 bit conversion FILE_F FUNCTIONS 12 45 F7 A3 53 B0 3A—conv8_7 —> 09 22 7F 51 29 58 1D 1E (7 bytes) (8 bytes) FILE DUMP HEADER F_DHDR void conv8_7 ( dest, src ) unsigned char *dest, *src;...
- Page 262 FILE DUMP DATA BLOCK F_DPKT FILE DIRECTORY REQUEST DIR_DRQ F0 2F 0c 02 oc oo <pkt> cc F7 F0 2F 0c 04 rc <dir name> <location> cc F7 c = channel (0-F) c = channel (0-F) oc = own channel (0-F) rc = request channel (0-F) oo = number of octects dir name = 8 chars file name + 3 chars extension...
- Page 263 EDIT EDIT PARAMETER EDIT_F FUNCTIONS SEND+REQUEST PAR_SND F0 2F 2c 03 rc oo <data> cc F7 c = channel (0-F) EDIT PARAMETER REQUEST rc = request channel (0-F) PAR_REQ oo = octects number F0 2F 2c 02 rc oo <hdr> cc F7 data = 1st octect contains data header and the next contains data parameters (ex.
- Page 264 DEVICE UNPREPARE SOUND DEVICE_CMD COMMAND UNPREPARE_soundAccess ACCESS F0 2F 5c 04 oc F7 c = channel (0-F) STATUS REQUEST STAT_REQUEST oc = own channel. (0-F) F0 2F 5c 00 oc F7 c = channel (0-F) oc = own channel (0-F) PREPARE BANK PREPARE_bankAccess ACCESS...
- Page 265 UNPREPARE GENERAL DATA DUMP DATA_DUMP ACCESS UNPREPARE_generalAccess F0 2F 5c 0D oc oo <pkt> cc F7 F0 2F 5c 0A oc F7 c = channel (0-F) c = channel (0-F) oc = own channel (0-F) oc = own channel. (0-F) oo = number of octects pkt = binary data in octects cc = checksum (xor of all bytes from 2F)
- Page 266 DIRECTORY ANSWER DIR_ANSWER MESSAGE SEND MESSAGESEND F0 2F 5c 10 oc dd bb pp <file name1> f1 <inf1> <file name2> F0 2F 5c 13 <message> oc ck F7 ck F7 c = channel (0-F) c = channel (0-F) <message> = message string (asci) (see MIOS doc.) oc = own channel (0-F) oc = own channel.
- Page 267 WAVEFORMS, SOUNDS AND PERFORMANCES Waveforms, Sounds, Performances xiii...
- Page 268 IST OF THE AVEFORMS RESIDENT IN AVEFORMS Piano Muted_Trp2 141) Vox_Tip Honky Tonk FrenchHorn 142) Car_Horn El.Piano 1 Brass 143) Door El.Piano 2 Brass_Rips 144) Rapsy_Ride El.Piano 3 Brass_Trp 145) Baby_Vox El.Piano 4 Anlg_Brass 146) Dolly_Vox El.Piano 5 Dual_Brass 147) Kitchen El.Piano 6 Brass_2 148) Logdrum...
- Page 269 OUND MAP The table shown in the pages which follow represents the Sound The Sound Library Library that resides in the instrument’s ROM, and which is automatically loaded into memory when the instrument is powered up in the following conditions: no floppy disk inserted in the disk drive, or the disk inserted does not contain a Sound Library;...
- Page 270 PIANO Family GrandPiano Env_Piano Brt_Piano El_GrPiano ElGrPiano Honky_Tonk Western El_Piano_1 El_Piano_2 Rhodx El_P_Chim ElPiano_32 Syn_El_P1 Syn_El_P2 El_Piano_3 El_Piano_4 El_Piano_5 Det_Piano El_Piano_6 El_Piano_7 El_P_Glock Harpsich_1 Harpsich_2 Harpsich32 Clavinet Syn_Clav_1 Syn_Clav_2 Wawaclav Clav_Filt Clavinet32 CHROMATIC PERCUSSION Family Celesta CelestaPlk Kocis Glockenspl Attack Glockensp2 Music_Box Wine_Gls1...
- Page 271 Seq_Bass Waveforms, Sounds, Performances xvii...
- Page 272 STRINGS Family Violin Viola Cello Contrabass TremoloStr Pizz_Str Harp Timpani Dyn_Orch ENSEMBLE Family Strings_1 Str_Glockn Strings_32 Strings_2 Orch_Str Synth_Str1 Synth_Str2 Synth_Str3 Synth_Str4 Choir Choir_32 Voice_Oohs LyriconØØ SynthVoice Anl_Voice Vocoder_1 Vocoder_2 Symphony Symph_Orch Reson_Orch BRASS Family Trumpet FlugelHorn Trp_Swell Trumpet_32 FlugHorn32 Trombone TrombSwel1 TrombSwel2...
- Page 273 BrasSwell1 BrasSwell2 BrassRip32 Waveforms, Sounds, Performances...
- Page 274 SYNTH LEAD Family Pulse_1 Pulse_2 Pulse_Ø5 Pulse_1Ø Pulse_15 Pulse_2Ø Pulse_25 Pulse_35 O_B_Filter Invasion TriangleWv Sinus SadJupiter Anl_Brass1 Anl_Brass2 Anlg_Pan Arp_26ØØØØ Azimut Syn_Lead_1 Snd_Track1 Snd_Track2 Snd_Track3 Sawix1_CM Old_Lead Chopper Frog Digital_1 Digital_2 Zerbino AnalogiX Analog_Y Jump_ØØ Jump_Ø1 Break_ØØ Cluster Reson_Park ChoOrg Lyle FilterRes1 FilterRes2...
- Page 275 Pulse_4Ø Pulse_45 Pulse_Harp Space_Harp Celestial Pulse_32 Anlg_Synth Synt_Res1 Waveaura Analog_1 SyntSquare Mooog_Wv Sinus_32 MooXLoopX Soft_Sound SimpLead Sharp_CM Sawix2_CM Sawix3_CM ChopRes Car_Horn Door Raspy_Ride Baby_Vox Dolly_Vox Kitchen Log_Drum Noise_Perc Guiro Guica_High Guica_Low Vibraslap Castanets Tambourine Timbales Cabasa Bd_Filters Steeldrum BDrumShort Bd_Rock_1 Hard_BDrum BD_Equaliz Sd_Brush_1...
- Page 276 DRUM KITS Family Drum_Kit1 Drum_Kit2 Drum_Kit3 Drum_Kit4 Standard Drum_Kit5 Room_Kit Drum_Kit6 Power_Kit Drum_Kit7 Electr_Kit Drum_Kit8 HouseDrums Jazz_Kit Jazz_Drums House_Kit Drum_Filt Brush_Kit Drum_WS OrchestrKit IST OF THE ERFORMANCES CONTAINED IN BANK/SONG PERFORMANCE 1 1 Europe Great Xpectat. Techno Vintage Ouverture Soloist 2 Toy Land Hurry Up Pink Sunrise...
- Page 277 Empty Disk: ____________________________ Author: __________ Notes: _____________________________ BANK/SONG PERFORMANCE 1 BANK/SONG PERFORMANCE 6 Waveforms, Sounds, Performances xxiii...
- Page 278 APPENDIX XXIV...
- Page 279 DRUMKITS AND PERCUSSION SAMPLES -Drumkits and Percussion Samples...
- Page 280 RUMKITS OF THE TANDARD OUND IBRARY Drum_Kit 1 121-1 General MIDI Drum_Kit 2 121-2 General MIDI APPENDIX XXVI...
- Page 281 Drum_Kit 3 121-3 General MIDI Drum_Kit 4 121-4 Korg M1 -Drumkits and Percussion Samples xxvii...
- Page 282 Drum_Kit 5 122-1 Yamaha SY77 Drum_Kit 6 123-1 APPENDIX XXVIII...
- Page 283 Drum_Kit 7 124-1 Drum_Kit 8 125-1 -Drumkits and Percussion Samples xxix...
- Page 284 Jazz_Kit 126-1 House_Kit 127-1 GS TR-808 APPENDIX...
- Page 285 Drum_Filt 127-2 Drum_WS 128-1 GEM WS2 -Drumkits and Percussion Samples xxxi...
- Page 286 Standard 121-5 GS Standard Room_Kit 122-5 GS Room Kit APPENDIX XXXII...
- Page 287 Power_Kit 123-5 GS Power Kit Electr_Kit 124-5 GS Electric Kit -Drumkits and Percussion Samples xxxiii...
- Page 288 HouseDrums 125-5 GS House Drums Jazz_Drums 126-5 GS Jazz Drums APPENDIX XXXIV...
- Page 289 Brush_Kit 127-5 GS Brush Kit OrchestKit 128-5 GS Orchestra Kit -Drumkits and Percussion Samples xxxv...
- Page 290 ERCUSSION AMPLES This table lists the percussion samples resident in the instrument’s ROM (the relative Waveforms appear last in the Waveform list). Each sample is listed with a sample note, which corresponds to the frequency which provides optimum timbre quality. As you move further away from this note, the sample assumes particular characteristics and its quality gradually decays.
- Page 291 TECHNICAL SPECIFICATIONS TECHNICAL SPECIFICATIONS xxxvii...
- Page 292 ECHNICAL PECIFICATIONS Keyboard Display 61 notes (S2), 76 notes (S3), weighted keys (synthesizer Resolution: 240 x 64 pixels backlit. type). Sensitive to Dynmaics (Key On, Key Off) and polyphonic Aftertouch. Sequencer Tracks: 16. Sound Generation Resolution: 192 Beats Per Quarter (BPQ). PCM, Wavetables, Multiloop, Crossfade Multiwave and Recordable events: approx.
- Page 293 GLOSSARY / ALPHABETICAL INDEX / TROUBLESHOOTING GLOSSARY ALPHABETICAL INDEX TROUBLESHOOTING GLOSSARY...
- Page 294 Glossary -1/<, +1/>: Buttons to increase/decrease data value by one step Disk Drive: Device that “reads” a floppy disk. The disk drive at a time. Also used in the name writing procedure, to is built-in and has a capacity of 1.65 Megabytes. It can move the flashing cursor left or right, or to move the also use 3.5”...
- Page 295 Master Keyboard: A controlling device (keyboard). Usually, Operating System: See MIOS. a MK is a generator of MIDI events, incapable of gener- Option: A space predisposed for the functions implemented ating Sounds. It is connected to the MIDI IN port of an by User Programs.
- Page 296 Sequencer: A system of recording MIDI data. The Sequencer Transpose: The change in pitch (higher or lower) of a note permits you to record a polyphonic song sound by sound, with respect to a standard value. and so reproduce the song after carrying out any neces- Tweak: A term that describes the slight modification of one or sary corrections.
- Page 297 LPHABETICAL NDEX Aftertouch Date 205 Decay. See Amplitude Envelope activation/deactivation 137, 138, 141 Balance control 148 Delay (of the track) 17, 136, 141 Pan control 166 Destinations 18, 42, 126, 135–136 Pitch control 147, 148 Internal generation 42, 126–128, 136–137, 139 Volume control 149 Midi Out 42, 126–128, 136–137 cutoff frequency control 155...
- Page 298 Microscope editor 193, 200 assignable MIDI messages 133 Move events editor 187 programming the User Sliders 132 Quantize editor 190 assignable MIDI messages 133 Transpose editor 189 Utility editor 196 Edit Sound 90–95, 142–168 Amplitude envelope editor 150–153. See also Gain 106, 117, 146 Amplitude envelope General Setup...
- Page 299 Microscope. See Edit Song: Microscope editor via MIDI 98 MIDI Pitch Bend 131, 132 compatibility General MIDI/GS. See General Pitch envelope 166. See also Envelope (general info) MIDI; GS tracking 162 MIDI Channel lock 204, 208 Pitch envelope tracking. See Pitch envelope: tracking MIDI Clock.
- Page 300 mastertrack 186 track playing modes 16, 43, 44, 48–49 playback 179 - resulting polyphony 143 quantize 84, 181 layer 48 recording 82–85, 83–85, 179, 181–182 multi 49 countdown 182 single 48 Edit Stop To Bar 182 split 48 Locator 182 erase 75, 135, 141 replace/overdub 182 configuratoin of the tracks 17, 44, 135–136...
- Page 301 ROUBLESHOOTING Problem Possible cause Solution The instrument doesn't turn on. The power cable is not inserted Check the connection and make sure correctly. that the plug is inserted fully home. The instrument (fitted with a Ram- The data contained in the Ram-disk Press ENTER an instant after disk) locks when you power up.
- Page 302 TROUBLESHOOTING...
- Page 303 FEDERAL COMMUNICATIONS COMMISSION Note: This equipment has been tested and found to comply with the limits for a Class B digital device, pursuant to Part 15 of FCC Rules. These limits are designed to provide reasonable protection against harmful interference in a residential installation. This equipment generates, uses, and can radiate radio frequency energy and, if not installed and used in accordance with the instructions, may cause harmful interference to radio communications.
- Page 304 Specifications are subject to change without prior notice. PRINTED IN ITALY Sales Division: I -47048 S.Giovanni in Marignano (RN) - Italy – Via delle Rose, 12 Tel. +39 541 959511 – fax +39 541 957404 Internet: http://www.generalmusic.com – tlx 550555 GMUSIC I...