
Subscribe to Our Youtube Channel
Related Manuals for Adam Equipment CPWplus 6


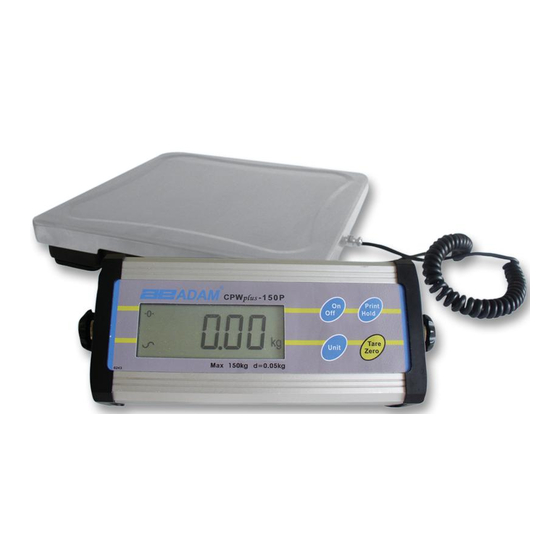
Summary of Contents for Adam Equipment CPWplus 6
- Page 1 Adam Equipment CPWplus SERIES (P.N. 7949, Rev. A5, June 2006) Software Revision: 1.2-06 © Adam Equipment Company 2006...
- Page 2 © Adam Equipment Company 2006...
-
Page 3: Table Of Contents
SETTING OF HOLD TIME LIMIT ................17 COMMUNICATION WITH A COMPUTER/PRINTER ..........18 10.0 ERROR MESSAGES ....................19 11.0 TECHNICAL PARAMETERS ..................20 11.1 FILTER ........................20 11.2 ZERO TRACKING ....................21 12.0 FACTORY PARAMETERS ..................22 13.0 REPLACEMENT PARTS AND ACCESSORIES ............22 14.0 SERVICE INFORMATION ..................23 © Adam Equipment Company 2006... - Page 4 © Adam Equipment Company 2006...
-
Page 5: Introduction
[Print/Hold], [Unit], and [Tare/Zero]. • With the standard AC adapter included and the facility for use with dry- cell batteries, the CPWplus platform scales can be used in a fixed location or as a portable scale. © Adam Equipment Company 2006... -
Page 6: Locating The Scale
Keep the scales clean. Do not stack material on the scales when they are not in use. 3.0 SETTING UP THE SCALE LIST OF ACCESSORIES Your packet contains- AC adapter The scale and Indicator Steel Pan An Instruction manual © Adam Equipment Company 2006... -
Page 7: Connecting The Indicator
Pillar using normal screws. Socket Connect the cable to the connector as before. • To adjust the angle of the indicator, use the two thumb screws on the side of the bracket that connects the indicator. Base © Adam Equipment Company 2006... -
Page 8: Installing Batteries
• Remove the cover from the battery compartment under the scale. Install six AA size batteries as shown below. • It is suggested that the alkaline batteries be used for best life. 6 X "AA" Alkaline © Adam Equipment Company 2006... -
Page 9: Specifications
Base: 300 x 300 x 50 mm / 11.8 ” x 11.8” x 2” (w x d x h) Indicator: 270 x 80 x 30 mm / 10.6” x 3.1” x 1.2” Net Weight 4 kg / 8.8 lb Accessories Hard carry case with lock and strap © Adam Equipment Company 2006... -
Page 10: Keypad And Display
When shown the result is stable. kg , lb, oz or Scale is in weighing mode lb-oz Battery is weak Indicates when Net Weight is being displayed Display is held until hold parameter setting is Hold © Adam Equipment Company 2006... -
Page 11: Operations
4%, pressing [Tare/Zero] key will tare the scale. See the next section on taring of the scale. • The scale has an automatic zero tracking function to account for environment or accumulation of material on the platform. © Adam Equipment Company 2006... -
Page 12: Taring The Scale
• If a container is used, this can be tared out as described in 6.3 on “Taring the scale”. Then material can be added to show the net weight. © Adam Equipment Company 2006... -
Page 13: Selecting The Unit
An error message “CALEr” will be displayed if an incorrect mass is selected by the user. Note. The new calibration must be within ±20% of the factory calibration value or an error will be shown and the calibration will be void. © Adam Equipment Company 2006... - Page 14 “CALEr” will be displayed and the scale will return to weighing without calibration being saved. Repeat the process correctly. • Remove the weight. • Verify the scale is calibrated correctly. If not then check the scale and repeat the process. © Adam Equipment Company 2006...
-
Page 15: User Parameters
If there is any weight on the scale or a key is pressed, the scale will continue to work. “Pr oFF” setting disables the Auto Power-off function. The scale will not automatically turn off. © Adam Equipment Company 2006... -
Page 16: Setting Of Backlight
• Use the [Tare/Zero] key to scroll through the options. • Press [Unit] to confirm the selection and move to the next function for setting the Baud rate for sending the data via RS-232 interface. © Adam Equipment Company 2006... -
Page 17: Selection Of Bps
Use the [Tare/Zero] key to scroll through the options. • Press the [Unit] key to confirm the selection and move to the next function for setting the transmission mode for sending the data to RS-232 interface. © Adam Equipment Company 2006... -
Page 18: Selection Of Transmission Mode
3” is made then it will lead to SETTING OF HOLD TIME “Hti x” (see section 8.9) • If “Hod 1” is selected, pressing the [Unit] key will take you back to the first parameter “Pr oFF”. © Adam Equipment Company 2006... -
Page 19: Setting Of Hold Time Limit
[Print/Hold] is [Print/Hold] is pressed occur again. pressed again or time again or time expires as Hold is released if [Print/Hold] is pressed expires as per setting. again or time expires as setting. setting. © Adam Equipment Company 2006... -
Page 20: Communication With A Computer/Printer
8.4, S stands for stable, N for no error G/W for gross weight, ASNG/W + 0.510 xx xx for the chosen unit( kg, lb, oz, lb:oz) ASNG/W + 2.998 xx <lf> (Includes 1 line feed) © Adam Equipment Company 2006... -
Page 21: Error Messages
If an error message is shown, repeat the procedure that caused the message such as turning the scale on, calibration or any other functions. If the error message is still shown, contact your supplier for further support. © Adam Equipment Company 2006... -
Page 22: Technical Parameters
• Press [Tare/Zero] to scroll through the settings. If it is set to “F1 1” then the display is at its slowest setting and at “F1 3” the display is in its fastest setting. • Press [Unit] to confirm the selection and move to the next parameter. © Adam Equipment Company 2006... -
Page 23: Zero Tracking
• If [Unit] is pressed instead of the [Print/Hold] key, the display will ask for Pin for entering into the Factory Parameters. Switch off the scale. © Adam Equipment Company 2006... -
Page 24: Factory Parameters
“Pi”, the scale must be switched off. 13.0 REPLACEMENT PARTS AND ACCESSORIES If you need to order any spare parts and accessories, contact your dealer or Adam Equipment. A partial list of such items is as follows- • Power Supply Adapter • In use cover •... -
Page 25: Service Information
Include any recent history of the unit. For example: -Has it been working since it’s delivered -Has it been in contact with water -Damaged from a fire -Electrical Storms in the area -Dropped on the floor, etc. © Adam Equipment Company 2006... - Page 26 WARRANTY STATEMENT Adam Equipment offers Limited Warranty (Parts and Labour) for the components failed due to defects in materials or workmanship. Warranty starts from the date of delivery. During the warranty period, should any repairs be necessary, the purchaser must inform its supplier or Adam Equipment Company.
- Page 27 Adam Equipment products have been tested with, and are always supplied with mains power adaptors which meet all legal requirements for the intended country or region of operation, including electrical safety, interference and energy efficiency.
- Page 28 E-mail: info@adamequipment.com.cn © Copyright by Adam Equipment Co. Ltd. All rights reserved. No part of this publication may be reprinted or translated in any form or by any means without the prior permission of Adam Equipment. Adam Equipment reserves the right to make changes to the technology, features, specifications and design of the equipment without notice.
Need help?
Do you have a question about the CPWplus 6 and is the answer not in the manual?
Questions and answers
can you change the placement of the decimal point?