Advertisement
Advertisement
Table of Contents

Subscribe to Our Youtube Channel
Summary of Contents for Progression Fitness 700 R
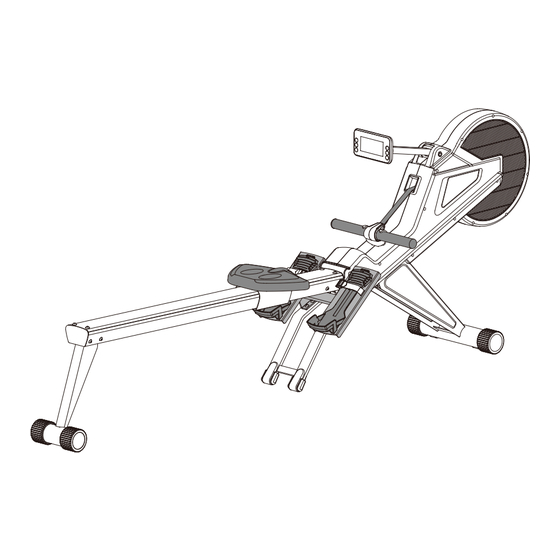
- Page 1 Rowing Machine MODEL: ENGLISH...
- Page 2 **Before you start to assemble the machine, please be sure to read the below instructions first and follow each assembly step. Warning: (1) Due to the weight of the machine it is recommend that 2 people carry out the assembly process. (2) As the machine is heavy the poly-foam is there to help support the machine until assembly steps are completed.
- Page 3 Front stabilizer Main frame Rear stabilizer Seat Adaptor Chest strap Slide track Pedal (J1) Screw M8*16 x 24PCS (J2) Washer M8 x 4PCS Tool: 5 M/M - 2 -...
- Page 4 HOW TO REMOVE THE POLY-FOAM Open the box to see the rower as shown in figure 1. Take out all the components except the machine, and then remove the poly-foam and remaining components from inside. Please put the components aside for later use.
- Page 5 HOW TO ASSEMBLE THE SADDLE AND THE SLIDE TRACK After turning the main frame (A), remove the poly-foam (3&4). Step 1. Fit the seat (E) on to the slide track (D) by four screws (J1) Step 2. Fit the slide track (D) to the main frame (A) by six screws (J1). ** Please note - before using the pull rope for exercise it is necessary to take off the strap holder first.
- Page 6 HOW TO ASSEMBLE THE PEDAL Step 1. Loosen the knob (A4) then pull it down. Fold up the slide track USE TOOL (D) as shown below until the knob touches the track. Be careful for the seat may slide down and pinch your hand. Step 2.
- Page 7 HOW TO USE THE ADAPTOR The power socket is located at the front of the machine as picture shown in Figure 8. The mains adapter is required to operate the computer console. Plug adaptor into the machine and then into the electrical outlet.
-
Page 8: How To Move The Machine
HOW TO MOVE THE MACHINE The front stabilizer has built-in transport wheels. Stand at the rear of the machine and lift it up by the bar on the main frame, use the other hand to hlod the slide track (D) to control the direction. Once the weight of the machine is transferred to the transport wheels, you can easily move the machine to a new location. - Page 9 Notice about Adjustment of Slide Track (D) and Sliding Track (E1) There are 3 screws (E9*1pc and E3*2pcs) shows under the sliding track (E1). Loosen the middle screw (E9) first and then adjust the other 2 screws (E3) to be loose or tight depending on personal preference. Lastly, tighten the middle screw (E9) to lock the setting.
- Page 11 DESCRIPTION Q”TY DESCRIPTION Q”TY I L I AXLE ∮12*39 TRANSPORTATION WHEEL * ” ” 2 SCREW 3/16”*1 1/4” ” 8 * ” A13 BUSH ∮38*3/8 I L I A21 MAGNETIC ∮6*5T ” 6 WASHER ∮5*∮13*1.5T PEDAL SUPPORTING TUBE PEDAL (L) PEDAL (R)(=G1) PEDAL STRAP PLASTIC BUTTON...
- Page 12 TIME/500M and STROKES/TOTAL STROKES , BPM U0 ~ U4 it should screen will fully machine will pick up the signal of the To properly learn h -11-...
-
Page 13: Manual Mode
will then press to choose choices you finish setting all functions PULSE MANUAL mode USER SELECT U0-U4 SELECT SEX OF MALE OR FEMALE SELECT AGE SELECT HGT SELECT WGT PRESS PRESS PRESS PRESS PRESS ENTER ENTER ENTER ENTER RESET 3SEC. DOWN DOWN DOWN... -
Page 14: Program Mode
PROGRAM mode SELECT AGE SELECT HGT SELECT WGT USER SELECT U0-U4 SELECT SEX OF MALE OR FEMALE PRESS PRESS PRESS PRESS PRESS ENTER ENTER ENTER ENTER RESET 3SEC. DOWN DOWN DOWN DOWN DOWN TO RESET PRESS UP PRESS UP PRESS UP PRESS UP PRESS UP OR DOWN... -
Page 15: User Mode
WATT mode USER SELECT U0-U4 SELECT SEX OF MALE OR FEMALE SELECT AGE SELECT HGT SELECT WGT PRESS PRESS PRESS PRESS PRESS ENTER ENTER ENTER ENTER RESET 3SEC. DOWN DOWN DOWN DOWN DOWN TO RESET PRESS UP PRESS UP PRESS UP PRESS UP PRESS UP OR DOWN... - Page 16 H.R.C mode SELECT AGE SELECT HGT SELECT WGT USER SELECT U0-U4 SELECT SEX OF MALE OR FEMALE PRESS PRESS PRESS PRESS PRESS ENTER ENTER ENTER ENTER RESET 3SEC. DOWN DOWN DOWN DOWN DOWN TO RESET PRESS UP PRESS UP PRESS UP PRESS UP PRESS UP OR DOWN...
-
Page 17: Race Mode
will wins RACE mode USER SELECT U0-U4 SELECT SEX OF MALE OR FEMALE SELECT AGE SELECT HGT SELECT WGT PRESS PRESS PRESS PRESS PRESS ENTER ENTER ENTER ENTER RESET 3SEC. DOWN DOWN DOWN DOWN DOWN TO RESET PRESS UP PRESS UP PRESS UP PRESS UP PRESS UP... - Page 18 120 Robin Cres, Saskatoon, SK S7L 6M7 1-886-978-1999...


Need help?
Do you have a question about the 700 R and is the answer not in the manual?
Questions and answers