Advertisement
Quick Links
INSTALLATION GUIDE
SAILOR 6210 VHF
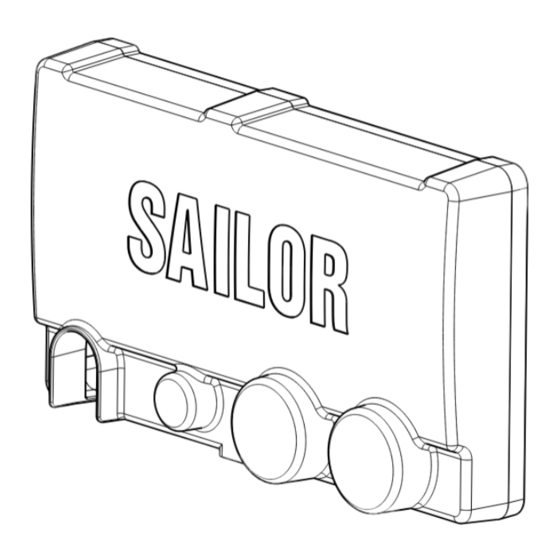
What's in the box?
Sun Screen
Transceiver
Wheel Knob
(2 pcs.)
U-Mounting
Bracket
Flush Mount
Bracket (2 pcs.)
Screw M4x12
Screw ø3.9x19
Screw M4x45
TORX 20 (5 pcs.)
TORX 20 (5 pcs.)
TORX 20 (5 pcs.)
What do I need to fit it?
Power Drill
Jigsaw
How to install the VHF flush mount
Square Nut M4x7x2.2 (4 pcs.)
Gasket
Flush Mount Bracket (2 pcs.)
Max wall thickness 26mm
99-130248
Note! e! e! e! e!
Not
Not
Not
Not
-
Firmly tie back and secure any wires not used in order to
avoid possibility for mutual shorting or shorting to ground!
-
To ensure waterproof sealing:
If the surface isn't plane and/or rigid remove the gasket and
seal with silicone sealant between the VHF and the surface.
Very important information!
Do not remove the membrane.
If you remove the membrane the radio will not be waterproof.
Membrane
USER & INSTALLATION MANUAL
SAILOR 6210 VHF
Gasket
User & Installation
Manual
Screw M4x12
TORX 20 (3 pcs.)
Cradle
Screw ø3.9x19
TORX 20 (3 pcs.)
Handmicrophone
Square Nut
Fuse
Power Cable
M4x7x2.2 (5 pcs.)
6.3x3.2mm (10AT)
Screwdriver
Drill for M4 or
TORX 20
Ø3.9 self-tapping
Screw M4x45 TORX 20 (4 pcs.)
Connect to LOUD HAILER
(RED isolation on inner connector)
Connect to POWER +
A
A
B
B
Connect to POWER -
Connect to EXT. SPEAKER
(WHITE isolation on inner connector)
How to install the VHF on desktop and overhead
Drilling plan on desktop and overhead
99-130249
Cable assembly for waterproof installation
Connect the 4 cable connections with rubber vulcanizing tape as shown .....
1.
(RED wire)
2.
(BLUE wire)
How to install the handmicrophone cradle
Thrane & Thrane A/S • info@thrane.com • www.thrane.com
Tilting ±20°
4 x M4 or hole for
self-tapping ø3.9
23mm
150mm
196mm
3.
4.
TT98-128464-THR-G
Advertisement

Subscribe to Our Youtube Channel
Related Manuals for Sailor 6210 VHF


Summary of Contents for Sailor 6210 VHF
- Page 1 How to install the VHF on desktop and overhead INSTALLATION GUIDE SAILOR 6210 VHF What’s in the box? USER & INSTALLATION MANUAL SAILOR 6210 VHF Sun Screen Transceiver Gasket User & Installation Tilting ±20° Manual Wheel Knob (2 pcs.) Screw M4x12 TORX 20 (3 pcs.)
- Page 2 12V Battery N420 12V DC Loud Hailer (4 ohm) External Speaker (8 ohm) 110/220V AC Note! e! e! e! e! The SAILOR 6204/05 Control Speaker Microphone 99-130265-A is not yet available. TT98-128464-THR-G Thrane & Thrane A/S • info@thrane.com • www.thrane.com...
Need help?
Do you have a question about the 6210 VHF and is the answer not in the manual?
Questions and answers