
Summary of Contents for Smart temp Viking SMT-920
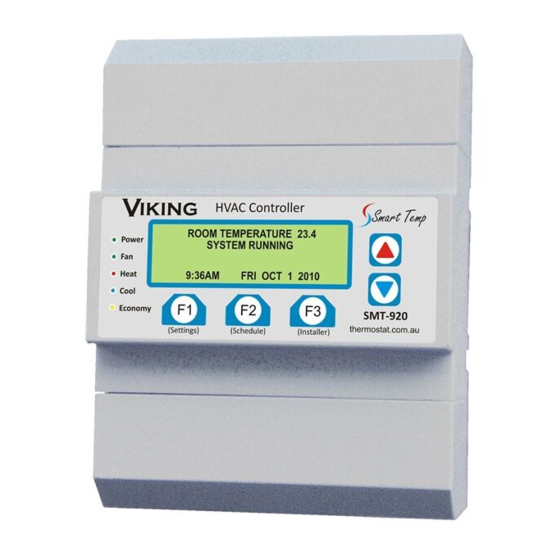
- Page 1 Viking SMT-920 Commercial multistage HVAC controller User & Installer Manual Ver 3.1 (Firmware 2.95+)
-
Page 2: Preface
Removed BACnet Great care has been taken in the preparation of this manual. Smart Temp Australia P/L takes no responsibility for errors or omissions contained in this document. It is the responsibility of the user to ensure this controller or equipment connected to it is operating to their respective specifications and in a safe manner. -
Page 3: Table Of Contents
Index Preface............... 2 Index ................3 Installation ..............4 Wiring Overview ............4 Powering the Viking ........... 4 Equipment Connections ..........4 Communications Terminals ........5 0-10V Outputs ............5 0-10V Input ..............5 Room Sensor Input (2 wire) ........5 Auxiliary Inputs ............ -
Page 4: Installation
Installation Wiring Overview The Viking is a DIN rail mounted device that has been designed to precisely control a wide selection of HVAC systems in commercial applications. Great effort has been made to ensure the Viking is very simple to set up and install ensuring reliable control of commercial HVAC systems. A brief input / output explanation is provided below, further function specific detail is provided through this manual. -
Page 5: Communications Terminals
Communications Terminals The Viking is provided with hardware and firmware to provide MODbus RTU communications capability. The “A” and “B” terminals are provided for communications. The communications terminals “A” and “B” are close to the 24V input. Take extreme care that 24V is not accidentally applied to the communications terminals or damage to the communications capability of the Viking will result. -
Page 6: Commissioning Aids
Commissioning Aids To assist commissioning the Viking there are a number of aids provided. Info Window Simply press and hold both the UP/DOWN buttons together to open the status window. This window gives an overview of the Viking functions showing the output from both analogue outputs, both the room and outside air temperature sensor as well as whether a relay is on or off. - Page 7 Typical Heat Pump System – 4 Compressors In this example the Viking is running a heat pump system with compressors providing 4 stages of heating and 4 stages of cooling. Viking being powered via 240VAC in this example. DIP Switch Settings Sw1 Off –...
- Page 8 2 Stage Heat With Modulating Cooling Control In Valve Mode both the relays and 0-10V outputs work tandem, permitting the Viking to modulate the 0-10V valve and also call for the circulating water pump on cooling demand required. Belimo valve terminal numbers are shown in this example.
-
Page 9: 0-10V Wiring
For projects that present difficulty in running wires for sensors, Smart Temp also offer the RS-W (non- adjustable), & RS-WA (+/- 4c adjustable) wireless room temperature sensor. This sensor is fitted with an afterhours run switch. The RS-W has a typical indoor range of approximately 30 meters. - Page 10 An example of averaging in 2, 3 and 4 places is shown using a combination of Smart Temp RS-1 & RS-2 sensors. These averaging combinations can also take advantage of the advanced sensor functions such as Vent Mode or After Hours start if necessary.
- Page 11 Sensor with Display. (P/N RS-SSD) (SSD ver II – pictured requires Viking with firmware version 2.8 or greater) Smart Temp Smart Sensors measure both humidity and temperature and are used when economy cooling is required or when you wish the occupants to be able to makes limited adjustments to the Viking operation.
-
Page 12: Ancillary Input Wiring
Ancillary Input wiring The Viking has two digital inputs that have been provided to permit a digital signal (ON/OFF) to override or compliment the various Viking functions. These inputs are very simple to use and setup. A number of pre-set functions can be selected for either or both of these two inputs. The installer menu provides details on these functions on page 19. - Page 13 UP/DOWN buttons will permit you to change the currently selected option. The [SAVE] button will save the changes and exit this window. The [REJECT] button will exit this window discarding any changes made. The table provided below provides a detailed description of the various menu items, their functions and the range the values that can be set where appropriate.
- Page 14 PIN requests. NOTE: If you change and then forget this PIN the Viking must be returned to Smart Temp or an authorised service agent for unlocking and resetting. There may be a fee for this service.
- Page 15 Change Temperature Control Limits? Default = Heat 49°C & Cool 6°C If permitted, the user can have the ability to adjust the heating and cooling set points. The range of the user adjustment can be limited if desired by setting the values below. Options Heat –...
- Page 16 Change Compressor Staging Limits? Default = 1.0°C Each of the Viking’s primary 3 compressors outputs have their own settings to control how each compressor performs as part of the overall system. The 4 compressor if enabled, uses the same setting set for the 3 compressor.
- Page 17 Change Room Sensor Functions? Default = OFF The room temperature sensor wiring can be used for additional functions other than just measuring the room temperature. When this sensor is open circuited (or permanently short circuited) and seen as missing by the Viking, additional functions can be performed. Options Force Off –...
- Page 18 Change Indoor Fan Options? Default Locked ON & No Purge The indoor fan in the Viking can be controlled by the user if desired (permitted to select Auto Fan or Fan On Mode) or locked into On or Auto Mode as set by this menu. Options Unlocked –...
- Page 19 Change Auxiliary Input Functions? Default = Not Used Two auxiliary inputs have been provided. These are digital inputs and each of these 2 inputs has the same list of options. In the event of a conflict, auxiliary input 1 will have priority. A fire or fault input regardless of what input calls them has absolute priority over all Viking inputs.
- Page 20 Change Analogue Output Settings? Default = NOT USED The Viking has two analogue outputs which can be assigned specific functions as detailed below. Each of the two analogue outputs has the same functions. Options Not Used – The output is not used. Output is 0V H &...
- Page 21 Change Night Purge Settings? Default = OFF The Viking can use outside air to cool a building at night when the air is cooler, to cool the building and prepare the building for the next day’s use. Options Off / Fan / Aux – Turns the Night Purge Function on or off and sets which relay should close to draw in outside air during the night purge period.
- Page 22 Edit Communications Settings? Default = 7 / 9.6K The Viking is fitted with integrated MODbus RTU communications drivers and firmware. This permits the Viking (or many Vikings) to be controlled remotely via a PLC or BMS if required. Communications information is provided in a separate document. Options MODbus Address –...
-
Page 23: Operation
PIN, use those digits rather than the ones given in this example. If the PIN has changed and the new PIN is not known by you, the Viking may need to be returned to Smart Temp or an authorised service agent for unlocking. There may be a fee for this service. -
Page 24: Setting The Clock
If these menus are PIN protected, it is necessary to enter the correct PIN before accessing the various menu items. Setting the Clock Press the <F2> “Schedule” button. If you are prompted to enter a PIN, see “The PIN Prompt” on page 23. Depending on values set within the Viking installer menu you will be presented with a number of options. -
Page 25: Set Holiday Schedules
Set the “Start” hour and minutes and the “Stop” hour and minutes for the day previously selected, Monday in this example. If you have 2 schedules per day you are given the option to swap back and forth between the 1 and 2 daily “Start”... -
Page 26: Setting Daylight Savings Times
The available options are: Off – The heating and cooling system will be off during this event. SB – (Setback - see page 15 ) The Viking will use the current Setback temperatures for the duration of the holiday event. The fan will cycle with the heating and cooling i.e. Auto Mode. OCC –... -
Page 27: Advanced Features
The example drawing below shows 24V Belimo brand damper actuators using the same 24V supply that is powering the Viking. Other power combinations are also possible. If in doubt please contact Smart Temp or an authorised distributor for application specific guidance. As some brands of dampers cannot easily operate in reverse (close at 10V) the Viking provides two 0-10V outputs, one forward acting and one reverse acting. -
Page 28: Economy Checklist
Economy Checklist. Wire the fresh, return and relief / spill dampers to the Viking analogue outputs. Note which Viking output is controlling which damper. For example analogue output 1 (Y1) can be set to control the return air damper while analogue output 2 (Y2) is may be set to control the fresh air &... -
Page 29: Co2 Input
electric cooling, bypassing the economy call. Remember, Economy is used for stage 1 cooling only, (not stage 2 3 or 4). Use the Economy TEST function to check the economy function. CO2 input well controlling Economy cooling shown above, the Viking permits you to additionally add a 0-10VDC CO2 sensor that regulates the introduction of outside air... -
Page 30: Handover Relay
“Anti-Bounce” logic is built into the Viking logic so that a single or multiple presses of the button (within a 10 second window) are seen by the Viking as a single call to start (or stop) the after-hours timer. (Version 2.9 firmware +) After Hours Timer Logic in Manual Mode If the Viking is set to “Manual Mode”... -
Page 31: Tips &Tricks
Tips &Tricks Programming Past Midnight The Viking uses a daily time clock for scheduling. This means that a “Start” event and a “Stop” event must occur on the same day. The Viking cannot start the HVAC system at 4pm one afternoon and stop it again at 6am the next morning with a single event. - Page 32 Master – Set Aux Relay Function to “Master” Mode in the installer menu, see details on page 17. This will close the Aux Relay whenever the master Viking is running Should the Viking receive a call to run outside scheduled hours. Slave –...
-
Page 33: Communications Functions
Adjustable Sensor – (Smart Sensor)This sensor is also fitted with a LCD showing the current room and set temperature along with other information and the ability to adjust the set temperature (up to the control limits as set in the Viking installer menu if set (see page 15)) or initiate / cancel the after- hours timer. - Page 34 For full details on applying the Viking to network use, for the points lists and other necessary information on networking the Viking please refer to the Viking communications addendum document available from Smart Temp or an authorised distributor. The SMT-920 “Viking” Modbus Objects list is provided in a separate document. It can be freely downloaded from our website at www.smarttemp.com.au.
-
Page 35: Faults
Faults Problem Remedy Viking will not show any information Viking clock is set to “0” in installer menu so Viking is other than room temperature on the locked into Manual mode. See “Change Display display. The <F2> button does not Settings”... -
Page 36: Specifications
Warranty ............36 Months RTB Date Installed Installed By Due to ongoing product improvement Smart Temp Australia P/L reserves the right to change the specifications of the SMT-920 “Viking” (or its components) without notice. All rights reserved. © Smart Temp Australia P/L 2010.
Need help?
Do you have a question about the Viking SMT-920 and is the answer not in the manual?
Questions and answers
Viking HVAC controller smt-920 indicating SYSTEM RECOVERY and unit not running..What will I do get it working?