Table of Contents
Advertisement
Quick Links
User
38-150
MANUAL
www.fila.com/watch
FM-756.1
1
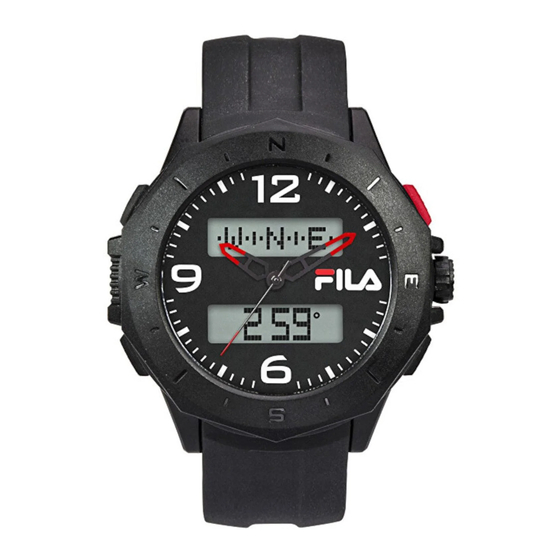
Design of the Watch
Thank you for purchasing this watch.
Please read this manual thoroughly before using the watch!
EL
Start/Stop/Compass
Button [EL]
Button [S/S/C]
MODE
Lap/Reset
Button [M]
Button [L/R]
MODE Button [M]
• To select the display among Current Time, World Time, Alarm, Chronograph and
Timer Modes.
• If has setting display : Hold down the button to enter the Setting Display.
• In Setting display: To select among different settings.
Start/Stop/Compass Button [S/S/C]
• To select Compass Mode.
• To start or stop Chronograph / Timer running.
• To select the next city in the World Time Mode.
• In Setting Display: To increase the setting value.
Lap/Reset Button [L/R]
• To activate the 'lap' or 'reset' function in the Chronograph Mode.
• To select the previous city in the World Time Mode.
• In Setting display: To decrease the setting value.
EL Button [EL]
• To turn on the EL backlight for 3 seconds.
NOTE: Press any button to activate your Watch under Power Saving Mode. For
more information, please refer to Chapter 11.
2
Specifications
• Compass Mode
• World Time Mode
• Chronograph Mode
• Current Time Mode
• Time System
• Calendar System
• Daily Alarm Mode
• Alarm Sound
• Backlight
• Battery
* These specifications might be changed without prior notice.
3
Setting Analog Watch
Click
Set Time
How to Set the Analog Watch
• To set time, gently pull out the crown to the 'click' position.
• Then turn the crown either clockwise or counter clockwise until the time is
set correctly.
• When the time is set, gently push the crown back to its original position to
resume normal operation.
NOTE:
When low battery is detected, the second hand will move per 2 seconds.
4
Major Function Display
S
EL
S
C
[S/S/C]
[M]
L
M
R
Compass Mode
Current Time
World Time Mode
[M]
Mode
NOTE:
[M]
- A different sound
will be given out
when going to the
Current Time mode.
- When low battery
[M]
[M]
is detected
,
icon will be shown
for 2 seconds.
Alarm
Timer Mode
Chronograph Mode
Mode
Major Function Display
5
Current Time Display
- Setting the Time
Day of
How to Set the Current Time
Date
Week
• To select the setting display, press
and hold the [M] button for 2
seconds in the Current Time Mode.
In setting display, the selected item
Current
will flash.
Time
• In the setting display, press the [M]
button to change the selection
following the adjacent Time Setting
Current Time
Sequence.
Display
• Press [S/S/C] to increase the setting
values and [L/R] to decrease them.
digits have been
• When the setting is completed, press
Hold
Hold
selected (flashing)
and hold the [M] button to exit the
[M]
[M]
Time Setting
setting display.
Display
[M]
[M]
[M]
[M]
UTC
Second
Minute
Hour
Year
[M]
[M]
[M]
[M]
[M]
DST
Hour
Date
Day
Month
On/Off
Format
Format
[M]
[M]
[M]
[M]
[M]
Key Tone
Hourly Chime
LCD
LCD
Contrast
Auto On
On/Off
On/Off
Auto Off
[M]
Time Setting Sequence
hold
[S/S/C] /
[S/S/C] /
[L/R]
[L/R]
Change the Setting
Change the Setting
Value at a higher
Value
speed
5.1
World Time Mode
- Basic functions and setting
City name
City
After
After
abbreviation
1 Sec.
1 Sec.
Code and
UTC
World time
World Time Display
Hold
[M]
[S/S/C] *
[M]
Increase the Time Zone
setting by 30 minutes
[M]
[L/R] *
Decrease the Time Zone
Edit My City
Time Zone
setting by 30 minutes
setting
setting
Note: *Hold down the [S/S/C] or [L/R] button can change the
setting at a higher speed.
View the World Time
• Press [M] button until enter world time mode.
• Press the [S/S/C] or [L/R] button to select the world time city. The city
name will be shown firstly and then show the city abbreviation code with
UTC afterwards.
Toggle the Daylight Saving Time (DST)
• Hold down the [L/R] button to toggle the daylight saving time.
• When Daylight Saving Time is on, time will be increased by an hour.
Setting of the My city
• Hold the [M] button in the World time mode, the letter in the first row will flash.
• Press the [S/S/C] button to select the letter and make your own name for the
city. Then, press the [L/R] button to move the cursor to the right.
• Repeat this process until you have set the name for the user-defined city.
• Press [M] to move the setting to the UTC setting display. Press the [S/S/C] /
[L/R] button to set the correct UTC.
• When setting is completed, hold down the [M] button to finish.
5.2
World Time Mode
- City Abbreviation Code Table
5.3
World Time Mode
- Time Zone
About UTC ( Coordinated Universal Time )
• Since the sun shines on different places on the Earth is different, the time of
different places is different. Therefore, our world is divided into several time
zones so that people in different places can get a more accurate and common
time.
• All the time zone calculations are relative to coordinated Universal Time (UTC).
For example, the time zone of London is 'UTC +0'. Hong Kong is 8 hours ahead
the time of UTC. Therefore, Hong Kong's time zone is 'UTC +8'.
6
Daily Alarm Mode
- Basic functions and setting
Alarm No.
Alarm Type
choose by
press
[S/S/C]
S
EL
S
C
L
M
R
[L/R]
Alarm ON
Alarm OFF
Alarm Mode Display
Alarm Mode
• There are 5 daily OR schedule alarms.
• Each schedule alarm can set a note (meeting, breakfast appointment, lunch
meeting, dinner, happy birthday, anniversary and take pill) as a reminder.
• Schedule alarm can be set to sound on a particular date.
Using the Alarm
• Press the [S/S/C] button to select different alarms.
• To turn ON/OFF an alarm, select the target alarm and press the [L/R] button to
turn it ON or OFF.
• To set an alarm, select the target alarm and hold down the [M] button to enter the
setting display.
• When the alarm is beeping, press any key to stop the sound.
NOTE
When the Schedule Alarm is selected, the date of the alarm will be scrolled once.
NOTE:
* Day / Month / Year settings will only appear if a Schedule
alarm is selected in the Alarm Type setting
** Note can only be selected when the Note option is ON.
Alarm Mode Display
** Note Selection: Meeting, Breakfast Appointment, Lunch
Meeting, Dinner, Happy Birthday, Anniversary and Take Pill.
Hold
Hold
[M]
[M]
[M]:
Schedule
[M]
[M]
[M]
Alarm
Alarm No.
Alarm Type
Hour
Minute
* Year
[M]: Daily Alarm
[M]
[M]
[M]: ON
[M]
[M]
** Note
Note On/Off
* Day
* Month
Selection
[M]: OFF
hold [S/S/C] /
[S/S/C] /
[L/R]
[L/R]
Change the Setting
Change the Setting
Value at a higher
Value
speed
7
Chronograph Mode
- Start/ Stop the chronograph
Lap time
the lap number
S
EL
S
C
L
M
R
Elapsed Time
Chronograph
'All Zero' Display
hold
[S/S/C]
[L/R]
[S/S/C]
[S/S/C]
digits stop
digits
counting
running
Chronograph
Chronograph
Running Display
Stop Display
Chronograph Mode
•
The Watch includes a function to measure elapsed time, lap time -
Chronograph Mode.
•
The display shows the 'All Zeros' display when the chronograph is selected
the first time or the chronograph has been reset.
7.1
Chronograph Mode
- Record the Lap Time
How to Record Lap Time
• When the chronograph is counting, press
S
EL
S
C
the [L/R] button once to record a lap time
(this key operation will not affect the
counting) and the lap time will be shown for
L
M
R
a short while. After that, the lap number will
be increased by 1.
Chronograph Running
• If there are more than 10 laps, the laps over
Display
the 10th lap will be accumulated into the
(No Lap recorded)
10th lap.
[L/R]
Lap number
increased by 1
After 10 sec.
Chronograph
Chronograph
Lap Display
Continuous running
To Record Lap Time
7.2
Chronograph Mode
- Record the Lap Records
How to Recall Lap Records
• To recall the lap records, press the [L/R] button
when the Chronograph is stopped.
• Press the [S/S/C] button to move to the last lap.
How to reset the Chronograph
• When the Chronograph is stopped, press and hold
Chronograph Stop Display
the [L/R] button to reset and all Lap records will be
reset to all zeros.
[L/R]
[S/S/C]
[L/R]
1st lap record
the next
[L/R]
lap records
[L/R]
the last lap
record
Lap Records Recall Sequence
8
Timer Mode
- Setting the Timer
Current
tim e
Hold
[M]
[M]
Hour
Hold
[M]
[M]
Minute
Timer Mode
Display
[M]
Second
hold [S/S/C] / [L/R]
[S/S/C] / [L/R]
Change
Change the Setting
Value at a higher
the Setting
speed
Value
•
The Timer starts counting from a preset value to zero and stops at zero.
8.1
Timer Mode
- Start / Stop the Timer
[S/S/C]
Digits
running
Current
time
Timer
Timer Display
Start Counting
(Initial time setting)
hold
[S/S/C]
[L/R]
Counting
Down
Beep!!
Stopped
Beep!!
Counting
Any key to stop beeping
and reload
Count down
to zero
Alert:
•
It will beep one per 10 second at last minute.
•
It will beep one per seconds at last 5 seconds.
•
It will beep for 30 seconds when reach zero.
9
Compass Mode
- Precautions
compass direction
S
EL
S
C
L
M
R
bearing direction
Compass Mode
Precautions for using the Compass
• Keep your Watch away from magnets or any appliances which may contain
magnetic objects such as mobile phones, speakers, motors and etc.
• The Watch, like most magnetic compass, points to the magnetic north which is
slightly different from the true north. Check the 'What is Magnetic Declination'
section for more details.
• Perform the compass calibration from time to time, because the calibration can
ensure the precision of the compass.
• To achieve an accurate result, you should avoid measuring direction on the
following conditions:
1) The watch is placed close to the magnetic objects,
2) The watch is placed close to the metal objects,
3) The watch is placed close to the electrical appliances
4) The watch is placed inside a moving object or a ferroconcrete building.
9.1
Compass Mode
- Compass Directions and Bearing Directions
The Direction of an Object
• The direction of an object from a point can be specified in either compass
directions or bearing directions.
• The Watch includes both compass directions and bearing directions.
The Compass Directions
• The compass directions are shown in the adjacent table.
• For example, in the figure on the left, the compass direction of object B from
point A is due East. The compass direction of object C from point A is Southeast.
The compass direction of object D from point A is Northwest.
The Bearing Directions
• The Bearing direction of an object is defined as the angular difference between
North and the object. (Assume 0°for due North, and the measuring range is from
0° to 359°).
• For example, in the figure on the left, the bearing direction of object B from point
A is 90°. The bearing direction of object C from point A is 135°. The bearing
direction of object D from point A is 315°.
Advertisement
Table of Contents

Subscribe to Our Youtube Channel
Related Manuals for FILA 38-150


Summary of Contents for FILA 38-150
- Page 1 Counting digits stop Alarm digits Timer Mode Chronograph Mode counting running Mode Chronograph Chronograph User 38-150 Running Display Stop Display Any key to stop beeping Major Function Display and reload MANUAL Count down www.fila.com/watch to zero Chronograph Mode • The Watch includes a function to measure elapsed time, lap time - FM-756.1...
- Page 2 • To compensate for an object's bearing, either subtract westerly (W) magnetic Analog movement will be stopped temporarily during compass measurement. The battery in your FILA watch is estimated to last for 2 years. declination or add easterly (E) magnetic declination with the magnetic bearing.
Need help?
Do you have a question about the 38-150 and is the answer not in the manual?
Questions and answers