Table of Contents
Advertisement
Quick Links
Advertisement
Table of Contents

Subscribe to Our Youtube Channel
Related Manuals for Bea-fon SL340i


Summary of Contents for Bea-fon SL340i
-
Page 1: General Information
User Manual SL340i... - Page 2 The content of this User Manual is presented as it is. Bea-fon does not assume any responsibility for the accuracy and completeness of the content of this user manual.
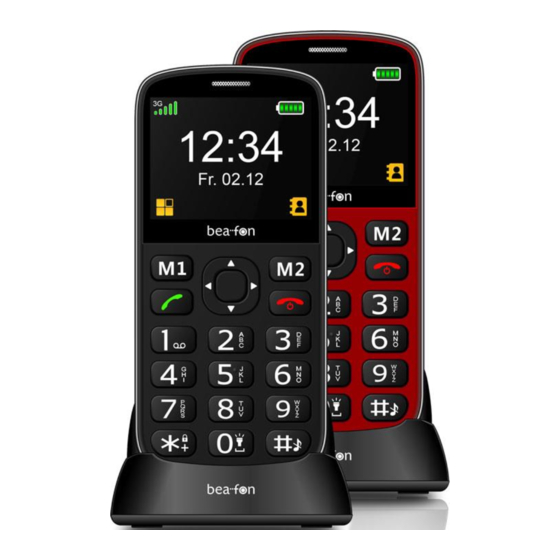
- Page 3 Bea-fon SL340i Contents: 1 Telephone 1 Charging station 1 Charger 1 Battery 1 USB cable User Manual...
-
Page 4: Device Code
General Information Should the font be too small and hardly legible for you, you may view a larger version of the user manual on our website. Go to Products on our website: www.beafon.com Device Code: The use of this code can prevent unauthorized persons from using this telephone. -
Page 5: Table Of Contents
Table of Contents General Information ........ 1 Device Code: ........4 PIN Code:........... 4 My Telephone SL340I ......8 Getting Started ........11 What is a micro SIM card? ....11 Inserting the micro SIM card and Micro SD card ..........11 Inserting the Battery ...... - Page 6 Accessing your telephone numbers ..24 New contact ........24 Editing a contact ........ 24 Delete contact ........25 Speed dial ......... 25 Memory status ........26 Messages ..........27 Write messages........27 Text input ......... 27 Inbox ..........28 Outbox: ..........
- Page 7 File manager ........37 Settings ..........38 SOS emergency number...... 40 SOS settings ........42 Settings M1 M2 ........43 Phone settings ........43 Display ..........44 Security settings ........ 44 Call settings ........46 Connection ........48 Specifications: ........50 FAQ ............
-
Page 8: My Telephone Sl340I
My Telephone SL340I Menu button, left (M1): in standby mode, you can enter the main menu with this button One touch key (M1) In standby mode, press and hold the key for 2-3 seconds in order to begin the direct dial function... - Page 9 Speaker OK key In default screen, call up the main menu. In the menu mode, selection of the selected menus or confirmation of an input Menu button, right In order to access the Phonebook in standby mode One touch key M2 In standby mode, press and hold this key for 2-3 seconds Power on/off/End conversation...
- Page 10 In Edit mode; change the input method. Emergency call button Polyphonic speakers Camera Microphone Charging tray connection Micro USB connection for charger and headset Flashlight...
-
Page 11: Getting Started
Getting Started What is a micro SIM card? Every mobile telephone requires an SIM card (Subscriber Identity Module); without the SIM card, you cannot make phone calls. The SIM card is a microprocessor that saves your data and contacts. Therefore, handle the card with care and exercise caution when inserting or removing the card. - Page 12 Getting Started Micro SD: Carefully push the Micro SD card in the SD Micro SD card holder (2) and lock it afterwards.
-
Page 13: Inserting The Battery
Press the other end of the battery until it snaps into place. Slide the battery cover on the device until it locks into place. Charging the Battery There are two ways in which the battery SL340I can be charged: Charging station Charger... -
Page 14: Switching The Telephone On/Off
Insert the charger connector into the telephone. Connect the charger to a power outlet. It could take several hours to charge the battery. If the telephone is charged while it is switched off, it takes a few seconds before the charging indicator appears in the display. -
Page 15: Standby
Please select your language and confirm your selection with “OK” (M1 key). Press and hold the red key for 2-3 seconds in order to switch off the telephone. Note: Without the SIM card, only the emergency call number can be dialed. If the PIN code is entered wrong 3 times, the telephone asks for the PUK code, which you received along with your SIM card from your... -
Page 16: Flash Light (Torch)
Additional functions: Auto keypad lock See in menu item “Settings – Security Settings”. You can still use the emergency call button even when the keys are locked. Flash light (Torch) On the home screen, press the “0” key for a few seconds, you can turn on the torch, thus the torch light is on;... -
Page 17: Torch
Left arrow key Calendar Right arrow key Alarm OK key Main menu Torch Press and hold on the “ ” key of the phone to switch the built-in torch on/off. Display (Home screen) 1. Reception strength 2. Symbols 3. Battery status 4. -
Page 18: Display Symbols
Display symbols Reception strength: The vertical bars show the strength of the reception of your network operator. E1: GSM G3: UMTS New Messages This symbol is displayed when you receive a new message. SIM card has an unread message. This symbol blinks when the Inbox folder is full. -
Page 19: Headset/Bluetooth Mode
Alarm This symbol is displayed when alarm clock is switched on. Bluetooth This symbol is displayed when the Bluetooth is switched on. Battery indicator This symbol changes color depending on the status of the battery: Headset/Bluetooth mode If a headset (not included) is connected to the USB socket (or a Bluetooth Headset), you can answer the call with the button on the headset. -
Page 20: Call Functions
Call functions Call Enter the telephone number including the area code and press the green key. International Calls: Prior to entering the area code, enter a + -symbol by pressing twice as well as the country (or regional) code. (If necessary, omit 0 before the area code). -
Page 21: Functions During A Conversation
If you would like to answer the call, press green key or M1. If you would like to refuse the call, press red key or M2. Functions during a conversation By pressing Options (M1 key) during a phone call, you can select from the following functions: Connected to BT Headset*: Call will be forwarded to BT Headset... -
Page 22: Hands-Free
Hands-free You can switch the hands-free function on/off by pressing the right menu button during the call (M2). Main menu... -
Page 23: Menu
Menu 1. Phonebook 4. Extras 2. Messages 1. Alarm 1. Write message 2. Reminders 2. Inbox 3. Calendar 3. Outbox 4. Calculator 4. Drafts 5. World clock 5. Sent 5. Multimedia 6. Broadcast – 1. Camera Messages 2. Show pictures 7. -
Page 24: Phonebook
Phonebook You can save up to telephone numbers in your SL340i telephone. On the SIM card, there is room for up to telephone numbers. Accessing your telephone numbers You have two options to go to the contacts: 1. When in default mode, press the M2 key 2. -
Page 25: Delete Contact
Select any field, press and edit the entries Press to confirm the entries. To save the changes, press Save (M1). Delete contact Select Menu, Phonebook and press OK (M1) Select Contact and press Options (M1) Select Delete and press OK (M1) Press OK (M1) again to confirm the deleting... -
Page 26: Memory Status
On the default screen, press the desired number (2-9) and the assigned number will be called. Memory status Select Menu, Phonebook and press Press Options Select Others and press Select Memory status and press Displays the number of all and the already used contact slots on the SIM and telephone... -
Page 27: Messages
Messages Write messages Select Menu, Messages and press Select Write message and press Select and press In this menu, you can compose messages. The number of letters used can be seen at the upper right edge of the display. Text input The following functions are available: ... -
Page 28: Inbox
Enter the desired word by pressing the keys for each individual letter only once. The word changes depending on which key is pressed. E.g. To write “Hello”, press the “42556” key. After you have finished the message, press Options and select Send. Press Option for other Options:... -
Page 29: Outbox
Delete, Reply (SMS or MMS), Forward, Call, Move, Copy, Add sender to Details Note: If the short message memory is full, the symbol blinks on the default screen. Please delete some messages to be able to receive new ones again. Outbox: In the Outbox, unsent SMS messages are saved. -
Page 30: Settings
Settings You can define the SMS settings. The following functions are available: Message center Here you can set, among others, the message service centre number (SMSC) (dependent on network operator) other settings. More functions: Message validity period, Status report, Replay path, Save sent messages, Preferred Storage, Export SMS Press right Navi-key to go to MMS menu... -
Page 31: Voicemail Server
Voicemail server Voice mail is a network function. If a voice mail has been received, the receipt of a new message will be shown on the display of your telephone. Select Menu, Messages and press Select Voicemail server and press Select Line number 1 and press Edit (M1). -
Page 32: Call History
Call history Call history Select Menu, Call logs and press Your telephone stores logs for Missed calls, Dialed calls, and Received calls The newest entries are at the top of the list. Under Option, the following functions are available to you: View, Call, Send text message, Send multimedia message, Save to Phonebook, and Delete. -
Page 33: Extras
Extras Alarm Select Menu, Extras and press Select Alarm and press Up to a maximum of 3 alarms can be set. Setting the alarm: 1. Select an alarm and press OK. 2. Setting alarm: Message, Time, Ringtone and the Repeat mode. -
Page 34: Calculator
Add event: 1. Press Options and select event. 2. Press and enter the desired details. 3. To save the event, press Save (M1). In the Calendar, the following Options available to you: Add new schedule, View schedule, View all, Clear all, Go to date, Weekly and Daily. -
Page 35: Multimedia
Multimedia Camera Select Menu, Multimedia and press Select Camera and press Taking photographs Aim the camera lens at a location or an object and press the camera button (upwards arrow key) to take a photo. After the snapshot has been taken, the photo is shown on the display and automatically saved. -
Page 36: Image
Delete, Mark, Rename, Slide play Details. Copy pictures to the computer To copy the pictures, you took with the SL340i camera onto the computer, proceed as follows: Connect the telephone to the computer using the supplied micro USB cable. After that, a menu appears on the telephone - select “Mass... -
Page 37: File Manager
Note: The photos are located in the telephone in the folder “Photos” File manager Use the file manager to manage your files and folders in the phone memory and on the memory card. Select Menu, Multimedia and press Select File manager and press The following functions are available to you under Options:... -
Page 38: Settings
Settings Profile (Tone settings) Select Menu, Settings and press Select profile and press Display profile mode list including: Normal, Silent, Meeting, Indoor Outdoor. The following functions are available to you under Options: Settings: Ring settings Caller ringtone: Set the incoming call ringing tone Message ringtone: Set the incoming message tone Adjust volume... -
Page 39: Ring Type
Ring type Call alert: a ring, vibration, silent, vibration and ringing and ringing after the first five vibration incoming call alert for you to choose Message alert: a ring, vibration, silent, ringing message alert vibration four ways for you to choose Alarm &... -
Page 40: Sos Emergency Number
SOS emergency number The SOS function is a simple function that can save lives at a critical point in time. You can save up to 5 SOS contacts and one SMS. These numbers, which you have to save one after another, are automatically dialed in case of emergency if you press the emergency call button on the back of the mobile phone. - Page 41 Outside of your network operator’s home network, the international SOS 112 can usually still be called. Attention: If you save emergency call numbers such as rescue, police, fire department, etc., you must clarify this in advance with the respective institutions. No liability is assumed for possibly incurred costs if you call by mistake.
-
Page 42: Sos Settings
SOS settings Select Menu, Settings and press Select SOS Settings and press The following menu items are available: SOS number settings Define a maximum of 5 SOS numbers their priority sequence. SOS SMS settings You can turn the SOS SMS on/off. -
Page 43: Settings M1 M2
Settings M1 M2 Select Menu, Settings and press Select Settings M1 M2 and press Here you can edit the M1 and M2 numbers. By pressing and holding (2-3 seconds) the M1 or M2 button in default mode, the phone dials the allocated telephone number. -
Page 44: Display
Display Contrast Setting the brightness and display illumination duration Backlight Set the time of display backlight. Keypad Backlight time: Set the time of keypad backlight. Security settings Select Menu, Settings and press Select Phone settings and press OK. The following menu items are available: PIN lock When switching the prompt for a PIN or off,... - Page 45 Telephone locked Telephone lock: While powering the PIN prompt or off, you will be prompted to enter the correct Phone password of the telephone. Changing the phone password To change the password, enter the actual password and then the new password 2x. Privacy Set access to enter the password to view functionality.
-
Page 46: Call Settings
settings - Security – Fixed dialing - Fixed dialing mode and select On. You will be asked to enter your PIN2 code After you have activated the FDN feature, you will need to add FDN contacts. Call settings Select Menu, Settings and press Select Call settings... -
Page 47: Call Barring
Call barring With this network service, you can restrict your calls. Others Automatic redial If the line of the person you are calling is busy or if the call was not answered, an automatic redial action can be initiated. Call duration reminder A signal tone sounds during the call Bluetooth With Bluetooth, you can connect your telephone... -
Page 48: Connection
In this menu, you can establish a connection with Bluetooth-enabled audio accessories. Advanced In this menu, you can: Define the Audio path and Storage and under My Addresses you see the MAC address of your telephone. Search for Bluetooth audio device To begin a search for another Bluetooth device, press OK. -
Page 49: Network Selection
The configuration of a data account is dependent on the data of your network operator. Important: Please contact your network operator and have the configuration data for the MMS Settings sent to you GPRS Service A GPRS connection is required to send MMS messages. -
Page 50: Specifications
Specifications: Dual Band GSM 900/1800 Network: Battery: Li-ion 3.7V - 1000mAh Dimensions: 123 x 57 x 12mm Standby time: < 300 hours* Talk time: < 480 minutes* * The operating life of the battery is dependent on the SIM card, network, settings applies and usage as well as the environment. -
Page 51: Faq
your phone appears questions frequently, please refer to the answers as follows. After that, you cannot solve the questions, please contact with the mobile phone dealers or network operator. Can’t turn the phone on: Check battery installation, please install battery correctly. - Page 52 Please contact your network operator, if you still have a weak signal or no signal. Bad talking quality: Weak signal? See: Weak signal or no signal. Check if battery if battery is low. Charge the battery or change the battery. ...
-
Page 53: Battery
Your phone may be affected with damp, keep it dry. PIN locked: Check if entered incorrect PIN code 3 times in a row. If yes, the phone is locked, then you should enter your PUK code (please contact your network operator for your PUK code). - Page 54 only with the chargers approved by the manufacturer. Unplug the charger when not in use. Do not leave the battery connected to a charger for longer than 10 days, since overcharging may shorten its lifetime. If left unused a fully charged battery will discharge itself over time.
-
Page 55: Phone
performance is particularly limited in temperatures well below freezing. Do not dispose of batteries in a fire! Dispose of batteries according to local regulations (e.g. recycling). Do not dispose as household waste. Do not charge your mobile phone if the battery is not installed. - Page 56 electronic devices, damage batteries, and warp or melt certain plastics. Do not store the phone in cold areas. When warms normal temperature), moisture can form inside, which damage electronic circuit boards. Do not attempt to open the phone. Non- expert handling may damage it.
-
Page 57: For Your Safety
For your safety Read these simple guidelines. Breaking the rules may be dangerous or illegal. Do not switch on the phone when wireless phone use is prohibited or when it may cause interference or danger. Road safety comes first Do not use a hand-held phone while driving. -
Page 58: Traffic Safety
Traffic Safety: Do not use a hand-held telephone while driving a vehicle. Always secure the phone in its holder; do not place the phone on the passenger seat or where it can break loose in a collision or sudden stop. Remember road safety always comes first! Operating environment: Remember to follow any special regulations in... -
Page 59: Electronic Devices
Electronic devices: Most modern electronic equipment is shielded from radio frequency (RF) signals. However, certain electronic equipment may not be shielded against the RF signals from your wireless phone. Pacemakers: Pacemaker manufacturers recommend that a minimum separation of 20 cm (6 inches) be maintained between a handheld wireless phone and a pacemaker to avoid potential interference... -
Page 60: Other Medical Devices
Some digital wireless phones may interfere with some hearing aids. In the event of such interference, you may want to consult your network operator. Other medical devices: Operation radio transmitting equipment, including cellular phones, may interfere with the functionality of inadequately protected medical devices. - Page 61 Users are advised to switch off the phone when at a refuelling point (service station). Users are reminded of the need to observe restrictions on the use of radio equipment in fuel depots (fuel storage and distribution areas), chemical plants or where blasting operations are in progress.
-
Page 62: For Your Safety
For your safety Certification information (SAR): This model phone meets the EU requirements for exposure to radio waves. The exposure standard for mobile phones employs a unit of measurement known as the Specific Absorption Rate, or SAR. The SAR limit recommended by The Council of the European Union is 2.0 W/kg. -
Page 63: Information
Information Liability Disclaimer: Bea-fon Mobile GmbH shall not bear any liability for any relevant, indirect, special, incidental, or inevitable injuries caused by using of this product, including injuries which have been considered, unconsidered, likely to happen. For any losses caused by natural disasters (such as earthquake, flood, etc.) or any... - Page 64 Information: SL340i distributed by Beafon For more Information, please visit the Bea-fon Homepage: www.beafon.com or contact us: support@beafon.com Address: BEAFON MOBILE GmbH 4722 Peuerbach Enzing 4 Austria V1.2...
Need help?
Do you have a question about the SL340i and is the answer not in the manual?
Questions and answers