
Related Manuals for Entrematic SPRINT PN

Summary of Contents for Entrematic SPRINT PN
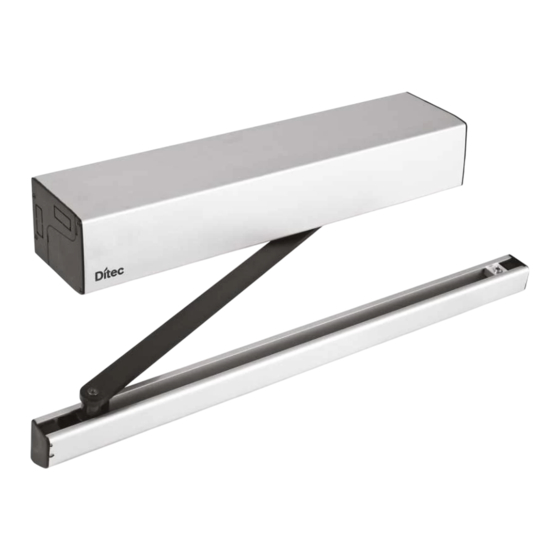
- Page 1 Ditec SPRINT IP2185EN Technical Manual Automation for swing doors (translation of the original instructions) www.ditecentrematic.com...
-
Page 3: Table Of Contents
Contents Subject Page General safety precautions Declaration of incorporation of partly completed machinery 2.1 Machinery Directive Technical specifications 3.1 Operating instructions 3.2 Dimensions Standard installation Main components Mechanical installation 6.1 Removing the casing Installation with SBS sliding arm Installation with SBA articulated arm Installation with SPRINTBRAS 3-lever articulated arm Installing the end stop on the ground Electrical connections... -
Page 4: General Safety Precautions
1. General safety precautions Failure to respect the information given in this manual may cause personal injury or damage to the device. Keep these instructions for future reference This installation manual is intended for qualified personnel only. Installation, electrical connections and adjustments must be performed in accordance with Good Working Methods and in compliance with the present standards. -
Page 5: Declaration Of Incorporation Of Partly Completed Machinery
(Directive 2006/42/EC, Annex II-B) The manufacturer Entrematic Group AB, with headquarters in Lodjursgatan 10, SE-261 44 Land- skrona, Sweden, declares that the automation for Ditec SPRINT type swing doors: - has been constructed to be installed on a manual door to construct a machine pursuant to the Directive 2006/42/EC. -
Page 6: Technical Specifications
3. Technical specifications SPRINT PN - P - V SPRINT LN - L - LV SPRINT PNJ - VJ Power 230V~ 50/60 Hz (to be protected 120V~ 60 Hz with an external fuse) Power 0.5 A Power 120W 120W 120W... -
Page 7: Operating Instructions
3.1 Operating instructions Service class: 5 (minimum 5-year working life with 600 cycles per day). Applications: VERY INTENSE (for entrances with very intense pedestrian use). - The performance characteristics refer to the recommended weight (approx. 2/3 of the maximum permitted weight). When used with the maximum permitted weight, a reduction in the above mentioned performance levels can be expected. -
Page 8: Standard Installation
Connection to the mains must be via an independent channel, sepa- rate from the connections to the control and safety devices. NB: the given operating and performance features can only be guaranteed with the use of DITEC Entrematic accessories and safety devices. -
Page 9: Main Components
5. Main components Ref. Code Description 24V motor with encoder EL38 Control panel SPRINTBAT Battery kit Base plate ON/OFF button Function selector button Arm support Aluminium casing [SPRINT V-SPRINT LV-SPRINT VJ] Grey plastic casing [SPRINT P-SPRINT L] Black plastic casing [SPRINTPN-SPRINT LN-SPRINT PNJ]... -
Page 10: Mechanical Installation
6. Mechanical installation Check the stability and weight of the door wing. Make sure it moves smoothly, without any fric- tion (reinforce the frame if necessary). Any “door closer” mechanisms must be removed or completely annulled. WARNING: in the event of installation on doors that divide areas with different pres- sure levels, check for proper functioning. -
Page 11: Installation With Sbs Sliding Arm
Installation with SBS sliding arm max 45 min 650 OPENING Use the SBS sliding arm for doors that open inwards (as seen from the automation side). is stable and level, respecting the measurements given in the figure (refer to the hinge axis). tion, making sure it is inserted in the arm support seat [D]. -
Page 12: Installation With Sba Articulated Arm
8. Installation with SBA articulated arm max 300 min 550 OPENING min 10° Use the SBA articulated arm for doors that open outwards (as seen from the automation side). it is stable and level, respecting the measurements given in the figure (refer to the hinge axis). -
Page 13: Installation With Sprintbras 3-Lever Articulated Arm
Installation with SPRINTBRAS 3-lever articulated arm max 185 min 650 OPENING max 45 OPENING min 395 min 220 Use the SPRINTBRAS articulated arm for doors that open inwards (as seen from the automa- tion side). it is stable and level, respecting the measurements given in the figure (refer to the hinge axis). -
Page 14: Installing The End Stop On The Ground
WARNING: the distance between the automatic system fixing point and the door can be between 185mm and 45mm. tion to the arm [C] when the door is closed. NB: the SPRINTBRAS articulated arm is assembled for doors with left-hand opening. In the case of doors with right-hand opening, separate arm [D] from arm [C] by removing the pin [E], then reassemble the two arms, rotating them by 180°. -
Page 15: Electrical Connections
11. Electrical connections 11.1 Electrical connections for 230V~ / 120V~ power supply AL05 (230 V~) AL05J (120 V~) Power Alimentazione Motor Motore Electric lock output Uscita elettroserratura 12 V max 1,2 A SPRINTBAT ON/OFF switch Interruttore ON-OFF Stop Stop Closing safety device Sicurezza in chiusura Opening Apertura... -
Page 16: Electrical Connections For 24V Power Supply
11.2 Electrical connections for 24V power supply (to be protected with an external F5A fuse, not supplied) Motor Motore Electric lock output Uscita elettroserratura 12 V max 1,2 A Power Alimentazione ON/OFF switch Interruttore ON-OFF Stop Stop Closing safety device Sicurezza in chiusura Opening Apertura... -
Page 17: Connecting The Power Supply
12. Connecting the power supply Before connecting the power supply, make sure the plate data correspond to those of the mains power supply. An omnipolar disconnection switch with a contact opening distance of at least 3mm must be fitted on the mains supply. Check there is an adequate residual current circuit breaker and overcurrent cut-out upstream of the electrical system. -
Page 18: Outputs And Accessories
14. Outputs and accessories Output Value - Accessories Description Power supply to accessories. Output for power supply to external accessories. 24V 0.3 A NB: the maximum absorption of 0.3 A corresponds to the sum of all terminals 1. Electric lock. Output for electric lock or electric block power supply. -
Page 19: Function Selector Button
14.1 Function selector button SPRINTV LATO SINISTRO LATO DESTRO LEFT SIDE RIGHT SIDE Radar B Radar A Radar B Radar A 24 V 24 V CONTROL QUADRO ELETTRONICO PANEL Ref. Description Door open. Permanent opening command 1-3. Door closed. The radar commands (A-3) are excluded. The door can be opened by command 1-3 (or pushed open if the Push&Go function is enabled). -
Page 20: Adjustments
16. Adjustments 16.1 Enabling procedure The trimmers and DIPs affect the force limiting safety function. They must be set as instructed. If not, the modifications will not be accepted and the IN LED will flash. expire. 16.2 Dip-switches Description DIP1 Push & Go function. Disabled. -
Page 21: Trimmer
16.3 Trimmers Trimmer Description Operation speed adjustment. Adjusts the automation operation speed. The closing speed equal to 2/3 the opening speed. WARNING: set the correct operation speed on the basis of the usage indica- tions given in the weight diagram, and make sure the operating force and the force of impact between the door and the obstacle are lower than the values indicated by Standard EN 16005. - Page 22 17. Requisites for doors for Low Energy use If the Ditec SPRINT automation is used with Low Energy service, adjust the VM trimmer so that the opening and closing times (apart from deceleration) are the same as (or greater than) those indicated in the table.
-
Page 23: Start-Up
18. Start-up WARNING: Before performing any type of operation, make sure that the automation is turned off and the batteries are disconnected. The operations in point 4 are performed without safety devices. The trimmers can only be adjusted with the automation idle. WARNING: to make the adjustments, you must perform the enabling procedure as ex- plained on page 21. -
Page 24: Troubleshooting
19. Troubleshooting Problem Possible cause Operation The automation does No power supply. Check the control panel is powered cor- not open or close. (POWER ALARM LED off). rectly. Short-circuited accessories Disconnect all the accessories from termi- (POWER ALARM LED off). nals 0-1 (a voltage of 24V must be present) and then reconnect them one at a time. -
Page 25: Routine Maintenance Plan
20. Routine maintenance plan Perform the following operations and checks every 6 months, according to the intensity of use of the automation. Disconnect the 230V~ power supply and batteries (if present), and position the ON-OFF switch on OFF: Restore the 230V~ power supply and batteries (if present), and position the ON-OFF switch on ON: NB: for spare parts, see the spares price list. -
Page 26: Example Of Installation With Function Selector
21. Example of installation with function selector The door opens with the radar commands PAS (1-3), and guarantees safe opening via the REM device (G1-8). The door operating mode is set using the COMH-K function selector. INSIDE OUTSIDE INSIDE INSIDE OUTSIDE INSIDE SPRINT... - Page 27 All the rights concerning this material are the exclusive property of Entrematic Group AB. Although the contents of this publication have been drawn up with the greatest care, Entrematic Group AB can- not be held responsible in any way for any damage caused by mistakes or omissions. We reserve the right to make changes without prior notice.
- Page 28 Entrematic Group AB Lodjursgatan 10 SE-261 44, Landskrona Sweden www.ditecentrematic.com...
Need help?
Do you have a question about the SPRINT PN and is the answer not in the manual?
Questions and answers