Table of Contents
Advertisement
Advertisement
Table of Contents

Subscribe to Our Youtube Channel
Summary of Contents for ICS Auto Sentry flex
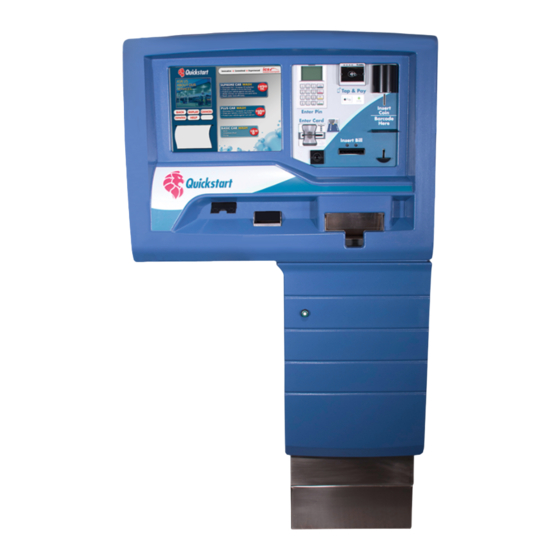
- Page 1 Auto Sentry® flex User Manual - Version 2.0...
- Page 2 Information in this manual is subject to change without notice. Companies, names, and data used in examples within the manual are fictitious unless otherwise noted. No part of this manual may be reproduced or transmitted in any form or by any means, electronic, or mechanical, for any purpose without the express written permission of Innovative Control Systems, Inc.
-
Page 3: Table Of Contents
Custom Graphic Design ICS Marketing Team ........20... - Page 4 Deterrent Warning Alarm ......... . 40 Deterrent Break-In Alarm .
- Page 5 Adding Value to a Gift Card ........80 Adding Value to a Gift Card with Bonus Increase .
- Page 6 Cash Management ............109 About Entries in the Cash Management Journal .
- Page 7 Display a Fleet Schedule ......... . 131 Display an Open Ticket Schedule.
- Page 8 Chapter 5: Reports ................167 Shift Detail Report .
- Page 9 Figure 13. Auto Sentry flex with EMV ........
- Page 10 Figure 30. Example Custom Video ..........46 Figure 31.
- Page 11 Figure 61. Card Duplicate Transaction ..........88 Figure 62.
- Page 12 Figure 92. Example Buggy Thursdays Schedule ........128 Figure 93.
- Page 13 Figure 123. Shift Detail Report, Page 1 ..........168 Figure 124.
- Page 14 Auto Sentry® flex User Manual List of Figures...
- Page 15 List of Tables Table 1. System Overview ..............20 Table 2.
- Page 16 Table 21. Audio Prompt for Help Button ............92 Table 22.
-
Page 17: Introduction
If you use Tunnel Master software for configuration and settings with your Auto Sentry® flex, then the content in this user manual does not apply. Instead, please contact ICS for a user manual for the parameters of your Auto ®... -
Page 18: Version Considerations
® business grows, WashConnect expands along with it, building a multi-site and multi-level organization. Version Considerations This is Version 2.0 of this document and includes content based on the following ICS software versions: AlertNotificationServer - V2.4.9.1 Autobilling - V3.4.12.2 ... -
Page 19: Related Documents
ReportUploader - V2.4.7.0 RFIDExpress - V1.0.9.0 StackController - V1.4.10.1 Touch/TouchPOSReady V5.2.25.33-SQL, V5.2.25.33-TM TouchES - V1.4.8.0 (if purchased) ValidateHardware - V1.0.0.4 VFD HMI - V1.1.8.0 (if purchased) WashConnect - V1.4.15.3 WashConnect Reports - V2.4.13.0 ... -
Page 20: In-Bay Equipment
Custom Graphic Design ICS Marketing Team All of the buttons and screens in this manual are custom designs created by the ICS marketing team. Innovative Control Systems (ICS) offers a professional marketing team of graphic designers to create custom artwork for as low at $65 per hour. - Page 21 Professional wash menu custom designed to match your other existing marketing materials. *Ask your salesman about our 46” digital outdoor menu. NOTE: ICS cannot print wind signs. However, we can assist in creating the files needed to the printer of your choice. ...
-
Page 22: Safe Configuration
Enabling or Disabling the Safe If you are a new ICS customer, then before you begin using your Auto Sentry® flex and cash management software, you will decide to enable or disable the safe. In either case, you can use cash management software to monitor the liquidity (cash on hand) at your site across devices. -
Page 23: Flex-Serve Facilities Without The Safe
TOUCH IT TOUCH IT VIRTUAL SAFE VIRTUAL SAFE FLEX FLEX POS & TOUCH IT WITH VIRTUAL SAFE | FLEX WITH VIRTUAL SAFE POS & TOUCH IT WITHOUT VIRTUAL SAFE | FLEX WITH VIRTUAL SAFE Figure 1. Auto Sentry with Safe, two different setups If the Auto Sentry®... -
Page 24: Auto Sentry® Flex Hardware Description
TOUCH IT VIRTUAL SAFE FLEX POS, TOUCH IT & FLEX WITHOUT VIRTUAL SAFE Figure 2. Facility without setting up the Safe Auto Sentry® flex Hardware Description The Auto Sentry® flex is equipped with various hardware and software components you can configure. -
Page 25: Single Board Computer
Figure 3. Custom Touch Screen Example Single Board Computer The Single Board Computer, often called the motherboard enclosure, provides processing and memory for the Auto Sentry® flex. Different peripheral devices (for example: bill dispenser, bill acceptor, and others) connect to the WashConnect through various communication ports (COM1, COM2, COM3, COM4, and 4 USB, etc.). -
Page 26: Serial Input/Output Board (Sio)
Serial Input/Output Board (SIO) Most of the field wiring is terminated on the SIO board. Figure 5. Serial I/O Board Bill Acceptor The bill acceptor can accept paper media, for example, bills or coupon notes. It provides four-way acceptance to allow the bills to be inserted in any direction. The bill acceptor will also accept bills in bad condition such as torn, wrinkled, faded, or dirty. -
Page 27: Coin Acceptor
Coin Acceptor The installed coin/token acceptor can be programmed to distinguish and accept up to 6 different coins or tokens. Figure 7. Coin Acceptor Auto Sentry® flex User Manual Introduction... -
Page 28: Bill Dispensers
ICS provides four different bill dispenser solutions to fit your needs. You can select one of the following for your Auto Sentry: ▪... -
Page 29: Figure 9. Talaris Multimech Bill Dispenser
Figure 9. Talaris MultiMech Bill Dispenser Figure 10. Gen-Mega Bill Dispenser Auto Sentry® flex User Manual Introduction... -
Page 30: Coin Hopper
Coin Hopper Each coin hopper can dispense approximately 300 coins per minute. One hopper can hold approximately 600 coins, depending on the coin’s value. Up to three hoppers can be installed. Figure 11. Coin Hopper Card Reader Each credit card processor uses a different card reader. The non-chip and PIN card reader can accept credit, gift, wash cards, and fleet cards. -
Page 31: Emv
Some chip cards can be tapped on the contactless reader that can be read over a very short distance using RFID technology. Figure 13. Auto Sentry flex with EMV Auto Sentry® flex User Manual... -
Page 32: Chip Card Reader
Chip Card Reader The chip card reader will accept credit, debit, gift, and fleet (customer) cards. This card reader is secure and is used with Moneris card processing. The electronic chip in the card is read and encrypted for a secure payment with the Credit Card Processor. The photographs in figures 4 - 7 are of the device that is used by Moneris Credit Card Processing. -
Page 33: Figure 16. Moneris Card Reader (Bottom Of Unit)
Figure 16. Moneris Card Reader (bottom of unit) Auto Sentry® flex User Manual Introduction... -
Page 34: Figure 17. Credit Card Reader (Face)
Figure 17. Credit Card Reader (face) Auto Sentry® flex User Manual Introduction... -
Page 35: Pin Pad
PIN Pad The Moneris PIN Pad works in conjunction with the Moneris Card Reader. Figure 18. Moneris PIN Pad Figure 19. Moneris PIN Pad cable port Auto Sentry® flex User Manual Introduction... -
Page 36: Contactless Tap And Pay Card Reader
Contactless Tap and Pay Card Reader Contactless mobile payments are dynamically encrypted making them one of the most secure ways to process a payment and the fastest way too. The Moneris Tap and Pay reader allows a smart phone to communicate wirelessly with the payment terminal when they’re close together, accepting Apple and Android Pay. -
Page 37: Gift Card Dispenser
Purchasing thermal paper from ICS provides the best quality receipt as the heat index is matched exactly to our printer and we order custom length rolls of paper. -
Page 38: Bar Code Scanner
Bar Code Scanner This is an optional feature. Our bar code scanner makes a fast customer transaction even speedier by scanning tickets and coupon bar codes. This must be installed at the time you purchased your Auto Sentry® flex. Auto Sentry® flex User Manual Introduction... -
Page 39: Sonic Sensor - Car Sense Eye
Sonic Sensor - Car Sense Eye When your wash is open, the sonic sensor is always sensing to determine if a car is present at the Auto Sentry. If it senses a vehicle, it triggers the initial Welcome video. Sonic Sensor installed in base of Auto Sentry Figure 23. -
Page 40: Vandalism Alarm
Vandalism Alarm The Vandalism Alarm is designed to deter vandals before any damage is done. ICS promotes two different Vandalism Alarms for the Auto Sentry that need to be set up with Technical Support: Deterrent Warning Alarm and Deterrent Break-in Alarm. -
Page 41: Deterrent Break-In Alarm
Sense/Vandal input on the SIO or PIO board. When the Seismic detector senses tampering of the unit, it triggers the Deterrent Break-In alarm. The ICS VandalismAlarm.avi video plays on the Auto Sentry screen, “Tampering attempt detected. Police have been notified.” Whether the police are notified is up to your alarm company but the message acts as a deterrent for the vandal. -
Page 42: Vandalism Sensor
Output 1 and 2. In order to install the Electronic Vibration Detector, WashConnect needs to be on version 1.4.5.1 or later. Contact ICS technical support to see if you can update WashConnect and install the Electronic Vibration Detector. In addition to the video, and up to two fired outputs, you can configure the system to send a Critical email Alert via WashConnect. -
Page 43: Chapter 2: Operating
Chapter 2: Operating This chapter includes descriptions of the screens presented to a customer when purchasing a basic wash and extra services. It includes an explanation of the on-screen buttons, messages, and graphics used to interact with the payment terminal. Most of these options can be customized. Introducing the Touch Screen The Auto Sentry®... -
Page 44: About Touchscreen Configurations
Video on the right, buttons on the left. This is the older configuration and still can be used. Figure 27. Welcome Screen with video on right Custom Graphics For more information about enabling left-right video displays, see “Auto Sentry® Main Options”... -
Page 45: About Custom Graphics
Auto Sentry® flex. This service is optional and additional fees apply. Custom audio and video prompts produced by ICS are available, and again they are optional and additional fees apply. You can also create your own audio and video prompts. -
Page 46: About Product Information Clips
NOTE: ® The following clips are available: Rain-X , tire shine, polish wax, sealer wax and under carriage. These short promotional clips are provided at no charge. Contact ICS technical support for more information. Auto Sentry® flex User Manual Operating... -
Page 47: About The Secondary Language Display
For more information about enabling product information clips, see “Using Videos” on page 119. About the Secondary Language Display The Auto Sentry® flex touch screen interface can be fully translated into Spanish. A standard set of Spanish-language buttons is included. You can configure the button text and many other text fields to your own Spanish-language requirements. -
Page 48: About The Purchase Buttons
After the customer is identified, the Auto Sentry® flex can display the correct screens to meet customer’s needs. About the Purchase Buttons Depending on how you configure your Auto Sentry® flex, the main options menu can display up to five out of seven Purchase Buttons. Up to five of these buttons can appear on the main options Auto Sentry®... - Page 49 Table 3: Purchase Buttons Button Description Coupon Code Used to enter a three- four- or five-digit coupon code. (A PLU needs to be created for the coupon and the PLU number is the Coupon number. A Profile needs to be created for Coupons and activated with a valid schedule with days and time selected.
-
Page 50: Figure 34. Main Menu Custom Graphics
• A Buy Club Membership button will appear on the Main Options screen after repeat- ing steps #1-4, and then from the Settings, select Clubs, and then in Sell Style box, select Passive; and then in Clubs Sell box, select True. Figure 34. -
Page 51: Purchasing A Wash With No Extra Services
Purchasing a Wash with No Extra Services The following examples show a single wash purchase with no upgrades, paid in cash—the simplest scenario for a customer. WELCOME SCREEN SELECT WASH SCREEN Figure 35. Welcome Screen and Select Wash Screen A customer can tap the Buy Wash button on the Welcome screen. The Select Wash screen appears. -
Page 52: Purchasing A Wash With An Extra Service
After the customer selects a wash, the Select Extra Services screen appears for the base wash selected. You can configure up to six extra services per base wash on the Select Extra Services screen. Five extra service examples are shown in Figure 36. Extra services are defined in WashConnect ®... -
Page 53: Figure 38. Basic Wash With An Extra Service Purchase
Figure 38. Basic Wash with an Extra Service Purchase In Figure 38, the virtual receipt shows a basic wash and extra service. Auto Sentry® flex User Manual Operating... -
Page 54: Selling Club Memberships
Membership along with the other buttons on the Buy Wash main options screen. ▪ None (this used to be the Original ICS setting) sets the buy club membership option to offer the club in the default style, where there is a Buy Club and NO THANK YOU button to the left of the video on the screen before the Buy Wash screen. -
Page 55: Renew Club Memberships At The Terminal
Join Wash Club or No Thank You. ICS does not support the None Club Sell Style. Figure 39. “None” Club Sell Style Screen Renew Club Memberships at the Terminal The system supports ONE of the following club membership renewal options: ▪... -
Page 56: About Unlimited Wash Clubs With A Club Card
About Unlimited Wash Clubs with a Club Card Wash club members are issued wash club cards (or with the ICS Auto Passport wireless tag system. See “Purchasing an extra service with a Club Tag” on page 57 for more information). -
Page 57: Purchasing An Extra Service With A Club Tag
® Club memberships are created in WashConnect software, and can be sold at the point-of-sale cash register or at the Auto Sentry . If purchasing club membership at the Auto Sentry ® ® , customer needs to see an operator to pick up their club card. The operator also collects more information about the vehicle to manually enter in WashConnect ®... - Page 58 If they skip this step, the customer cannot return to the Auto Sentry® flex for a club wash but instead will be charged for the wash. The ICS Auto Passport system requires an RFID Reader that communicates with the wireless electronic chips in the RFID tags adhered to the vehicles’...
-
Page 59: Figure 40. Wash Club Purchase With Club Tag
then that Auto Sentry® flex will always display “Please Wait While We Verify Your Membership.” Figure 40. Wash Club Purchase with Club Tag In Figure 40, when the club customer arrives, the Auto Sentry® flex system checks for an RFID tag and active membership status. -
Page 60: Selling Gift Cards At The Auto Sentry® Flex
and a unique club ID number. The club customer selected TireShine and DuraShine extra service and paid $4.00 cash. Table 6: Audio Prompts for Wash Purchase with a Club Tag Screen Transcription Welcome to the car wash. Please wait while we verify your membership. Please select a car wash by simply touching that item on the screen. -
Page 61: Figure 41. Lt. Passive Gift Card Selling And Rt. Active Gift Card Selling Screens
Figure 41. Lt. Passive Gift Card Selling and Rt. Active Gift Card Selling Screens None turns off the selling of gift cards and the gift card button will not appear at all. None is the default setting. Other settings include Active and Passive. Set up Passive or Active Sell Style for Gift Cards To enable the passive or active selling style for gift cards, follow these steps: 1 On the System Setup menu, click Devices, and then click Settings. -
Page 62: Selling Gift Cards And Clubs Together
® Figure 42. WashConnect Gift Card Settings for Passive Sell Style Selling Gift Cards and Clubs Together Figure 43. Passive Sell Style Buy Wash and Buy Gift Card buttons Active/Passive Selling Gift Card and Club together Configure terminal to sell both gift cards and clubs using the following combinations: Auto Sentry®... -
Page 63: Purchasing A Wash With A Wash Code
Active Gift Cards, Passive Clubs Active Clubs, Passive Gift Cards Passive Gift Cards, Passive Clubs NOTE: System cannot be configured for both active gift and active clubs. Also, only one type of purchase can happen in a transaction, regardless of the active or passive setting. In other words, if a customer purchases a gift card, they cannot purchase a club in the same transaction and vice-versa. -
Page 64: Figure 44. Wash Purchase With Prepaid Wash Code
Figure 44. Wash Purchase with prepaid Wash Code In Figure 44, the customer arrives with a wash code on a receipt. He touches the Enter Wash Code button, and then types the five-digit wash code. The receipt shows an $10.00 upgrade credit. Auto Sentry®... -
Page 65: Paying The Attendant To Purchase A Wash
Table 7: Audio Prompts for Wash Purchase with Wash Code Screen Transcription — Welcome to our car wash. To get started, touch "Buy Wash" -or- if you have a valid wash code, touch "Enter Wash Code." If you have a coupon, touch "Enter Coupon." Enter code. -
Page 66: Purchasing A Wash With A Coupon
Table 8: Audio Prompts for Wash Purchase with Pay Attendant Screen Transcriptions Welcome to the car wash. If you have a valid wash code, please tap the button on the screen labeled enter wash code. If you would like to purchase a car wash, please tap the button on the screen labeled buy wash. -
Page 67: Figure 46. Wash Purchase With Coupon And No Extra Services
The following example shows a car wash purchased with a coupon. Figure 46. Wash Purchase with Coupon and No Extra Services In Figure 46, the customer taps the Enter Coupon button. He enters the three-digit code. The virtual receipt shows BEST WASH $2.00 CPN which is the best wash at retail price of $12.00 given at a reduced price of $10.00. -
Page 68: Track Zip Codes By Using Coupons
Track Zip Codes by Using Coupons The following steps are used to set up a wash with a PLU for a coupon that will track the customer’s zip codes. 1 On the Configuration menu, click Goods and Services, and then click Sales Item. 2 Click the Add button to add a new sales item. - Page 69 issued to authorized users. Those cards contain unique code numbers which are accepted at the Auto Sentry® flex. The fleet account cards are optionally secured with a PIN. The customer enters the Fleet Card PIN number by tapping the numbers on the on-screen keypad. Next, the card is approved and then the wash is charged to the fleet account.
-
Page 70: Figure 47. Wash Purchase With Fleet Account Card
different options. The on-screen receipt shows a recognized fleet account. A $5.00 wash is charged to the fleet account. Figure 47. Wash Purchase with Fleet Account Card Auto Sentry® flex User Manual Operating... -
Page 71: Wash Clubs
$5.00 a wash. Or you might entitle club customers to $5.00 off any regular wash choice. Wash club members are issued RFID tags adhered to the customer’s windshield and read with the ICS Auto Passport wireless tag system. Club cards an also be issued if necessary. NOTE: Club cards are not recommended for Express Car Wash Sites, unless you limit your club cards to only 4 or 5 washes per month. -
Page 72: Figure 48. Wash Purchase And Extra Service With Club Card
Figure 48. Wash Purchase and Extra Service with Club Card Auto Sentry® flex User Manual Operating... -
Page 73: Purchasing A Wash With A Club Rfid Tag
$30.00 per month wash club, entitling members to redeem unlimited basic washes at $5.00 a wash. Or you might entitle club customers to $5.00 off any regular wash choice. ICS Auto Passport system makes it simple to identify club accounts. An RFID tag is affixed to the vehicle’s windshield. -
Page 74: Figure 49. Wash Purchase With Club Rfid Tag
Figure 49. Wash Purchase with Club RFID Tag Auto Sentry® flex User Manual Operating... -
Page 75: Sensing A High Vehicle
In Figure 49, the club customer arrives. The system checks for a tag ID and active membership status. The club name is shown at the top of the screen. The wash choices includes an extra service list. The on-screen receipt shows a the designated club service and a unique club ID number. The club customer selects shield and shine extra service and pays $4.00 cash. -
Page 76: Understanding Payment Scenarios
Figure 50. High Vehicle Profile Retail Menu Custom Graphics Table 13: Audio Prompts for High Vehicle Profile (HVP) Wash Purchase Screen Transcription Welcome to our car wash. To get started, touch "Buy Wash." -or- if you have a valid wash code, touch "Enter Wash Code."... -
Page 77: About Credit Card And Gift Card Combinations
® Token coins and notes (i.e., MEI brand coins and coupons) Card payment methods include the following: Credit cards Gift cards Fleet cards Club cards Debit cards (If your credit card processor accepts debit transactions. Freedom Pay and Moneris accept Debit Cards.) About Credit Card and Gift Card Combinations The on-screen credit card and gift card payment options depend on the settings configured in... -
Page 78: Cash And Coin Payment Combinations
Cash and Coin Payment Combinations If the customer selects a payment type of cash, then one of the following screens is displayed depending upon whether your Auto Sentry® flex accepts bills only or both bills and coins. A coin only payment option is not available. INSERT CASH ONLY INSERT BILLS OR COINS Figure 52. -
Page 79: Payment Process Feedback
Payment Process Feedback A club customer inserts payment for the extra services. Various information points provide feedback on the payment process. The total amount owed is $4.00. A status message shows the payment type and amount received. A virtual receipt also shows the payment type and amount received. ... -
Page 80: About Gift Card Payments
Figure 55. Gift Card Add Value Option In Figure 55, the customer selected a $30.00 Hand Wax Super Wash and paid with a gift card. The card contained a balance of only $20.00, and so the Insufficient Funds screen appeared. The customer selected Add Value to Gift Card, and then entered $20.00, which he paid in cash. -
Page 81: Table 14. Audio Prompts For Add Value To Gift Card
Table 14: Audio Prompts for Add Value to Gift Card Screen Transcription The value on your gift card is less than the total of your purchase. If you would like to add value to your gift card, touch "Add Value.” If you would like to pay the difference with cash or credit, touch "Pay Difference.”... -
Page 82: Figure 56. Gift Card Add Value Option With Promotional Increase
Adding Value to a Gift Card with Bonus Increase In Figure 56, a customer selects the Add Value to Gift Card with increased percentage bonus. Figure 56. Gift Card Add Value Option with Promotional Increase Auto Sentry® flex User Manual Operating... -
Page 83: Adding Value To A Gift Card With Bonus Increase
In Figure 56, the customer selected a $30.00 Hand Wax Super Wash and paid with a gift card. The card contained a balance of only $10.00. The Insufficient Funds screen appeared. The customer selected Add Value to Gift Card, and then entered $20.00, which he paid in cash. A ten percent promotional increase was in effect, which added another $2.00 to the value of the card. -
Page 84: Figure 57. Pay Difference On Gift Card
Pay Difference The following example shows a customer selecting the Pay Difference option. Figure 57. Pay Difference on Gift Card In Figure 57, the customer selected a $30.00 Hand Wax Super Wash and paid with a gift card. The card contained a balance of only $10.00, as shown in the status box above the virtual receipt. The Insufficient Funds screen appeared. -
Page 85: Pay Difference
+ $10.00 Beginning Balance on Gift Card + $20.00 Pay Difference in Cash - $30.00 Cost of Wash -------- + $0.00 Ending Balance on Gift Card Table 16: Audio Prompts for Add Value to Gift Card with Promotional Increase Screen Transcription The value on your gift card is less than the total of your purchase. -
Page 86: About Receipt Options
Figure 58. Receipt Printing Options For more information, see “Auto Sentry® Receipt Footer” on page 178 and “Auto Sentry® Receipt Header” on page 178. About Errors and Command Buttons Various error messages provide instructions to customers when an unexpected condition occurs. Command buttons such as Cancel and Back help customers navigate the touch-screen interface. -
Page 87: Card Authorization Failure
Table 17: Audio Prompt for Card Authorization Failure Screen Transcription The credit card you provided has failed to authorize. Please check the card and try again. Card Maximum Timeout If a card reaches the maximum timeout period, the following screen is displayed. Figure 60. -
Page 88: Wash Code Not Valid
Wash Code Not Valid The following screen is displayed if a wash code is not valid. Figure 62. Wash Code Not Valid Table 18: Audio Prompts for Invalid Wash Code Screen Transcription The wash code you entered is not valid. Please check the code and try again. Wash Code Expired The following screen is displayed if a wash code is expired. -
Page 89: Credit Due For Wash Payment
Credit Due for Wash Payment The following screen is displayed when a customer overpays for a wash with cash, coin or token and the Auto Sentry® flex cannot dispense change. Figure 64. Credit Due for Wash Payment Credit Due for Canceling Transaction The following screen is displayed when a customer inserts cash, coin, or token, and then taps Cancel before finalizing a wash selection. -
Page 90: Unspecified Error
Unspecified Error The following screen is displayed when a customer encounters an unspecified error, such as when no services are available in the current Schedule dialog box. A common error is forgetting to schedule days and times to your profile. Figure 66. -
Page 91: Help Button
Help Button The Help button is available for customers who need more information about using the Auto Sentry® flex touchscreen interface. Figure 68. Help Button Table 21: Audio Prompt for Help Button Screen Transcription You may touch the button below labeled replay to hear the instructions for the screen that you are viewing. - Page 92 Auto Sentry® flex User Manual Operating...
-
Page 93: Service Unit Screen
Chapter 3: Service Unit Screen You can use the Service Unit screen to add and remove money from the bill dispenser or coin hoppers; remove money from the bill or coin acceptors; and verify the coin hoppers. This screen will be directly accessible on the Auto Sentry touch screen. ... -
Page 94: Accessing The Service Unit Screen
5 Click the Save button. The user’s password and PIN are saved. Accessing the Service Unit Screen To access the Service Unit Screen for the Auto Sentry® flex®, first locate one of the service buttons inside the Auto Sentry® flex, in either the upper-left chamber of the Auto Sentry or in the lower- right chamber. -
Page 95: Figure 72. Service Unit Screen User's Site Id
Figure 72. Service Unit Screen User’s Site ID 4 Select a Site ID, which is typically a four-digit number such as 1002. USER ID/PIN Figure 73. Enter PIN NOTE: If the User’s site is not listed, the user will need to change to their site first, and then enter their User ID. - Page 96 7 Log on with your user ID and four-digit PIN, and then tap Enter. To access the Auto Sentry® flex®, your user PIN must be numeric. An alphanumeric PIN is not accepted. NOTE: The PIN is set up from the Users menu, in the Manage Users dialog box in WashConnect®.
-
Page 97: Add Funds
Close Terminal, Open Terminal. Do this when you need to open or close the Auto Sentry® flex. When the terminal is closed, customers cannot purchase washes. ▪ Tap Close Terminal after you finish servicing the unit. ▪ Tap Exit to display Wash Closed on the touch screen. ▪... -
Page 98: Add Bills (To The Auto Sentry)
▪ Enter total amount (in dollars) you are adding to Hopper 1. Tap the ENTER button when finished. 3 Type the dollar amount on the keypad. The amount appears in the keypad display. 4 Tap Enter. The dollar amount is confirmed in the verification box. ▪... -
Page 99: Verify Coin Hoppers
5 Tap Enter to confirm. The amount is added and the instruction box confirms the transaction. The quantity is displayed on the bill dispenser icon. 6 Take the receipt. 7 Slide out the bill dispenser drawer. Physically add bills, and then slide the drawer back. Verify Coin Hoppers To audit the coin totals in the Auto Sentry®... -
Page 100: Remove Bill Or Coins (From The Auto Sentry)
Remove Bill or Coins (from the Auto Sentry) Selecting the Remove command tells the software to zero out the amount (or quantity in the case of tokens) at the selected device. This automatic journal entry is entered in the WashConnect® software. -
Page 101: Terminal Operations
3 Have a bag or bucket ready to collect the coins, if necessary. 4 Tap Verify, and then tap Start. 5 Tap Stop when the hopper is empty. 6 Count the number of coins. If the amount is correct: ▪ Tap Stop. -
Page 102: Bump Shift
The Close Terminal button is used when closing the wash at the end of business to prevent customers from attempting to purchase a wash. A message will be displayed on the screen to indicate that the Wash is Closed. NOTE: The Close Terminal button simply stops access to the terminal to prevent wash purchases. -
Page 103: Open Terminal
Open Terminal Select the Open Terminal button or use the override switch if installed at the facility. Diagnostics The diagnostics screen displays information about the bill dispenser. You can also test the printer and issue a dispense command to the bill dispenser and coin hoppers. Table 1: Diagnostics Screen Icon Descriptions Tap the Test button to print a test receipt. -
Page 104: Bill Dispenser Diagnostics And Life History
Version information may include but is not limited to the following application names: CAGE.exe. Credit card clearing software. CoreGatewayServer.exe. Sever application. Touch.exe. WashConnect® touch-screen software. Deviceint.exe. Device interface software. Bill Acceptor. Configured bill acceptor for the WashConnect®. Bill Dispenser Diagnostics and Life History Sensor Health, Pot Level (potentiometer) and Legend are displayed for Fujitsu™... -
Page 105: Terminal Balances
-or- If need to do some maintenance while in the unit, select the Disable Alarm button to prevent the alarm from inadvertently going off. When the Disable Alarm button is selected, it reappears as Enable Alarm. 3 Select the Enable Alarm button to reactivate the Vandalism Alarm. 4 If one forgets to select the Enable Alarm button, exiting the Service Unit screen will automatically enable the alarm. - Page 106 Terminal Balances displays how much cash is in an Auto Sentry® flex terminal, POS drawer, or Safe in real- time. Area 2 of 5: Auto Sentry flex Bill Acceptor This shows the denomination, for example, Twenties; quantity for example, 10. The bill acceptor can be configured to recognize up to three different types of token bills.
- Page 107 Area Description Area 3 of 5: Touch POS Terminal Drawer Cash This shows the total amount in the drawer. The system does not track every dollar or coin that is taken in or given out as change. Checks This shows the total amount of checks collected during the shift.
- Page 108 Area Description Area 5 of 5: Cash On Hand Cash on Hand displays the total amount of cash and checks in all the devices at the site in real-time. Bills The amounts are broken down by denomination. Coins The amounts are broken down by coins and tokens.
-
Page 109: Cash Management
Cash Management Cash management is available in WashConnect® software for the Auto Sentry® flex®. Cash management provides a system to track cash flow in and out of the unit. To access the main cash management journal in WashConnect®, on the Financial menu, click Cash Management, and then click Journals. -
Page 110: Servicing Tips
The Action column shows what activity occurred for the journal entry. The following table describes each of the possible actions that can appear in the Action column. The recommendation is to use the safe. Table 1: Journals Entry Descriptions with Safe enabled Entry Description Beginning Balance... -
Page 111: Check Balances Periodically
Check Balances Periodically You can view the balances for each Auto Sentry® as often as you like in the Terminal Balances screen (Financial > Audit Controls > Terminal Balance Report). The numbers are updated in real time as customers make purchases. You can press the Refresh button to refresh the report and see the most current balances. - Page 112 Auto Sentry® flex User Manual Service Unit Screen...
-
Page 113: Marketing With Your Auto Sentry
Chapter 4: Marketing with your Auto Sentry This chapter includes information on using your Auto Sentry® flex to promote and market your car wash. In this section you can find information about the following: custom buttons, video clips, profiles and profile times, tokens, fundraisers, and time-limited PLUs. Custom Buttons Custom buttons are used in place of the standard buttons presented to customers at the Select Wash and Select Extra Services screens. -
Page 114: Figure 78. Custom Button Enabled For Plu 5
Figure 78. Custom Button Enabled for PLU 5 Auto Sentry® flex User Manual Marketing with your Auto Sentry... -
Page 115: Sizing Custom Buttons
The FullservX.bmp file is located in the ICS/BMPFiles/Primary/Custom directory. It will be used whenever PLU 5 is part of the active profile at the Auto Sentry® flex. The bmp will only be used if there are two or more wash services or extra services. -
Page 116: Naming Custom Buttons
You must save custom button files on the Auto Sentry® flex drive. For example, by using a network connection. Save primary language custom button bitmap files here: \ICS\BMPFiles\Primary\Custom Save secondary language custom button bitmap files here: \ICS\BMPFiles\Secondary\Custom Enabling Buttons You can use the Sales Item dialog box to enable custom buttons. -
Page 117: Buttons Layout Examples
4 In the BMP File box, type the file name of the custom button. Do not type the size suffix (S, M, L or X). Do not type the .bmp file extension. 5 Click Save when you are finished. The custom button is enabled for the PLU. Buttons Layout Examples The following figures show examples of how each size custom button is displayed on the Auto Sentry®... -
Page 118: Large Size Custom Buttons, 3 Services
Large Size Custom Buttons, 3 Services Figure 81. Large Size Custom Buttons, 3 Services Extra Large Size Custom Buttons, 2 Services Figure 82. Extra Large Size 2 Services Custom Buttons Auto Sentry® flex User Manual Marketing with your Auto Sentry... -
Page 119: Using Videos
Extra Large Size Custom Button, Available for One Extra Service Only Figure 83. Extra Large Custom Button, only available for one Extra Service NOTE: A wash selection menu with only one wash service is not available. If you only have one wash service in the Profile, the screen will go to Extra Services if you have those configured. -
Page 120: Ordering Video Clips
Sealer wax Under carriage These short promotional clips are provided at no charge. Contact ICS technical support for more information. Recording Video Clips You can record your own video clips. The narrator should be recorded in a portrait setting with their head and top of shoulders just inside the frame. -
Page 121: Video Clip Specifications
Video Clip Specifications A video clip file must be saved in the audio-video interleave (.avi) format with the following specifications: Table 3: Video and Audio Specifications Parameter Setting Video Specifications Codec ® Microsoft MPEG-4 Video Codec V3 Frame Size for Clip Width, 352—Height, 288 Frame Size for Welcome Video Width, 720—Height, 480... -
Page 122: Enabling Video Clip Files
In the Info Video File box, Polish appears. This associates the video clip file named Polish.avi with PLU 5. Enabling Video Clip Files To enable a video clip for a custom button, you must save it in the ICS directory in the correct folder, for example: ... -
Page 123: Enabling Welcome Videos And Damage Waivers
▪ For a damage waiver video, name the file DamageWaiver.avi. 2 Save the file here: ▪ \ICS\AVIFiles 3 Restart Touch.exe. to enable the video. NOTE: Except for the size, the specifications for welcome videos and damage waivers are the same as the specifications for promotional clips. Promotional clips are 352 by 288 pixels. -
Page 124: Figure 88. Example Of A List Of Profiles From The Profile Tab
more business at slower times and/or days. By using a profile to contain your services, you can display a customized wash menu to customers at the Auto Sentry® flex. Profiles can be enabled based on the following parameters: Day of week, start and end time. ... -
Page 125: About Wash Selections Based On The Day And Time
About Wash Selections Based on the Day and Time You can configure Auto Sentry® flex to offer a different set of wash options based on various conditions which might include the following: Weekdays, weekends, and evenings Holidays Slow times and busy times ... -
Page 126: Display A Holiday Schedule
Display a Holiday Schedule The following example shows a schedule to accommodate extended hours over the Labor Day weekend. Figure 90. Example Labor Day Schedule In this example, the Standard Offerings schedule includes specific dates for the Labor Day weekend when the wash is open for extended hours. The weekend schedule is active from 9/3/ 2011 to 9/4/2011. -
Page 127: Display Busy And Slow Schedules
Display Busy and Slow Schedules This example shows how you can provide different profiles for your busy and slow times. Figure 91. Example Busy and Slow Schedules In the example above, two profiles enable the Auto Sentry® flex to display wash selections based on how busy the wash is expected to be. -
Page 128: Display An Inclement Weather Schedule
Display an Inclement Weather Schedule The following example shows how you can create profiles and schedules to deal with inclement weather and heavy insect conditions. You might consider creating a special profile for snowy days and one for buggy days during periods of heavy insect activity. Figure 92. -
Page 129: Display A Twenty-Four Hour Schedule
Display a Twenty-Four Hour Schedule The following example is a twenty-four hour wash Profile. Figure 93. Example Twenty-Four Hour Schedule In this example, the Start Time and End Time are entered; however, if the schedule is 24 hours, only the Start Date needs to be included, not the end date. Select the days of the week or All Days. The default time is 24 hours, the entire day. -
Page 130: Display A Retail Schedule
Display a Retail Schedule The Retail transaction type is the main wash options and is set up as the default menu. When a customer selects the Buy Wash button at the Auto Sentry® flex, the system attempts to match the day, time and vehicle height. -
Page 131: Display A Fleet Schedule
Display a Fleet Schedule The Fleet profile transaction type Applies To Fleet. The profile is active for fleet customers who swipe a fleet card at the Auto Sentry® flex or customers with Auto Passport windshield tags, if the required hardware and software is installed which is optional and incurs additional fees. Fleet profiles can be created to offer a limited set of wash choices. -
Page 132: Display An Open Ticket Schedule
Display an Open Ticket Schedule The Open Ticket transaction type is active for customers with unpaid wash tickets who select Enter Wash Code on the Auto Sentry® flex touch screen. Open tickets can be used with frequency promotion campaigns. Customers who receive an open ticket get a wash code for an unpaid service. -
Page 133: Display A Club Schedule
Figure 97. Paid Ticket Schedule Example For example, in Figure 97, the Fuel Upgrade Standard profile is active for All Days from 6:00 AM to 9:00 PM. A customer with a paid ticket who selects Enter Wash Code will receive this profile, which contains wash upgrades and extra services. -
Page 134: Display A Coupon Schedule
Figure 98. Club Schedule Example In Figure 98, the In Bay Club profile is active for All Days from 6:00 AM to 9:00 PM. A customer with an active club membership will receive this profile, which includes the Xtreme Club Wash. This is an example of a club that offers the top wash with one upgrade option. -
Page 135: Display A Club Sales Schedule
Figure 99. Coupon Schedule A coupon is a discount off of a single wash and needs a profile to activate the coupon. You can have multiple coupons that are active inside of one profile. A discount coupon is used to give a discount off an entire profile. -
Page 136: Using Discount Coupon
Figure 100. Club Sales Schedule The In Bay Club Purchase profile is selected. It is active All Days from 6:00 AM to 9:00 PM. Customers who touch Buy Club at the Auto Sentry® flex see this profile, which includes the In Bay Club Charge for $25.00. -
Page 137: Figure 101. Discount Coupon Sales Item
2 In the Profit Center box, select a profit center from the list that the sales item will be sold and tracked in. NOTE: Profit centers are important for reporting purposes. For more information on Profit Centers that appear the list, see Profit Centers. 3 Click the Add button. -
Page 138: Add A Discount Coupon Profile And Schedule
11 Click the Save button. 12 The message "Sales item saved successfully" appears. 13 Next, set up a Discount Coupon Profile with this discount coupon PLU. Add a Discount Coupon Profile and Schedule Save time and create one Discount Coupon (Coupon Code) that is good for all of your Retail/Flex washes or all of your Club Sales Profile but not both. -
Page 139: Add A Schedule For A Discount Coupon
8 From the Discount Coupons section, select all Discounts that apply. (Only those Sales Items defined as Discount Coupon will be available for assignment.) Figure 102. Discount Coupon Profile 9 Click OK. 10 Click the Save button. The message “This profile is not enabled do you want to enable it at this site” appears. 11 Click Yes. -
Page 140: Using Tokens
2 Select a Profile in the list. (Active profiles are highlighted in green.) This is the Profile to which you will assign the schedule. 3 In the Schedule area, click the Add button. The Schedule dialog box appears. 4 In the Day of Week box, select All Days or the individual days. 5 In the Start Date box, select a start date. -
Page 141: Dispensing Tokens As Part Of A Promotion
Dispensing Tokens as Part of a Promotion This section deals with dispensing tokens as part of a promotion. Dispensing tokens is the first part of a two-part process. The second part of the process involves accepting tokens which is described in the next section. ... -
Page 142: Figure 104. Auto Sentry® Flex
Next, you can configure the Auto Sentry® flex coin hopper to dispense tokens: Figure 104. Auto Sentry® flex ® 1 Open WashConnect 2 On the System Setup menu, click Devices, and then click Assign Denominations. The Assign Denominations tab appears. 3 In the Device box, select the device that will dispense tokens. -
Page 143: Figure 105. Denomination Dialog Box
5 Click the Add or Edit button. The Denomination dialog box appears. Figure 105. Denomination Dialog Box 6 Do the following: ▪ In the Denomination box, select Some Token ▪ In the Max. Dispense box, type a dispense limit per transaction. 7 Click the Save button. -
Page 144: Figure 106. Tokens And Hopper Setup For A Plu Example
The PLU is available to edit. Figure 106. Tokens and Hopper Setup for a PLU Example 3 In the Token to Dispense area, type an amount to dispense in the Quantity box. 4 Click the Save button. The PLU is configured to dispense tokens. 5 Should fill the coin hopper with the correct token coins. -
Page 145: Configure Coin Acceptor To Accept Tokens
Figure 107. Please Take Coins Below Custom Graphic Figure 107, the sale of a $13.00 Xtreme Wash is complete. Before the customer is instructed to drive ahead, a token is dispensed. A reminder message to take the coins is displayed. Configure Coin Acceptor to Accept Tokens You can accept Tokens as Part of a Promotion with the Auto Sentry®... -
Page 146: Add A Currency Value For The Coin Acceptor
7 Click Save, and then click Exit. 8 Restart Touch.exe. The coin acceptor is configured to accept tokens. Figure 109. Wash Paid with 1.00 Token In the previous figure, the sale of a $7.00 Express Wash is complete. The receipt shows the customer paid with a $1.00 token and $6.00 cash. -
Page 147: Using Frequency Promotion
Coin acceptor channels must be programmed separately at the coin acceptor. Refer to the coin acceptor documentation or contact ICS support for more information. 6 Click Save when you are finished. The denomination is assigned to a channel on the coin acceptor. -
Page 148: Figure 112. Frequency Promotion Example
4 Promo Receipt Text 5 Flex/Retail Standard Screen Set up a promotion package PLU to offer $3.00 off Exterior Wash on the next wash redeemed within a certain time period. The $3.00 off the Exterior Wash is redeemed with a wash code printed on a presell ticket at the initial time of purchase. -
Page 149: Promo Receipt Text
▪ Click the column header to reorder the column to ascending or click again for descending order. ▪ Below the Frequency Promotions title bar, you can select the number of PLU numbers to view on one page: 20, 40, or 60. 7 In the Promotion PLU box, type Promotion Package PLU number. -
Page 150: About Promotional Plus And Extra Services
When the frequency promotion is active (the Active checkbox is selected), a customer who purchases one of the following sales items PLU: 1, 2, or 3. After selecting one of these washes, the customer will also receive a presell ticket containing a wash code. WASH CODE Figure 114. -
Page 151: Figure 115. Receiving Free Wash Plu
Figure 115. Receiving Free Wash PLU Next, at the Auto Sentry® flex: Customer selects Royal Flush Wash. Customer also selects Heavy Detail extra service. Customer receives a receipt with a five-digit wash code good for PLU 190, Free Royal Flush. Auto Sentry®... -
Page 152: Redeeming A Presell Ticket
Redeeming a Presell Ticket A customer can redeem a presell ticket at the Auto Sentry® flex. Typically, a frequency promotion profile and a Presell profile time is created to facilitate this. When such a profile and profile time is set up in WashConnect, then customers who select Enter Wash Code at the Auto Sentry® flex touch screen will receive the correct extra service selections. -
Page 153: Table 4. Business Considerations For Wash Club Promotion
$9.00 Deluxe Wash $11.00 Ultimate Wash $13.00 Xtreme Wash The following table lists some common considerations and suggested decision-making guidelines. Table 4: Business Considerations for Wash Club Promotion Consideration Suggestion Discussion Price? Based on frequency of Wash club pricing can be determined by estimating the visits average number of visits a customer will make in a given time period. -
Page 154: Setting Up Your Wash Club Menu
Setting up your Wash Club Menu Customers who join an unlimited wash club provide a credit card that will automatically be charged a flat fee every month, and in return, receive unlimited washes for that specific vehicle. This example outlines the process for multi-site clubs using Auto Sentry® flex. The organization includes two sites. -
Page 155: Iii. Create A Package For Every Wash Club
III. Create a Package for every Wash Club Since the customer has already paid for the wash in the membership fee, they will not be charged when redeeming a wash. Therefore, create a separate Package for each wash club or offering. Packages combine the base wash service PLU for the club and a redemption wash PLU. -
Page 156: Create A New Profile For Each Wash Club
5 In the Price box, type a pretax price for the wash club. 6 In the Name box, type a name for the wash club. NOTE: This name will display on the POS and the Auto Sentry Screen with or without custom graphics. -
Page 157: Vi. Create A Profile For The Entire Wash Club Offerings
1 If necessary, log on to WashConnect at local site. 2 On the Configuration menu, click Goods and Services, click Profiles. 3 In the Profile box, type a name for the wash club Profile. 4 In the Device Type box, select the Device Type from the list. 5 In the Devices box, select the devices from the list. -
Page 158: Create A Sales Item For The Discount Coupon Code (Optional)
NOTE: Optional, set up a discount coupon code that can be applied to all of your clubs on the menu, follow these extra steps: VII. Create a Sales Item for the Discount Coupon Code (optional) A Discount Coupon Code allows multiple discounts on a single transaction using the same Sales Item PLU. -
Page 159: Assigning Services To The Club Package
Assigning Services to the Club Package The following illustrations provide a very brief overview. More considerations include the following: selling clubs at the POS, issuing card numbers, creating club packages, creating club profiles, linking clubs and profiles, and enabling club profiles. These topics are outside the scope of this document. -
Page 160: Using Fundraiser Promotions
Using Fundraiser Promotions Fundraising and charity car washing, which were once viewed as detrimental to professional car washes, are now becoming a profitable marketing channel for many operators. For example, the Car Wash Operators of New Jersey (www.cwonj.com) has teamed up with the New Jersey Department of Environmental Protection (www.cleanwaternj.com) to form an alliance for fundraisers. -
Page 161: Setting Up Fundraiser Coupon Codes
For more information on custom buttons, see “Custom Buttons” on page 113. You can also request a Fundraising image file from ICS. The fundraiser button replaces the following file: C:\ICS\BMPFiles\Primary\ Rename MainForm.Coupon.bmp to MainForm.Coupon.Original.bmp Name the fundraiser button file MainForm.Fundraiser.bmp, and then save it to the C:\ICS\BMPFiles\Primary\ directory. -
Page 162: Setting Up Fundraiser Extra Choices
Setting Up Fundraiser Extra Choices You can also prompt customers to select an extra amount for the fundraiser donation. Set up another PLU to add the extra amount the customer could select. For example, PLU 402, Add Extra $3.00, is a three-dollar extra service in the wash detail (Express) profit center. This allows a customer to donate an additional amount to the fundraiser. -
Page 163: Figure 120. Example Screen Progression For Fundraiser Purchase
Figure 120. Example Screen Progression for Fundraiser Purchase Auto Sentry® flex User Manual Marketing with your Auto Sentry... -
Page 164: Viewing Reports For Fundraising Purchases
In Figure 120: 1 The customer arrives at the Auto Sentry® flex where the Fundraising button is passive. 2 The customer touches the Fundraising button, and then enters the fundraiser code, which is 600 in this example. This code is linked to package PLU 600, which has been enabled in the Active Settings dialog box. -
Page 165: Figure 122. Fundraising Report
Figure 122. Fundraising Report In the Figure 122, “Fundraising Report,” the package Relay for Life PLU 150 was the coupon code entered by the customer at the Auto Sentry® flex touch screen. Instead, the extra services are listed separately: PLU 325, NHS Fund Towel Exchange. This is the extra service provides $1.50 donation if selected by the customer after the initial fundraising wash purchase. - Page 166 Auto Sentry® flex User Manual Marketing with your Auto Sentry...
-
Page 167: Reports
Chapter 5: Reports You can view many different reports for the transactions that take place on your Auto Sentry® flex. This chapter includes an overview of the most essential reports: Shift Detail, Journals, and Terminal Balance. See WashConnect Web Help if you would like more information on the other management reports that are available. -
Page 168: Figure 123. Shift Detail Report
Figure 123. Shift Detail Report, Page 1 Auto Sentry® flex - User Manual Reports... -
Page 169: Figure 124. Shift Detail Report
Figure 124. Shift Detail Report, Page 2 Auto Sentry® flex - User Manual Reports... -
Page 170: Figure 125. Shift Detail Report
Figure 125. Shift Detail Report, Page 3 The Shift Detail report summarizes all transactions and lists all services sold for the selected shift or shifts. The following table describes the shift report section headings and line-item labels. The table is comprehensive. -
Page 171: Table 5. Shift Detail Report Descriptions
Table 5: Shift Detail Report Descriptions Line-Item Name Description Profit Center A Profit Center name will appear on the left above the section breakdown. The breakdown of each Profit Center will be itemized based on how the PLUs were setup for the particular Profit Center, for example, breakdown may include Base, Extra, Discount, Other, and more. - Page 172 Sales Tax: This is to account for the amount of money that will be collected as Sales Tax revenue, received from applying specified tax rates to specific Sales Items. This works with the configuration of Sales Items to determine if they are nontaxable, subject to a single tax, or subject to multiple taxes.
- Page 173 Total Credit Cards This entry includes the total number and total dollar amount of all sales identified as being processed with a Credit Card during the selected shift(s). The Credit Card totals will be broken down and listed by credit card type, i.e. Visa, MasterCard, etc. All of the individual credit card types will be summed and displayed in the Total Credit Cards line.
- Page 174 Beginning Bank This entry includes the beginning amount of cash available in each device at the opening of its shift. This is known as the Beginning Bank and this entry will sum up all Beginning Bank entries for each device included in the selected shifts. Adds This entry includes all amounts where an Add function was done to add money into a device.
- Page 175 Bank Deposits (Cash) This entry includes the total dollar amount of cash being taken from the system and sent to the Bank for Deposit. Cash deposited to the Bank will be deducted from your total Cash on Hand. Total Bank Deposits This entry includes the total number and amount of all deposits taken to the bank.
-
Page 176: View A Shift Detail Report
Retired Transactions - This entry displays the number of transactions and the total dollar Only can occur if site is value of all transactions that have been retired for the selected using a Tunnel Master shift(s). These transactions could have been retired while the shift was open or after it was closed. - Page 177 ▪ Select Account to see profit centers. The report will show profit center summaries, not PLUs.When Account is selected the report will be broken down by the Account ID and name that the individual services will be associated to in your accounting package. The report will display how many services are tied to each individual account.
-
Page 178: Journals
Journals You can view the Journal. Figure 127. Journal About Journal Actions Every line in the Journal is considered one journal entry. The Action column shows what activity occurred for the journal entry. The following table describes each of the possible activities or movements that can appear in the Action column for each journal entry. -
Page 179: Search For A Journal
Search for a Journal You can view one journal for each shift and device combination. You cannot simultaneously view multiple shifts and devices. To search for a journal, follow these steps: 1 On the Financial menu, click Cash Management, and then click Journals. The Journals tab appears. -
Page 180: Verify A Journal Entry
In Figure 128: The Deposit appears with the breakdown of Cash $134.99 and Check $0.00. The Verify line appears with the same breakdown of Cash $134.99 and Check $0.00. Verify a Journal Entry Verifying journal entries is an important, yet simple process, where a manager or supervisor verifies the money that was moved via a journal action matching the amount that is shown in Cash Management. -
Page 181: Figure 129. Select A Journal Entry To Verify
Figure 129. Select a Journal Entry to Verify 4 Click the Verify button. The Verify Journal dialog box appears. Figure 130. Verify Journal Dialog Box Auto Sentry® flex - User Manual Reports... -
Page 182: Figure 131. Journal Entry Verified
5 Optional: Type changes in the New Qty. boxes. 6 Click the Save button. The entry is verified and Journals appears. The Verified column shows a date and logon ID for the verified entry. Figure 131. Journal Entry Verified Auto Sentry® flex - User Manual Reports... -
Page 183: Terminal Balance Report
Terminal Balance Report The Terminal Balance Report will give the user the ability to see the ending terminal balance for a specific day. The report can be viewed per day and the user can drill down from the Site level all the way to the individual component level in a device to see the ending balance on that specific day. -
Page 184: View The Terminal Balance Report
View the Terminal Balance Report To view the Terminal Balance report, follow these steps: 1 On the Financial menu, click Cash Management, and then click Terminal Balance report. The Terminal Balance tab appears. Figure 133. Terminal Balance tab 2 In the Start Date box, select a start date. 3 In the End Date box, select an end date. - Page 185 Coins tokens adding Adding funds removing Audio verifying specifications Coupon Auto Sentry Flex In-Bay schedule Credit cards screen options Back button Credit due Beginning balance cancelling transaction Bill acceptor Custom buttons about layout examples Bill dispenser...
- Page 186 English button Open ticket schedule Opening the Auto Sentry Flex In Bay Fatal system error Operating requirements Fleet schedule Frequcny promotion Paid ticket profile times Fundraisers active settings dialog box schedule buttons Password coupon codes create example Payment example sale...
- Page 187 terminal operations Removing bills verifying coin hoppers coins verifying coins tokens Shift Detail Report Removing funds Shift report viewing Replay button Reporting Single-board computer Retail Spanish button schedule Terminal balances Sales Item, Discount Coupon Terminal balances report view Schedule, Club Schedule, Club Sales Terminal Balances Rreport Schedule, Coupon...
-
Page 188: Figure 63. Wash Code Expired
Wash busy Wash code expired not valid Auto Sentry® flex - User Manual... -
Page 189: Table 1. Document Change History
Change History Table 1: Document Change History Document Reviewer Date Description Version Initials Version 1.0 May 3, 2011 M.R., R.H., B.M., First release. J.M. Version 2.0 December 7, 2016 W.S., M.S., K.K., T.R. Second Release. Auto Sentry® flex - User Manual... - Page 190 Auto Sentry® flex - User Manual...
Need help?
Do you have a question about the Auto Sentry flex and is the answer not in the manual?
Questions and answers