Table of Contents
Advertisement
Quick Links
Download this manual
See also:
User Manual
Advertisement
Table of Contents

Subscribe to Our Youtube Channel
Related Manuals for Star SP298 SERIES


Summary of Contents for Star SP298 SERIES
-
Page 1: Slip Printer
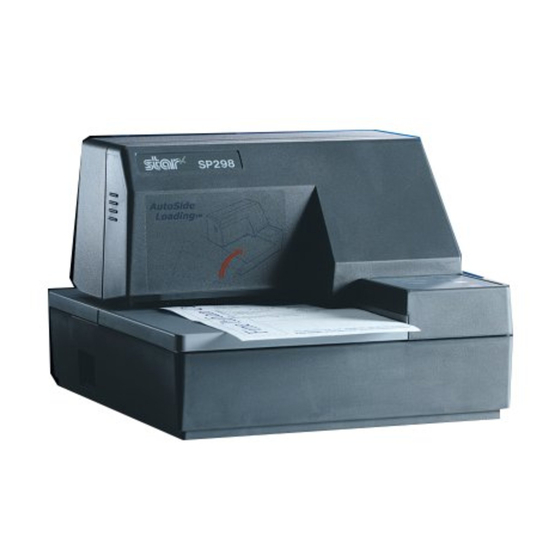
SLIP PRINTER SP298 SERIES USERS MANUAL MODE D’EMPLOI BEDIENUNGSANLEITUNG MANUALE DI ISTRUZIONI... -
Page 2: Trademark Acknowledgments
ESC/POS, TM-295: Seiko Epson Corporation Notice • All rights reserved. Reproduction of any part of this manual in any form whatsoever, without STAR’s express per- mission, is strictly forbidden. • The contents of this manual are subject to change without notice. -
Page 3: Chapter 1: Printer Setup
Chapter 1: Printer Setup This chapter contains important information on setting up your printer. Be sure to read this chapter carefully before using the printer for the first time. In this chapter you will learn about: Choosing a place for the printer Unpacking and setting up the printer Installing the ribbon cassette Connecting to a host computer... -
Page 4: Unpacking The Printer
Unpacking the printer Check to make sure that the carton contains each of the items shown in the following illustration. Ribbon cassette Printer User’s Manual Ferrite core Fastener If anything is missing, contact the dealer where you bought the printer and ask them to supply the missing part. -
Page 5: General Guide
General guide The following illustrations describe the major components, buttons, and connectors of your printer. Printer cover Protects internal components. Control panel Three indicators show the printer status, and two switches provide control over printer functions. Power switch Document table Turns printer Supports the paper fed power on and off. -
Page 6: Removing The Printer Cover
Removing the printer cover Push straight up on the ridged locations on the sides of the printer cover to remove it from the printer. To replace the cover, slide it back down into position. Gently press down on the cover until you hear it click securely into place. Installing the ribbon cassette Make sure that the printer's paper release is activated (the paper is not held in place by the paper feed roller). - Page 7 Remove the ribbon cassette from its packaging, and turn its knob in the direction indicated by the arrow to take up any slack in the ribbon. Holding the ribbon cassette so that the ribbon is facing down, install the cassette into the slip printer as shown in the illustration. Press gently but firmly on the cassette until it snaps securely into place.
-
Page 8: Removing The Ribbon Cassette
Removing the ribbon cassette Use the following procedure to remove the ribbon cassette from the slip printer when you want to replace it with a new one. Make sure that the printer is turned off and unplugged from its power outlet. - Page 9 Plug the other end of the power cord to a standard household wall outlet. Use the power switch on the left side of the printer to turn power on and off. Important! We recommend that you unplug the printer from the power outlet whenever you do not plan to use it for long periods.
-
Page 10: Connecting To Your Host Computer
Connecting to your host computer The computer sends data to the printer through a cable to the printer’s standard serial interface (Connector Type: D-sub 25-pin). This printer does not come with a cable, so it is up to you to obtain one that suits your needs. Important! •... - Page 11 Pass the fastener through the ferrite core. 5 cm maximum Fastner Loop the fastener around the cable and lock it. Use scissors to cut off any excess. Pull and cut Plug one end of the serial cable into the serial port of your computer, and the other end of the cable into the socket on the back of the printer.
-
Page 12: Connecting To A Peripheral Unit
Connecting to a peripheral unit You can connect a peripheral unit to the printer using a modular plug. The following describes how to install the ferrite core and make the actual connection. See “Modular plug” on page 108 for details about the type of modular plug that is required. -
Page 13: Inserting The Paper Into The Printer
Loop the fastener around the cable and lock it. Use scissors to cut off any excess. Pull and cut Plug one end of the modular cable into the modular jack of the peripheral. Remove the modular jack cover from the back of the printer and plug the other end of the modular cable into the jack of the printer. -
Page 14: Autoside Loading
Place a piece of the paper onto the printer’s document table and slide its right edge into the printer. Printing will be performed on the side of the paper that is facing up (the one you can see), starting from the top of the paper. - Page 15 Push the right edge of the paper into the printer until it stops. At that time, the PAPER OUT indicator will go out, and the printer mechanism will automatically align the paper for printing from the top. Send data from your host computer to be printed on the paper. After printing, press the RELEASE button to automatically release the paper.
-
Page 16: Chapter 2: Control Panel Operations
Chapter 2: Control Panel Operations The control panel gives you some push-button control over the slip printer operation. It also includes indicator lights, which tell you the current status of the printer at a glance. FORWARD POWER RELEASE PAPER REVERSE RELEASE Indicator lights The following table describes the meaning of indicator lights when it is on, off,... -
Page 17: Adjusting The Dot Alignment
Buttons The following table describes the function of the three control buttons of the control panel. Button Description Feeds the slip paper forward, toward the back of the printer. One press FORWARD feeds one line, holding down performs continuous feed. Feeds the slip paper back, toward the front of the printer. - Page 18 This is caused when mechanical parts of the printer get out of alignment. This happens only rarely and you may never experience it at all throughout the life of the printer. If you do have problems, use the following procedure to correct it. Turn on the printer and insert a piece of paper.
-
Page 19: Hexadecimal Dump
The dots alignment adjustment setting you selected is stored in printer memory and a pattern is printed using the selected setting followed by the message “Adjust Complete!” The printer ejects the paper after printing is complete. Note: You setting is not registered if you turn off printer power before pressing REVERSE to exit the Dot Alignment Adjust Mode. -
Page 20: Recoverable Errors
The method used by the printer to recover from a data receive error depends on the current command mode. Command mode Data Receive Error Recover Procedure Star mode The printer prints a question mark. Memory switch 4-0=0 : The printer prints a question mark. ESC/POS mode... -
Page 21: Chapter 3: Command Summary
Access the following URL for the latest version of this manual and for updates on supported commands: http://www.star-micronics.co.jp/service/ sp_sup_e.htm Star Mode Commands The following tables show the Star mode commands that are supported by this printer. Character Selection Hexadecimal Control Codes... -
Page 22: Print Position Control
Hexadecimal Control Codes Function Codes <ESC> “W” n 1B 57 n Set the magnification rate in character width. <ESC> “h” n 1B 68 n Sets the magnification rate in character height. <ESC> “–” “1” 1B 2D 31 Select underlining <ESC> “–” <1> 1B 2D 01 <ESC>... -
Page 23: Dot Graphics Control
Hexadecimal Control Codes Function Codes <ESC> “z” “0” 1B 7A 30 Set line spacing to 1/12-inch <ESC> “z” <0> 1B 7A 00 <ESC> “z” “1” 1B 7A 31 Set line spacing to 1/6-inch <ESC> “z” <1> 1B 7A 01 <ESC> “0” 1B 30 Set line spacing to 1/8-inch <ESC>... -
Page 24: Download Graphics Printing
Download Graphics Printing Hexadecimal Control Codes Function Codes <ESC> “&” <0> n1 n2 .. 1B 26 00 n1 n2 .. Defines download characters <ESC> “%” “1” 1B 25 31 Enables download character set <ESC> “%” <1> 1B 25 01 <ESC> “%” “0” 1B 25 30 Disables download character set <ESC>... -
Page 25: Page Mode
Page mode Hexadecimal Control Codes Function Codes <ESC> “n” 1B 6E Select page mode <ESC> “!” 1B 21 Select line mode <ESC> “*” ... 1B 2A ... Setting print area in page mode <ESC> “T” n 1B 54 n Setting print direction in page mode <FF>... -
Page 26: Esc/Pos Mode Commands
ESC/POS Mode Commands The following table lists the ESC/POS mode commands that are supported by this printer. Hexadecimal Control Codes Function Codes <HT> Horizontal tab <LF> Line feed Paper eject in single sheet mode. <FF> Paper mode print and return. <DLE>... - Page 27 Hexadecimal Control Codes Function Codes <ESC> T 1B 54 Selects direction for page mode character printing <ESC> W 1B 57 Sets print area for page mode printing <ESC> c4 1B 63 34 Enables paper out sensor <ESC> c5 1B 63 35 Enables/disables control panel switches <ESC>...
-
Page 28: Appendix A: Specifications
Star mode ESC/POS mode (TM-295 emulation) Interface Serial (RS-232C standard) Data Buffer Star mode: 2 K bytes / 35 bytes ESC/POS mode: 512 bytes / 35 bytes Reliability Mechanism (MCBF): 2.5 million lines Printer head life: 70 million characters Operating Environment Temperature 41°F to 104°F (5°C to 40°C) -
Page 29: Printing Specifications
63mm Character Set Star Mode ASCII : 96 / Block Graphics : 64 / Special : 64 / Katakana : 64 / IBM Special : 64 / IBM Block Graphics : 50 / International :11 / Slashed Zero / Code Page 850 / Code Page 852... -
Page 30: Paper Specifications
38.1mm (13.5mm or 14.0mm when bottom of form sensor is disabled.) Right margin: 5.1mm Paper Feed Drive Stepping motor Pitch Star Mode: Adjustable in 1/144″ units ESC/POS Mode: Adjustable in 1/60″ units (approximate) Speed (while printing) 3.5″ per second Speed (while ejecting) 4.5″ per second Important! Slip paper must be flat, smooth, and free of curls, bends, wrinkles and folds, all... -
Page 31: Power Supply Specifications
Power Supply Specifications Power Supply AC Adaptor PS48-24A, switching type Input 90 to 246V AC, 50/60V 24V DC ±5%, 2.0A Output Plug 3-pin POWER JACK TCP 8927 (Hoshiden brand or equivalent.) Consumption Current Conditions: 24V, excluding external equipment driving Operating Continuous ASCII printing + paper feed: 0.6A (approximate averages) Solid block printing + paper feed: 1.0A... -
Page 32: Appendix B: Making Dip Switch Settings
Appendix B: Making DIP Switch Settings The printer’s DIP switches let you specify communications parameters, receive buffer size, and emulation. This Appendix explains the settings you can make and tells you how to actually change DIP switch settings. Accessing the DIP switches The DIP switches are located inside the printer, underneath the document table. - Page 33 It is not necessary to remove the document table completely, just move it enough so you can get at the DIP switches inside. Note: If the document table seems to be getting caught on the rollers, it means that you are not pressing down at point (a) enough. Pressing at point (a) should separate the rollers to the document table can slide freely.
-
Page 34: Available Dip Switch Settings
8 bits 7 bits Parity Check Disabled Enabled Parity Even Handshake DTR/DSR XON/XOFF STAR: 2K bytes Receive Buffer Size 35 bytes ESC/POS: 512 bytes Command Emulation STAR ESC/POS Pin 6 (DSR) Reset Signal Enabled Disabled Pin 25 (INIT) Reset Signal... -
Page 35: Appendix C: Memory Switch Settings
Appendix C: Memory Switch Settings Each memory switch is a 16-bit word store in EEPROM. For details on the functions and settings of memory switches, see the separate Programmer’s Manual. The table below shows the factory settings for the memory switches. Memory Switch Hexadecimal Code 0000... -
Page 36: Appendix D: Interface
Direction Function Name — Frame ground Transmission data Receive data STAR Mode When Memory Switch 4-D = 0: Same as DTR signal When Memory Switch 4-D = 1: Always SPACE ESC/POS Mode Same as DTR signal N.C. Not connected • DIP Switch 9 = OFF STAR Mode Status of this signal is not checked. -
Page 37: Interface Connections
Signal Direction Function Name Signal ground 8 -19 N.C. Not connected Indicates whether data receive from host is enabled or disabled. DTR/DSR Communication Mode Space when receive is enabled. X-On/X-Off Communication Mode Always space, except during following conditions: • Period between reset and communication enabled •... -
Page 38: Appendix E: Peripheral Unit Driver Circuit
Appendix E: Peripheral Unit Driver Circuit This printer is equipped with a circuit for driving peripheral units, such as cash drawers. A 6-pin modular connector for connection of the peripheral unit is located on the back of the printer. To connect to the drive circuit, connect the peripheral unit to the modular connector using a cable supplied by you like that one shown in the figure below. -
Page 39: Drive Circuit
Drive circuit The recommended drive unit is shown below. Drive output: 24V, 1.0A max. With shield Peripheral unit 1 7824 +24V M-GND 4.7kΩ 1/4W M-GND Peripheral unit 2 Compulsion switch Frame ground Printer side User side Notes • Peripheral Units 1 and 2 cannot be driven simultaneously. •... - Page 40 Tel: 732-572-9512, Fax: 732-572-5095 Tel: 0543-47-0112, Fax: 0543-48-5271 STAR MICRONICS U.K. LTD. Please access the following URL Star House, Peregrine Business Park, Gomm Road, http://www.star-micronics.co.jp/service/sp_sup_e.htm High Wycombe, Bucks, HP 13 7DL, U.K. for the lastest revision of the manual. Tel: 01494-471111, Fax: 01494-473333 1998.
Need help?
Do you have a question about the SP298 SERIES and is the answer not in the manual?
Questions and answers