Table of Contents
Advertisement
Advertisement
Table of Contents

Related Manuals for ECOVACS WINBOT WA30


Summary of Contents for ECOVACS WINBOT WA30
- Page 1 Instruction Manual...
-
Page 2: Instruction Manual
......................2 Congratulations on the purchase of your ECOVACS ROBOTICS DEEBOT! We hope it brings you many years of satisfaction. We believe that your new robot will help keep your home clean and give you more quality time to do other things. -
Page 3: Table Of Contents
Contents 1. Important Safety Instructions ............................4 2. Package Contents and Technical Specifications ......................6 3. Operating WINBOT ................................10 4. Maintenance ..................................19 5. Status Indicator Light and Sounds ..........................23 6. Troubleshooting ................................24... -
Page 4: Important Safety Instructions
1. Important Safety Instructions IMPORTANT SAFETY INSTRUCTIONS 10. 1Store the Appliance away from heat and flammable materials. 11. Do not use the Appliance if it does not firmly attach to the glass When using an electrical appliance, basic precautions should always or has visible signs of damage. - Page 5 1. Important Safety Instructions 23. The Appliance must be disconnected from the receptacle This device complies with Industry Canada’s licence-exempt RSSs. Operation is subject to the following two conditions: before removing the battery for disposal of the Appliance. (1) This device may not cause interference; and 24.
-
Page 6: Package Contents And Technical Specifications
2. Package Contents and Technical Specifications 2.1 Package Contents WINBOT Power Adapter Instruction Manual Quick Start Guide Remote Control with WINBOT Cleaning Safety Pod with Batteries Cleaning Pads * 4 Batteries Solution Note: Figures and illustrations are for reference only and may differ from actual product appearance. Product design and specifications are subject to changes without notice. -
Page 7: Specifications
2. Package Contents and Technical Specifications 2.2 Specifications 2.3 Product Diagram WINBOT Model WA30 Handle Working voltage 22.2V DC Rated power Remote Control Rated output voltage 3V DC WINBOT Status Indicator Light/ START/ PAUSE Button Power Adapter OH-1048A2701700U1-U 100-240V AC, Input Output 27V DC, 1.7A... -
Page 8: Remote Control
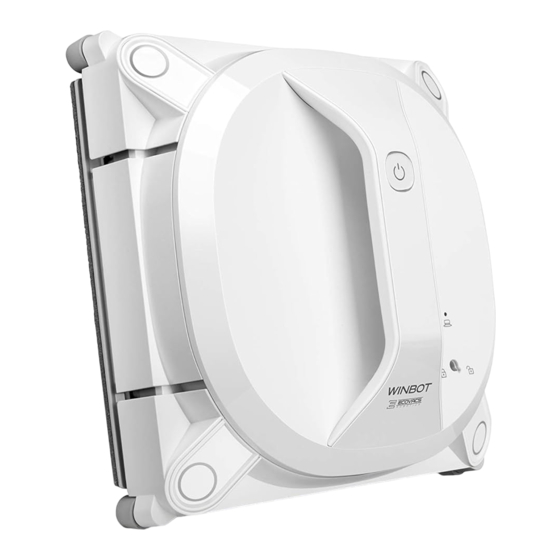
2. Package Contents and Technical Specifications WINBOT Remote Control Edge Detection Sensors Cleaning Pad Squeegee Direction Control START/PAUSE Button Velcro Buttons Cleaning Pad Deep Cleaning Mode Driving Treads Button RESET Button Power Switch Remote Control Pairing Button Side Rollers Bottom Safety Pod Bottom WINBOT Status Indicator Light Status Indicator Light... - Page 9 2. Package Contents and Technical Specifications Safety Pod Safety Pod Jack Battery Indicator Safety Pod Pairing Power Switch Button Battery Slot Quick Release Handle...
-
Page 10: Operating Winbot
3. Operating and Programming 3.1 Notes Before Cleaning Do not use WINBOT on a framed window with a frame smaller than WINBOT can clean framed or frameless glass, larger than 50cm x 5mm (0.2’’). 50cm (19.7’’ x 19.7’’). If WINBOT’s Status Indicator Light flashes RED, the battery requires If the Battery Pod’s Battery Indicator Light flashes RED, the battery power charging. - Page 11 3. Operating and Programming If the window is covered with dirt, clean a small area on the glass before WINBOT can clean glass mounted at an angle but may not operate normally; in such a case, a person should be in the vicinity to assist use and place WINBOT there.
- Page 12 3. Operating and Programming 3.2 Using WINBOT Charge WINBOT Assemble Power Adapter When WINBOT is charging, the Status Indicator Light flashes Note: BLUE. When WINBOT is fully charged, WINBOT glows a continuous BLUE and then goes out. Power ON Attach the Cleaning Pad Note: Make sure the white side of the Cleaning Pad attaches to the Velcro.
- Page 13 Spray Cleaning Solution Note: It is recommended to use WINBOT with WINBOT Cleaning Solution from ECOVACS. Using tap water or other cleaners could have an adverse effect on cleaning performance. Using other cleaning solutions could potentially nullify the warranty. After spraying, wipe the bottom of WINBOT with a dry cloth.
- Page 14 3. Operating and Programming Warning: When using WINBOT to clean windows, Safety Pod must be used to guarantee the safety function of WINBOT. Attach the Safety Pod Step Step Step Step Step...
- Page 15 3. Operating and Programming Start Cleaning Step...
- Page 16 3. Operating and Programming Make sure Safety Pod is attached at least 1.6 meters above ground, and the robot is suggested to be placed within an Step Step 1-meter radius of Safety Pod. Note: WINBOT has successfully attached to the window when the WINBOT Status Indicator Light glows a continuous BLUE and beeps.
- Page 17 3. Operating and Programming Deep Cleaning Mode AUTO Cleaning Mode Step This mode is applicable for glass of more concentrated dirt or dust. This is the most commonly used mode and is good for regular cleaning. Pause Note: Direct WINBOT to move using the Direction Control Buttons on Note: WINBOT automatically chooses the suitable cleaning path in “N”...
- Page 18 3. Operating and Programming Stop Step When WINBOT completes its cleaning cycle, it returns to the place it started and beeps. Step Remove WINBOT from the window after the fan stops working. Note: Step Polish away any marks left on the glass from the robot’s removal with a dry cloth If you want to stop the WINBOT during cleaning, please first press Start/Pause Button once to pause WINBOT and then press and hold this button for more than 5 seconds to stop WINBOT..
-
Page 19: Maintenance
4. Maintenance Before performing cleaning and maintenance on WINBOT, Power OFF WINBOT and disconnect it from the Power Adapter. 4.1 Cleaning Pad 4.2 Fan, Sensors and Squeegee Side Rollers Wash with mild detergent . Do NOT use a wet Cleaning Pad on WINBOT or it may slip on the window. -
Page 20: Driving Treads
4. Maintenance Edge Detection Sensors 4.3 Driving Treads Step Squeegee Inspect the Driving Treads by using the Direction Control buttons on the Remote Control. Stop the Driving Treads if dirt is Step seen on the Treads. - Page 21 4. Maintenance 4.4 Safety Pod Step Note: Remove the Safety Pod’s battery if the robot will not be used for a long time. In case of battery leakage, please remove the battery and dispose of it according to local laws and regulations.
-
Page 22: Regular Maintenance
Replacement Frequency Cleaning Pad After each use Every 40 washings Side Rollers WINBOT Edge Detection Sensors After each use Squeegees Driving Treads Note: ECOVACS manufactures various replacement parts and assemblies. Please contact Customer Service for more information on replacement parts. -
Page 23: Status Indicator Light And Sounds
5. Status Indicator Light and Sounds Indicator Description 1. WINBOT is charging. WINBOT Status Indicator Light flashes BLUE 2. WINBOT has been paired with Safety Pod already and ready to be placed on the glass. 1. WINBOT has successfully adhered itself to the glass and is ready to WINBOT Status Indicator Light glows a clean. -
Page 24: Troubleshooting
6. Troubleshooting Malfunction Possible Causes Solutions Check the Safety Pod Status Indicator Light on the The robot’s fan does not work Safety Pod malfunction WINBOT, and refer to Section 5 for details. Pause WINBOT by pressing the START/PAUSE button on When WINBOT is cleaning, only the START/ the robot or Remote Control. - Page 25 6. Troubleshooting Malfunction Possible Causes Solutions The Cleaning Pad is attached incorrectly and Remove the Cleaning Pad and re-attach it making sure it is covering the fan or the Edge Detection is placed exactly within its Velcro area and does not cover Sensors.
- Page 26 6. Troubleshooting Malfunction Possible Causes Solutions A. Press the RESET Button on the Remote Control. Use the Direction Control buttons on the Remote Control to move WINBOT away from the problem area and at least 10cm/4〃 from window corners and obstacles. Restart WINBOT has moved over a problem area and WINBOT.
- Page 27 6. Troubleshooting Malfunction Possible Causes Solutions A. Spray additional Cleaning Solution on the Cleaning Pad. B. Clean the Driving Treads as described in section 4. C. Replace the Cleaning Pad and restart the cleaning WINBOT moves in an irregular There is too much dirt and debris on the cycle.
- Page 28 Ecovacs Robotics Co., Ltd No. 18 You Xiang Road, Wuzhong District, Suzhou City, WA30-EN01-IM2017R00 Jiangsu Province, P.R.China...
Need help?
Do you have a question about the WINBOT WA30 and is the answer not in the manual?
Questions and answers