
Related Manuals for OTC Wireless WiJET

Summary of Contents for OTC Wireless WiJET
- Page 1 802.11b WiJET Wireless Projector/Monitor Adaptor Technical Manual www.otcwireless.com...
- Page 2 The seller may make improvements or changes in the product(s) and/or the program(s) described in this documentation at any time. Other product and company names herein may be trademarks of their respective owners. Copyright 2001, 2003 OTC Wireless, Inc. All rights reserved. Rev 1.02 March 4, 2003...
- Page 3 Using the WiJET in a Meeting..................9 Configuring your Computer to control the WiJET ............. 9 WiJET Presentation Session Manager ..............10 Configuring your Wireless Adaptor to Connect to the WiJET......11 Automatically Configuring the Wireless Adaptor ..........12 Manually Configuring the Wireless Adaptor............14 Configuring the Wireless Adaptor for Windows XP..........
-
Page 4: Chapter 1 - Introduction
Contrast this to physically disconnecting and reconnecting the VGA cable as well as configuring the laptop to output to the laptop’s VGA connector and it is easy to see how the WiJET can make multiple people giving presentations effortless. -
Page 5: Wijet Wireless Projector/Monitor Adapter
Automatic selection of clear channel to minimize interference Automatic detection of nearby active WiJETs to prevent ambiguous links User customizable WiJET-ready banner image to allow the display of information such as meeting agenda, conference logo, etc. before and between presentations... -
Page 6: Chapter 2 - Installation
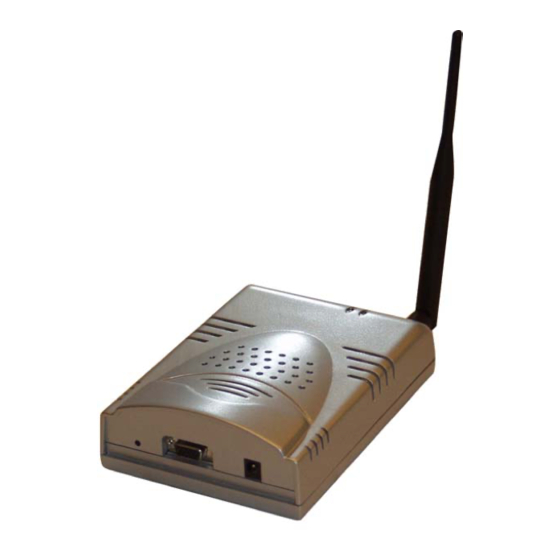
Status LED’s There are two status LED’s on the WiJET. From the front of the unit, the LED on the left is the power indicator while the LED on the right is the link status and video out indicator. -
Page 7: Installing The Software
When installation finishes, you will be brought back to your desktop. Installation for the WiJET Administration Tool To install the WiJET Administration Tool, you must first install the WiJET PSM. If you do not install the WiJET PSM, installation of the WiJET Administration tool will fail. -
Page 8: System Requirements For Web-Based Utility Program
Insert the Installation Disc in your computer’s CD-ROM drive. The install program should then auto-start. Click “Cancel” and then “exit setup” to stop the installation of the WiJET PSM utility. Click on “Start”, “Run”, and then type in “x:\” where x is the drive letter of your CD-ROM. -
Page 9: Chapter 3 – Using The Wijet
The WiJET is designed to be in the “Ad-Hoc” mode instead of the “Infrastructure” mode. This means you have to configure your Wireless card to connect to the WiJET, but do not have to change any of your network settings (IP address, etc.). -
Page 10: Wijet Presentation Session Manager
WiFi device manually. WiJET Presentation Session Manager When the WiJET is first turned on, it will undergo a boot up sequence that results in a banner screen with two important pieces of information. On the top left hand corner will be a name like WiJET0001 or WiJET0005. -
Page 11: Configuring Your Wireless Adaptor To Connect To The Wijet
Configuring your Wireless Adaptor to Connect to the WiJET PLEASE NOTE: For those users whose computer’s wireless adapter card (PCMCIA, mini-PCI or external USB device) uses a driver with MAC I/O control, the WiJET Presentation Session Manager automatically configures the card to connect to WiJET. -
Page 12: Automatically Configuring The Wireless Adaptor
Select your WiJET from the dropdown list. Note that you can only see two WiJET numbers at one time and there are a total of 9 possible WiJET SSID numbers. To see the other WiJET SSID numbers, simply click the up and down arrows at the side of the drop... - Page 13 Figure 6 Using the up and Down arrows on the Drop Down window The WiJET number to select appears on the upper left corner of the WiJET-ready banner page on the projector/monitor screen in your meeting room. It is important that you make this proper determination as there may be other WiJETs operating in the vicinity.
-
Page 14: Manually Configuring The Wireless Adaptor
WiJET000x, where x is a number from 1 – 9. The channel number the WiJET is on is displayed on the top right hand corner of the screen and is a number from 1 – 11 for the US or 1 – 13 for Europe. - Page 15 Windows XP and you should read the rest of this section as it will instruct you in how to connect your wireless adaptor to the WiJET under Windows XP. If you do not have the addition Wireless Network Connection icon in your system tray, you should see if you have some sort of Wireless configuration utility in your system tray instead, as in Figure 10.
- Page 16 Figure 12 Network Properties for Wireless Adaptors Click on the “Wireless Networks” tab and you should see a figure like Figure 13. Figure 13 Wireless Networks tab.
- Page 17 If there is more than one ad hoc network, you must use the “Move up” and “Move down” buttons to move the WiJET you wish to have connected to the top. When you are done, press the “OK” button. At that time you should be back to the desktop and your system tray should display an image much like Figure 16.
-
Page 18: Start Or Resume Your Wijet Presentation Session
“Connect” button on his/her PSM. Stop Your WiJET Presentation Session If at any time you wish to disconnect your computer from the WiJET, simply bring up the WiJET PSM and click on the “Stop” button. Clicking the “Stop” button does not terminate the wireless connection between your computer and the WiJET. -
Page 19: Chapter 4 – Using The Web Based Utility
WiJET is first powered. Accessing the Web Based Utility There are two ways of accessing the Web Based Utility. One way is to install the WiJET Administration Tool as described in Chapter 2 – Installation for the WiJET Administration Tool. -
Page 20: Configuring Your Wifi Adaptor Manually
To access the Web Based Utility on the WiJET, you must setup your WiFi card as instructed in Chapter 3 - Configuring your computer to Control the WiJET. Once you have setup your Wireless Card to be able to control the WiJET, you must connect to the WiJET using the PSM. -
Page 21: Wijet Firmware Version
There are several details worthy of notice on this webpage and it shall be explained below in greater detail. WiJET Firmware Version This is the current WiJET firmware version. It is important when you are calling or emailing tech support to know which WiJET firmware version you have. Configuration... - Page 22 This is the configuration screen where you set the security for the WiJET. The description of each feature is as detailed below. WEP enabled: This check box allows users to enable or disable WEP feature. The WiJET currently supports only the default (shared) WEP key scheme defined in the 802.11 standard, not the mapped key scheme.
-
Page 23: Administration
16 characters. Confirm New Password: To confirm the password that you entered in the above field. Reboot WiJET: This will reboot the WiJET. Note that it will not change the User name or password if you did not click Apply beforehand. -
Page 24: Firmware And Banner Page Upload
.tar.gz. For Banner page file, you will want to get a file with the extension of .jpg. For the best picture on the WiJET banner screen, the picture file should be of 1024 x 768 resolution. The maximum .jpg size is 2 megabytes or 2048 bytes. When uploading the firmware or banner page, do NOT power off or disconnect the WiJET. -
Page 25: Chapter 5 – Troubleshooting
Figure 25 Target Not Found There are several causes for this. 1) The computer’s WiFi adaptor’s SSID is not set up to be the same as the WiJET’s. 2) The computer’s WiFi Adaptor is not set to Ad-Hoc or Peer-to-Peer mode. - Page 26 The WiJET banner page unexpectedly re-appears in the middle of a presentation This signals that the WiJET has detected a link-loss lasted more than 8 seconds. Since the WiJET is designed to support one presentation at a time, the WiJET returns itself to the initial state (where displaying the banner page is a part) of being “available for...
- Page 27 Technical Support If problems are still not solved, please contact our Technical Support to obtain further assistance. Call: 1-800-770-6698 in USA Call: 011-510-490-8288 outside of USA E-mail: support@otcwireless.com...
-
Page 28: Appendix A
Appendix A: LIMITED WARRANTY Wireless LAN Hardware The seller warrants to the end user (“Customer”) that this product will be free from defects in workmanship and materials, under normal use and service, for one (1) year from the date of purchase. The seller’s sole obligation under this express warranty shall be, at the seller’s option and expense, to repair the defective product or part, deliver to Customer an equivalent product or part to replace the defective item. -
Page 29: Appendix B
FCC Part 15 Declaration of Conformity (DoC) The following equipment: Product Name: WiJET Wireless Projector/Monitor Adapter Model Number: WiJET is herewith confirmed to comply with the requirements of FCC Part 15 rules. The operation is subject to the following two conditions: 1. -
Page 30: European Community (Ec) Directives Conformity And Restrictions
European Community (EC) Directives Conformity and Restrictions This product is in conformity with the protection requirements of EC Council directives 89/336/EEC, 73/23/EEC, and 1999/5/EC on the approximation and harmonization of the laws of the Member States relating to electromagnetic compatibility, safety of electrical equipment designed for use within certain voltage limits and on radio equipment and telecommunications terminal equipment.
Need help?
Do you have a question about the WiJET and is the answer not in the manual?
Questions and answers