Advertisement
Table of Contents
- 1 Table of Contents
- 2 Parts Included with the AKM 6230 Basic Package
- 3 Safety Instruc Ons & Warnings
- 4 Start/Stop Instruc Ons
- 5 How to Assemble the Dough Hook & Dough Scraper
- 6 Tips for Using the Dough Roller & Dough Scraper
- 7 Tips for Using the Dough Roller & Dough Scraper Cont
- 8 Tips for Using the Dough Hook & Dough Scraper
- 9 How to Assemble the Double Beater Bowl
- 10 Tips for Using the Double Beater Bowl
- Download this manual
Advertisement
Table of Contents

Related Manuals for Ankarsrum AKM 6230


Summary of Contents for Ankarsrum AKM 6230
- Page 1 AKM 6230 Series Type: N30 Ankarsrum USA—English Manual 1 ...
-
Page 2: Table Of Contents
Table of Contents 3. Parts included with the AKM 6230 Basic Package 4. Safety Instruc ons & Warnings 5. Start & Stop Instruc ons 6. How to Assemble the Bowl, Dough Roller & Dough Scraper 7. How to Assemble the Dough Hook & Dough Scraper 8. Tips for using the Dough Roller & Dough Scraper 9. Tips for using the Dough Roller & Dough Scraper Cont. 10. Arm/Roller Posi oning Chart for Bread Dough and Other Mixing Op ons 11. Tips for using the Dough Hook & Dough Scraper 12. How to Assemble the Double Beater Bowl 13. Tips for using the Double Beater Bowl 14. FAQ: “Which bowl and mixing a achment should I use for……..?” 15. USA Warranty Policy & Customer Support Informa on 2 ... -
Page 3: Parts Included With The Akm 6230 Basic Package
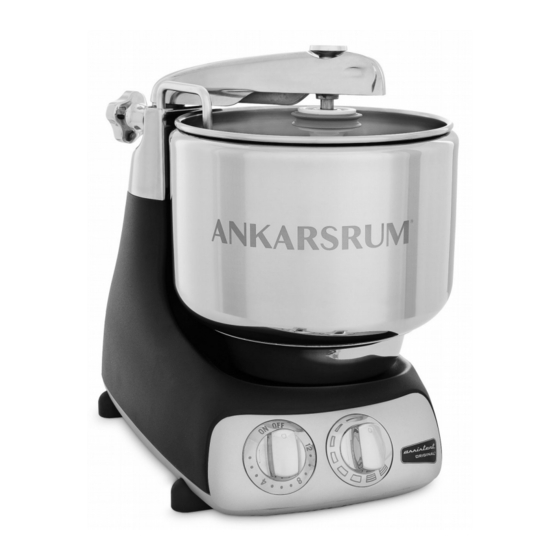
② ⑤ ① ③ ⑨ ④ ⑦ ⑧ ⑩ ⑥ Parts included with the AKM 6230 Basic Package: 1. 7 Lt. Stainless Steel Bowl (8 Qt.) 2. Dough Scraper 3. Dough Roller 4. Dough Hook 5. 3.5 Lt. Plas c Beater Bowl (3.7 Qt.) 6. Single Wire Beaters 7. Mul ‐Wire Balloon Whisks 8. Beater Housing and Gear 9. Plas c Bowl Lid 10. Cast Aluminum Mixer/Motor Base 11. Not Pictured: White plas c sha for Plas c Beater Bowl 3 ... -
Page 4: Safety Instruc Ons & Warnings
1. READ ALL INSTRUCTIONS 2. To protect against risk of electrical shock, do not put the base into water or other liquid. 3. Close supervision is necessary when any appliance is used by or near children. 4. Unplug from outlet when not in use, before pu ng on or taking off parts and before cleaning. 5. Avoid contact with moving parts. 6. Remove all accessories from the mixer before washing. 7. Do not operate any appliance with a damaged cord or plug, or a er the appliance malfunc ons or is dropped or damaged in any manner. Contact your retailer to find the nearest authorized service facility for examina on, repair or electrical or mechanical adjustment. 8. The use of a achments not recommended or sold by Ankarsrum may cause fire, electric shock or injury. 9. Do not use outdoors. 10. Do not let cord hang over the edge of a table or counter or contact a hot surface. 11. When using a achments, refer to the a achment instruc ons for specific opera ng safeguards. 12. This appliance is not intended for use by persons (including children) with reduced physical, sensory or mental capabili es, or lack of experience and knowledge, unless they have been given supervision or in‐ struc on concerning use of the appliance by a person responsible for their safety. Children should be su‐ pervised to ensure that they do not play with the appliance. SAVE THESE INSTRUCTIONS ... -
Page 5: Start/Stop Instruc Ons
② ① Warning: Never leave the appliance una ended when it is plugged in. Moving parts can cause personal injuries. Start/Stop Instruc ons: Insert plug into wall socket and secure into the back of the motor base. The Assistant is started by turning the On/Off/Timer knob ① to the ON posi on for con nuous use or to the desired me from 1 to 12 minutes. If you wish to stop the machine or interrupt a set me, simply turn the knob back to the OFF posi on. The speed adjustment knob ② can be used to regulate the bowl speed. For suitable speed se ngs, please refer to specific recipes or a achment use. The general terminology used for the speed control knob in this manual and our recipes is that of a clock. The lowest speed is set at 12 o’clock. Our recipes follow specific instruc ons for mixing at 3 o’clock, 6 o’clock and so on. Speed Control Conversion Chart Low 12—1 o’clock Medium‐Low 2—3 o’clock Medium 3—4 o’clock Medium‐High 5—6 o’clock ... - Page 6 ③ ② ① How to assemble the Bowl, Dough Scraper and Dough Roller Place the bowl onto the motor base and gently turn un l the bowl drops down onto the drive socket. Place the dough scraper down into the smaller hole located near the tension knob ②. To a ach the dough roller, loosen the tension knob, allowing the arm ① to swing over the top of the bowl. Pull up on the pin ③, posi on the roller under the arm and push the pin down into the center of the roller. Gently allow the arm/roller to return to the side of the bowl. When kneading dough, lock the arm and roller away from the rim of the bowl by pulling the arm towards the middle of the bowl and ghtening in place using the tension knob. 6 ...
-
Page 7: How To Assemble The Dough Hook & Dough Scraper
③ ① ② How to assemble the Dough Hook and Dough Scraper Place the bowl onto the motor base and gently turn un l the bowl drops down onto the drive socket. Place the dough scraper down into the smaller hole located near the tension knob ②. To a ach the dough hook, fit the dough hook into the larger hole located near the tension knob. Loosen the tension knob, allowing the arm ① to swing over the top of the bowl. Pull up on the pin ③ and gently push down into the slot on the side of the dough hook. Tighten the tension knob so that dough hook is locked in the center of the bowl. When kneading dough with the dough hook, you do not want the hook moving inside the bowl. 7 ... -
Page 8: Tips For Using The Dough Roller & Dough Scraper
Tips for using the Dough Roller & Dough Scraper Dough Mixing: Use the roller and scraper for yeast dough recipes with higher hydra on. Start the machine on the lowest speed with the dough roller res ng against the rim of the bowl. Start with your liquid ingredients and then slowly begin adding your flour. As the dough thickens, adjust the roller away from the side of the bowl and lock in place using the tension knob. The distance of the roller from the rim of the bowl is determined by the amount of dough you are mixing. You will want the roller to apply gentle pressure to the dough as it passes between the roller and the side of the bowl but do not want the roller too close that it pushes the dough up and out of the bowl. NOTE: When “locking” the arm/roller in place, the arm is s ll able to move towards the center of the bowl. If the amount of dough in the bowl begins moving the arm/roller back and forth too harshly, reduce the speed and adjust the roller a li le further away from the side of the bowl. Follow specific recipe for kneading speed and me. Creaming Bu er or Margarine: Place ROOM TEMPERATURE bu er or margarine with sugar into the bowl. The roller should be res ng against the rim of the bowl. Start machine on low and slowly increase speed to a high/medium (about 6 o’clock on the speed knob). If ingredients collect in the center of the bowl, gently swing the arm/roller into the center a couple of mes to ensure complete mixing. Run for approx. 5 minutes for best results. (Bu er and margarine will s ck to the roller at the beginning but will work itself off and cream beau fully). Cookies: Follow direc ons above for creaming bu er and sugar. Once creamed, reduce speed to low and add remaining cookie ingredients. Again, if ingredients collect in the center of the bowl, gently swing the arm/roller back and forth to ensure proper mixing. If mixing a large batch of cookies, adjust arm/roller slightly away from the rim of the bowl ... -
Page 9: Tips For Using The Dough Roller & Dough Scraper Cont
Tips for using the Dough Roller & Dough Scraper Cont. Cakes: With roller res ng against the rim of the bowl, combine ingredients and mix on medium/high speed for about 5 minutes or un l mixture is well mixed. Remember to gently swing the arm/roller into the center of the bowl to ensure all ingredients are incorporated. Whipping Cream (2‐4.5 cups): Pour whipping cream into the stainless steel bowl. With the roller res ng against the rim of the bowl, turn machine on star ng on the lowest speed. Slowly increase speed to medium/high (about 6 o’clock on the speed dial) and whip un l cream has reached the desired thickness. NOTE: For be er results, the stainless steel bowl may be chilled in the refrigerator or freezer before adding the cream. Meringue (4‐12 egg whites): Combine egg whites and sugar into the stainless steel bowl. With the roller res ng against the rim of the bowl, turn machine on star ng on the lowest speed. Slowly increase speed to medium/high (about 6 o’clock on the speed dial) and whip un l the desired s ffness is reached. NOTE: For be er results, the stainless steel bowl may be chilled in the refrigerator or freezer before adding the egg whites. Mashed Potatoes (1‐5 lbs): Place cooked potatoes into the stainless steel bowl with the roller res ng against the side of the bowl. Turn machine on star ng on the lowest speed. Add addi onal desired ingredients. Apply gentle pressure to the arm/roller at the top, forcing potatoes to mash. NOTE: Be careful not to overmix your potatoes causing them to become gummy. Mincemeat, Sausage Meat, Pate (1‐6.5 lbs): Mix ground meat at medium speed (about 4 o’clock on the speed dial). If you are mixing large quan es, adjust roller about 2 inches ... - Page 10 Arm/Roller Posi oning Chart for Bread Dough and other mixing op ons. Recipe/Technique Posi oning Tension Knob Arm/Roller Posi on Star ng Speed Kneading bread dough (1‐3 Tightened (by turning towards Roller should be 1 inch from Begin on low and follow cups of flour). you) to secure the arm so it the rim of the bowl. specific recipe instruc ons, cannot move back to the rim of referring to the Speed Control the bowl. Conversion chart on page 5. Kneading bread dough (3‐5 Tightened (by turning towards Roller should be about 2 inches Begin on low and follow cups of flour). you) to secure the arm so it from the rim of the bowl. specific recipe instruc ons, cannot move back to the rim of referring to the Speed Control the bowl. Conversion chart on page 5. Kneading bread dough (5‐9 Tightened (by turning towards ...
-
Page 11: Tips For Using The Dough Hook & Dough Scraper
Tips for using the Dough Hook & Dough Scraper Yeast Dough: Use the dough hook for low hydra on yeast doughs. Add all ingredients into the stainless steel bowl with the hook locked about 2 inches away from the rim of the bowl. Start the machine on the lowest speed. As the dough thickens, adjust arm/hook away from the side of the bowl, posi oning and locking in the middle of the bowl. Follow specific recipe for kneading speed and me. NOTE: For large quan es of dough, first add about half of the flour. Mix well before adding the rest of the flour. Mincemeat (1‐5.5 lbs): Lock the dough hook in the center of the bowl and run at medium speed (about 4‐5 o’clock on the speed knob) CLEANING: The dough hook is dishwasher safe! To wash by hand, use warm soapy water and a sponge or dish cloth. 11 ... -
Page 12: How To Assemble The Double Beater Bowl
① ② ④ ③ ⑤ How to assemble the Double Beater Bowl Remove the stainless steel bowl from the motor base. Place the double beater bowl sha ① onto the motor base and gently turn un l the sha fits snuggly onto the base. Slide the double beater bowl ② down over the sha , gently turn un l the bowl drops down into place. The spout should be facing the mixer arm and the bowl handle should be facing out over the ON/OFF knob. Determine which set of beaters you will use. Mul ‐wire balloon whisks ④ or the single wire whips ⑤. To change out beaters, place the beater house ③ down on a hard surface with the beaters poin ng up (as shown above). Gently pull on the beaters and they will pop off to reveal a metal prong. Take the new beater and slide down over the prong, making sure to line up the teeth on the beater and the teeth on the large center gear. Gently snap into place. This is the same technique you will use to clean your beater. NOTE: The large gear inside the beater housing ③ will come out for cleaning once the beaters are removed. The gear must be in the housing in order for the beaters to snap into place. 12 ... -
Page 13: Tips For Using The Double Beater Bowl
① ② Tips for using the Double Beater Bowl WARNING: Bu er, margarine and cream cheese should ALWAYS be at room temperature before using the double whisk bowl and beaters. Mul ‐wire Balloon Whisks ①: should be used for light mixtures only. Whipping cream, egg whites, light icings (glazes), meringue and marshmallows. NOTE: The beater bowl is heat safe and boiling sugar can be poured into it. Single‐wire Whips ②: should be used for so cookie dough, cake ba er, pancake ba er, muffin ba er and brownies. NOTE: A basic chocolate chip cookie dough would be consid‐ ered a “so ” cookie dough. A thick cookie dough calling for oatmeal, nuts, seeds, chocolate chunks and fruit should be mixed in the stainless steel bowl with the dough roller and dough scraper. Mixing Instruc ons: Always start mixing on the lowest se ng and slowing increase speed. Cookie Dough: Place room temperature bu er or margarine along with sugar into the double beater bowl and place the beater housing with single‐wire beaters in place. Start machine on the lowest speed and slowly increase to medium/high (about 6 o’clock on the speed knob). Once bu er and sugar are creamed, return to lowest speed and add remaining ingredients. Mix just un l dry ingredients are combined and turn machine off. NOTE: Overmixing can cause cookie dough to be tough and the s ffer the dough, the bigger the risk of beaters or double beater gears breaking. ... - Page 14 FAQ “Which bowl and mixing a achment should I use for….?” Use the below chart to determine which bowl and mixing a achment should be used for a specific recipe. If you do not see your desired recipe listed here, please contact us at: support@ankarsrumoriginalusa.com and we will do our best to offer support and sugges ons. SS Bowl + Roller/Scraper SS Bowl + Dough Hook Plas c Beater Bowl + Plas c Beater Bowl + Balloon Whisks Single‐Wire Whips Yeast Dough w/ High Yeast Dough w/ Low Hydra on Whipping Cream So Cookie Dough (Basic Hydra on chocolate chip, spritz cookies, Mincemeat Egg Whites cheese straws, Danish Creaming Bu er Icing—Light or glazes shortbread bu er cookies) S ff Cookie Dough (Recipes Marshmallows Cake Ba er ...
- Page 15 USA Warranty Policy This Ankarsrum Model AKM6230 comes with a 7 year manufacturer’s warranty on the motor base assembly. For detailed warranty informa on, visit the warranty page at www.ankarsrumoriginalusa.com. For warranty service, visit this same page and fill out a warranty repair cket. Once submi ed, a customer service agent will contact you to discuss and assess the problem. If your warranty issue is within 30 days of your purchase, we will replace or repair the unit at our discre on, covering ALL S/H, parts and labor. A er the 30 days, you will be responsible for S/H to our repair facility in Woodstock, GA. Once the unit arrives, we will inspect to make sure the problem is, in fact, a warranty issue. Parts, labor and S/H back to you will be covered per your warranty. If we find that the service needed is due to misuse, we will contact you before repairing your machine to discuss your op ons. If you have any ques ons, please reach out to us at: support@ankarsrumoriginalusa.com Customer Support Informa on For step by step recipes and instruc ons on the use of the Ankarsrum Assistant and its many a achments, visit our Ankarsrum USA Recipe Blog: ps://www.ankarsrumoriginalusa.com/blog Find us on Social Media On Facebook as: Ankarsrum Original USA On Instagram as: @ankarsrumusa On Pinterest as: Ankarsrum USA YouTube Channel: AnkarsrumUSA This manual has been created by Ankarsrum USA · 305 Bell Park Drive · Woodstock, GA 30188 support@ankarsrumoriginalusa.com · 770‐516‐0577 15 ...
Need help?
Do you have a question about the AKM 6230 and is the answer not in the manual?
Questions and answers
Как изменить высоту между дном ёмкости и крюком