Table of Contents
Advertisement
Quick Links
Advertisement
Table of Contents

Subscribe to Our Youtube Channel
Related Manuals for suprabeam Q1mini


Summary of Contents for suprabeam Q1mini
- Page 1 Repair and Troubleshooting Guide...
-
Page 2: Troubleshooting
Find out how old the product is by looking at the batch number which is placed inside the torch or battery pack of a headlamp. Here below is a short definition of Suprabeam Batch numbers, first letter is year and second letter is... -
Page 3: Table Of Contents
TABLE OF CONTENTS Q1prime Q1mini Q3classic Q3defend Q4xr Q7compact Q7defend Q7xr V3air V3air rechargeable V3pro V3pro rechargeable V4pro rechargeable... -
Page 4: Q1Prime
Q1prime SCAN THE QR CODE TO SEE VIDEO TUTORIALS UNABLE TO TURN ON THE FLASHLIGHT / FLICKERING This issue may be due to an incorrect contact between the battery and the contacts of the flashlight. Possible causes for this are: DIRT Please check that the flashlight is clean, particularly between the tube and the tail... - Page 5 OBSTRUCTING OBJECTS Control the interior of the tube for any object that may obstruct the contacts. Our flashlights have a “Batch nr.” sticker located inside the body of the flashlight. In some cases this sticker may fall inside the tube. 1) Look inside the tube of the flashlight.
-
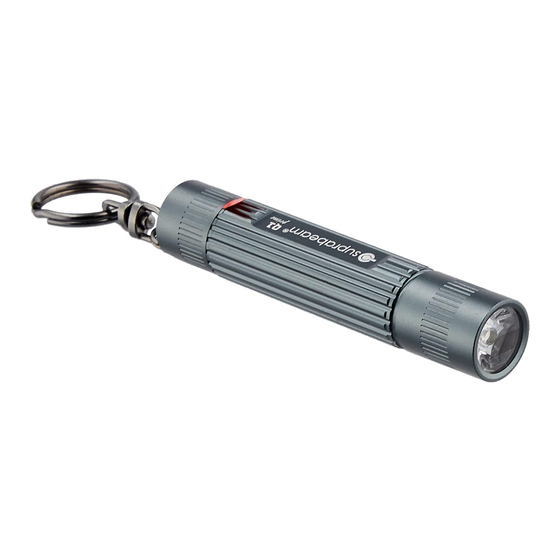
Page 6: Q1Mini
Q1mini SCAN THE QR CODE TO SEE VIDEO TUTORIALS UNABLE TO TURN ON THE FLASHLIGHT / FLICKERING This issue may be due to an incorrect contact between the battery and the contacts of the flashlight. Possible causes for this are:... - Page 7 OBSTRUCTING OBJECTS Control the interior of the tube for any object that may obstruct the contacts. Our flashlights have a “Batch nr.” sticker located inside the body of the flashlight. In some cases this sticker may fall inside the tube. 1) Look inside the tube of the flashlight.
- Page 8 SCAN THE QR CODE TO SEE VIDEO TUTORIALS UNABLE TO TURN ON THE FLASHLIGHT / FLICKERING This issue may be due to an incorrect contact between the battery and the contacts of the flashlight. Possible causes for this are: DIRT Please check that the flashlight is clean, particularly between the tube and the tail cap:...
- Page 9 OBSTRUCTING OBJECTS Control the interior of the tube for any object that may obstruct the contacts. Our flashlights have a “Batch nr.” sticker located inside the body of the flashlight. In some cases this sticker may fall inside the tube. 1) Look inside the tube of the flashlight.
- Page 10 SCAN THE QR CODE TO SEE VIDEO TUTORIALS UNABLE TO TURN ON THE FLASHLIGHT / FLICKERING This issue may be due to an incorrect contact between the battery and the contacts of the flashlight. Possible causes for this are: DIRT Please check that the flashlight is clean, particularly between the tube and the tail cap:...
- Page 11 BATTERY Check that the battery is properly placed and not drained. 1) Make sure that the battery is placed correctly. The minus (-) side of the battery should be facing upwards. 2) Close the flashlight and tighten the tail cap firmly to ensure a proper contact. REPLACING A DAMAGED LENS Follow these steps in order to replace a lens: 1) Unscrew the topmost part of the head.
-
Page 12: Q3Classic
Q3classic SCAN THE QR CODE TO SEE VIDEO TUTORIALS UNABLE TO TURN ON THE FLASHLIGHT / FLICKERING This issue may be due to an incorrect contact between the battery and the contacts of the flashlight. Possible causes for this are: DIRT Please check that the flashlight is clean, particularly between the tube and the tail... - Page 13 In older models it is necessary to replace the entire tail unit (battery pack + tail cap). PINS ON THE BATTERY PACK In some rare cases, it could happen that the pins of the battery pack get stuck or sunk. If this is the case, it is necessary to take them out to their normal position.
-
Page 14: Q3Defend
Q3defend SCAN THE QR CODE TO SEE VIDEO TUTORIALS UNABLE TO TURN ON THE FLASHLIGHT / FLICKERING This issue may be due to an incorrect contact between the battery and the contacts of the flashlight. Possible causes for this are: DIRT Please check that the flashlight is clean, particularly between the tube and the tail... - Page 15 DUST COVER Please check that the flashlight is clean under the dust cover, particularly in the area around the button: 1) Remove the end of the tail cap. 2) Clean the dust cover and area around the button. BATTERIES Check that the batteries are properly placed and not drained.
- Page 16 OBSTRUCTED LIGHT BEAM The Q3defend has a cover filter to protect the lens. It is possible that this filter may become damaged or scratched, which will be visible on the light beam. In this case, it may necessary to replace the filter: 1) Remove the strike bezel.
- Page 17 SCAN THE QR CODE TO SEE VIDEO TUTORIALS UNABLE TO TURN ON THE FLASHLIGHT / FLICKERING This issue may be due to an incorrect contact between the battery and the contacts of the flashlight. Possible causes for this are: DIRT Please check that the flashlight is clean, particularly between the tube and the tail cap:...
- Page 18 BATTERIES Check that the batteries are properly placed and not drained. 1) Make sure that the batteries are placed correctly. Look at the engravings on the battery pack showing the corresponding end of the battery. 2) Close the flashlight and tighten the tail cap firmly to ensure a proper contact.
- Page 19 REPLACING A DAMAGED LENS Follow these steps in order to replace a lens: 1) Unscrew the topmost part of the head. 2) Locate the security ring inside the head. Unscrew this ring for disasembling the head. 3) Replace the lens and reassembly the head firmly.
-
Page 20: Q3R
SCAN THE QR CODE TO SEE VIDEO TUTORIALS UNABLE TO TURN ON THE FLASHLIGHT / FLICKERING This issue may be due to an incorrect contact between the battery and the contacts of the flashlight. Possible causes for this are: DIRT Please check that the flashlight is clean, particularly between the tube and the tail cap:... - Page 21 OBSTRUCTING OBJECTS Control the interior of the tube for any object that may obstruct the contacts. Our flashlights have a “Batch nr.” sticker located inside the body of the flashlight. In some cases this sticker may fall inside the tube. 1) Look inside the tube of the flashlight.
-
Page 22: Q4Xr
Q4xr SCAN THE QR CODE TO SEE VIDEO TUTORIALS UNABLE TO TURN ON THE FLASHLIGHT / FLICKERING This issue may be due to an incorrect contact between the battery and the contacts of the flashlight. Possible causes for this are: DIRT Please check that the flashlight is clean, particularly between the tube and the tail... - Page 23 OBSTRUCTING OBJECTS Control the interior of the tube for any object that may obstruct the contacts. Our flashlights have a “Batch nr.” sticker located inside the body of the flashlight. In some cases this sticker may fall inside the tube. 1) Look inside the tube of the flashlight.
- Page 24 PROBLEMS WITH THE FOCUS When it gets very difficult to use the focus, most of the time it is caused by insufficient cleaning. Make sure that the flashlight is clean around the area of the focus. Use a damp cloth to clean it. 1) Turn the head to open the focus.
-
Page 25: Q7Compact
Q7compact SCAN THE QR CODE TO SEE VIDEO TUTORIALS UNABLE TO TURN ON THE FLASHLIGHT / FLICKERING This issue may be due to an incorrect contact between the battery and the contacts of the flashlight. Possible causes for this are: DIRT Please check that the flashlight is clean, particularly between the tube and the tail... - Page 26 BATTERIES Check that the batteries are properly placed and not drained. 1) Make sure that the batteries are placed correctly. Look at the engravings on the battery pack showing the corresponding end of the battery. 2) Close the flashlight and tighten the tail cap firmly to ensure a proper contact.
- Page 27 PROBLEMS WITH THE FOCUS When it gets very difficult to use the focus, most of the time it is caused by insufficient cleaning. Make sure that the flashlight is clean around the area of the focus. Use a damp cloth to clean it. 1) Turn the head to open the focus.
-
Page 28: Q7Defend
Q7defend SCAN THE QR CODE TO SEE VIDEO TUTORIALS UNABLE TO TURN ON THE FLASHLIGHT / FLICKERING This issue may be due to an incorrect contact between the battery and the contacts of the flashlight. Possible causes for this are: DIRT Please check that the flashlight is clean, particularly between the tube and the tail... - Page 29 SWITCH There could be a problem with the switch. In this case you might have to try with a new unit. 1) Remove the battery pack from the flashlight. 2) Remove the tail cap from the battery pack. 3) The switch is located inside the tail cap. PINS ON THE BATTERY PACK In some rare cases, it could happen that the pins of the battery pack get stuck or sunk.
- Page 30 PROBLEMS WITH THE FOCUS When it gets very difficult to use the focus, most of the time it is caused by insufficient cleaning. Make sure that the flashlight is clean around the area of the focus. Use a damp cloth to clean it. 1) Turn the head to open the focus.
-
Page 31: Q7R
SCAN THE QR CODE TO SEE VIDEO TUTORIALS UNABLE TO TURN ON THE FLASHLIGHT / FLICKERING This issue may be due to an incorrect contact between the battery and the contacts of the flashlight. Possible causes for this are: DIRT Please check that the flashlight is clean, particularly between the tube and the tail cap:... - Page 32 SWITCH There could be a problem with the switch. In this case remove the tail cap completely and try with a new unit. BATTERY Check that the battery is properly placed and charged. 1) Make sure that the battery is placed correctly.
- Page 33 PROBLEMS WITH THE FOCUS When it gets very difficult to use the focus, most of the time it is caused by insufficient cleaning. Make sure that the flashlight is clean around the area of the focus. Use a damp cloth to clean it. 1) Turn the head to open the focus.
-
Page 34: Q7Xr
Q7xr SCAN THE QR CODE TO SEE VIDEO TUTORIALS UNABLE TO TURN ON THE FLASHLIGHT / FLICKERING This issue may be due to an incorrect contact between the battery and the contacts of the flashlight. Possible causes for this are: DIRT Please check that the flashlight is clean, particularly between the tube and the tail... - Page 35 OBSTRUCTING OBJECTS Control the interior of the tube for any object that may obstruct the contacts. Our flashlights have a “Batch nr.” sticker located inside the body of the flashlight. In some cases this sticker may fall inside the tube. 1) Look inside the tube of the flashlight.
- Page 36 PROBLEMS WITH THE FOCUS When it gets very difficult to use the focus, most of the time it is caused by insufficient cleaning. Make sure that the flashlight is clean around the area of the focus. Use a damp cloth to clean it. 1) Turn the head to open the focus.
-
Page 37: V3Air
V3air SCAN THE QR CODE TO SEE VIDEO TUTORIALS MOUNTING THE HEADLAMP ON THE BAND 1) The headlamp should be mounted on the longer side of the headband. Leaving the adjustment clips free on one side between the lamphead and battery pack. ADJUSTING THE HEADBAND 2) Adjust the length of the headband using its shorter side. - Page 38 UNABLE TO ADJUST THE ANGLE When it gets difficult to change the angle of the head, most of the time it is caused by insufficient cleaning. Please check that the head of the headlamp is clean: 1) Rotate the head of the lamp to open it. 2) Make sure that the headlamp is clean, particularly around the highlighted area.
-
Page 39: V3Air Rechargeable
V3air rechargeable SCAN THE QR CODE TO SEE VIDEO TUTORIALS MOUNTING THE HEADLAMP ON THE BAND 1) The headlamp should be mounted on the longer side of the headband. Leaving the adjustment clips free on one side between the lamphead and battery pack. ADJUSTING THE HEADBAND 2) Adjust the length of the headband using its shorter side. - Page 40 PROBLEMS WITH THE FOCUS When it gets difficult to use the focus, most of the time it is caused by insufficient cleaning. Make sure that the flashlight is clean around the area of the focus. Use a damp cloth to clean it. 1) Slide the head out to open the focus.
- Page 41 SECURITY TAPE Make sure that the security tape of the battery has been removed. TURNING ON THE LAMP In order to turn the headlamp on the button must be pressed for 1.2 sec *Please refer to the manual for the use of 1.2 sec lightmodes REPLACING A DAMAGED LENS...
-
Page 42: V3Pro
V3pro SCAN THE QR CODE TO SEE VIDEO TUTORIALS MOUNTING THE HEADLAMP ON THE BAND 1) The headlamp should be mounted on the longer side of the headband. Leaving the adjustment clips free on one side between the lamphead and battery pack. ADJUSTING THE HEADBAND 2) Adjust the length of the headband using its shorter side. - Page 43 UNABLE TO ADJUST THE ANGLE When it gets difficult to change the angle of the head, most of the time it is caused by insufficient cleaning. Please check that the head of the headlamp is clean: 1) Rotate the head of the lamp to open it. 2) Make sure that the headlamp is clean, particularly around the highlighted area.
- Page 44 REPLACING THE CABLE Follow these simple steps for connecting the cable correctly: 1) The short side of the cable will be 0° connected to the battery pack. The long side of the cable will be connected to the headlamp. 2) To avoid damaging the pins make sure to Click! bring the cable as straight as possible to Click!
-
Page 45: V3Pro Rechargeable
V3pro rechargeable SCAN THE QR CODE TO SEE VIDEO TUTORIALS MOUNTING THE HEADLAMP ON THE BAND 1) The headlamp should be mounted on the longer side of the headband. Leaving the adjustment clips free on one side between the lamphead and battery pack. ADJUSTING THE HEADBAND 2) Adjust the length of the headband using its shorter side. - Page 46 PROBLEMS WITH THE FOCUS When it gets very difficult to use the focus, most of the time it is caused by insufficient cleaning. Make sure that the flashlight is clean around the area of the focus. Use a damp cloth to clean it. 1) Slide the head out to open the focus.
- Page 47 TURNING ON THE LAMP In order to turn the headlamp on the button must be pressed for 1.2 sec 1.2 sec *Please refer to the manual for the use of lightmodes DAMAGED CABLE Check for any visible damages on the cable. If any, replace the cable.
- Page 48 REPLACING A DAMAGED LENS Follow these steps in order to replace a lens: 1) Unscrew the foremost part of the head. 2) Disassemble the head, replace the lens and assembly the head firmly.
-
Page 49: V4Pro Rechargeable
V4pro rechargeable SCAN THE QR CODE TO SEE VIDEO TUTORIALS MOUNTING THE HEADLAMP ON THE BAND 1) The headlamp should be mounted on the longer side of the headband. Leaving the adjustment clips free on one side between the lamphead and battery pack. ADJUSTING THE HEADBAND 2) Adjust the length of the headband using its shorter side. - Page 50 UNABLE TO ADJUST THE ANGLE When it gets difficult to change the angle of the head, most of the time it is caused by insufficient cleaning. Please check that the head of the headlamp is clean: 1) Rotate the head of the lamp to open it. 2) Make sure that the headlamp is clean, particularly around the highlighted area.
- Page 51 DAMAGED CABLE Check for any visible damages on the cable. If any, replace the cable. REPLACING THE CABLE Follow these simple steps for connecting the cable correctly: 1) The short side of the cable will be 0° connected to the battery pack. The long side of the cable will be connected to the headlamp.
Need help?
Do you have a question about the Q1mini and is the answer not in the manual?
Questions and answers