Table of Contents
Advertisement
Available languages
Available languages
Quick Links
Kichler® is a registered trademark of
The L.D. Kichler Co. All Rights Reserved.
ATTACH YOUR RECEIPT HERE
Serial Number
Questions, problems, missing parts? Before returning to your retailer, call our customer
service department at 1-800-554-6504, 8 a.m. - 4:30 p.m, EST, Monday - Friday.
Purchase Date
1
ITEM #0803773
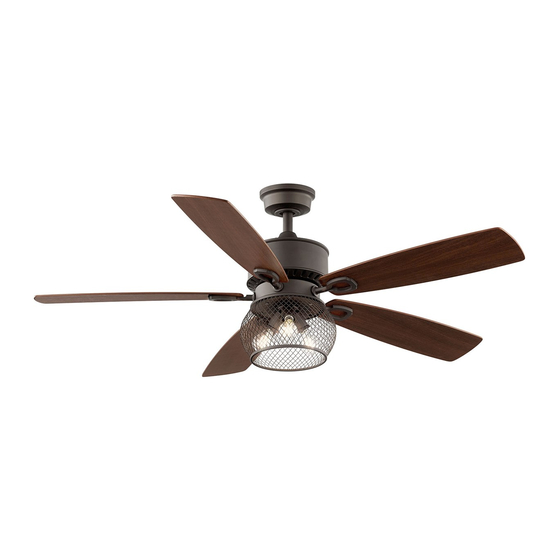
CEILING FAN
MODEL #35156
Français p. 17
Español p. 33
Advertisement
Table of Contents

Related Manuals for Kichler Lighting 35156


Summary of Contents for Kichler Lighting 35156
- Page 1 ITEM #0803773 CEILING FAN Kichler® is a registered trademark of The L.D. Kichler Co. All Rights Reserved. MODEL #35156 Français p. 17 Español p. 33 ATTACH YOUR RECEIPT HERE Serial Number Purchase Date Questions, problems, missing parts? Before returning to your retailer, call our customer...
-
Page 2: Package Contents
PACKAGE CONTENTS PART DESCRIPTION PART DESCRIPTION Hanging Bracket Motor Assembly Down Rod Light Kit Housing Canopy Light Kit Blade Blade Iron Motor Coupling Cover LED Bulb... -
Page 3: Hardware Contents
HARDWARE CONTENTS HARDWARE BAG REMOTE CONTROL Hanging bracket Screw Lag Screw Hanging bracket Washer Remote Control and Receiver Flat Washer + Spring Washer Wood Screw Battery Wire Connector Blade Screw Anchor and Screws Blade Iron Screws Balance Kit Shade Screws Remote Control Holder SAFETY INFORMATION Please read and understand this entire manual before attempting to assemble, operate or install the... - Page 4 WARNING (continued) • To reduce the risk of fire or electrical shock, do not use this fan with any solid state fan speed device or variable speed control. • Do not touch hot LED • The LED light output is strong enough to injure human eyes. Precautions must be taken to prevent looking directly at the LEDs with unaided eyes for more than a few seconds.
- Page 5 ASSEMBLY INSTRUCTIONS 1. Turn off the circuit breaker to the fan supply line leads. DANGER: Failure to disconnect power supply prior to installation may result in serious injury or death. 2. Secure the hanging bracket (A) to the ceiling outlet Outlet Box box using hanging bracket screws and hanging bracket washers.
- Page 6 ASSEMBLY INSTRUCTIONS 4. Insert downrod (B) through canopy (C) and motor coupling cover (E). 5. Feed wires from the motor assembly (F) through the downrod (B), then insert the downrod (B) into the coupling found on top of the motor assembly (F). Motor Coupling...
- Page 7 ASSEMBLY INSTRUCTIONS 6. Pass the previously removed clevis pin through the downrod (B) and coupling of motor assembly (F), then secure with previously removed hair pin. Re-tighten set screws on the coupling and lower the motor coupling cover (E). 7. Carefully lift the fan and seat the ball of the downrod (B) in the hanger bracket (A).
- Page 8 ASSEMBLY INSTRUCTIONS 8. For Canadian installation and for USA fans over 35 Spring lbs, the safety cable must be installed into the house Washer structure beams using a 3” lag screw. Make sure Safety that when the safety cable is fully extended the lead Flat Cable Washer...
- Page 9 ASSEMBLY INSTRUCTIONS Outlet Box GREEN or BARE COPPER WHITE BLACK (Neutral) (Live) WHITE BLACK (AC Input) (AC Input) BLUE (Light) BLACK (Motor) Receiver WHITE (Neutral) BLUE BLACK WHITE 10. Wiring the fan per wiring diagram and securely connect wires with wire connectors: Wrap electrical tape (not included) around each wire connector and make sure no bare wire or wire strands are visible after making connections.
- Page 10 ASSEMBLY INSTRUCTIONS 11. Once wiring step has been completed, slide the wired remote receiver in between the hanging bracket (A) and the top of the downrod ball (B) with the flat side of the receiver facing the ceiling. Turn lead wires upward and carefully push them into the outlet box, with the white and green wires to one side of the box and the black wires toward the other side.
- Page 11 ASSEMBLY INSTRUCTIONS 14. Attach blade irons (I) to the underside of the motor assembly (F) with the blade iron screws. Blade Iron Screws 15. Remove the preassembled mounting screws from the motor assembly (F). Feed the wires from the motor assembly (F) through the center hole in the light kit housing (G).
- Page 12 ASSEMBLY INSTRUCTIONS 16.Remove the preassembled screws from the inside of the light kit housing (G). Connect wires from the motor assembly (F) to the light kit (H) - WHITE to WHITE and BLACK to BLACK. Position slots on light kit (H) to the slots from the previously removed screws found on the light kit housing (G).
-
Page 13: Operation
OPERATION Fan control : Medium Speed Low: Low speed High Med: Medium speed Speed High: High speed Speed Off: To turn off the fan Turns the light ON and OFF Light as well as controlling the brightness setting. On / Off NOTE: Remove batteries if remote has not been used for a long period of time in order to avoid damage. - Page 14 STEPS TO BALANCING THE CEILING FAN • Tighten screws on the mounting bracket, outlet box, the downrod , fan blades to blade holders, and blade holders to the motor housing. • Measure the distance from the tip of each blade to the ceiling. All blades should have the same vertical distance from the ceiling.
-
Page 15: Fcc Warning
FCC WARNING This device complies with part 15 of the FCC Rules. Operation is subject to the following two conditions: (1) This device may not cause harmful interference, and (2) this device must accept any interference received, including interference that may cause undesired operation. Changes or modifications not expressly approved by the party responsible for compliance could void the user's authority to operate the equipment. -
Page 16: Warranty
WARRANTY Kichler Lighting warrants that its products will be free from defects in material and workmanship for one (1) year from the date of purchase by the Original Purchaser. To replace a product that has a warranted defect, the Original Purchaser shall return any allegedly defective parts or products to the authorized Kichler distributor that the product was purchased from with PROOF OF PURCHASE, Original Purchaser’s name and return address and a description of the... - Page 17 ARTICLE #0803773 VENTILATEUR DE PLAFOND Kichler® est une marque déposée de The L.D. Kichler Co. Tous droits réservés. MODÈLE #35156 Instalar Instalar JOIGNEZ VOTRE REÇU ICI Numéro de série Date d’achat Des questions, des problèmes, des pièces manquantes? Avant de retourner le produit à...
-
Page 18: Contenu De L'emballage
CONTENU DE L’EMBALLAGE PIÈCE DESCRIPTION QTÉ PIÈCE DESCRIPTION QTÉ Support de suspension Ensemble moteu Tige Logement du kit d’éclairage Pavillon Kit d’éclairage Pale Support des pales Cache raccord du moteur Ampoule DEL... - Page 19 QUINCAILLERIE INCLUSE SACHET DE QUINCAILLERIE TÉLÉCOMMANDE Vis du support de suspension Tire-fond Rondelle du support de suspension Télécommande et Récepteur Rondelle plate + rondelle ressort Vis à bois Pile Capuchon de connexion Vis de pale Chevilles et vis Vis du support des pales Ensemble d'équilibrage Vis de abat-jour Support de la télécommande...
-
Page 20: Instructions Pour L'assemblage
(suite) AVERTISSEMENT • Pour réduire les risques d'incendie ou de choc électrique, n'utilisez pas ce ventilateur avec une commande de vitesse à semi-conducteurs ou une commande de variation de vitesse. • Ne touchez pas les DEL chaudes. • La lumière produite par les DEL est assez puissante pour blesser les yeux humains. Il est impératif de prendre des précautions pour éviter de recevoir directement dans les yeux non protégés la lumière des DEL pendant plus de quelques secondes. - Page 21 INSTRUCTIONS POUR L'ASSEMBLAGE 1. Coupez l'interrupteur mural et le disjoncteur qui contrôlent les fils d'alimentation du ventilateur. DANGER: Si l'alimentation électrique n'est pas coupée avant l'installation, il peut en résulter de graves blessures ou la mort. 2. Fixez le support de suspension (A) à la boîte de Boîte de sortie du plafond à...
- Page 22 INSTRUCTIONS POUR L'ASSEMBLAGE 4. 2. Insérez la tige de suspension (B) à travers le pavillon (C) et le cache raccord du moteur (E). 5. 3. Enfilez les câbles de l'ensemble moteur (F) dans la tige de suspension (B), puis insérez la tige (B) dans le raccord situé...
- Page 23 INSTRUCTIONS POUR L'ASSEMBLAGE 6. Faites passer la clavette précédemment retirée à travers la tige (B) et le raccord de l'ensemble moteur (F), puis fixez à l'aide de la goupille de verrouillage précédemment retirée. Revissez les vis de réglage sur le raccord et le cache raccord du moteurinférieur (E).
- Page 24 INSTRUCTIONS POUR L'ASSEMBLAGE 8. Pour une installation au Canada et pour les Rodelle ventilateurs de plus de 15,8 kg (35 lbs) aux É.-U., le Ressort câble de sécurité doit être fixé à une poutre porteuse Câble de Rondelle de la maison à l'aide d'un tire-fond de 76 mm (3 po). sécurité...
- Page 25 INSTRUCTIONS POUR L'ASSEMBLAGE Boîte de sortie GREEN BARE BLANC NOIR BLANC NOIR BLEU NOIR Récepteur BLANC BLEU NOIR BLANC 10. Réalisez le câblage du ventilateur conformément au schéma de câblage et connectez fermement les fils à l'aide des connecteurs de fils : Enroulez du ruban isolant (non fourni) autour de chaque connecteur de fils et assurez-vous qu'aucun fil nu ou toron n'est visible une fois la connexion réalisée.
- Page 26 INSTRUCTIONS POUR L'ASSEMBLAGE 11. Une fois le câblage réalisé, insérez le récepteur distant câblé entre le support de suspension (A) et le sommet de la boule de suspension (B) en plaçant la partie plate du récepteur face au plafond. Tournez les fils vers le haut et poussez-les délicatement dans la boite de sortie, en plaçant les fils blanc et vert d'un côté...
- Page 27 INSTRUCTIONS POUR L'ASSEMBLAGE 14. Attachez les fixations de pale (I) au-dessous de l'ensemble moteur (F) à l'aide des vis pour fixations de pales. Vis du support des pales 15. Retirez de l'ensemble moteur (F) les vis de montage préassemblées. Faites passer les fils de l'ensemble moteur (F) à travers le trou central du logement du kit d'éclairage (G).
- Page 28 INSTRUCTIONS POUR L'ASSEMBLAGE 16.Retirez les vis préassemblées de l'intérieur du logement du corps d'éclairage (G). Connectez les fils de l'ensemble moteur (F) au kit d'éclairage (H) - BLANC avec BLANC et NOIR avec NOIR. Positionnez les fentes du kit d'éclairage (H) face aux fentes des vis précédemment retirées sur le logement du kit d'éclairage (G).
- Page 29 OPERATION Réglage du ventilateur : Vitesse moyenne Lente: Vitesse lente Vitesse Moyenne: Vitesse moyenne Vitesse rapide Rapide: Vitesse rapide lente Désactiver: Pour arrêter le ventilateur Allume et éteint la lumière Désactiver Lumière Et permet de régler l'intensité lumineuse. marche/ ventilateur arrêt REMARQUE : Retirez les piles de la télécommande en cas de non-utilisation...
- Page 30 ÉTAPES POUR ÉQUILIBRER LE VENTILATEUR DE PLAFOND • Serrez les vis sur le support de fixation, la boîte de sortie, la tige, entre les pales du ventilateur et les supports de pales, et entre les supports de pales et le logement du moteur. •...
-
Page 31: Avertissement Fcc
AVERTISSEMENT FCC Cet appareil est conforme au chapitre 15 des règlements de la FCC. La mise en œuvre est soumise aux deux conditions suivantes : (1) cet appareil ne provoque pas de brouillage nuisible, et (2) cet appareil doit accepter toute interférence reçue, notamment l’interférence qui pourrait provoquer un fonctionnement indésirable. -
Page 32: Garantie
GARANTIE Kichler Lighting garantit que ses produits seront libres de tout vice de fabrication ou défaut matériel pendant un (1) an à compter de la date d'achat par l'acheteur initial. Pour remplacer un produit porteur d'un défaut couvert par la garantie, l'acheteur initial doit retourner tout produit ou pièce supposés défectueux au distributeur Kichler agréé... -
Page 33: Ventilador De Techo
ARTÍCULO #0803773 VENTILADOR DE TECHO Kichler® es una marca registrada de The L.D. Kichler Co. Todos los derechos reservados. MODELO #35156 ADJUNTE SU RECIBO AQUÍ Número de serie Fecha de compra ¿Preguntas, problemas, piezas faltantes? Antes de devolverlo a la tienda, llame a nuestro departamento de servicio al cliente al 1-800-554-6504, de 8:00 a.m. -
Page 34: Contenido Del Paquete
CONTENIDO DEL PAQUETE PIEZA DESCRIPCIÓN CANT PIEZA DESCRIPCIÓN CANT Soporte colgante Motor Alojamiento del kit de luces Barra colgante Kit de luces Cubierta Soporte del aspa Aspa Ampoule DEL Cubierta del acople del motor... -
Page 35: Control Remoto
ADITAMENTOS BOLSA DE MATERIALES CONTROL REMOTO Tornillo del soporte colgante Tornillo de compresión Arandela de soporte colgante Control Remoto y Receptor Arandela plana + arandela de presión Tornillo para madera Batería Conector de cables Tornillo del aspa Taquetes y Tornillos Tornillo para madera Balance Kit Soporte del control remoto... -
Page 36: Instrucciones De Ensamblaje
(continuación) ADVERTENCIA • Para reducir el riesgo de incendios o descargas eléctricas, no use este ventilador con dispositivos de velocidad para ventiladores de estado sólido ni con un control de velocidad variable. • No toque el LED caliente • El haz de luz LED es lo suficientemente fuerte para lesionar los ojos humanos. Se deben tomar precauciones para evitar mirar directamente los LED con los ojos sin protección por más de unos pocos segundos. - Page 37 INSTRUCCIONES DE ENSAMBLAJE 1. Apague el interruptor de la pared y el cortacircuitos de las líneas de suministro eléctrico del ventilador. PELIGRO: El no desconectar la alimentación eléctrica antes de la instalación puede resultar en lesiones graves o la muerte. 2.
- Page 38 INSTRUCCIONES DE ENSAMBLAJE 4. Inserte la varilla (B) por la cubierta (C) y la tapa del acoplamiento del motor (E). 5. Pase los cables desde el conjunto del motor (F) por la varilla (B); después inserte la varilla (B) en el acople que se encuentra en la parte superior del conjunto del motor (F).
- Page 39 INSTRUCCIONES DE ENSAMBLAJE 6. Pase el pasador de horquilla que retiró anteriormente por la varilla (B) y el acoplamiento del conjunto del motor (F); después asegúrelo con el pasador de horquilla que había retirado. Vuelva a apretar los tornillos fijadores del acoplamiento. 7.
- Page 40 INSTRUCCIONES DE ENSAMBLAJE 8. Para la instalación canadiense y para ventiladores Aradela en los EE. UU. de más de 15.8 k (35 libras), el cable de seguridad se debe instalar en las vigas de la presión Cable de estructura de la edificación utilizando un tornillo de Arandela seguridad Plana...
- Page 41 INSTRUCCIONES DE ENSAMBLAJE Caja de salida VERDE DESNUDO BLANCO NEGRO BLANCO NEGRO AZUL NEGRO Receptor BLANCO AZUL NEGRO BLANCO 7. Realice el cableado del ventilador según el diagrama, y conecte firmemente los cables con conectores de cables: envuelva cada conector de cables con cinta aislante (no se incluye) y cerciórese de que no haya cable o filamentos de cable expuestos después de hacer las conexiones.
- Page 42 INSTRUCCIONES DE ENSAMBLAJE 11. Una vez completado el paso del cableado, deslice el receptor remoto cableado entre el soporte colgante (A) y el extremo superior de la rótula de la varilla (B), con la parte plana del receptor orientada hacia el techo.
- Page 43 INSTRUCCIONES DE ENSAMBLAJE 14. Fije los soportes del aspa (I) en la parte inferior del conjunto del motor (F) con los tornillos para los soportes del aspa. Tornillo para madera 15. Retire los tornillos de montaje pre-ensamblados del conjunto del motor (F). Pase los cables desde el conjunto del motor (F) a través del agujero central del alojamiento del kit de luces (G).
- Page 44 INSTRUCCIONES DE ENSAMBLAJE 16.Retire los tornillos pre-ensamblados del interior del alojamiento del kit de luces (G). Conecte los cables del conjunto del motor (F) al kit de luces (H); BLANCO con BLANCO y NEGRO con NEGRO. Alinee las ranuras del kit de luces (H) con las ranuras de los tornillos que se retiraron que se encuentran en el alojamiento del kit de luces (G).
-
Page 45: Operación
OPERACIÓN Control del ventilador : Velocidad media Bajo: Baja velocidad Alta Medio: Velocidad media Baja velocidad Alta: Alta velocidad velocidad Apaga: Para apagar el ventilador Enciende (ON) y apaga (OFF) la luz. Luz prendida Apague el (On) También controla la configuración de brillo. ventilador /apagada (Off) NOTA: Retire las baterías si el control remoto... - Page 46 PASOS PARA BALANCEAR EL VENTILADOR DE TECHO • Apriete los tornillos del soporte de montaje, de la caja eléctrica, de la barra colgante, de las aspas del ventilador a los soportes de las aspas, y los soportes de las aspas al motor. •...
-
Page 47: Advertencia De La Fcc
ADVERTENCIA DE LA FCC Este dispositivo cumple con el Apartado 15 de las Normas de la FCC. El funcionamiento está sujeto a las siguientes dos condiciones: (1) este dispositivo no puede causar interferencia perjudicial y (2) este dispositivo debe aceptar cualquier interferencia recibida, incluyendo interferencia que pueda causar funcionamiento no deseado. - Page 48 GARANTÍA Kichler ofrece la siguiente garantía limitada de por vida al Comprador Original de un Ventilador de Techo Kichler: si el motor del ventilador o piezas relacionadas con el motor fallasen debido a lo que Kichler, a su exclusiva discreción, determine que sea un defecto de materiales o mano de obra, Kichler, a su elección, reparará...
Need help?
Do you have a question about the 35156 and is the answer not in the manual?
Questions and answers
On a 35156 fan how do you remove the upper shroud ( collar) to access the removal of the fan