Table of Contents
Advertisement
Quick Links
Advertisement
Table of Contents
Troubleshooting

Subscribe to Our Youtube Channel
Related Manuals for Advantech EKI-9628G


Summary of Contents for Advantech EKI-9628G
- Page 1 User Manual EKI-9628G 24G+4G Combo port L3 Managed Switch...
- Page 2 No part of this manual may be reproduced, copied, translated or transmitted in any form or by any means without the prior written permission of Advantech Co., Ltd. Information provided in this manual is intended to be accurate and reliable. How- ever, Advantech Co., Ltd.
-
Page 3: Declaration Of Conformity
Technical Support and Assistance Visit the Advantech web site at www.advantech.com/support where you can find the latest information about the product. Contact your distributor, sales representative, or Advantech's customer service center for technical support if you need additional assistance. -
Page 4: Document Feedback
Before setting up the system, check that the items listed below are included and in good condition. If any item does not accord with the table, please contact your dealer immediately. 1 x Industrial Ethernet Switch 2 x Wall-mounting Bracket 1 x Startup Manual EKI-9628G User Manual... -
Page 5: Safety Instructions
The sound pressure level at the operator's position according to IEC 704-1:1982 is no more than 70 dB (A). DISCLAIMER: This set of instructions is given according to IEC 704-1. Advantech disclaims all responsibility for the accuracy of any statements contained herein. - Page 6 Der arbeitsplatzbezogene Schalldruckpegel nach DIN 45 635 Teil 1000 beträgt 70dB(A) oder weiger. Haftungsausschluss: Die Bedienungsanleitungen wurden entsprechend der IEC- 704-1 erstellt. Advantech lehnt jegliche Verantwortung für die Richtigkeit der in die- sem Zusammenhang getätigten Aussagen ab. EKI-9628G User Manual...
- Page 7 Don't touch any components on the CPU card or other cards while the PC is on. Disconnect power before making any configuration changes. The sudden rush of power as you connect a jumper or install a card may damage sensitive elec- tronic components. EKI-9628G User Manual...
-
Page 8: Table Of Contents
Accessing the CLI............... 24 Web Browser Configuration ..............25 3.3.1 Preparing for Web Configuration ..........25 3.3.2 System Login ................25 Chapter Managing Switch....... 26 Log In ...................... 27 Recommended Practices................ 27 4.2.1 Changing Default Password ............27 EKI-9628G User Manual viii... - Page 9 4.10.4 DHCP Server ................92 4.10.5 SMTP Client................97 4.10.6 RMON ..................100 4.11 Diagnostics.................... 103 4.11.1 Cable Diagnostics ..............103 4.11.2 Ping Test................... 104 4.11.3 IPv6 Ping Test................105 4.11.4 System Log ................106 4.11.5 DDM..................108 EKI-9628G User Manual...
- Page 10 4.12.4 Save Configuration ..............112 4.12.5 User Account ................112 4.12.6 Reset System ................113 4.12.7 Reboot Device ................113 4.13 Modbus/TCP Mapping ................113 4.13.1 Modbus/TCP Mapping Table ............ 113 Chapter Troubleshooting......133 Troubleshooting ..................134 EKI-9628G User Manual...
- Page 11 Serial Console Cable....................14 Figure 2.10 DB 9 Pin Position......................14 Figure 2.11 Pin Assignment......................14 Figure 2.12 Power Wiring for EKI-9628G ..................15 Figure 2.13 Grounding Connection....................17 Figure 2.14 Terminal Receptor: Relay Contact ................17 Figure 2.15 Terminal Receptor: Power Input Contacts..............18 Figure 2.16...
- Page 12 Management > SNMP > SNMP Trap ................91 Figure 4.94 Management > TCP Modbus Settings > TCP Modbus Settings ......... 91 Figure 4.95 Management > DHCP Server > Status Settings ............92 Figure 4.96 Management > DHCP Server > Global Settings ............93 EKI-9628G User Manual...
- Page 13 Figure 4.116 Diagnostics > LED Indication..................109 Figure 4.117 Tools > Backup Manager................... 110 Figure 4.118 Tools > Upgrade Manager..................111 Figure 4.119 Tools > Dual Image ....................111 Figure 4.120 Tools > User Account ....................112 xiii EKI-9628G User Manual...
-
Page 14: Product Overview
Chapter Product Overview... -
Page 15: Specifications
EN 61000-4-3 (RS) Level 3; EN 61000-4-4 (EFT) Level 3 EN 61000-4-5 (Surge) Level 3; EN 61000-4-6 (CS) Level 3 EN 61000-4-8 (Magnetic Field) Level 3 Shock IEC 60068-2-27 Freefall IEC 60068-2-32 Vibration IEC 60068-2-6 Railway Track EN 50121-4 Side EKI-9628G User Manual... -
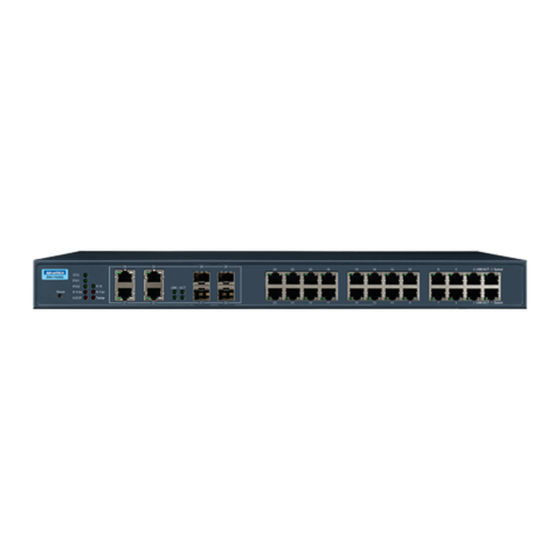
Page 16: Hardware Views
Power down or not installed. P-FAIL Solid red When PW1 or PW2 is disconnected, the LED lights. When PW1 and PW2 is connected, the LED is off. LOOP Detection Solid red When loop detected, the LED lights. No loop detected. EKI-9628G User Manual... -
Page 17: Rear View
Console cable port to COM port (DB9 male) on computer to RS232 port managed switch (RJ45 female). P-Fail block An open circuit occurs upon detecting a power failure. A close circuit denotes normal power activity. Power block Connect cabling for power wiring. EKI-9628G User Manual... -
Page 18: Dimensions
1 x Industrial Ethernet Switch 1 x Rack Mount Kit 1 x Startup Manual 1 x EKI Device Configuration Utility CD ROM EKI-9628G User Manual... -
Page 19: Switch Installation
Chapter Switch Installation... -
Page 20: Warnings
Caution! This unit may have more than one power supply connection. All connec- tions must be removed to de-energize the unit. Caution! The installation, replacement, or service of the device must be Only be performed by trained and qualified personnel. EKI-9628G User Manual... -
Page 21: Installation Guidelines
Make sure the cabling is positioned away from equipment that can damage the cables. Operating environment is within the ranges listed range, see “Specifications” on page 2. Relative humidity around the switch does not exceed 95 percent (noncondens- ing). EKI-9628G User Manual... -
Page 22: Environment And Enclosure Guidelines
The other LEDs turn off and return to their operating status. If the switch fails POST, the System LED switches to an amber state. After a successful self-test, power down the switch and disconnect the power cabling. The switch is now ready for installation on its final location. EKI-9628G User Manual... -
Page 23: Installing The Switch
II, and the Rx (receive) port of device I to the Tx (transmit) port of device II. If you make your own cable, we suggest labeling the two sides of the same line with the same letter (A-to-A and B-to-B, or A1-to-A2 and B1-to-B2). EKI-9628G User Manual... -
Page 24: Installing Sfp Modules
Remove the protective plug from the SFP transceiver. Note! Do not remove the dust plug from the transceiver if you are not installing the fiber optic cable at this time. The dust plug protects hardware from dust contamination. EKI-9628G User Manual... -
Page 25: Removing Sfp Modules
Hold the handle on the transceiver and pull the transceiver out of the slot. Handle Figure 2.7 Removing an SFP Transceiver Note! Replace the dust plug on the slot if you are not installing a transceiver. The dust plug protects hardware from dust contamination. EKI-9628G User Manual... -
Page 26: Connecting The Switch To Ethernet Ports
Pin 2 Pin 6 Pin 3 Pin 3 Pin 3 Pin 1 Pin 6 Pin 6 Pin 6 Pin 2 Figure 2.8 Ethernet Plug & Connector Pin Position Maximum cable length: 100 meters (328 ft.) for 10/100/1000BaseT. EKI-9628G User Manual... -
Page 27: Connecting The Switch To Console Port
Figure 2.9 Serial Console Cable Figure 2.10 DB 9 Pin Position DB9 Connector RJ45 Connector 1 Orange/White 2 Orange 3 Green/White 4 Blue 5 Blue/White 6 Green 7 Brown/White 8 Brown RJ45 Female Male Figure 2.11 Pin Assignment EKI-9628G User Manual... -
Page 28: Power Supply Installation
EKI-9612G supports 12 to 48 VD. Dual power inputs are supported and allow you to connect a backup power source. Single DC Power Redundant DC Power P2 P1 P2 P1 Chassis Chassis (pane) (pane) One DC Supply Dual DC Supplies Figure 2.12 Power Wiring for EKI-9628G EKI-9628G User Manual... -
Page 29: Considerations
Caution! Before connecting the device properly ground the device. Lack of a proper grounding setup may result in a safety risk and could be hazard- ous. Caution! Do not service equipment or cables during periods of lightning activity. EKI-9628G User Manual... -
Page 30: Wiring A Relay Contact
2.9.4 Wiring a Relay Contact The following section details the wiring of the relay output. The terminal block on the EKI-9628G is wired and then installed onto the terminal receptor located on the EKI- 9628G. P-Fail Figure 2.14 Terminal Receptor: Relay Contact The terminal receptor includes a total of six pins: two for PWR1, two for PWR2 and two for a fault circuit. -
Page 31: Wiring The Power Inputs
PW2 in the same manner. Tighten the wire-clamp screws to secure the DC wires in place. Loosening Installing DC Wire-clamp Wires Screws Securing Wire- clamp Screws Figure 2.16 Installing DC Wires in a Terminal Block EKI-9628G User Manual... -
Page 32: Reset Button
Reset Button Reset configuration to factory default: Press and hold Reset button for 5 seconds. System reboot: Press and hold Reset button for 3 seconds. Note! Do NOT power off the Ethernet switch when loading default settings. EKI-9628G User Manual... -
Page 33: Configuration Utility
Chapter Configuration Utility... -
Page 34: First Time Setup
Secure Shell (SSH). An SNMP interface can be used to read/write many settings. Command Line Interface (CLI) can be used to read/write most settings. Initial setup must be done using an Ethernet connection (recommended) or the serial port. EKI-9628G User Manual... -
Page 35: Using The Graphical (Web) Interface
NTP Server: The IP address or domain name of an NTP (Network Time Proto- col) server from which the switch may retrieve the current time at startup. Please note that using a domain name requires that at least one domain name server be configured. EKI-9628G User Manual... -
Page 36: Configuring The Ethernet Ports
Otherwise, the switch will use the fixed Ethernet port and the correspond- ing settings for it. Note! When 100f is selected for the SFP of a gigabit combination port, the cor- responding fixed Ethernet jack will be disabled unless it is changed back to 1000F. EKI-9628G User Manual... -
Page 37: Command Line Interface Configuration
To connect by Ethernet, open a command prompt window and type: telnet <switchip> (where <switchip> is the IP address of the switch) At the login prompt, type “cli” for the username and “admin” for the password. The switch will respond with “Managed switch configuration CLI ready”. EKI-9628G User Manual... -
Page 38: Web Browser Configuration
In the browser’s address bar, type the switch’s default IP address (192.168.1.1). The login screen displays. Enter the user default name and password (admin / admin). Click OK on the login screen to log in. The main interface displays. EKI-9628G User Manual... -
Page 39: Managing Switch
Chapter Managing Switch... -
Page 40: Log In
In the User Name field, enter admin for this account. It is not necessary to change the user name, however, a change in the default settings increases the security settings. In the Password field, type in the new password. Re-type the same password in the Retype Password field. EKI-9628G User Manual... -
Page 41: Monitoring
Location, MAC Address, Firmware version, and more, pertaining to the system. The information is for review only. To modify the device information, see the respective item within the user interface. To access this page, click Monitoring > Device Information. Figure 4.3 Monitoring > Device Information EKI-9628G User Manual... -
Page 42: Logging Message
Click the drop-down menu to select a target to store the log mes- sages. Buffered: Store log messages in RAM. All log messages are cleared after system reboot. File: Store log messages in a file. EKI-9628G User Manual... -
Page 43: Port Monitoring
Clear Click Clear to clear the counter selections. The ensuing table for IF MIB Counters settings are informational only and display the following: ifInOctets, ifInUcastPkts, ifInNUcastPkts, ifInDiscards, ifOutOctets, ifOutUcastPkts, ifOutNUcastPkts, ifOutDiscards, ifInMulticastPkts, ifInBroadcastPkts, ifOutMulticastPkts and ifOutBroadcastPkts. EKI-9628G User Manual... -
Page 44: Link Aggregation
The Link Aggregation function provides LAG information for each trunk. It displays membership status, link state and membership type for each port. To access this page, click Monitoring > Link Aggregation. Figure 4.7 Monitoring > Link Aggregation EKI-9628G User Manual... -
Page 45: Lldp Statistics
Insertions, Deletions, Drops and Age Outs. The ensuing table for LLDP Port Statistics settings are informational only and dis- play the following: Port, TX Frames (Total), RX Frames (Total, Discarded and Errors), RX TLVs (Discarded and Unrecognized) and RX Ageouts (Total). EKI-9628G User Manual... -
Page 46: Igmp Statistics
Total RX, Valid RX, Invalid RX, Other RX, Leave RX, Report RX, General Query RX, Special Group Query RX, Special Group & Source Query RX, Leave TX, Report TX, General Query TX, Special Group Query TX and Special Group & Source Query TX. EKI-9628G User Manual... -
Page 47: Igmp Statistics
Total RX, Valid RX, Invalid RX, Other RX, Leave RX, Report RX, General Query RX, Special Group Query RX, Special Group & Source Query RX, Leave TX, Report TX, General Query TX, Special Group Query TX, and Special Group & Source Query TX. EKI-9628G User Manual... -
Page 48: System
DHCP State, Static IP Address, Static Subnet Mask, Static Gateway, Static DNS Server 1 and Static DNS Server 2. 4.4.2 IPv6 Settings To access this page, click System > IPv6 Settings. Figure 4.12 System > IPv6 Settings EKI-9628G User Manual... -
Page 49: System Time
To access this page, click System > System Time. Figure 4.13 System > System Time The following table describes the items in the previous figure. Item Description Enable SNTP Click the radio button to enable or disable the SNTP. EKI-9628G User Manual... -
Page 50: Network Port
Enter the value to designate the port number for the HTTP protocol (default: 80). HTTPS Enter the value to designate the port number for the HTTPS protocol (default: 443). TELNET Enter the value to designate the port number for the Telnet protocol (default: 23). EKI-9628G User Manual... -
Page 51: L2 Switching
Click the radio button to enable or disable the flow control function. Fiber Port Click the drop-down menu to designate the port to be used by the fiber ports (GE9 to GE12). Enabled Click the radio-button to enable or disable the fiber port setting func- tion. EKI-9628G User Manual... -
Page 52: Port Mirror
Click the drop-down menu to enable or disable the Allow-ingress func- tion. Sniffer RX Ports Enter the variable to define the RX port. Sniffer TX Ports Enter the variable to define the TX port. Apply Click Apply to save the values and update the screen. EKI-9628G User Manual... -
Page 53: Link Aggregation
Figure 4.18 L2 Switching > Link Aggregation > LAG Management The following table describes the items in the previous figure. Item Description Click the drop-down menu to select the designated trunk group: Trunk 1 ~8. Name Enter an entry to specify the LAG name. EKI-9628G User Manual... -
Page 54: Figure 4.19 L2 Switching > Link Aggregation > Lag Port Settings
The LACP Priority Settings page allows you to configure the system priority for LACP. To access this page, click L2 Switching > Link Aggregation > LACP Priority Set- tings. Figure 4.20 L2 Switching > Link Aggregation > LACP Priority Settings EKI-9628G User Manual... -
Page 55: Figure 4.21 L2 Switching > Link Aggregation > Lacp Port Settings
Passive: Enables LACP only when an LACP device is detected (default state). Apply Click Apply to save the values and update the screen. The ensuing table for LACP Port Information settings are informational only and display the following: Port Name, Priority, Timeout and Mode. EKI-9628G User Manual... -
Page 56: Q Vlan
The PVID Settings page allows you to designate a PVID for a selected port, define the accepted type and enable/disable the ingress filtering. To access this page, click L2 Switching > 802.1Q VLAN > PVID Settings. Figure 4.23 L2 Switching > 802.1Q VLAN > PVID Settings EKI-9628G User Manual... - Page 57 Click Apply to save the values and update the screen. The ensuing table for Port VLAN Status settings are informational only and display the following: Port, Interface VLAN Mode, PVID, Accept Frame Type and Ingress Fil- tering. EKI-9628G User Manual...
-
Page 58: Figure 4.24 L2 Switching > 802.1Q Vlan > Port To Vlan
Trunk: Port hybrid model. Tunnel: Port hybrid model. Membership Displays the assigned membership status of the port entry, options include: Forbidden, Excluded Tagged or Untagged. Apply Click Apply to save the values and update the screen. EKI-9628G User Manual... -
Page 59: Q-In-Q
4.5.5.1 Global Settings The Global Settings page allows you to set the outer VLAN Ethertype setting. To access this page, click L2 Switching > Q-in-Q > Global Settings. Figure 4.26 L2 Switching > Q-in-Q > Global Settings EKI-9628G User Manual... -
Page 60: Figure 4.27 L2 Switching > Q-In-Q > Port Settings
Apply Click Apply to save the values and update the screen. The ensuing table for QinQ Port Information settings are informational only and dis- play the following: Port, Outer PVID and Outer Mode. EKI-9628G User Manual... -
Page 61: Garp
12000. An instance of this timer exists for each GARP participant for each port. Apply Click Apply to save the values and update the screen. The ensuing table for GARP Information settings are informational only and display the following: Join Time, Leave Time and Leave All Time. EKI-9628G User Manual... -
Page 62: Az Eee
Click Enabled or Disabled to set the state mode of the port select setting. Apply Click Apply to save the values and update the screen. The ensuing table for EEE Enable Status settings are informational only and display the following: Port and EEE State. EKI-9628G User Manual... -
Page 63: Multicast
The following table describes the items in the previous figure. Item Description IGMP Snooping Select Enable or Disable to designate the IGMP Snooping State. State IGMP Snooping Ver- Select designate the IGMP Snooping Version: V2 or V3. sion EKI-9628G User Manual... -
Page 64: Figure 4.33 L2 Switching > Multicast > Igmp Snooping > Igmp Querier
VLAN ID, Querier State, Querier Status, Querier Version and Que- rier IP. IGMP Static Groups To access this page, click L2 Switching > Multicast > IGMP Snooping > IGMP Static Groups. Figure 4.34 L2 Switching > Multicast > IGMP Snooping > IGMP Static Groups EKI-9628G User Manual... -
Page 65: Figure 4.35 L2 Switching > Multicast > Mld Snooping > Mld Settings
Click Apply to save the values and update the screen. The ensuing table for MLD Snooping Information settings are informational only and display the following: MLD Snooping State, MLD Snooping Version and MLD Snooping V2 Report Suppression. EKI-9628G User Manual... -
Page 66: Figure 4.36 L2 Switching > Multicast > Mld Snooping > Mld Querier
Figure 4.37 L2 Switching > Multicast > MLD Snooping > MLD Static Group The following table describes the items in the previous figure. Item Description VLAN ID Enter the VLAN ID to define the local MLD Static Group. EKI-9628G User Manual... -
Page 67: Jumbo Frame
Enter the variable in bytes (1518 to 9216) to define the jumbo frame (Bytes) size. Apply Click Apply to save the values and update the screen. The ensuing table for Jumbo Frame Config settings are informational only and dis- play the following: Jumbo Frame (Bytes). EKI-9628G User Manual... -
Page 68: Spanning Tree
MSTP-Operation: 802.1s operation. Apply Click Apply to save the values and update the screen. The ensuing table for STP Information settings are informational only and display the following: STP, BPDU Forward, PathCost Method and Force Version. EKI-9628G User Manual... -
Page 69: Figure 4.40 L2 Switching > Spanning Tree > Stp Port Settings
BPDU formats. Apply Click Apply to save the values and update the screen. The ensuing table for STP Port Status settings are informational only and display the following: Port, Admin Enable, Path Cost, Edge Port and P2P MAC. EKI-9628G User Manual... -
Page 70: Figure 4.41 L2 Switching > Spanning Tree > Stp Bridge Settings
The STP Port Advanced Settings page allows you to select the port list to apply this setting. To access this page, click L2 Switching > Spanning Tree > STP Port Advanced Settings. Figure 4.42 L2 Switching > Spanning Tree > STP Port Advanced Settings EKI-9628G User Manual... -
Page 71: Figure 4.43 L2 Switching > Spanning Tree > Mst Config Identification
The MST Instance ID Settings page allows you to edit the MSTI ID and VID List set- tings. To access this page, click L2 Switching > Spanning Tree > MST Instance ID Set- tings. Figure 4.44 L2 Switching > Spanning Tree > MST Instance ID Settings EKI-9628G User Manual... -
Page 72: Figure 4.45 L2 Switching > Spanning Tree > Mst Instance Priority Settings
To access this page, click L2 Switching > Spanning Tree > STP Statistics. The ensuing table for STP Statistics settings are informational only and display the following: Port, Configuration BPDUs Received, TCN BPDUs Received, Configura- tion BPDUs Transmitted and TCN BPDUs Transmitted. EKI-9628G User Manual... -
Page 73: X-Ring Elite
Click Add to save the values and update the screen. The ensuing table for Information settings are informational only and display the fol- lowing: Ring ID, Role, Port 1, Port 2 and Delete (click to delete the desired Ring ID). EKI-9628G User Manual... -
Page 74: X-Ring Pro
Enter a number to specifies a ranging from 1 to 255 to identify a given X-Ring Pro group. Port 1 Click the drop-down menu to define the port designation. Port 2 Click the drop-down menu to define the port designation. Click Add to save the values and update the screen. EKI-9628G User Manual... -
Page 75: Loopback Detection
Enter the variable in seconds (1 to 32767) to set the interval at which frames are transmitted. Recover Time Enter the variable in seconds (60 to 1000000) to define the delay before recovery. Apply Click Apply to save the values and update the screen. EKI-9628G User Manual... -
Page 76: Figure 4.52 L2 Switching > Loopback Detection > Port Settings
Select Enabled or Disabled to setup the Loopback Detection func- tion. Apply Click Apply to save the values and update the screen. The ensuing table for Loopback Detection Port Information settings are informa- tional only and display the following: Port, Enable State and Loop Status. EKI-9628G User Manual... -
Page 77: Rl3 Switching
The following table describes the items in the previous figure. Item Description Interface Click the drop-down menu to select the interface. Original Source IP Define the original source IP address. Address Original Source IP Define the original source IP mask. Mask EKI-9628G User Manual... -
Page 78: Dnat (Destination Nat)
Click Add to save the values and update the screen. The ensuing table for Entry Information settings are informational only and display the following: Original Destination IP Address, New Destination IP address and Delete (click to delete the desired interface). EKI-9628G User Manual... -
Page 79: Routing
The Static MAC page allows you to configure the address for forwarding of packets, the VLAN ID of the listed MAC address and the designated Port. To access this page, click MAC Address Table > Static MAC. Figure 4.57 MAC Address Table > Static MAC EKI-9628G User Manual... -
Page 80: Mac Aging Time
The port each hardware address is associated with The VLAN to show or clear dynamic MAC entries The MAC address selection To access this page, click MAC Address Table > Dynamic Forwarding Table. Figure 4.59 MAC Address Table > Dynamic Forwarding Table EKI-9628G User Manual... -
Page 81: Security
Included: include preamble & IFG (20 bytes) when count ingress storm control rate. Apply Click Apply to save the values and update the screen. The ensuing table for Storm Control Global Information settings are informational only and display the following: Unit and Preamble & IFG. EKI-9628G User Manual... -
Page 82: Figure 4.61 Security > Storm Control > Port Settings
Click Apply to save the values and update the screen. The ensuing table for Storm Control Port Information settings are informational only and display the following: Port, Port State, Broadcast (Kbps), Unknown Multicast (Kbps), Unknown Unicast (Kbps) and Action. EKI-9628G User Manual... -
Page 83: Port Security
Select Unprotected or Protected to define the port type. Apply Click Apply to save the values and update the screen. The ensuing table for Protected Ports Status settings are informational only and display the following: Protected Ports and Unprotected Ports. EKI-9628G User Manual... -
Page 84: Dos Prevention
The following table describes the items in the previous figure. Item Description DMAC = SMAC Click Enabled or Disabled to define DMAC-SMAC for the DoS Global settings. LAND Click Enabled or Disabled to define LAND for the DoS Global set- tings. EKI-9628G User Manual... -
Page 85: Figure 4.65 Security > Dos Prevention > Dos Port Settings
The DoS Port Settings page allow you to configure DoS security (enabled or dis- abled) for the selected port. To access this page, click Security > DoS Prevention > DoS Port Settings. Figure 4.65 Security > DoS Prevention > DoS Port Settings EKI-9628G User Manual... -
Page 86: Applications
The following table describes the items in the previous figure. Item Description SSH Service Click Enabled or Disabled to set up Ethernet encapsulation (remote access) through the Secure Shell (SSH) function. Apply Click Apply to save the values and update the screen. EKI-9628G User Manual... -
Page 87: Figure 4.68 Security > Applications > Http
Enter the variable in minutes (0 to 86400) to define the timeout period for the HTTP session. Apply Click Apply to save the values and update the screen. The ensuing table for HTTPS Information settings are informational only and display the following: HTTPS Service and Session Timeout. EKI-9628G User Manual... -
Page 88: Figure 4.70 Security > 802.1X > 802.1X Settings
Click Apply to save the values and update the screen. The ensuing table for 802.1x Information settings are informational only and display the following: 802.1x State, Server IP, Server Port, Accounting Port, Security Key and Reauth Period. EKI-9628G User Manual... -
Page 89: Ip Security
Click Enabled or Disabled to define the global setting for the IP secu- rity function. Apply Click Apply to save the values and update the screen. The ensuing table for IP Security Status settings are informational only and display the following: IP Security. EKI-9628G User Manual... -
Page 90: Qos
Implementing QoS in the network makes performance predictable and bandwidth utilization much more effective. The QoS implementation is based on the prioritization values in Layer 2 frames. EKI-9628G User Manual... -
Page 91: Figure 4.74 Qos > General > Qos Properties
Apply Click Apply to save the values and update the screen. The ensuing table for QoS Status settings are informational only and display the fol- lowing: Port, CoS value, Remark CoS, Remark DSCP and Remark IP Precedence. EKI-9628G User Manual... -
Page 92: Figure 4.76 Qos > General > Qos Scheduling
% of WRR Bandwidth Displays the allotted bandwidth for the queue entry in percentage val- ues. Apply Click Apply to save the values and update the screen. The ensuing table for Queue Information settings are informational only and display the following: Strict Priority Queue Number. EKI-9628G User Manual... -
Page 93: Figure 4.77 Qos > General > Cos Mapping
The ensuing table for CoS Mapping Information settings are informational only and display the following: CoS and Mapping to Queue. The ensuing table for Queue Mapping Information settings are informational only and display the following: Queue and Mapping to CoS. EKI-9628G User Manual... -
Page 94: Figure 4.78 Qos > General > Dscp Mapping
The ensuing table for DSCP Mapping Information settings are informational only and display the following: DSCP and Mapping to Queue. The ensuing table for Queue Mapping Information settings are informational only and display the following: Queue and Mapping to DSCP. EKI-9628G User Manual... -
Page 95: Figure 4.79 Qos > General > Ip Precedence Mapping
The ensuing table for IP Precedence Mapping Information settings are informa- tional only and display the following: IP Precedence and Mapping to Queue. The ensuing table for Queue Mapping Information settings are informational only and display the following: Queue and Mapping to IP Precedence. EKI-9628G User Manual... -
Page 96: Qos Basic Mode
Select Enabled or Disabled to set the port’s trust state status. Apply Click Apply to save the values and update the screen. The ensuing table for QoS Port Status settings are informational only and display the following: Port and Trust State. EKI-9628G User Manual... -
Page 97: Rate Limit
To access this page, click QoS > Rate Limit > Egress Bandwidth Control. Figure 4.83 QoS > Rate Limit > Egress Bandwidth Control The following table describes the items in the previous figure. Item Description Port Enter the port number to set the Egress Bandwidth Control. EKI-9628G User Manual... -
Page 98: Figure 4.84 Qos > Rate Limit > Egress Queue
Egress queue. Apply Click Apply to save the values and update the screen. The ensuing table for FE1 Egress Per Queue Status settings are informational only and display the following: Queue Id and Egress Rate Limit (Kbps). EKI-9628G User Manual... -
Page 99: Management
Click Apply to save the values and update the screen. The ensuing table for LLDP Global Config settings are informational only and dis- play the following: LLDP Enabled, LLDP PDU Disable Action, Transmission Interval, Holdtime Multiplier, Reinitialization Delay and Transmit Delay. EKI-9628G User Manual... -
Page 100: Figure 4.86 Management > Lldp > Lldp Port Settings > Lldp Port Configuration
System Capability: To include system capability TLV in LLDP frames. 802.3 MAC-PHY: 802.3 Link Aggregation: 802.3 Maximum Frame Size: Management Address: 802.1 PVID: Apply Click Apply to save the values and update the screen. EKI-9628G User Manual... -
Page 101: Figure 4.88 Management > Lldp > Lldp Port Settings > Vlan Name Tlv Vlan Selection
Figure 4.89 Management > LLDP > LLDP Remote Device Info The following table describes the items in the previous figure. Item Description Detail Click to display the device details. Delete Click to delete the selected devices. Refresh Click to refresh the remote device information list. EKI-9628G User Manual... -
Page 102: Snmp
To access this page, click Management > SNMP > SNMP Community. Figure 4.91 Management > SNMP > SNMP Community The following table describes the items in the previous figure. Item Description Community Name Enter a community name (up to 20 characters). EKI-9628G User Manual... -
Page 103: Figure 4.92 Management > Snmp > Snmp User Settings
Click Add to save the values and update the screen. The ensuing table for User Status settings are informational only and display the fol- lowing: User Name, Access Right, Auth-Protocol, Priv-Protocol and Delete (click to delete the desired user name). EKI-9628G User Manual... -
Page 104: Tcp Modbus Settings
To access this page, click Management > TCP Modbus Settings > TCP Modbus Settings. Figure 4.94 Management > TCP Modbus Settings > TCP Modbus Settings The following table describes the items in the previous figure. Item Description State Click Disabled or Enabled to set the TCP Modbus state. EKI-9628G User Manual... -
Page 105: Dhcp Server
IP settings are changed, the DHCP server must be restarted for the IP settings to take effect. The ensuing table for Status Information settings are informational only and display the following: DHCP Server Service. EKI-9628G User Manual... -
Page 106: Figure 4.96 Management > Dhcp Server > Global Settings
Click Apply to save the values and update the screen. The ensuing table for Global Information settings are informational only and display the following: Lease Time, Low IP Address, High IP Address, Subnet Mask, Gateway, DNS and Clear (click to clear IP pool). EKI-9628G User Manual... -
Page 107: Figure 4.97 Management > Dhcp Server > Port Settings
The ensuing table for Port Information settings are informational only and display the following: Port, Low IP Address, High IP Address, Subnet Mask, Gateway, DNS, Edit (click to modify the settings) and Clear (click to clear the settings). EKI-9628G User Manual... -
Page 108: Figure 4.98 Management > Dhcp Server > Vlan Settings
Entry (click the drop-down menu to select an entry), Entry ID, VLAN ID, Low IP Address, High IP Address, Subnet Mask, Gateway, DNS, Edit (click to modify the settings) and Clear (click to clear the settings). EKI-9628G User Manual... -
Page 109: Figure 4.99 Management > Dhcp Server > Option 82 Settings
The ensuing table for Entry Information settings are informational only and display the following: Entry (click the drop-down menu to select an entry), Entry ID, Circuit ID Format, Circuit ID Content, Remote ID Format, Remote ID Content, Low IP Address, EKI-9628G User Manual... -
Page 110: Smtp Client
The Profile Settings page allows you to select the server IP, the server port, and sender mail for the listed profile. To access this page, click Management > SMTP Client > Profile Settings. Figure 4.101 Management > SMTP Client > Profile Settings > Profile Settings EKI-9628G User Manual... -
Page 111: Figure 4.102 Management > Smtp Client > Profile Settings > Profile Target Mail Settings
Click Apply to save the values and update the screen. The ensuing table for Profile Information settings are informational only and display the following: Profile ID (click the drop-down menu to select a profile ID), Server IP, Server Port and Sender Mail Address. EKI-9628G User Manual... -
Page 112: Figure 4.103 Management > Smtp Client > Sending Message
(alphanumeric, symbols (. (dot), _ (underline), - (dash line) and space). Content Assign the content of the email. The maximum length is 64 characters (alphanumeric, symbols (. (dot), _ (underline), - (dash line) and space). Apply Click Apply to save the values and update the screen. EKI-9628G User Manual... -
Page 113: Rmon
Owner and Delete (click to delete the desired index). 4.10.6.2 RMON History The RMON History page allows you to configure the display of history entries. To access this page, click Management > RMON > RMON History. Figure 4.105 Management > RMON > RMON History EKI-9628G User Manual... -
Page 114: Figure 4.106 Management > Rmon > Rmon Alarm
Sample Type Enter the variable sample type. Rising Threshold Enter the rising alarm threshold trigger. Falling Threshold Enter the falling alarm threshold trigger. Rising Event Index Enter the rising event index (1-65535) to define the alarm group. EKI-9628G User Manual... -
Page 115: Figure 4.107 Management > Rmon > Rmon Event
Click Apply to save the values and update the screen. The ensuing table for Event Information settings are informational only and display the following: Index, Description, Type, Community, Owner and Delete (click to delete the desired index). EKI-9628G User Manual... -
Page 116: Diagnostics
The ensuing table for Test Result settings are informational only and display the fol- lowing: Port, Channel A, Cable Length A, Channel B, Cable Length B, Channel C, Cable Length C, Channel D and Cable Length D. EKI-9628G User Manual... -
Page 117: Ping Test
1. The value ranges from 1 to 5. The interval entered is not retained across a power cycle. Size (in bytes) Enter the size of ping packet. The default value is 56. The value ranges from 8 to 5120. The size entered is not retained across a power cycle. EKI-9628G User Manual... -
Page 118: Ipv6 Ping Test
Click Apply to display ping result for the IP address. 4.11.3 IPv6 Ping Test The IPv6 Ping Test page allows you to configure the Ping Test for IPv6. To access this page, click Diagnostics > IPv6 Ping Test. Figure 4.110 Diagnostics > IPv6 Ping Test EKI-9628G User Manual... -
Page 119: System Log
Figure 4.111 Diagnostics > System Log > Logging Service The following table describes the items in the previous figure. Item Description Logging Service Click Enabled or Disabled to set the Logging Service status. Apply Click Apply to save the values and update the screen. EKI-9628G User Manual... -
Page 120: Figure 4.112 Diagnostics > System Log > Local Logging
Click Apply to save the values and update the screen. The ensuing table for Local Logging Settings Status settings are informational only and display the following: Status, Target, Severity and Delete (click to delete the desired target). EKI-9628G User Manual... -
Page 121: Ddm
Status, Server Info, Severity, Facility and Delete (click to delete the desired server address). 4.11.5 The DDM page allows you to setup the diagnostic alarm status. To access this page, click Diagnostics > DDM. Figure 4.114 Diagnostics > DDM EKI-9628G User Manual... -
Page 122: Led Indication
The ensuing table for Vendor Info settings are informational only and display the fol- lowing: Refresh (click to reload the vendor information), Port, Connector, Speed, VendorName, VendorOui, VendorPn, VendorRev, VendorSn and DateCode. 4.11.6 LED Indication To access this page, click Diagnostics > LED Indication. Figure 4.116 Diagnostics > LED Indication EKI-9628G User Manual... -
Page 123: Tools
Click a type to define the backup method: image: running configura- tion, startup configuration, flash log, or buffered log. Image Click the format for the image type: 9612G_1_00_13.bix (Active) or vmlinux.bix (backup). Backup Click Backup to backup the settings. EKI-9628G User Manual... -
Page 124: Upgrade Manager
Click Upgrade to upgrade to the current version. 4.12.3 Dual Image The Dual Image page allows you to setup an active and backup partitions for firm- ware image redundancy. To access this page, click Tools > Dual Image. Figure 4.119 Tools > Dual Image EKI-9628G User Manual... -
Page 125: Save Configuration
Click Apply to create a new user account. The ensuing table for Local Users settings are informational only and display the fol- lowing: User Name, Password Type, Privilege Type and Delete (click to delete the desired user account). EKI-9628G User Manual... -
Page 126: Reset System
4.13 Modbus/TCP Mapping The data map addresses of Advantech switches shown in the following table start from Modbus address 30001 for function code 4. In the given example, the address offset 0x1000 (hex) equals Modbus address 34097, while the address offset 0x1100 (hex) equals Modbus address 34353. - Page 127 16 bits 0x1000 ~ 34097 ~ Port Status 0x101F 34128 0x0000: Link down 0x0001: Link up 0xFFFF: No port Port 1 Status 1 word 16 bits 0x1000 34097 Port 2 Status 1 word 16 bits 0x1001 34098 EKI-9628G User Manual...
- Page 128 34124 Port 29 Sta- 1 word 16 bits 0x101C 34125 Port 30 Sta- 1 word 16 bits 0x101D 34126 Port 31 Sta- 1 word 16 bits 0x101E 34127 Port 32 Sta- 1 word 16 bits 0x101F 34128 EKI-9628G User Manual...
- Page 129 Speed Port 25 1 word 16 bits 0x1118 34377 Speed Port 26 1 word 16 bits 0x1119 34378 Speed Port 27 1 word 16 bits 0x111A 34379 Speed Port 28 1 word 16 bits 0x111B 34380 Speed EKI-9628G User Manual...
- Page 130 1 word 16 bits 0x1213 34628 Control Port 21 Flow 1 word 16 bits 0x1214 34629 Control Port 22 Flow 1 word 16 bits 0x1215 34630 Control Port 23 Flow 1 word 16 bits 0x1216 34631 Control EKI-9628G User Manual...
- Page 131 20 words 40 chars ASCII 0x14B4 35301 Description Port 11 20 words 40 chars ASCII 0x14C8 35321 Description Port 12 20 words 40 chars ASCII 0x14DC 35341 Description Port 13 20 words 40 chars ASCII 0x14F0 35361 Description EKI-9628G User Manual...
- Page 132 0x1703 35892 Up Counter Port 5 Link 1 word 16 bits 0x1704 35893 Up Counter Port 6 Link 1 word 16 bits 0x1705 35894 Up Counter Port 7 Link 1 word 16 bits 0x1706 35895 Up Counter EKI-9628G User Manual...
- Page 133 0x1800 ~ 36145 ~ PoE Voltage (V) 0x181F 36176 Ex: poe voltage = 5 Received MODBUS response: 0x0005 Port 1 PoE 1 word 16 bits 0x1800 36145 Voltage Port 2 PoE 1 word 16 bits 0x1801 36146 Voltage EKI-9628G User Manual...
- Page 134 1 word 16 bits 0x181B 36172 Voltage Port 29 PoE 1 word 16 bits 0x181C 36173 Voltage Port 30 PoE 1 word 16 bits 0x181D 36174 Voltage Port 31 PoE 1 word 16 bits 0x181E 36175 Voltage EKI-9628G User Manual...
- Page 135 1 word 16 bits 0x1836 36199 Current Port 24 PoE 1 word 16 bits 0x1837 36200 Current Port 25 PoE 1 word 16 bits 0x1838 36201 Current Port 26 PoE 1 word 16 bits 0x1839 36202 Current EKI-9628G User Manual...
- Page 136 1 word 16 bits 0x1851 36226 Power Port 19 PoE 1 word 16 bits 0x1852 36227 Power Port 20 PoE 1 word 16 bits 0x1853 36228 Power Port 21 PoE 1 word 16 bits 0x1854 36229 Power EKI-9628G User Manual...
- Page 137 1 word 16 bits 0x186B 36252 Temperature Port 13 PoE 1 word 16 bits 0x186C 36253 Temperature Port 14 PoE 1 word 16 bits 0x186D 36254 Temperature Port 15 PoE 1 word 16 bits 0x186E 36255 Temperature EKI-9628G User Manual...
- Page 138 4 words 64 bits 0x2010 38209 Packets Port 6 Tx 4 words 64 bits 0x2014 38213 Packets Port 7 Tx 4 words 64 bits 0x2018 38217 Packets Port 8 Tx 4 words 64 bits 0x201C 38221 Packets EKI-9628G User Manual...
- Page 139 Ex: port 1 Rx Packet Amount = 11223344 Received MODBUS response: 0xAB4130 Word 0 = 0x0000 Word 1 = 0x0000 Word 2 = 0x00AB Word 3 = 0x4130 Port 1 Rx 4 words 64 bits 0x2100 38449 Packets EKI-9628G User Manual...
- Page 140 4 words 64 bits 0x2168 38553 Packets Port 28 Rx 4 words 64 bits 0x216C 38557 Packets Port 29 Rx 4 words 64 bits 0x2170 38561 Packets Port 30 Rx 4 words 64 bits 0x2174 38565 Packets EKI-9628G User Manual...
- Page 141 0x2228 38745 Error Packets Port 22 Tx 2 words 32 bits 0x222A 38747 Error Packets Port 23 Tx 2 words 32 bits 0x222C 38749 Error Packets Port 24 Tx 2 words 32 bits 0x222E 38751 Error Packets EKI-9628G User Manual...
- Page 142 0x231C 38989 Error Packets Port 16 Rx 2 words 32 bits 0x231E 38991 Error Packets Port 17 Rx 2 words 32 bits 0x2320 38993 Error Packets Port 18 Rx 2 words 32 bits 0x2322 38995 Error Packets EKI-9628G User Manual...
- Page 143 0x2338 39017 Error Packets Port 30 Rx 2 words 32 bits 0x233A 39019 Error Packets Port 31 Rx 2 words 32 bits 0x233C 39021 Error Packets Port 32 Rx 2 words 32 bits 0x233E 39023 Error Packets EKI-9628G User Manual...
- Page 144 EKI-9628G User Manual...
- Page 145 EKI-9628G User Manual...
-
Page 146: Troubleshooting
Chapter Troubleshooting... -
Page 147: Troubleshooting
If the LED indicators are normal and the connected cables are correct but pack- ets still cannot be transmitted, please check the user system's Ethernet device configuration or status. EKI-9628G User Manual... - Page 148 No part of this publication may be reproduced in any form or by any means, electronic, photocopying, recording or otherwise, without prior written permis- sion of the publisher. All brand and product names are trademarks or registered trademarks of their respective companies. © Advantech Co., Ltd. 2007...
Need help?
Do you have a question about the EKI-9628G and is the answer not in the manual?
Questions and answers