Hologic ThinPrep 5000 Operator's Manual
Processor
Hide thumbs
Also See for ThinPrep 5000:
- Instruction manual (27 pages) ,
- Operator's manual (346 pages) ,
- Quick reference manual (2 pages)
Table of Contents
Advertisement
Quick Links
Advertisement
Chapters
Table of Contents
Troubleshooting

Subscribe to Our Youtube Channel
Related Manuals for Hologic ThinPrep 5000


Summary of Contents for Hologic ThinPrep 5000
- Page 1 ThinPrep 5000 Processor ® Operator’s Manual...
- Page 2 ThinPrep 5000 Processor ® Operator’s Manual Hologic, Inc. 250 Campus Drive Marlborough, MA 01752 USA Tel: 1-800-442-9892 1-508-263-2900 Fax: 1-508-229-2795 web: www.hologic.com For Use with Version 2.x.y Software MAN-02203-001...
- Page 3 ThinPrep 5000 processor. Preparation of microscope slides using the ThinPrep 5000 processor should be performed only by personnel who have been trained by Hologic or by organizations or individuals designated by Hologic.
- Page 5 ® ThinPrep 5000 Processor Instructions for Use MAN-04008-001 Rev.
- Page 6 At the laboratory, the PreservCyt sample vial is barcoded along with the test request form to establish a sample chain of custody and is placed into a ThinPrep 5000 processor. A glass slide bearing the same sample identification number as on the sample vial is loaded into the processor. A gentle dispersion step mixes the cell sample by currents in the fluid that are strong enough to separate debris and disperse mucus, but gentle enough to have no adverse effect on cell appearance.
- Page 7 The PreservCyt Solution component of the ThinPrep 5000 system is also an alternative collection and transport medium for gynecologic specimens tested with the Roche Diagnostics COBAS AMPLICOR CT/NG assay. Refer to Hologic’s labeling (Document #MAN-02063-001) for instructions for using PreservCyt Solution for collection, transport, storage, and preparation of specimens and to the Roche Diagnostics COBAS AMPLICOR CT/NG package insert for instructions for use of that system.
- Page 8 Supplies used by the ThinPrep 5000 processor are those designed and supplied by Hologic specifically for the ThinPrep 5000 processor. These include PreservCyt Solution vials, ThinPrep Pap test filters, and ThinPrep microscope slides. These supplies are required for proper performance of the system and cannot be substituted.
- Page 9 ThinPrep 5000 processor are predicated on those of the ThinPrep 2000 system. Both the clinical studies for the ThinPrep 2000 system and those comparing the ThinPrep 5000 processor to the ThinPrep 2000 are described in the following sections.
- Page 10 Pap smear slides were examined and diagnosed independently. Reporting forms containing patient history as well as a checklist of all possible categories of The Bethesda System were used to record the results of the screening. A single independent pathologist reviewed all discrepant and positive slides from all sites in a blinded fashion to provide a further objective review of the results.
-
Page 11: Table Of Contents
Table 2: Diagnostic Classification Table, All Categories Conventional NEG ASCUS AGUS LSIL HSIL SQ CA GL CA TOTAL 5224 5593 ThinPrep ASCUS AGUS LSIL HSIL SQ CA GL CA ... -
Page 12: Ascus
Table 5: Two Category Diagnostic Classification Table, ASCUS/AGUS and More Severe Diagnoses Conventional ASCUS/AGUS+ TOTAL ThinPrep 5224 5593 ASCUS/ 1154 AGUS+ TOTAL 5680 1067 6747 The diagnostic data analysis from the sites is summarized in Table 6 and 7. -
Page 13: Lsil
Table 7: Results by Site, ASCUS/AGUS and More Severe Lesions ThinPrep Increased Method Convent. Site Cases p-Value ASCUS+ ASCUS+ Detection* Favored 1,336 0.067 Neither 1,563 <0.001 ThinPrep 1,058 <0.001 ThinPrep 0.007 ThinPrep 1,010 (8%) 0.360 Neither (9%) 0.102 Neither... - Page 14 Table 8: Independent Pathologist Results by Site, LSIL and More Severe Lesions Cases Site ThinPrep Conventional Method Positive by p-Value Independent Positive Positive Favored Pathologist 0.170 Neither ...
- Page 15 Table 10 below shows the summary for all sites of the descriptive diagnosis for all Bethesda System categories. Table 10: Summary of Descriptive Diagnosis Descriptive Diagnosis ThinPrep Conventional Number of Patients: 6747 Benign Cellular Changes: 1592 23.6 1591...
- Page 16 Table 11 shows the rates of detection for infection, reactive changes, and the total benign ® cellular changes for both the ThinPrep and conventional methods at all sites. Table 11: Benign Cellular Changes Results ThinPrep Conventional ...
- Page 17 Table 12: Summary of Specimen Adequacy Results Specimen Adequacy ThinPrep Conventional Number of Patients: 7223 Satisfactory 5656 78.3 5101 70.6 Satisfactory for Evaluation 1431 19.8 2008 27.8 but Limited by: Air-Drying Artifact Thick Smear ...
- Page 18 Table 14: Specimen Adequacy Results by Site ThinPrep Convent. ThinPrep Convent. ThinPrep Convent. Site Cases SBLB SBLB UNSAT UNSAT Cases Cases Cases Cases Cases Cases 1,386 1092 1178 1,668 1530 1477 1,093 1,046 1,049 All Sites 7,223 5656 5101...
-
Page 19: Hsil
Direct-to-Vial HSIL+ Study Following initial FDA approval of the ThinPrep system, Hologic conducted a multi-site direct-to- vial clinical study to evaluate the ThinPrep 2000 system versus conventional Pap smear for the detection of High Grade Squamous Intraepithelial and more severe lesions (HSIL+). Two types of patient groups were enrolled in the trial from ten (10) leading academic hospitals in major metropolitan areas throughout the United States. - Page 20 6 weeks of specimen collection. All study specimens were processed both on a ThinPrep 5000 processor and a ThinPrep 2000 system. The order in which the slides were processed was alternated in blocks of 20. All slides were stained, coverslipped, and read manually following standard laboratory procedures;...
-
Page 21: Total
Reference Diagnosis by Adjudication Review After all slides in the study were reviewed, all ThinPrep 2000 and ThinPrep 5000 slides were subject to an adjudication review. Adjudication was done at a facility that was not one of the study sites conducting the study. -
Page 22: Lsil
Tables 20 through 23 present the comparison of Laboratory true positive and negative rates for ASC-US+, LSIL+, ASC-H+, and HSIL+. Table 20: Laboratory ThinPrep 5000 Results vs Laboratory ThinPrep 2000 Results for the Specimens with Reference Diagnosis of ASC-US+ In the study, there were 530 specimens with Reference Diagnosis of ASC-US+ (combined ASC-US, AGUS, LSIL, ASC-H, HSIL, and Cancer) and 696 specimens with Reference Diagnosis of NILM. - Page 23 Table 22: Laboratory ThinPrep 5000 Results vs Laboratory ThinPrep 2000 Results for the Specimens with Reference Diagnosis of ASC-H+ In the study, there were 185 specimens with Reference Diagnosis of ASC-H+ (combined ASC-H, HSIL, and Cancer) and 1,041 specimens with Reference Diagnosis of (combined NILM, ASC-US/AGUS, and LSIL).
-
Page 24: Total
The following tables indicate the extent to which the laboratory cytotechnologists / pathologists at a given site agreed amongst themselves on the diagnosis, comparing the ThinPrep 5000 processor to the ThinPrep 2000 system. Tables are provided for ASC-US+ and ASC-H+. - Page 25 The rate of agreement between the ThinPrep 5000 result and the ThinPrep 2000 result from the previous table is presented below. PPA is the positive percent agreement, percent of specimens of ASC-H+ diagnosis with ThinPrep 5000 slides by a majority of laboratory CT/Pathologists among all specimens of ASC-H+ diagnosis with ThinPrep 2000 slides by a majority of laboratory CT/Pathologists.
- Page 26 The rate of agreement between the ThinPrep 5000 result and the ThinPrep 2000 result from the previous table is presented below. PPA is the positive percent agreement, percent of specimens of ASC-US+ diagnosis with ThinPrep 5000 slides by a majority of laboratory CT/Pathologists among all specimens of ASC-US+ diagnosis with ThinPrep 2000 slides by a majority of laboratory CT/Pathologists.
- Page 27 Within-Instrument Precision The study was designed to examine the ability of the ThinPrep 5000 system to prepare reproducible slides from the same patient specimen using the same instrument. A total of 80 specimens were enrolled in the study. Each specimen was split into three portions and processed on three separate runs of one instrument.
- Page 28 Two hundred ten (210) specimens were enrolled in the study (139 NILM, 28 ASC-US, 28 LSIL, and 15 HSIL). Each specimen was split into two parts, processed on a ThinPrep 2000 and ThinPrep 5000 system, then stained and coverslipped. All slides were run on a ThinPrep Imaging System to obtain Imager object count data, which has been demonstrated to correlate closely with cytotechnologist cell count estimates.
- Page 29 Considering the technological similarity to the ThinPrep 2000 system and the comparative clinical and analytical study results, it is concluded that the ThinPrep 5000 processor is similar to the ThinPrep 2000 processor and may be used as a replacement for the conventional Pap smear method for the detection of atypical cells, cervical cancer, or its precursor lesions, as well as all other cytologic categories as defined by The Bethesda System.
- Page 30 MATERIALS REQUIRED Materials Provided ThinPrep 5000 Processor ThinPrep 5000 processor instrument ThinPrep 5000 Processor Operator’s Manual Fixative baths with evaporation covers (3) Carousel (1) Waste bottle assembly - includes bottle, bottle cap, tubing set, fittings, waste filter ...
- Page 31 Liquid-based, thin-layer preparation vs. conventional Pap smear. Acta Cytol 2002; 46: 453-7 TECHNICAL SERVICE AND PRODUCT INFORMATION For technical service and assistance related to use of the ThinPrep 5000 processor, contact Hologic: Telephone: 1-800-442-9892 Fax: 1-508-229-2795 For international or toll-free blocked calls, please contact 1-508-263-2900.
- Page 33 SECTION F: Connect the Waste Bottle ........2.3 SECTION G: Connect Power to the System.........2.4 SECTION H: Turn on the ThinPrep 5000 Processor....2.4 SECTION I: Set User Preferences..........2.5 SECTION J: Turn Off the ThinPrep 5000 Processor ....2.6 Chapter Three ® ®...
- Page 34 SECTION D: Administrative Options ........6.15 Chapter Seven OPERATING INSTRUCTIONS SECTION A: Introduction ..............7.1 SECTION B: Material Requirements ..........7.1 SECTION C: Labeling the Sample Vials and Slides ....7.3 SECTION D: Load the ThinPrep 5000 Processor ......7.6 ® ThinPrep 5000 Processor Operator’s Manual...
- Page 35 SECTION F: Initiate a Batch ............7.11 SECTION G: Processing Slides ............7.12 SECTION H: Pause a Batch ............7.15 SECTION I: Batch Complete ............7.16 SECTION J: Unload the ThinPrep 5000 Processor ....7.17 SECTION K: Optional Instructions for Ancillary Testing ..7.18 Chapter Eight MAINTENANCE SECTION A: Daily ................8.1...
- Page 36 ONTENTS SECTION C: Recommended Staining Guidelines ....10.2 SECTION D: Coverslipping ............10.4 Chapter Eleven ® THINPREP PAP TEST TRAINING PROGRAM SECTION A: Objective ..............11.1 SECTION B: Design ..............11.1 SECTION C: Bibliography ............11.2 Chapter Twelve SERVICE INFORMATION 12.1 Chapter Thirteen ORDERING INFORMATION 13.1 Index ®...
-
Page 38: Chapter One
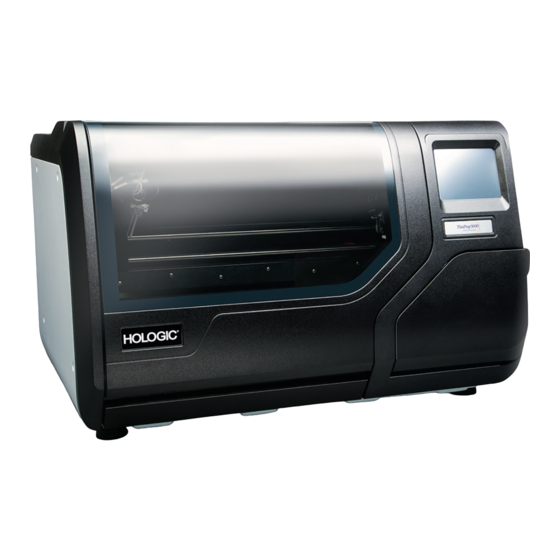
Each batch may contain only one type of specimen (all gynecologic or all non-gynecologic or all UroCyte). The system accommodates up to 20 samples per batch. Figure 1-1 A ThinPrep 5000 Processor The instructions for using the ThinPrep 5000 processor are the same regardless of the instru- Note: ment color. - Page 39 At the laboratory, matching barcoded labels are applied to the sample vial, microscope slide and accompanying test request form. The sample vial is then placed in a sample vial carousel and loaded into the ThinPrep 5000 processor. (Refer to Figure 1-2.) During the slide preparation process, a gentle dispersion step breaks up blood, mucus and non-diagnostic debris and thoroughly mixes the cell sample.
- Page 40 Hologic. • Supplies used in the ThinPrep 5000 processor are those designed and supplied by Hologic specifically for the ThinPrep 5000 processor. These include PreservCyt Solution vials, ThinPrep Pap test filters, and ThinPrep microscope slides. These supplies are required for proper performance of the system and cannot be substituted.
- Page 41 • Chlamydia trachomatis and Neisseria gonorrhoeae testing using Hologic’s APTIMA COMBO 2 CT/NG assay and the Roche Diagnostics COBAS AMPLICOR assay should not be performed on a sample that has already been processed using the ThinPrep 5000 processor. Warnings •...
- Page 42 20 samples per batch. Loading fewer than 20 samples is acceptable. The carousel is placed into the ThinPrep 5000 processor. A fixative bath containing a staining rack and fixative alcohol is placed into the output compartment. The filter waste bin is emptied, if necessary.
- Page 43 Filter waste bin Input carousel staining rack Figure 1-3 ThinPrep 5000 Processor Components Overview of Processing For routine batch processing, the ThinPrep 5000 processor proceeds in this fashion once the batch is started: • Check the vial and slide IDs •...
-
Page 44: Thinprep 5000 Processor
The following items are included when the ThinPrep 5000 processor is delivered for installation. (These items may vary according to your order.) • ThinPrep 5000 processor • ThinPrep 5000 Processor Operator’s Manual • Power cord • Waste bottle with tubing harness and transport cover •... -
Page 45: Section B: Technical Specifications
NTRODUCTION SECTION TECHNICAL SPECIFICATIONS Overview of Components ® ThinPrep 5000 processor Waste bottle ThinPrep filter ThinPrep microscope slide Sample in PreservCyt Solution vials Input carousel Fixative bath with Filter waste bin staining rack Main door (Input door) Slide transport arm Touch screen Filter/vial transport arm Bath door... - Page 46 Waste bottle: 17 inches (43 cm) high x 6 inches (15 cm) diameter Clearances 40 inches (102 cm) high 36 inches (92 cm) deep 40 inches (102 cm) wide Figure 1-5 ThinPrep 5000 Processor Clearances Shown with Top Service Lid Open Environmental Operating temperature 16–32°C 60–90°F Operating humidity 20%–80% RH, non-condensing Non-operating temperature -28°C–50°C...
- Page 47 ThinPrep 5000 processor. Safety, EMI and EMC Standards The ThinPrep 5000 processor has been tested and certified by a U.S. nationally recognized testing Laboratory (NRTL) to comply with current Safety, Electro-Magnetic Interference (EMI) and Electro- Magnetic Compatibility (EMC) standards.
-
Page 48: Section C: Internal Quality Control
SECTION THINPREP 5000 HAZARDS The ThinPrep 5000 processor is intended to be operated in the manner specified in this manual. Be sure to review and understand the information listed below in order to avoid harm to operators and/or damage to the instrument. - Page 49 Attention, refer to accompanying documents Fuse Waste Electrical and Electronic Equipment. Do not dispose in municipal waste. Contact Hologic for disposal of the instrument. In vitro diagnostic medical device Power Switch On Power Switch Off Manufacturer Authorized representative in the...
- Page 50 Consult documents (waste bottle full) Figure 1-8 Right Side of Processor and Waste Bottle Warnings Used in this Manual: WARNING Service Installation Only This system is to be installed by trained Hologic personnel only. 1.13 ® ThinPrep 5000 Processor Operator’s Manual...
- Page 51 NTRODUCTION WARNING Moving Parts The processor contains moving parts. Keep hands, hair, loose clothing, jewelry, etc., clear. Do not operate with the doors open. WARNING Grounded Outlet To ensure safe operation of the equipment, use a three-wire grounded outlet. Disconnection from the power source is by removal of the power cord.
- Page 52 NTRODUCTION WARNING Instrument Fusing For continued protection against fire, replace only with fuses of the specified type and current rating. Refer to the Maintenance chapter for instructions on replacing user accessible fuses. Refer to Ordering Information for fuse specification and ordering. WARNING Do not process a cerebrospinal fluid (CSF) specimen or other sample type that is suspected of possessing prion infectivity (PrPsc) derived from a person with a TSE, such as Creutzfeldt-Jakob...
-
Page 53: Section E: Disposal
NTRODUCTION SECTION DISPOSAL Disposal of Consumable Items CAUTION: All disposables are for single use only and should not be reused. ® • PreservCyt Solution. Follow local, state, provincial and federal or county guidelines. Dispose of all solvents as hazardous waste. ®... - Page 54 1-508-229-2795 Web: www.hologic.com Safety Data Sheet CytoLyt Solution; PreservCyt Solution: The Safety Data Sheet (SDS) for these solutions may be requested from Hologic Technical Support, or found online at www.hologicsds.com. For other reagents, refer to the manufacturer’s SDS. 1.17 ®...
- Page 55 NTRODUCTION This page intentionally left blank. 1.18 ® ThinPrep 5000 Processor Operator’s Manual...
-
Page 57: Chapter Two
Location Locate the ThinPrep 5000 processor near (within 3 meters) a three-wire grounded power outlet that is free of voltage fluctuations and power surges. The processor will be connected to a UPS (uninterruptible power supply), which will be plugged into the electrical outlet. -
Page 58: Section D: Moving The Thinprep 5000 Processor
During operation the ThinPrep 5000 processor is sensitive to vibrations. It should be placed on a flat, sturdy surface that can support the 185 lbs (84 kg) that it weighs. It should be placed away from any vibrating equipment. -
Page 59: Section E: Storage And Handling Post Installation
CAUTION: At no time should bleach be present in the waste bottle while it is connected to the ThinPrep 5000 processor. 1. The waste bottle should be placed at the same height or below the ThinPrep 5000 processor. Do not place the waste bottle above the instrument. -
Page 60: Section G: Connect Power To The System
Figure 2-3 Rear of ThinPrep 5000 Processor SECTION TURN ON THE THINPREP 5000 PROCESSOR CAUTION: Do not power on the processor while a USB key is in any of the USB ports. See Figure 2-3 and Figure 2-4 for USB port locations. - Page 61 The pump/compressor will be heard to energize and the mechanisms will move and then position for access. The doors will unlock. The ThinPrep 5000 processor is intended to be left on. For shutdown or extended shutdown, Note: see page 2.6.
-
Page 62: Section J: Turn Off The Thinprep 5000 Processor
NSTALLATION SECTION TURN OFF THE THINPREP 5000 PROCESSOR Normal Shutdown CAUTION: Never turn off power to the instrument without first quitting the application via the user interface. If the instrument is to be turned off, it must be in an idle state. If a batch is in progress, either let it finish, or stop the batch. -
Page 64: Chapter Three
Packaging Please refer to the Ordering Information in this manual for part numbers and detailed information regarding the ordering of solutions and supplies for the ThinPrep 5000 processor. • Vials (20 mL) of PreservCyt Solution are contained in each ThinPrep Pap test. - Page 65 ® & C ® S RESERV OLUTIONS Refer to “OPTIONAL INSTRUCTIONS FOR ANCILLARY TESTING” on page 7.18 Note: for instructions for aliquot removal for ancillary testing prior to running the ThinPrep Pap test. ® • Storage requirements for quantities of PreservCyt Solution are dependent on local regulations regarding the size and configuration of your facility.
- Page 66 ® & C ® S RESERV OLUTIONS Handling/Disposal Handle all chemical-containing materials carefully in accordance with safe laboratory practices. When required by reagent composition, additional precautions are marked on the reagent containers or in the instructions for use. ® Dispose of PreservCyt Solution according to the guidelines for disposing of hazardous waste.
-
Page 67: Section B: Cytolyt Solution
® & C ® S RESERV OLUTIONS SECTION CYTOLYT ® SOLUTION CytoLyt Solution is a methanol-based, buffered, preservative solution designed to lyse red blood cells, prevent protein precipitation, dissolve mucus, and preserve morphology of general cytology samples. It is intended as a transportation medium and is used in specimen preparation prior to processing. - Page 68 ® & C ® S RESERV OLUTIONS Handling/Disposal Handle all chemical-containing materials carefully in accordance with safe laboratory practices. Safety Data Sheet The SDS for CytoLyt Solution is included in the packaging of the product. It may also be accessed at www.hologicsds.com.
- Page 69 ® & C ® S RESERV OLUTIONS This page intentionally left blank. ® ThinPrep 5000 Processor Operator’s Manual...
- Page 70 Solution classifications: PreservCyt – Class IC; CytoLyt – Class II; CellFyx – Class IB This information is Hologic’s summary of the various regulations. To view the codes in their entirety, please refer to NFPA 30 and NFPA 45. A Liquid Warehouse shall have a sprinkler system that complies with the appropriate system indicated in NFPA 30.
- Page 71 ThinPrep® Solutions Storage Guide Allowable quantities in a warehouse can be increased with a sprinkler system rated higher than standard systems. (10) A Liquid Warehouse is a separate, detached building or attached building used for warehousing-type operations for liquids. (11) Quantities are permitted to be increased 100% where stored in approved flammable liquids storage cabinets.
- Page 72 Exempt specimens: Specimens that with the minimal likelihood that pathogens are present (fixed tissue, etc.) * These instructions are Hologic’s interpretation of the various regulations as of the effective date. However, Hologic will not be responsible for any non-conformance to the actual regulations.
- Page 73 Shipping Requirements Category B or Exempt – Ambient Temperature: 1. Packaging must consist of three components a. a primary receptacle, leak proof b. secondary packaging, leak proof c. a rigid outer packaging NOTES: FedEx will not accept clinical samples or diagnostic specimens packaged in FedEx envelopes, FedEx tubes, FedEx Paks, or FedEx Boxes, Styrofoam boxes, plastic bags, or paper envelopes.
- Page 74 10. If using FedEx, the FedEx USA Airbill, Section 6, Special Handling must be completed with dangerous goods/dry ice information: Does this shipment contain dangerous goods? YES- Shipper’s Declaration not required 11. The outer container of all diagnostic/clinical specimen packages must display the following: a.
- Page 75 Notes: ® ™ ThinPrep PreservCyt Solution is classified as a Class 3 Flammable liquid, assigned to Packing Group III (PG III). ® ™ 49 CFR 173.150 (Limited Quantities) allows ThinPrep PreservCyt Solution in vials to be shipped in Limited Quantities when shipped via ground transportation in a sturdy box. The total volume in a package cannot exceed 5 liters or weigh more than 30 kg (66 lbs).
- Page 76 4. Single packages containing more than sixty (60) liters (3000-vials) of total product must be clearly marked “FOR CARGO AIRCRAFT ONLY”. 5. The vials must be shipped in United Nations (UN) certified 4G packaging for any quantity in ® ™ an aircraft.
- Page 77 1. Do not include “Ltd Qty” in the wording on the package or on the Shipping papers as indicated in c and d above. 2. Affix both a Class 3 “Flammable Liquid” label and a secondary Class 6.1 “Toxic” label to the package adjacent to the markings.
- Page 78 ™ ® ThinPrep CytoLyt Solution has a flash point of 109° F. For domestic ground transportation only, a flammable liquid with a flashpoint at or above 100° F that does not meet the definition of any other ™ ® hazard class may be reclassed as a combustible liquid. As such, ThinPrep CytoLyt Solution, shipped via ground, is exempt from the requirements of the DOT Hazardous Materials Regulations.
-
Page 80: Chapter Four
YNECOLOGIC AMPLE REPARATION C h a p t e r F o u r Gynecologic Sample Preparation SECTION GYNECOLOGIC SAMPLE PREPARATION Includes cell samples from the ectocervix and the endocervix. ® 1. Collection: Deposit the specimen directly into a PreservCyt Solution vial. -
Page 81: Section B: Collection Preparation
YNECOLOGIC AMPLE REPARATION SECTION COLLECTION PREPARATION ThinPrep ® Collection Techniques The detection of cervical cancer and its precursors as well as other gynecologic abnormalities is the primary purpose of obtaining a cervical cell sample. The following guidelines are referenced from CLSI Document GP15-A3 and are recommended in the collection process for obtaining a ThinPrep Pap test (TPPT) specimen. -
Page 82: Section C: Specimen Collection
YNECOLOGIC AMPLE REPARATION SECTION SPECIMEN COLLECTION Collect Gynecologic Sample Using the Broom-Like Device Physician/clinician instructions for collecting gynecologic samples. 1. Obtain an adequate sampling from the cervix using a broom-like device. Insert the central bristles of the broom into the endocervical canal deep enough to allow the shorter bristles to fully contact the ectocervix. - Page 83 YNECOLOGIC AMPLE REPARATION Collect Gynecologic Sample, Using the Endocervical Brush/Spatula Device Physician/clinician instructions for collecting gynecologic samples. 1. Obtain an adequate sampling from the ectocervix using a plastic spatula. ® 2. Rinse the spatula as quickly as possible into the PreservCyt Solution vial by swirling the spatula vigorously in the vial 10 times.
-
Page 84: Section D: Special Precautions
The Clinical and Laboratory Standard Institute Guidelines and ACOG recommend that you not take a Pap during menses. For samples to be processed on the ThinPrep 5000 processor, lubricants can adhere to the filter membrane and may cause poor cell transfer to the slide. If its use is unavoidable, the lubricant should be used in minimum amounts. -
Page 85: Section E: Sample Processing Troubleshooting
YNECOLOGIC AMPLE REPARATION Dispose of PreservCyt Solution according to your guidelines for disposing of hazardous waste. PreservCyt Solution contains methanol. SECTION SAMPLE PROCESSING TROUBLESHOOTING ® Reprocessing a ThinPrep Pap Test Sample Vial Following an Unsatisfactory Result ® Laboratory personnel may reprocess ThinPrep Pap test specimens where slides have been interpreted as inadequate (“Unsatisfactory for Evaluation”) for diagnosis following cytotechnologist screening. - Page 86 YNECOLOGIC AMPLE REPARATION 4 a. Carefully pour off the supernatant from the centrifuge tube to avoid loss of cells. Dispose of according to local regulations. b. Vortex the centrifuge tube briefly. ® c. Pour 30 mL of the CytoLyt Solution and 10% glacial acetic acid mixture into the centrifuge tube and cap securely.
- Page 87 YNECOLOGIC AMPLE REPARATION This page intentionally left blank. ® ThinPrep 5000 Processor Operator’s Manual...
-
Page 89: Chapter Five
YNECOLOGIC AMPLE REPARATION C h a p t e r F i v e Non-Gynecologic Sample Preparation SECTION INTRODUCTION This chapter provides instructions for preparing non-gynecologic (non-gyn) samples and making ® slides with the ThinPrep 5000 processor. For the best results, carefully follow the instructions in this chapter. Because there is biological variability among samples and variability in collection methods, standard processing may not always yield a satisfactory and uniformly distributed preparation on the first slide. - Page 90 • ThinPrep UroCyte PreservCyt vials for the Vysis UroVysion assay urine specimens • ThinPrep microscope slides • ThinPrep 5000 processor • Vortexor Refer to the Ordering Information in this manual for more information about supplies and Note: solutions from Hologic.
- Page 91 ® CytoLyt Solution. There are preferred collection methods for different sample types. This section will describe the Hologic-recommended procedure as well as alternate collection methods. WARNING: For washes and lavages, do not expose the patient to CytoLyt Solution. Fine Needle Aspirate Specimens The optimal collection technique for FNAs is to deposit and rinse the entire sample into a centrifuge tube containing 30 mL of CytoLyt Solution.
- Page 92 ThinPrep 5000 processor. These solutions are primarily used as media for washings or lavages which contact the patient. Non-Recommended Collection Media Hologic does not recommend the use of the following collection solutions with the ThinPrep 5000 processor. Use of these solutions will produce sub-optimal results: •...
-
Page 93: Section D: General Steps For Sample Preparation
YNECOLOGIC AMPLE REPARATION • • Solutions containing formalin ® ® Specimens must be centrifuged and washed in CytoLyt Solution and transferred to PreservCyt ® Solution prior to being processed on the ThinPrep 5000 processor. Refer to page 5.12 for CytoLyt Solution wash instructions. See Chapter 3, PreservCyt®... - Page 94 YNECOLOGIC AMPLE REPARATION Figure 5-1 Measuring the Centrifuge Find the radius of your centrifuge in the first column of Figure 5-2. Draw a line from the radius value through the 600 Gravities (g) column and into the rpm column. Read the rpm value from the straight edge as shown in Figure 5-2.
- Page 95 YNECOLOGIC AMPLE REPARATION Figure 5-2 Determining the Correct Centrifuge Speed To reduce the time required for the centrifugation step, operate your centrifuge at 1200g for 5 minutes. POUR OFF SUPERNATANT AND VORTEX TO RESUSPEND CELL PELLET Pour off the supernatant completely to effectively concentrate the sample. To do this, invert the centrifuge tube 180 degrees in one smooth movement, pour off all the supernatant, and then return the tube to its original position as shown in Figure 5-3.
- Page 96 YNECOLOGIC AMPLE REPARATION CAUTION: Failure to completely pour off the supernatant may produce a sparse sample and an unsatisfactory slide due to dilution of the cell pellet. START Figure 5-3 Pouring Off Supernatant After pouring off the supernatant, place the centrifuge tube onto a vortexor and agitate the cell pellet for 3 seconds.
- Page 97 YNECOLOGIC AMPLE REPARATION EVALUATE CELL PELLET APPEARANCE Appearance of Cell Pellet Procedure Cell pellet is white, pale pink, tan, or ® Add specimen to PreservCyt Solution vial. not visible. See page 5.10 in this chapter. Cell pellet is distinctly red or brown ®...
- Page 98 Factors to Consider The type of pipette that you use may affect the concentration of the sample that is added to the PreservCyt Solution vial, and therefore may affect the volume of sample. Hologic recommends using standard, 1 mL, graduated, plastic pipettes.
- Page 99 For more information on PreservCyt Solution, refer to Chapter 3, PreservCyt® & CytoLyt® Solutions. RUN ON THINPREP 5000 PROCESSOR USING SEQUENCE NON-GYN. FIX, STAIN, AND EVALUATE. After the sample has been in contact with PreservCyt Solution for 15 minutes, it ®...
- Page 100 YNECOLOGIC AMPLE REPARATION CYTOLYT SOLUTION WASH MUCOID ONLY ® Addition of CytoLyt Solution to cell pellets is required to wash the sample. A CytoLyt Solution Wash performs the following functions while preserving cellular morphology: • Lyse red blood cells • Dissolve mucus •...
-
Page 101: Section E: Specimen Preparation Guidelines
YNECOLOGIC AMPLE REPARATION SECTION SPECIMEN PREPARATION GUIDELINES The following guidelines outline the preferred methods for preparing the different types of specimens. The methods are described in general terms. For more detailed information about each step, refer to the description of the methods in Section D of this chapter. See Section F for troubleshooting sample preparation. - Page 102 YNECOLOGIC AMPLE REPARATION FINE NEEDLE ASPIRATES (FNA) ® 1. Collection: Collect sample directly into 30 mL of CytoLyt Solution. If specimen must be collected in an intravenous solution, use a balanced electrolyte solution. : If possible, flush the needle and syringe with a sterile Note anticoagulant solution prior to aspirating the sample.
- Page 103 YNECOLOGIC AMPLE REPARATION ® 7. Run on ThinPrep 5000 processor using Sequence Non-Gyn. Fix, stain, and evaluate. MUCOID SPECIMENS Mucoid specimens may include respiratory and gastrointestinal specimens. 1. Collection: Solution. OR ® Collect sample directly into 30 mL of CytoLyt Add 30 mL of CytoLyt Solution to the fresh specimen as soon as possible.
- Page 104 YNECOLOGIC AMPLE REPARATION 6. Add an appropriate amount of specimen (dependent on the size of the ® cell pellet) to PreservCyt Solution vial (page 5.10). 7. Allow to stand in PreservCyt Solution for 15 minutes (page 5.11). ® 8. Run on ThinPrep 5000 processor using Sequence Non-Gyn.
- Page 105 YNECOLOGIC AMPLE REPARATION BODY FLUIDS Body Fluids may include serous effusions, urinary and cerebrospinal fluids. 1. Collection: Collect body fluids fresh. ® : Fluids collected in CytoLyt Solution also require a CytoLyt Note Solution wash prior to instrument processing. : For extremely bloody fluids (i.e., pericardial), start with only Note 10 mL of fresh fluid.
- Page 106 YNECOLOGIC AMPLE REPARATION 7. Allow to stand in PreservCyt Solution for 15 minutes (page 5.11). ® 8. Run on ThinPrep 5000 processor using Sequence Non-Gyn. Fix, stain, and evaluate. 5.18 ® ThinPrep 5000 Processor Operator’s Manual...
- Page 107 YNECOLOGIC AMPLE REPARATION ® ® THINPREP UROCYTE SPECIMENS For use with Vysis UroVysion. If performing urine cytology, follow the BODY FLUIDS protocol. 1. Collection: Collect urine directly into the ThinPrep UroCyte Urine Collection Kit, OR process urine fresh. ® Fresh urine can be mixed with a 2:1 urine-to-PreservCyt Solution Note: ratio and stored for up to 48 hours before processing.
- Page 108 YNECOLOGIC AMPLE REPARATION ® 6. Add entire specimen to PreservCyt Solution vial (page 5.10). Allow to stand in PreservCyt Solution for 15 minutes. ® 7. Run on ThinPrep 5000 processor using Sequence UroCyte. Fix, stain, and evaluate cytology, OR perform the molecular diagnostic testing according to the manufacturer’s instructions for use.
- Page 109 YNECOLOGIC AMPLE REPARATION 4. Tightly secure blue cap on specimen cup to prevent leakage. (Keep turning for another 1/4 inch after you hear the audible click.) 5. Place cup and absorbent pads into biohazard bag. Tightly seal bag. 6. Store between 4 C and 30 C (39 F–86...
-
Page 110: Section F: Sample Preparation Troubleshooting
A sparse cell spot lacking in a cellular component and containing blood, protein, and debris. This type of slide may be accompanied by a “Sample Is Dilute” message. Satisfactory slide appearance is a matter of judgment and experience. Hologic recommends Note: that you check the quality of the slide after staining. - Page 111 1 mL of sample to a new PreservCyt lar material and/or Solution vial. Prepare slide using sequence white blood cells? Non-Gyn. If a halo is present on the new slide, call Hologic NO YES Technical Service. 1. Pour the contents of the PreservCyt sample vial C.
- Page 112 8. Add specimen to PreservCyt Solution vial (page 5.10). ® 9. Run on ThinPrep 5000 processor using Sequence Non-Gyn. Fix, stain, and evaluate. 10. If the new slide is sparse, call Hologic Technical Service (page 12.1). 5.24 ® ThinPrep 5000 Processor Operator’s Manual...
- Page 113 Sequence Non-Gyn. If a halo is present on the new slide, call NO YES Hologic Technical Service (page 12.1). 1. Pour the contents of the PreservCyt C. Is the slide sparse and sample vial into a centrifuge tube.
- Page 114 7. Run on ThinPrep 5000 processor using Sequence Non-Gyn. Fix, stain, and evaluate. 8. If the new slide is sparse, call Hologic Technical Support (page 12.1). Techniques Used in Troubleshooting Diluting the Sample 20 to 1 To dilute a sample suspended in PreservCyt Solution, add 1 mL of the sample that is suspended in PreservCyt Solution to a new PreservCyt Solution vial (20 mL).
-
Page 116: Chapter Six
NTERFACE C h a p t e r S i x User Interface This chapter provides detailed information on the user interface screens and how to use them to ® operate, troubleshoot and maintain the ThinPrep 5000 processor. The content found in this chapter: MAIN SCREEN, PROCESSOR IDLE . -
Page 117: Main Screen, Processor Idle
NTERFACE • Reports and Logs ....... 6.28 System Events ......6.29 Batch Reports . - Page 118 NTERFACE Table 6.1: Status Indicators CAROUSEL DOORS BATHS WASTE POWER Status OK, ready to Status OK, ready to Status OK, ready to Status OK, ready to process Status OK, ready to process process process process Carousel not One or both doors The system is running A fixative bath is not Press the icon to display a...
- Page 119 If a batch is in process, interrupt it and elect to end the batch. (Refer to page 6.10.) When the mechanisms have put all consumables away and the main screen displays, shut down the system according to the directions in section “TURN OFF THE THINPREP 5000 PROCESSOR” on page 2.6.
-
Page 120: Process Sequences
NTERFACE Process Sequences Prior to processing a batch, select the type of process sequence that will be run: gynecologic ® samples, non-gynecologic samples, UroCyte samples. The Advanced button is for specific batch options (described below). For running a batch of gynecologic specimens. ®... - Page 121 NTERFACE Advanced processing options Disable slide ID match Select which sample type is to be processed (must have appropriate filter & slide type loaded). Press OK to accept the setting and return to the main screen. Press to Cancel and return to the main screen.
- Page 122 NTERFACE Figure 6-4 Main Screen Showing Disable Slide ID Match Is Selected 9. Press the Start button to process the sample. When the sample has been processed, the system reverts to Slide ID Match ON. To process Note: another sample without the vial/slide ID match, repeat the steps above. Only one vial may be loaded into the carousel.
-
Page 123: Start Button
NTERFACE Multiple Slides per Vial allows you to run a non-gynecologic specimen and extract from 1 to 10 samples from the same vial. The system will bypass the fluid level too low check when processing multiple slides per vial. To process a sample: 1. -
Page 124: Section B: Main Screen, During Processing
NTERFACE MAIN SCREEN, DURING PROCESSING SECTION Processing When the Start button is pressed, the doors can be heard to lock. The main screen changes to display the batch status, a progress bar, the Admin Options button and a Pause button, as shown below. Processing header, indicating sample type... -
Page 125: Pause A Batch
NTERFACE Batch status Progress bar Sample error(s) Figure 6-9 Batch in Process Screen Pause a Batch Figure 6-10 Pause Button A batch may be paused by pressing the Pause button. When the Pause button is pressed, the system will complete processing the current vial and then pause. - Page 126 NTERFACE Interrupting Processing screen Batch Paused screen Administrative Options button - Operator access to system settings and reports Stop Processing button - the batch is over. Continue button continues with the batch in process. Figure 6-11 Processing Paused Screen While the batch is paused, only the baths area can be accessed.
-
Page 127: Batch Complete
NTERFACE Batch Complete When a batch has completed processing, the processor returns to an idle state, with a Batch Complete message on the screen. See Figure 6-12. The doors unlock. If an alarm sound has been set for batch completion, it will sound briefly. To view the batch report, press the Batch Report button. -
Page 128: Section C: Baths Screen
NTERFACE SECTION BATHS SCREEN Fixative bath position (8 total) Bath movement Fixative bath commands position during processing Bath door position for Done button, to loading or return to main removal screen Figure 6-13 Baths Screen Fixative Bath Status The baths compartment has room for eight fixative baths. The processor continuously monitors the status of each bath position. -
Page 129: Baths Movement Commands
NTERFACE Baths Movement Commands Move to Front - to move a fixative bath to the door, touch the position it occupies on the screen display. The system locks the door and moves the position in front of the door. When the door unlocks, it may be opened and the fixative bath removed. -
Page 130: Section D: Administrative Options
Disable the touch screen for cleaning • Empty the liquid waste bottle • Shut down the instrument • A Service button is available for Hologic service personnel usage and it is password- protected. System Settings 6.15 ® ThinPrep 5000 Processor Operator’s Manual... - Page 131 NTERFACE Instrument Name Date button button Lab Name button Time button Vial & Slide ID Sound button Pre-match button Alert Tones but- Language button Done - return to More settings, main screen shown below Install Printer button Select Labels format button LIS button More settings,...
-
Page 132: Set Date
NTERFACE Set date Date button shows current setting. Figure 6-17 Set Date Button To change the date (day, month or year) touch the up/down button for that field until the desired value is displayed. Press the Save Changes button to return to the System Settings screen. Press Cancel to cancel changes and revert to the previous setting. -
Page 133: Lab Name
NTERFACE To change the time (hour, minute, meridian), touch the up/down button for that field until the desired value is displayed. For the meridian, press the AM or PM button, as appropriate. Press the Save Changes button to save and return to the System Settings screen. See Figure 6-20. Depending on which language has been selected, the clock on the display may change from Note: 12 hour to 24 hour, to reflect customary usage. -
Page 134: Instrument Name
Figure 6-23 Instrument Name Button To enter or edit a name for the ThinPrep 5000 processor, press the Instrument Name button. Press the letter buttons to enter a name, up to 20 characters long. See Figure 6-24. To create a capital letter, press the Shift button and then press the letter. -
Page 135: Set Sound
NTERFACE Press the Save Changes button to save and return to the System Settings screen. Figure 6-24 Edit Instrument Name Screen Set sound Sound volume button shows current setting. Figure 6-25 Sound Volume Button Audible alert tones can be set to signal batch completion and error condition. The volume of the audible alert tones may be increased or decreased using the Sound setting. -
Page 136: Alert Tones
NTERFACE Sound volume Decrease Increase Done - Save setting adjustment Preview - Press this button to hear the sound at the and return to System Settings current volume. The button becomes a Stop button, screen which is pressed to cease the volume test. Figure 6-26 Sound Screen Press the -1 button repeatedly to decrease the volume. - Page 137 NTERFACE Having differentiated tones makes it easier to know if the instrument has completed a batch or needs attention. In a setting that might have multiple machines, the different tones can help identify them. Alert tones for batch completion Alert tones for an error condition Turn the option on, and then select a tone.
-
Page 138: Language
NTERFACE Language Language button shows the current setting. Figure 6-30 Language Button Press the Language button to select the language that is displayed on the user interface and on the reports. Cancel button to abort changes and return to List of languages System Settings available screen... -
Page 139: Install Printer
NTERFACE If Vial & Slide ID pre-match is selected the system will check the match between each vial/slide ID set in the carousel before beginning to process the batch. If any of the vial/slide IDs do not match, a dialog box appears, listing the carousel positions of the discrepant vial/slide IDs. -
Page 140: Label Format
NTERFACE If a network printer is installed as part of your system, this function will search the network for its presence and connect to it at the time of setup. If a printer is not installed, or is unavailable to the system, a message will display that a printer could not be found. - Page 141 NTERFACE Select OCR: Imager label format. The format is always numeric characters only, 7 digits over 7 digits. This must be used if slides are being processed for use on the ® ThinPrep Imaging System. Note that the corresponding vial ID bar- code must be in 1-D format.
- Page 142 NTERFACE OCR Imager format must be 14-digits long in two rows, 7 digits over 7 digits, with the patient ID being 11 digits and a 3-digit CRC at the end. The font must be 12 point OCR-A. Numbers only, no alpha characters.
-
Page 143: Lis (Laboratory Information System)
NTERFACE LIS (Laboratory Information System) LIS button shows the current setting. Figure 6-39 LIS Button If your system is equipped with the optional LIS interface, select whether batch reports are automatically sent to the server or not. See Figure 6-40. Select Yes in order to copy batch reports to the server. -
Page 144: System Events
NTERFACE • System Events - a log of all system errors excluding UPS power status events or sample preparation errors that do not interfere with the operation of the instrument. The record of errors is retained for three years; errors older than three years are purged. •... - Page 145 NTERFACE Event Codes button displays Instrument name an event code list List of system events: • Event ID • Date/Time • Usage Count (total of all Save to USB samples run to date) Print report (if optional printer is Done button - present) return to Reports and Logs screen...
-
Page 146: Batch Reports
NTERFACE Batch reports Figure 6-46 Batch Reports Button The system creates an individual batch report for each carousel processed in the system. A batch can be 1–20 samples in a carousel. A display will show a list of the reports generated for the last eight weeks, with the most recent at the top of the list. -
Page 147: Batch Report Printout
NTERFACE Batch Report Sample Status: Sequence Batch status OK = slide made Process summary Error = sample error, no slide Detail by position made Event = slide made, but needs attention (sample dilute for exam- ple) Done button to return to Reports display Figure 6-48 A Batch Report Display - Successful Batch Batch Report... - Page 148 NTERFACE • The serial number of the ThinPrep 5000 processor • The type of process sequence selected for the batch to run The batch report lists every vial encountered by the system and for each vial, lists: • The carousel position of the vial •...
-
Page 149: Save A Report To Usb Key
NTERFACE To close a report, press the Done button. The system will retain batch reports for eight weeks and then purge them from the database. Note: Should your lab require longer record retention, plan to print or down load the batch reports. Save a report to USB key Refer to Figure 2-4 for USB port locations. - Page 150 NTERFACE when the report is viewed or printed from any other source, it will look like the report seen on the T5000 interface. Batch report style sheet file Batch reports Error report style sheet file Error reports Usage report style sheet file Usage report Figure 6-52 Reports Saved to USB 6.35...
-
Page 151: Usage Details
Print report (if a USB key printer is installed) Figure 6-54 Usage Details Screen The usage details report keeps a tally of the number of slides created to date on the ThinPrep 5000 processor. The usage history report header identifies: •... -
Page 152: Gather Diagnostics
Figure 6-56 Gather Diagnostics Screen The instrument operating information will be gathered into a folder on the USB device titled T5000Logs. There will be three zipped files in the folder. These can be e-mailed to Hologic Technical Support. Clean Screen This is described in Chapter 8, Maintenance. -
Page 153: Empty Liquid Waste
NTERFACE Empty Liquid Waste This is described in Chapter 8, Maintenance. 6.38 ® ThinPrep 5000 Processor Operator’s Manual... -
Page 155: Chapter Seven
PERATING NSTRUCTIONS C h a p t e r S e v e n Operating Instructions SECTION INTRODUCTION Normal instrument operation consists of loading supplies, starting the batch and unloading the prepared slides and processed sample vials when the batch is complete. A batch report is generated at the completion of each batch. - Page 156 The ThinPrep microscope slide is a high-quality, pre-cleaned, glass microscope slide with a defined screening area and a large labeling area. The slide is designed specifically for use with the ThinPrep 5000 processor and depending on the process application there are three types of slides: •...
- Page 157 Hologic recommends Code 128, 1-D barcode symbology for the barcode label on the sample vial. The ThinPrep 5000 processor also supports Interleaved 2 of 5, Code 39 and Code 93 1-D barcode symbologies. No OCR vial label formats may be used. With an optional upgrade, the ThinPrep 5000 processor supports 2-D barcode labels on vials.
- Page 158 PERATING NSTRUCTIONS Torque tab features enables the processor to uncap/recap the vial Barcode label Frosted area indicates min./max. acceptable fluid level for processing (17 mL–21 mL) Figure 7-2 PreservCyt Solution Sample Vial Slide Labeling Requirements Slides must bear a label with an accession ID that matches the ID on the vial. (Refer to “Advanced processing options”...
- Page 159 PERATING NSTRUCTIONS ® Required slide label format for use with the ThinPrep Imaging System For ThinPrep Pap test slides that will subsequently be imaged by the ThinPrep Imaging System, slide labels must be in an OCR, 14 character, 7 digits-over-7 digits format, with the last 3 digits being a CRC number.
- Page 160 SECTION LOAD THE THINPREP 5000 PROCESSOR CAUTION: Prior to loading and operating the ThinPrep 5000 processor, please note that if ancil- lary testing is to be performed, read and understand the instructions in “OPTIONAL INSTRUCTIONS FOR ANCILLARY TESTING” on page 7.18.
- Page 161 PERATING NSTRUCTIONS Load filter into slot, open end Load labeled slide into slot with label facing outward. Load labeled vial into posi- tion. Figure 7-6 Load Carousel with Vials, Slides and Filters The filters, slides and vials can be loaded in any order that is convenient for loading (filters Note: then slides then vials), as long as the patient ID labels match up.
- Page 162 PERATING NSTRUCTIONS Figure 7-8 Load Carousel into the Processor Load Alcohol Fixative Bath into the Bath Compartment When filling the fixative bath tubs, place an empty staining rack into the fixative bath receptacle. Orient the rack so that the embossed words on the side that read “UP SIDE” face the handle of the bath.
- Page 163 PERATING NSTRUCTIONS “UP SIDE” faces bath handle Fill bath with alcohol up to here Figure 7-9 Fixative Bath and Staining Rack Open the door to the bath compartment and slide the bath container into the slot until it stops. Filter waste Slide fixative bath into the processor...
-
Page 164: Section E: Select The Sample Processing Sequence
PERATING NSTRUCTIONS SECTION SELECT THE SAMPLE PROCESSING SEQUENCE Select the desired processing sequence for the batch. Figure 7-11 Sample Processing Sequence Gyn for running a batch of gynecologic samples Non-Gyn for running a batch of non-gynecologic samples ® UroCyte for use with urine in the Vysis UroVysion assay Advanced enables selection of: Disable Slide ID Match, which allows one sample to be run with the vial/slide ID match... -
Page 165: Section F: Initiate A Batch
PERATING NSTRUCTIONS SECTION INITIATE A BATCH When the input carousel has been loaded with labeled sample vials, the appropriate filters and slides, and a fixative bath is ready in the bath compartment, select the sample processing sequence and press the Start button (Figure 7-12). Figure 7-12 Start Batch Button The main door and bath door will be heard to lock. -
Page 166: Section G: Processing Slides
PERATING NSTRUCTIONS If a sample error occurs, the batch continues, but an error indicator is displayed on the batch screen, as shown in Figure 7-14. Sample error indicators are displayed on the screen during processing. Figure 7-14 Sample Errors During Sample Processing SECTION PROCESSING SLIDES The sequence of events that occurs when a batch is initiated goes in this order:... - Page 167 PERATING NSTRUCTIONS Table 7.2: Sequence of Events in Processing a Slide Check vial and slide IDs. Position carousel for first vial pickup. Pick up vial and then filter, and move to dispersion area. Place vial into dispersion well and tighten its cap. Pick the slide.
- Page 168 PERATING NSTRUCTIONS Table 7.2: Sequence of Events in Processing a Slide Spin the vial to disperse the contents. Uncap the vial. Introduce filter to vial and perform level sensing to verify min./max. liquid level. Cell collection onto filter Rotate slide to horizontal position and place on cell transfer station Cell transfer onto slide...
-
Page 169: Section H: Pause A Batch
PERATING NSTRUCTIONS Table 7.2: Sequence of Events in Processing a Slide Deposit slide into fixative bath. Puncture and dispose of filter. Recap vial. Return vial to carousel. SECTION PAUSE A BATCH A batch may be paused by pressing the Pause button. When the Pause button is pressed the system will complete processing the current vial and then pause. -
Page 170: Section I: Batch Complete
PERATING NSTRUCTIONS SECTION BATCH COMPLETE When a batch has completed processing, the processor returns to an idle state, with a Batch Complete message on the screen. See Figure 7-15. The doors unlock. If an alarm sound has been set for batch completion, it will sound briefly. -
Page 171: Section J: Unload The Thinprep 5000 Processor
Refer to “Batch reports” on page 6.31 for complete details of viewing, printing and saving batch reports. SECTION UNLOAD THE THINPREP 5000 PROCESSOR Carousel Remove the carousel from the processor. The slides that were loaded should now be in the fixative bath, and the filters should be disposed of in the filter waste bin. -
Page 172: Section K: Optional Instructions For Ancillary Testing
Pap testing. It is contraindicated to perform Chlamydia trachomatis and Neisseria gonorrhoeae testing, using the Roche Diagnostics COBAS AMPLICOR CT/NG Test, if the sample has already been processed using the ThinPrep 5000 processor. 7.18 ®... - Page 173 PERATING NSTRUCTIONS Removing an Aliquot (of up to 4 mL) from the PreservCyt Sample Vial prior to Performing the ThinPrep Pap Test Only one aliquot may be removed from the PreservCyt sample vial prior to performing the Note: ThinPrep Pap test, regardless of the volume of the aliquot (maximum aliquot volume = 4 mL).
- Page 174 PERATING NSTRUCTIONS This page intentionally left blank. 7.20 ® ThinPrep 5000 Processor Operator’s Manual...
-
Page 176: Chapter Eight
AINTENANCE C h a p t e r E i g h t Maintenance Table 8.1: Routine Maintenance Every Batch Empty filter waste bin at the start of each batch. Daily or Change fixative every 100 slides or daily, more whichever comes first. -
Page 177: Section B: Weekly Cleaning
AINTENANCE SECTION WEEKLY CLEANING Clean Around Carousel And Dispersion Areas On a weekly basis, remove the carousel and clean around the bottom of the processing area, using deionized water and lint-free towels. Do not dislodge the carousel sensors, but do keep the area around them clean and make sure nothing blocks them. - Page 178 AINTENANCE Filter puncture point (filter shown on for reference) Filter plug body Figure 8-3 Clean Filter Plug and Filter Puncture Area Clean Slide Holder Pneumatic Cups A lint-free cloth soaked with isopropanol alcohol may be used to wipe down the surfaces of the slide holder cups.
-
Page 179: Section C: Empty The Waste Bottle
AINTENANCE SECTION EMPTY THE WASTE BOTTLE Waste resulting from sample processing is routed to and stored in the waste bottle. The instrument senses when the waste bottle is full and displays a message to empty the waste (see Figure 8-6). Or the waste may be emptied during routine maintenance of the instrument. Waste tubing Waste cap Waste bottle... - Page 180 AINTENANCE Figure 8-7 Venting the Waste Bottle A message prompts for the operator to dispose of the waste according to the instructions in this manual. Figure 8-8. Figure 8-8 Empty and Maintain the Waste Bottle 1. To remove the waste cap, rotate the waste cap with one hand while holding the waste bottle in place with the other hand.
- Page 181 AINTENANCE Bottle OPEN CLOSED Figure 8-9 Opening/Closing the Waste Bottle WARNING: Hazardous Waste Toxic Mixture Flammable Liquid and Vapor 2. Place the transport cover onto the waste bottle for transporting to the waste disposal area. 3. Dispose of the liquid waste from the waste bottle according to your laboratory guidelines. Dispose of all solvents as hazardous waste.
- Page 182 1. The waste bottle should be placed at the same height or below the ThinPrep 5000 processor. Do not place the waste bottle above the instrument.
-
Page 183: Section D: Clean The Touch Screen
AINTENANCE Blue - waste tubing No Color - sensor tubing Yellow - vacuum tubing Waste filter Figure 8-12 Waste Bottle Tubing Connections 4. Connect the color-coded waste tubing connectors to the corresponding connectors located in the rear of the instrument. When the proper connection has been established, the buttons on the connectors pop up/outward with a click sound. -
Page 184: Section E: Clean Input Carousel And Dust Cover
AINTENANCE Figure 8-13 Touch Screen Disabled for Cleaning The system disables the touch screen for 20 seconds so that the screen may be cleaned without inadvertently activating buttons or having to power off the instrument. SECTION SECTION SECTION CLEAN INPUT CAROUSEL AND DUST COVER Input Carousel As needed, clean the input carousel by wiping it down with soap and water. -
Page 185: Section F: Change Absorbent Pads
AINTENANCE SECTION CHANGE ABSORBENT PADS ® There are two absorbent pads on the ThinPrep 5000 processor that absorb drips that may result from processing. One is located at the base of the filter plug, and the other is on the top of the evaporative cover over the fixative bath carousel. -
Page 186: Section G: Remove And Clean Drip Trays
REMOVE AND CLEAN DRIP TRAYS Figure 8-15 Drip Trays Two plastic drip trays are located on the underside of the ThinPrep 5000 processor. They slide all the way out for inspection and cleaning. Wash them down with soap and water. Allow them to dry thoroughly before returning them to the processor. -
Page 187: Section H: Replacing The User Accessible Fuses
1/4 turn. The fuse can be felt to engage with the catches and it will be slightly recessed into the fuse holder. 7. Reattach the power cord to the instrument. 8. Turn the instrument power switch ON. If the instrument fails to operate, contact Hologic Technical Support. 8.12 ® ThinPrep... - Page 188 AINTENANCE ThinPrep ® 5000 Processor Maintenance Maintenance Schedule for the Month/Year: Instrument # Every Batch Daily or More Weekly As Needed Clean Change Fix Clean Empty Clean Change Remove Carousel, Clean Empty Filter Reagent Every Pneumatic Waste Carousel Absorbent and Clean Dispersion Touch Waste Bin...
- Page 189 AINTENANCE This page intentionally left blank. 8.14 ® ThinPrep 5000 Processor Operator’s Manual...
-
Page 191: Chapter Nine
ROUBLESHOOTING C h a p t e r N i n e Troubleshooting SECTION GENERAL There are three categories of error/status that the system can generate: • Sample Processing Errors • User Correctable Batch Errors • System Errors SECTION SAMPLE PROCESSING ERRORS At the conclusion of batch processing, sample errors are reported on the batch report. - Page 192 ROUBLESHOOTING Corrective Action Gyn slides - If the slide is satisfactory for screening purposes, no further action is necessary. If the slide is inadequate, follow laboratory procedure for reporting unsatisfactory specimens. Non-gyn slides - If there is additional sample material available, make another slide with more cells if possible. 5001 - Sample Too Dense The sample is too dense for the instrument to make a satisfactory slide.
- Page 193 ROUBLESHOOTING Corrective Action Examine the barcode label to see if it is missing, or damaged, or printed poorly. Replace, if necessary (refer to “Adhering Vial Labels” on page 7.3). Examine the barcode label and ensure it is the correct format. (Refer to “Slide barcode label format”...
- Page 194 ROUBLESHOOTING 5007 - Filter Not Found Could not detect the presence of a filter. The sample was not processed and a slide was not made. Possible Cause A filter was not loaded in the carousel slot, or loaded upside down. A filter is stuck in the carousel, preventing pickup.
- Page 195 ROUBLESHOOTING Corrective Action Make sure a filter is present and loaded correctly, with the open end up. Examine the vial to make sure it is not leaking. Place sample into another vial if it is damaged. Check the fluid level in the vial. Add PreservCyt Solution if the level is below the frosted line on the vial.
- Page 196 ROUBLESHOOTING Possible Cause Filter not present All fluid in the vial was consumed. Pneumatic system failure Corrective Action Make sure a filter is present. If Multiple Slides per Vial mode is being used, there is not enough sample to process the desired number of slides.
- Page 197 ROUBLESHOOTING 5100 - Processing Error 5101 - Processing Error 5102 - Processing Error 5104 - Processing Error 5105 - Pneumatic Error 5106 - Processing Error A processor timeout error, usually caused by a leak or other pneumatic error condition. The sample was not processed and no slide was made.
-
Page 198: Section C: Batch Processing Errors
ROUBLESHOOTING SECTION BATCH PROCESSING ERRORS Batch processing errors are errors that the system is capable of recovering from with user intervention. The errors occur during the processing of a batch. When the system encounters a batch error condition, the batch halts (terminates, or pauses, depending on the cause) and signals the error via a message on the user interface and by sounding the audible alarm, if it is enabled. - Page 199 ROUBLESHOOTING 4002 - Extra Vials Detected (Multiple Slides per Vial mode) The system detected more than one vial when starting a Multiple Slides per Vial batch. The batch will not start. Possible Cause More than one vial is in the carousel. Sensor malfunction Corrective Action Make sure there is a vial in slot 1 of the carousel.
- Page 200 ROUBLESHOOTING Possible Cause Fixative bath did not have a staining rack in it to hold the slide. Failure of the slide sensor Corrective Action Inspect the fixative bath to see if a slide was deposited into it and if there is a staining rack to hold it.
- Page 201 ROUBLESHOOTING 4009 - Positive Tank Pressure Positive tank failed to reach transfer pressure. (Pressure within the filter required for cell transfer from the filter membrane to the microscope slide did not occur.) Possible Cause The filter might be punctured or defective. The system has a pressure leak.
-
Page 202: Section D: System Errors
SECTION SYSTEM ERRORS System errors are errors that the ThinPrep 5000 processor is not capable of recovering from without user intervention. The current batch terminates and the system attempts to create a batch report. A system error is an error that will most likely require field service assistance. A user may choose or be instructed to restart the system. - Page 203 ROUBLESHOOTING Error code number and descriptive name Error condition status message OK button to dismiss error screen and transition to restricted mode screen Silence Alarm button to halt alarm sound but leave error message on the screen Figure 9-1 System Detected an Error If the system cannot recover, it attempts to move the mechanisms out of the way, turns off the transport arm motors so the operator can easily move the slide and filter transport arms and releases the input carousel so that it can spin freely.
- Page 204 ROUBLESHOOTING Figure 9-2 Restricted Mode Admin Options Screen To recover from an error requiring shutdown, press the Shutdown button. Wait for the computer to turn off (wait until the touch screen interface goes blank). Then turn off the power switch on the right side of the instrument. After a few seconds of the power being fully off, turn the processor on again and let it boot up.
- Page 205 ROUBLESHOOTING Release Vial Cap will open the fin- gers of the vial gripper to drop the vial cap. Release Slide will release the slide gripper fingers to let go of the slide and release the suction vac- uum of the slide holder cups at the cell transfer area.
- Page 206 ROUBLESHOOTING Release Vial Cap The vial gripper fingers remain closed in an error condition, so that a vial will not drop. Move the vial transport arm toward the middle of the instrument and then press the Release Vial button to open the gripper and retrieve the vial.
- Page 207 ROUBLESHOOTING System Error Code A system error has a two-part error code associated with it. The first four digits represent the error category and the following characters represent the status of the particular electromechanical device at the time the fault occurred. See Figure 9-7. Error category Mechanism Operation...
- Page 208 ROUBLESHOOTING This page intentionally left blank. 9.18 ® ThinPrep 5000 Processor Operator’s Manual...
-
Page 210: Chapter Ten
SECTION FIXATION The ThinPrep 5000 processor deposits completed slides into a staining rack immersed in a fixative bath that contains 95% reagent alcohol or 95% ethyl alcohol. Use the following procedure to fix ThinPrep microscope slide preparations. - Page 211 • The use of mild bluing solutions and dilute acid baths will optimize nuclear staining and minimize possible cell shedding. Hologic recommends the use of a dilute Lithium Carbonate solution, or Ammonium Hydroxide solution as the bluing solution. •...
- Page 212 TAINING AND OVERSLIPPING Table 10.1: Hologic Staining Protocol Solution Time* 70% Reagent Alcohol 1 minute with agitation 50% Reagent Alcohol 1 minute with agitation Distilled H O (dH 1 minute with agitation Richard-Allan Hematoxylin I 30 seconds with agitation Distilled H...
- Page 213 Each laboratory should evaluate their choice of coverslip and mounting media to ensure compatibility with ThinPrep slides. Hologic also recommends that 24 mm x 40 mm or 24 mm x 50 mm glass coverslips be used. Plastic coverslip material used with automated coverslipping instrumentation is also acceptable.
-
Page 215: Chapter Eleven
SECTION OBJECTIVE The ThinPrep Pap Test Training Program was developed by Hologic to assist laboratories in the conversion process from the conventional Pap smear to the ThinPrep Pap test. Hologic offers information, support and training for the conversion process, including communicating the change to the clinician, cytopreparatory training, ThinPrep Pap test morphology training and guidelines to assist with training the entire cytology staff in the laboratory. -
Page 216: Section C: Bibliography
Participants of the training program receiving less than 90% on the Final Assessment would require remedial training in their individual laboratories. This training involves the screening/diagnosing of an additional ThinPrep Pap test slide module provided by Hologic and requires a score of 90% or better to complete Hologic’s ThinPrep Pap Test Training Program. -
Page 218: Chapter Twelve
Orders can also be faxed to the attention of Customer Service at 508-229-2795. Warranty A copy of Hologic’s limited warranty and other terms and conditions of sale may be obtained by contacting Customer Service at the numbers listed above. Technical Support ®... - Page 219 ERVICE NFORMATION This page intentionally left blank. 12.2 ® ThinPrep 5000 Processor Operator’s Manual...
- Page 221 Orders can also be faxed to the attention of Customer Service at 508-229-2795. Warranty A copy of Hologic’s limited warranty and other terms and conditions of sale may be obtained by contacting Customer Service at the numbers listed above. Protocol for Returned Goods ®...
- Page 222 ThinPrep 5000 Operator’s Manual 1 replacement manual MAN-02203-001 Vortexor 1 vortexor 15A/250V 3AB SLO-BLO fuses Replacement fuses 53247-015 * Order number depends upon specific power requirements for each country. Contact Hologic Customer Service. 13.2 ® ThinPrep 5000 Processor Operator’s Manual...
- Page 223 RDERING NFORMATION Table 13.2: Supplies for the ThinPrep Pap Test (Gynecologic) Application Item Description Order Number ThinPrep Pap Test Kit Materials for 500 ThinPrep Pap Tests Contains: 500 Vials of PreservCyt Solution for use with the ThinPrep Pap Test 500 ThinPrep Pap Test Filters (Clear) 500 ThinPrep Microscope Slides 500 Collection Devices Configured with:...
- Page 224 RDERING NFORMATION Table 13.2: Supplies for the ThinPrep Pap Test (Gynecologic) Application Item Description Order Number ThinPrep Pap Test Contains: Laboratory Kit 500 ThinPrep Pap Test Filters (Clear) ThinPrep Microscope Slides 70137-001 ThinPrep Pap Test Contains: Laboratory Kit (for use with 500 ThinPrep Pap Test Filters (Clear) the ThinPrep Imaging System) 500 ThinPrep Imaging System Microscope Slides...
- Page 225 RDERING NFORMATION Table 13.3: Supplies and Solutions for Non-Gynecologic Applications Item Description Order Number PreservCyt Solution 20 mL in a 2-oz. vial 0234005 50 vials/box 946 mL in a 32-oz. bottle 0234004 4 bottles/box CytoLyt Solution 946 mL in a 32-oz. bottle 0236004 4 bottles/box 30 mL in a 50-mL centrifuge tube...
- Page 226 RDERING NFORMATION This page intentionally left blank. 13.6 ® ThinPrep 5000 Processor Operator’s Manual...
- Page 228 NDEX Index absorbent pad evaporation cover 8.10, 13.2 filter plug 8.10, 13.2 Administrative Options 6.15 advanced processing options aliquot removal 7.18 ancillary testing 7.18 barcode label format slide vial batch complete 6.12, 7.16 batch processing errors bleach bloody specimens (non-gyn) 5.23 carousel sensors carousel, ordering...
- Page 229 NDEX coverslipping 10.4 Customer Service 12.1, 13.1 CytoLyt Solution 3.4, 13.5 composition handling/disposal packaging stability storage requirements CytoLyt Solution wash 5.12 dimensions Disable Slide ID Match processing mode Disposal consumables 1.16 DiThioThreitol (DTT) procedure 5.16 drip trays 8.11 dust cover, carousel dust cover, ordering 13.2 empty liquid waste tank...
- Page 230 5.14 Fuse 1.10 fuse 8.12 glacial acetic acid 4.6, 5.23 gynecologic sample preparation hazards 1.11 installation Intended use (ThinPrep 5000 Processor) leak test Load carousel filters, slides, vials fixative bath load baths 6.14 lubricant 4.2, main screen during processing processor idle maintenance schedule 8.13...
- Page 231 NDEX material safety data sheet CytoLyt Solution 1.17 PreservCyt Solution 1.17 move bath to door 6.14 moving the processor mucoid specimens collection preparation 5.15 Multiple Slide per Vial processing mode non-gyn filters 7.2, 13.5 non-gyn sample prep troubleshooting 5.22 non-gyn sample preparation OCR label format operator’s manual, ordering 13.2...
- Page 232 NDEX release filter 9.15 release slide 9.16 release vial 9.16 remove baths 6.14 reprocessing protocol, gyn restart the system 9.17 restricted mode 9.13 Safety Data Sheet, CytoLyt Safety Data Sheet, PreservCyt sample is dilute sample processing errors save a report to USB key 6.34 serial number label 1.13...
- Page 233 NDEX Technical Support 12.1 ThinPrep Pap Test ThinPrep Pap Test filters 7.2, 13.3 ThinPrep Pap Test kit 13.3 troubleshooting unload fixative bath 7.17 urine specimens collection preparation 5.17 UroCyte collection kit 5.20, 13.5 UroCyte filters 7.2, 13.5 UroCyte specimens 5.19 USB ports vial labels voltage...
- Page 235 Hologic, Inc. 250 Campus Drive Marlborough, MA 01752 USA +1-508-263-2900 www.hologic.com MAN-02203-001 Rev. 002...
Need help?
Do you have a question about the ThinPrep 5000 and is the answer not in the manual?
Questions and answers