Sierra Flame FS-26-922 Installation And Operation Instructions Manual
Zero clearance and free standing units
Hide thumbs
Also See for FS-26-922:
- Installation and operation instructions manual (17 pages) ,
- Installation and owner's manual (22 pages)
Table of Contents
Advertisement
Quick Links
INSTALLATION AND OPERATION INSTRUCTIONS FOR ZERO CLEARANCE
AND FREE STANDING UNITS
FS-26-922
SAFETY INFORM ATION
WARNING
If the information in these instructions are
not followed exactly, a fire or explosion
may result causing property damage,
personal injury or loss of life.
Do not store or use gasoline or ot her flammable vapors
and liquids in t he vicinit y of t his or any ot her appliance.
INSTALLER: LEAVE THIS M ANUAL W ITH THE APPLIANCE.
CONSUM ER: RETAIN THIS M ANUAL FOR FUTURE REFERENCE.
Advertisement
Table of Contents

Subscribe to Our Youtube Channel
Related Manuals for Sierra Flame FS-26-922


Summary of Contents for Sierra Flame FS-26-922
- Page 1 INSTALLATION AND OPERATION INSTRUCTIONS FOR ZERO CLEARANCE AND FREE STANDING UNITS FS-26-922 SAFETY INFORM ATION WARNING If the information in these instructions are not followed exactly, a fire or explosion may result causing property damage, personal injury or loss of life.
-
Page 2: Table Of Contents
The inst ruct ions included here will assure t hat you have many years of dependable and enjoyable service from your Sierra flame product . -
Page 3: Important Instructions
IM PORTANT INSTRUCTIONS Read all inst ruct ions before inst alling or using t his heat er. Keep combust ible mat erials, such as furnit ure, pillows, bedding, papers, clot hes and curt ains at least 3 feet from t he front of t he heat er; keep t hem away from sides and rear as well. ’... -
Page 4: Grounding Appliance
GROUNDING APPLIANCE This appliance is for use on 120 Volt s. The cord has a plug as shown in (A). An adapt er as shown in (C) is available for connect ing t hree-blade grounding t ype plugs t o t wo-slot receptacles. The green grounding lug ext ending from t he adapt er must be connect ed t o a permanent ground such as a properly grounded out let box. -
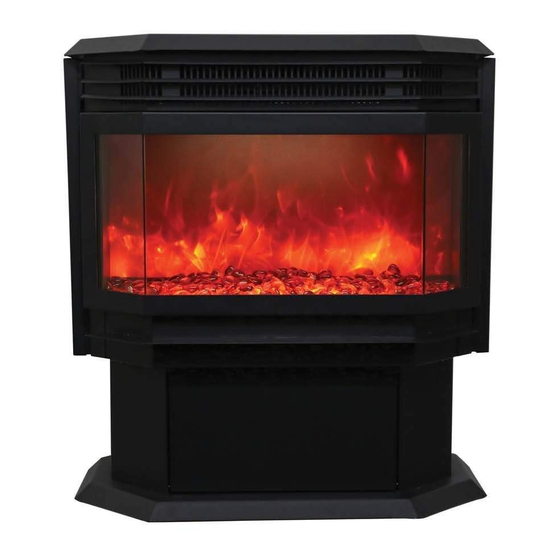
Page 5: Fs-26-922
FS-26-922 This appliance has been tested in Descript ion Free Standing Appliance accordance wit h t he UL St andard 2021 Voltage 120V AC 60Hz fixed locat ion dedicated Watt s 1500W M ax elect ric room appliances in t he Unit ed... -
Page 6: Hard- Wire Installation
HARD- W IRE INSTALLATION Turn off t he appliance complet ely and let cool before servicing. Only a qualified service person should service and repair t his elect ric appliance. If it is necessary t o hard wire t his appliance, a qualified elect rician must remove t he cord connect ion, and wire t he appliance direct ly t o t he house hold wiring. -
Page 7: Media Options
M EDIA OPTIONS Your fireplace shipped wit h t he following media: 3 bags of sable glass and an 11 piece log set . Cust omers decorat e t heir fireplace according t o t heir wishes wit h supplied media. This fireplace includes t he following decorat ive media: The glass panel is hooked by 2 hooks on each... -
Page 8: Operation
OPERATION The fireplace can be operat ed eit her by t he swit ches located on t he left front of t he fireplace unit or by supplied remot e cont rol. M ANUAL OPERATION Push t o reveal t he manual cont rol panel. (As shows in bellow pict ure) Push here to open the manual control panel The main power ON/ OFF swit ch in posit ion O, t he fireplace is OFF. -
Page 9: Remote Control Operation
NOTE: If operated at t he Low heat sett ing, t he fireplace will not provide as much heat out put as in t he High heat sett ing, however t he low sett ing will not require as much elect rical power t o operate. To avoid overloading a circuit , do not plug t he fireplace into a circuit t hat already has ot her appliances working. -
Page 10: Installing Wall Thermostat
FLASH button: Switches mood light into flash mode, this cycles through all mood light colors. HEATER ON/OFF button: Switching the heater ON/OFF. It has functions of setting memory. HIGHT button: Press the high button to switch the heater to high heat setting 1500W. LOW button: Press the low button to switch the heater to low heat setting 750W. -
Page 12: Replacement Parts
REPLACEMENT PARTS This list contains replacement parts PART NUMBER DESCRIPTION QTY. 10701213 FRONT CLEAR GLASS (MIDDLE) 10701214 FRONT CLEAR GLASS (SIDES) 10702166 BOTTOM GLASS 3126010 BACK BLACK PLASTIC GLASS 10104002 SWITCH 3126512 FLICKER ASSEMBLY 10101201C FLAME MOTOR 601137B LED STRIP FOR TRAY 601136B LED STRIP FOR FLAME 3001506B... -
Page 13: Exploded View
EXPLODED VIEW... -
Page 14: Wiring Diagram
Wiring Diagram... -
Page 15: Trouble Shooting
TROUBLE SHOOTING PROBLEM POSSIBLE CAUSE SOLUTION ’ ’ Dim or no flame Flame LED s are burnt out Inspect t he LED s and replace t hem if necessary. Back black clot h is falling off Change a flicker and back black clot h. and rolled up in t he flicker ’... -
Page 16: Service History
SERVICE HISTORY This heat er must be serviced annually depending on usage. Date Dealer Service technician Service Performed Special Concerns Name Name NOTES:...
Need help?
Do you have a question about the FS-26-922 and is the answer not in the manual?
Questions and answers