Table of Contents
Advertisement
Quick Links
Advertisement
Table of Contents

Related Manuals for IPRO QQ2


Summary of Contents for IPRO QQ2
- Page 1 User’s Manual of QQ2 Mobile Phone...
-
Page 2: Table Of Contents
TABLE OF CONTENT 1. BASIC INFORMATION ....7 1.1..........7 RIEF NTRODUCTION 2. BEFORE USE ........8 2.1....8 AME AND XPLANATION OF 2.1.1. Appearance Sketch Map ......8 2.1.2. Description of the Standby Pictures ..8 2.1.3. Description of Keys ........ - Page 3 3.1........... 17 EATURE UNCTIONS 3.2..........19 UNCTION 3.3............19 IAL A 3.4............ 20 EJECT A 3.5..........20 ECEIVE A 3.6............21 ND A 3.7........21 MERGENCY ERVICES 3.8........21 XTENSION PEED 3.9. IALED ALLS ISSED...
- Page 4 4.1.5. Delete all ..........25 4.1.6. Call timers ..........25 4.1.7. Call cost ..........25 4.1.8. GPRS counter .......... 26 4.2............26 ULTIMEDIA 4.2.1. Camera ............ 26 4.2.2. Image browser ......... 28 4.2.3. Video recorder ........29 4.2.4. Audio Player ........... 30 4.2.5.
- Page 5 4.4..........38 NTERTAINMENT 4.4.1. Sokoban ........... 38 4.5............. 38 ESSAGE 4.5.1. Write Message ........38 4.5.2. Inbox ............39 4.5.3. Outbox ............. 40 4.5.4. Drafts ............41 4.5.5. Sentbox ........... 41 4.5.6. Templates ..........42 4.5.7. Voice mail server ........42 4.5.8.
- Page 6 4.7.3. Display settings ........56 4.7.4. Security settings ........57 4.7.5. Connection management ......58 4.8............. 59 ROFILES 4.9............61 NTERNET 5. TEXT INPUT ........62 6. ACCESSORIES ........ 63 7. CARE AND MAINTENANCE ..64 8. ADDITIONAL SAFETY INFORMATION ........
-
Page 7: Basic Information
Thanks for selecting QQ2 color screen GSM/GPRS digital mobile phone. Through reading the manual, you can fully know how to use QQ2 mobile phone, appreciate its complete function and simple operating method. QQ2 color screen mobile phone is designed aiming at GSM/GPRS network environment;... -
Page 8: Before Use
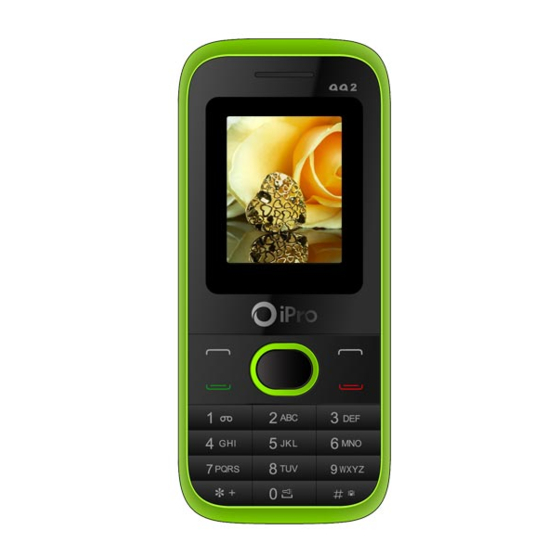
manual without prior notice. 2. Before Use 2.1. Name and Explanation of Each Part 2.1.1. Appearance Sketch Map The picture is only for your reference. 2.1.2. Description of the Standby Pictures Network signal strength The more the stripe is, the stronger the signal is. When SIM card 1s inserted in card slot 1, standby screen will show the icon. - Page 9 Battery strength The full the fill is, the more electric quantity is. Standby screen will show the icon. Alarm clock on and off It means that alarm clock is set and started. If alarm clock is set as off, the icon will disappear automatically.
-
Page 10: Description Of Keys
Outdoor mode When scene mode is set as high ring and vibrate mode, standby screen will show the icon. 2.1.3. Description of Keys Keys Function 1.Execute functions that the left-down/right-down corner indicator shows. Left soft key/ 2. In the standby mode, press Left Soft Right soft key key to access Menu, Right Soft key to access Contacts. - Page 11 show or hide dial panel. 1. Press this key to dial or receive an Dial key incoming call. 2. When in the standby mode, press this key to access Dialed Calls. It is used to dial and input numbers or characters.
-
Page 12: Install Sim Card And Memory Card
2.2. Install SIM Card and Memory Card 2.2.1. SIM Card Before using the phone, you must insert valid SIM (Subscriber Identity Module) card in the phone. SIM card 1s provided by network supplier. All the information related to network connection are recorded in the chip of SIM card, also the names, telephone numbers and SMS that storing in the name card holder of SIM card. -
Page 13: Inserting And Taking Out Sim Card
2.2.2. Inserting and Taking out SIM Card Metal contact surface of SIM card is easily scratched. You must take out SIM card carefully before the assembly. Power off the phone, remove the rear cover, battery or other external power supply. Make the end of SIM card without cutting angle inside and aim at the card slot of the phone and metal surface of SIM card face downward, then insert SIM card to the card slot of... -
Page 14: Battery
2.3. Battery 2.3.1. Install the Battery Take off the rear cover, of the mobile. Make one end of battery with metal surface aim at the battery connector. Then gently press the battery downward using the finger, and then press the other end to install the battery. Prompt: Please operate correctly to avoid damaging the battery connector. -
Page 15: Charging
Risk of explosion if battery is replaced by an incorrect type . Dispose of used batteries according to the instructions . 2.3.2. Charging Insert the charger on the charging interface at the side end of the phone. After inserting the charging plug, battery strength icon stripe at the top right corner of the screen is scrolling, which means that the charging is processing;... -
Page 16: Security Password
2.4. Security Password PIN (Personal Identification Number) is used to prevent your SIM card from being used illegally. PIN is usually provided with SIM card together. If you input wrong PIN for continuous three times, please input PUK to unlock it. Please contact with network operations company for more details. -
Page 17: Quick User Guide
functions that need PIN2. Please contact with your service provider to buy new card. You can’t change PUK 2. If you lose the code, please contact with your service provider. 3. Quick User Guide 3.1. Feature Functions The phone has not only the basic functions of mobile phone, but also support rich, practical and rapid feature functions, can be briefly introduced as follows: Contacts: Each name card holder record stored in the phone... - Page 18 of call log for you to check; support to call the telephone number in the call log; support to save the telephone number in the call log to name card holder and set as rejected call; support the function of sending SMS and etc. to the telephone numbers in the call log.
-
Page 19: Function Hot Key
symbols, and etc. 3.2. Function Hot Key Function Hot key Status description Power on Press hold Power-off mode power-on power-off key Power off Press hold Power-on mode power-on power-off key Enter function list Press OK key Standby mode Enter contacts Press right soft key Standby mode Enter call log... -
Page 20: Reject A Call
Press left soft key to access Options. -Add to contacts: Add a phone number to telephone directory -Add to Existing Contact: Add a phone number to the name already existed -Send SMS: Send message to a certain number -Insert WPN: Pause P/Wait W -SIM 1 Call : Dial the number of SIM card 1 -SIM 2 Call: Dial the number of SIM card 2 -IP Call: Dial IP phone... -
Page 21: End A Call
3.6. End a Call After finishing a call, you can press End key to end a call. 3.7. Emergency Services You can directly dial an emergency service call without SIM card. Different network uses different emergency numbers, please consult your network operations company for more details. 3.8. -
Page 22: Call Forward
3.10. Call Forward After call forward function is started, according to different forward conditions settings (Call Forward Unconditionally, Forward Busy, Forward No Answer, Forward Can Not Reach), you can select to switch the incoming call to voice inbox or other telephone numbers. -
Page 23: T-Flash Card
the phone. 3.14. T-flash Card Insert the T-Flash card into phone from the background. This will expand the Flash memory of the phone. Tap Multimedia menu, you can browse MP3, MP4, picture, video, photograph etc. 4. Function Menu 4.1. Call Logs Display your recent call log. -
Page 24: Received Calls
Time, Duration, From, Style, and SIM Name) Call: Recall the number. Save: Save the number to Phone/SIM1/SIM2 Send SMS: You could send SMS to this number. Add to the existed contacts: Add this number to the existing record of the name card holder. Add to blacklist: Add this number to the blacklist. -
Page 25: Rejected Calls
4.1.4. Rejected calls Display the incoming call records in the blacklist. The operation is the same as the Dialed. 4.1.5. Delete all You could delete all the records of the Dialed, Received, Missed and Rejected. 4.1.6. Call timers Display information details of SIM1/SIM2: Last Call, Received Calls, Dialed Calls, and All Calls. -
Page 26: Gprs Counter
network operator. The design of the charging unit and the phone rate limit shall require you to input the PIN2 code. Please contact with your network operator to achieve the password. 4.1.8. GPRS counter Display information details of SIM1/SIM2: Last sent, Last received, Total sent, and Total received. - Page 27 up/down direction key to adjust focus; press left/right direction key to adjust menu settings; press OK key to get the picture; ――Size: You can set the photo image size. ――Night mode: You can set up the image modes as normal and night. ――Brightness: Six levels of brightness are available.
-
Page 28: Image Browser
quality: High, Normal and Brief. The default mode will be “High”. ―Banding: You can set as 50Hz or 60Hz.. ―Shutter sound: You can set up the sound of shutter as: Active or Off. ―Auto save: You can select “Active” or “Off”. ―Display parameters: You can select “Active”... -
Page 29: Video Recorder
--Rename: rename the file --Mark: choose the image or all of the images. --Details: to show the images details. --Slide settings: to setup the slide about effect and slide delay time. 4.2.3. Video recorder The device is equipped with a video capture so that you can chat with your friends through it. -
Page 30: Audio Player
――Settings: ―Banding: You can set as 50Hz or 60Hz.. ―Audio: You can set as on or off. ―Type: You can set as AVI or 3gp ―Display parameters: You can set as on or off. ――Storage: You can save it to the Phone or memory card. -
Page 31: Video Player
do operations as follows: --Music list: Display all the MP3 or the play list you’ve saved. --Music mark: Mark the selected MP3 to play. --Add: Add the selected MP3 to the list. --Set as ringtone: Set the selected MP3 as the call ring or alarm ring of the incoming call. -
Page 32: Fm Radio
-- Order play: You can set as open or close. --Video application: You can set the video file as power on animation or power off animation --File attribute: to show the video file details. 4.2.6. FM Radio You can listen to Fm radio freely. Enter the radio interface, search the frequency automatically by pressing the up and down direction keys, and change previous or next channel by pressing the left and right direction keys。... -
Page 33: Recorder
other operations while listening to the radio. --help Prompt: Please connect with the earphone before you listen to the radio, for the device is equal to radio antenna. When the battery of your cell is insufficient, you may not enter the TV or Radio channel. -
Page 34: File Management
――Record again ――Delete: Delete the tape you just recorded. ――Send: Put the tape to bluetooth send to others. Way. ――Record file list: Enter the tapes list. Prompt: Call record is saved in the tapes list. 4.2.8. File management You can check the specific content and service condition of the phone memory via this function. -
Page 35: Contacts
8. More: View the service condition of the phone memory. In this interface you can format the phone memory by pressing left soft key, but this operation will cause the data in it lose forever. Prompt: There is no own memory capacity in the phone. 4.3. -
Page 36: New
4.3.1. Create new name card holder records to SIM card or the mobile phone. 4.3.2. Search Search the record stored in the phone or the SIM cards. 4.3.3. Details Check the number of information details. 4.3.4. Write SMS Send SMS to this record. 4.3.5. -
Page 37: Delete
4.3.6. Delete Delete this record. 4.3.7. Mark Choose one record or all records, and cancel what you choose are also allowed. 4.3.8. Copy Copy the record to SIM cards or memory card.. 4.3.9. Others ――Caller ID: You can view or edit the number of this phone. -
Page 38: Entertainment
4.4. Entertainment 4.4.1. Sokoban ·New Game: You can start a new push cases game. ·Resume: You can continue to play the game you didn’t finish last time. ·Select level: You can choose the level of the game. ·Help 4.5. Message 4.5.1. -
Page 39: Inbox
to send. --Insert template: Enter the templates interface and you could insert the template to the message. --Add contact info: Enter the Name card holder interface and you could insert the name card holder information to the message. --Add phiz: Enter the symbol interface and add the symbols to the message. -
Page 40: Outbox
――Call: Call the addresser. --Lock/unlock: Lock the message or unlock it. ――Mark: Choose this message or all messages in the inbox, or only choose the messages saved in SIM 1, SIM 2, SIM1storage SMS or SIM2 storage SMS ――Sort: Sort the messages in the inbox by time, contact person, theme or message type. -
Page 41: Drafts
person, theme or message type. 4.5.4. Drafts Store the SMS you’ve edited. The SMS is stored in SIM1, SIM2 or the phone. Choose one SMS and press left soft key, you could delete, edit, lock, mark, sort, and so on. --Delete: Delete this message. -
Page 42: Templates
forward, lock, mark, sort, and so on. --Delete: Delete this SMS. --Forward: Forward this message to others. --Lock/unlock: Lock the message or unlock it. ――Mark: Choose this message or all messages in the inbox, or only choose the messages saved in SIM 1, SIM 2, SIM1 storage SMS or SIM2 storage SMS. -
Page 43: Broadcast Message
Prompt: The realization of the voice mail requires the support of the network operator and you may firstly apply for this service. For more information and the number of the voice mail, please inquire about your local network operator. 4.5.8. Broadcast message The area info services send different kinds of messages. -
Page 44: Sms Settings
4.5.9. SMS Settings Message Settings There are seven options: SIM 1 service center, SIM2 service center, validity period, status report, save sent message, prior storage medium. --SIM1 msg center: Display the SMS service center number in SIM1. --SIM2 msg center: Display the SMS service center number in SIM2. -
Page 45: Message Capacity
know whether your message sent successfully or not conveniently. --Save sent messages: There are three options: “prompt”, “Save”, “Not save”. Prompt: Before sending the message, you will be suggested to choose “Send and Save” or “Send only”. Save: Save automatically your sent message. -
Page 46: Tools
4.6. Tools 4.6.1. Calendar You can use this feature to view the year, date and solar term easily. Use up/down/left/right direction key to navigator other date. -Add new Schedule ·Subject: Enter the schedule name. ·Date: Edit the schedule date. ·Time: Edit the schedule time ·Ring tone: Fixed rings: Ring1/ Ring2/ Ring3/ Ring4/ Ring5/ Ring6/ Ring7/ Ring8 /More Rings ·Fype: Set Freq: Once/ Everyday/ Every Week/ Every... -
Page 47: Alarm
-Clear Today is tasks: Delete today schedule. -Clear All: Delete all schedules. -Go to Date: Enter the Solar calendar and it can go to the date you want to check. -Weekly ·Add new Schedule ·View Schedules ·All Schedules ·Clear Today is tasks ·Clear All ·Go to Date ·Monthly... -
Page 48: Calculator
·Enable/Disable: Set alarm1 activate or deactivate. -Alarm2: Refer to "Alarm1". -Alarm3: Refer to "Alarm1". 4.6.3. Calculator The function will make your device a calculator with which you can carry out simple math calculation. Write by stylus to enter the numbers. Use following direction keys to calculate:... -
Page 49: Stk
You can choose to “open” or “close” Bluetooth. Bluetooth visibility You can choose “show phone” or “hidden” Bluetooth. If the Bluetooth is hidden, others cannot search your phone. Paired device You can search different Bluetooth equipments and find compatible ones (as long as the PIN codes of two Bluetooth equipments are identical with each other, the match will be successful. -
Page 50: Settings
the service, the function can not be available. Contact network service operator, if you want to have more information. 4.7. Settings You can customize the settings, such as time and date, language, call settings etc. 4.7.1. Call Settings Dual-SIM ――Standby mode: Only SIM1 Open/ Only SIM2 Open/ Dual SIM Open ――Reply by original SIM: Call/ SMS/ Internet/ Prompt Dial/ Original SIM Reply... - Page 51 search various networks. This operation will let your phone register the most suitable network. -Manual Select: Press the left soft key and Ok, the mobile phone will search various networks. You can select the suitable network from the listed networks. Call divert: When “call divert”...
- Page 52 off or out of the service area, the incoming calls will be transferred to voice inbox or other phone number according to the setup. ――Cancel All Diverts: You can delete all settings of call divert. Call barred: All outgoing calls, incoming calls, roaming incoming calls, international outgoing calls, roaming international outgoing calls are available.
- Page 53 ――Change Password: You can consult your network operator about the call barring password. Prompt: The above-mentioned function will have to need network support. To use the function, please contact your network service provider. Call waiting: You can start up or shut down the function. When it is started up, even when you are making a call, you can also receive another income call.
- Page 54 Flight mode: You can start up the function directly or choose when power on. It is used on flight. When flight mode is working all the functions connect with network, such as SMS, dialing back, WAP network, will be unavailable, to avoid interfering the signal of the flight you take.
-
Page 55: Phone Settings
――Answer/Reject mode: SMS reply after reject/ anykey answer ――Auto redial: Activate/ Deactivate 4.7.2. Phone settings Time & Date: You can set up the date and time on the phone as well as their display mode. Select Language: You can select phone language. Shortcut settings: You can set the menu when you press right softkey to enter in standby interface. -
Page 56: Display Settings
4.7.3. Display settings Wallpaper settings: You can set as default wallpaper image as well as more other wallpaper images. Idle display settings: ――Time & date ――Service provider Contrast: On the screen backlight interface you can set different lightness of your phone by pressing the left/right direction key. -
Page 57: Security Settings
――Off 4.7.4. Security settings ――PIN You can start up, shut down or modify PIN code. Correct PIN code shall be input when you unlock or shut down PIN code. If PIN code verification is started up, each time when you switch on your phone, you will have to input PIN code. -
Page 58: Connection Management
The default password of privacy protection mode is 1234. ――Auto Keypad lock -Off -5 secs -15 secs -30 secs -1 min -5 mins ――Lock screen by end-key -Activate -Deactivate ――Power-on password You can start up or shut down “phone password” or revise it. -
Page 59: Profiles
——CMCC WAP ——CMCC NET ——CUCC WAP GPRS settings You can select connect when needed, always connect. 4.8. Profiles You could set different scene modes. ——Normal ——Silent ——Vibrate ——Indoor ——Outdoor ——Earphone ——Bluetooth You could active, settings, rename or enhance ring. Ring Settings ――SIM1 call ring: You could set the ringtone of SIM1 into fixed tone or more tones. - Page 60 ――SIM1 msg ring: You could set the message tone when the SIM1 receives the message. ――SIM2 msg ring: You could set the message tone when the SIM2 receives the message. Adjust Volume ――Caller ringtone: You could set the ringtone volume when there is an incoming call.
-
Page 61: Internet
Alarm & calendar remind You could set the alarm clock alerts into ringtone, vibrate, silent, ring and vibrate. Keypad Tone You could set the keypad tone into mute, ringtone 1 and ringtone 2. Battery Low alert You could set to start or close the low voltage alarms. After starting this function, when the electric quantity of the battery is low, the low voltage alarm will ring. -
Page 62: Text Input
Select SIM/SIM2 to enter: 5. Text Input The device provides several text input modes so that you can write text or input data in your “contacts”, edit “contacts” record, search English names and write SMS and to-do list. In “text input” mode, if you want to change the input way, you can press “#”... -
Page 63: Accessories
“6” key three times continuously and get “o”, then press the key”5” twice, “ k” will appear on the screen. Press right soft key, you can delete the text you input. Number Enter “edit” mode, press “#” key you can change the input way to “... -
Page 64: Care And Maintenance
it is supplied.) You can purchase the lithium batteries with different capacity provided by this company. Travel Charger (The customer is suggested to confirm whether it is supplied.) Ultra-light, applicable quick charger. It can quickly charge the phone. Plug the charger into electrical outlet, and the other terminal shall be plug into the charger connector at the bottom of the phone. - Page 65 ·Your device is powered by a rechargeable battery. It is necessary to have the battery charged when it is going to wear out. The full performance of a new battery is achieved only when it is fully wore out. ·Unplug the charger from the electrical plug and the device when not in use.
-
Page 66: Additional Safety Information
coverage. ·Keep the device and accessories out of the reach of small children. ·Keep the device dry. All types of liquids or moisture will corrode electronic circuits. · Do not store the device in hot areas. High temperatures can shorten the life of electronic devices and warp or melt certain plastics. - Page 67 when you are driving a vehicle without safety wireless equipment. Please park the vehicle in a safe place before you use the device in order to guarantee that you pay all attention to drive. Observe related regulations. ·In case there is no adequate protection, certain electronic systems of the vehicle may be affected by the electric wave of the device.
- Page 68 ·Your device may interfere with some hearing aids, pacemakers and other medical devices. Please obey the suggestions provided by physicians or medical device manufacturers. · You are suggested to switch off the device in any area with potentially explosive atmosphere, such as gas station, chemical factories etc.
- Page 69 15 of the FCC Rules. These limits are designed to provide reasonable protection against harmful interference in a residential installation. This equipment generates uses and can radiate radio frequency energy and, if not installed and used in accordance with the instructions, may cause harmful interference to radio communications.
- Page 70 for exposure to radio waves. The guidelines are based on standards that were developed by independent scientific organizations through periodic and thorough evaluation of scientific studies. The standards include a substantial safety margin designed to assure the safety of all persons regardless of age or health.
- Page 71 Body-worn Operation This device was tested for typical body-worn operations. To comply with RF exposure requirements, a minimum separation distance of 1.5 cm must be maintained between the user’s body and the handset, including the antenna. Third-party belt-clips, holsters, and similar accessories used by this device should not contain any metallic components.
Need help?
Do you have a question about the QQ2 and is the answer not in the manual?
Questions and answers