Table of Contents
Advertisement
Quick Links
Advertisement
Table of Contents

Subscribe to Our Youtube Channel
Summary of Contents for Monoprice 24659
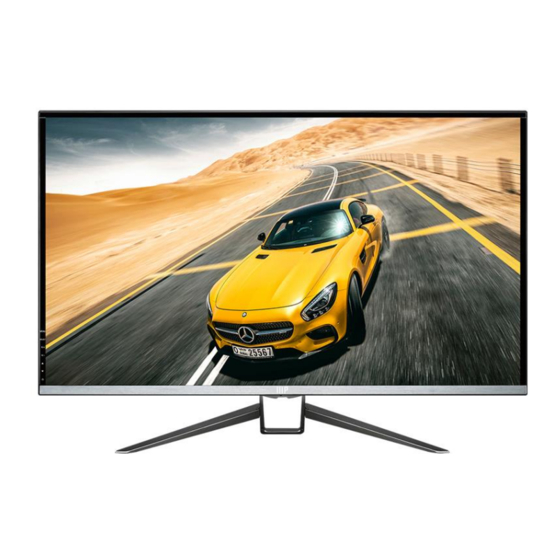
- Page 1 MONOPRICE 27" WQHD Monitor P/N 24659 User's Manual...
-
Page 2: Table Of Contents
CONTENTS SAFETY WARNINGS AND GUIDELINES ..........................3 FEATURES ........................................4 CUSTOMER SERVICE ................................... 4 PACKAGE CONTENTS ..................................4 PRODUCT OVERVIEW ..................................5 Front ........................................... 5 Rear ..........................................5 Rear Panel ......................................6 Controls ........................................6 Remote Control ....................................7 STAND ASSEMBLY ....................................9 INPUT SELECT MENU .................................. -
Page 3: Safety Warnings And Guidelines
SAFETY WARNINGS AND GUIDELINES Please read this entire manual before using this device, paying extra attention to these safety warnings and guidelines. Please keep this manual in a safe place for future reference. This monitor is intended for indoor use only. ... -
Page 4: Features
If you have any problem with your order, please give us an opportunity to make it right. You can contact a Monoprice Customer Service representative through the Live Chat link on our website www.monoprice.com during normal business hours (Mon-Fri: 5am-7pm PT, Sat- Sun: 9am-6pm PT) or via email at support@monoprice.com... -
Page 5: Product Overview
PRODUCT OVERVIEW Front Rear... -
Page 6: Rear Panel
Rear Panel DisplayPort: DisplayPort 1.2 input with a 2560x1440@60Hz maximum resolution. RGB (VGA): VGA input with a 1920x1080@60Hz maximum resolution. DVI: Dual-Link DVI-D input with a 2560x1440@60Hz maximum resolution. HDMI: HDMI® input with a 2560x1440@60Hz maximum resolution. Audio Out: 3.5mm TRS stereo analog audio output. DC IN: DC barrel connector for connecting the included AC power adapter. -
Page 7: Remote Control
5. ▲: If the OSD menu is displayed, press the ▲ button to move the highlight up. 6. ▼: If the OSD menu is displayed, press the ▼button to move the highlight down. : Press the button to power the monitor on or off. Remote Control Turns the monitor on or off. - Page 8 When the OSD menu is not displayed, press this button to increase the volume level. When the OSD menu is displayed and an entry has been selected for editing, press this button to increase the displayed value. If the OSD menu is displayed, press this button to select the highlighted menu entry.
-
Page 9: Stand Assembly
STAND ASSEMBLY To conserve space in the packaging, the stand is shipped in three parts. Perform the following steps to assemble the stand and attach it to the monitor. 1. Place the monitor box on a flat surface to serve as a cushion, then place the monitor face down on the box. -
Page 10: Input Select Menu
3. Using the four remaining Stand Base Screws, attach the stand assembly to the monitor, as shown in the image below. INPUT SELECT MENU You can quickly cycle through the active inputs by pressing the SELECT button. The Input Select menu will briefly display to show the selected input. -
Page 11: Osd Menu System
OSD MENU SYSTEM Set Menu BRIGHTNESS: Adjusts the overall brightness of the display. CONTRAST: Adjusts the contrast level of the display. BLACK LEVEL: Adjusts the darkness level of the display. ECO: Selects one of the image color presets designed for use with different applications. -
Page 12: Position Menu
Position Menu H. POSITION: Adjusts the horizontal position of the image on the screen. This option is only available when the VGA input is selected. V. POSITION: Adjusts the vertical position of the image on the screen. This option is only available when the VGA input is selected. -
Page 13: Color Menu
Color Menu COLOR TEMP.: Allows selection of a color temperature preset. The available options are User, User2, User3, SRGB, Warm, and Cool. When User, User2, or User3 is selected, you can manually change the individual Red, Green, and Blue levels. GAMMA: Adjusts the gamma level of the display. -
Page 14: Osd Set Menu
OSD Set Menu LANGUAGE: Allows selection of the language used in the OSD menu system. The available options are English, Chinese, and Korean. OSD H.POS.: Adjusts the horizontal position of the OSD menu on the screen. OSD V.POS.: Adjusts the vertical position of the OSD menu on the screen. OSD TIMER: Adjusts the amount of time that the OSD menu is displayed when no buttons are used. -
Page 15: Reset Menu
Reset Menu IMAGE AUTO ADJUST: Automatically adjusts the position of the image on the screen. This option is only available when the VGA input is selected. COLOR AUTO ADJUST: Automatically adjusts the color of the displayed image. This option is only available when the VGA input is selected. RESET: Resets the monitor's settings to the factory default values. -
Page 16: Set 2 Menu
Set 2 Menu SIGNAL SOURCE: Allows selection of the video input. The available options are VGA, DVI, HDMI®, and DP. Note that if you select an inactive input, the monitor will automatically switch to the first active input after a few seconds. MUTE: Turns audio muting on or off. -
Page 17: Technical Support
TECHNICAL SUPPORT Monoprice is pleased to provide free, live, online technical support to assist you with any questions you may have about installation, setup, troubleshooting, or product recommendations. If you ever need assistance with your new product, please come online to talk to one of our friendly and knowledgeable Tech Support Associates. -
Page 18: Regulatory Compliance
REGULATORY COMPLIANCE Notice for FCC Modifying the equipment without Monoprice's authorization may result in the equipment no longer complying with FCC requirements for Class B digital devices. In that event, your right to use the equipment may be limited by FCC regulations, and you may be required to correct any interference to radio or television communications at your own expense.


Need help?
Do you have a question about the 24659 and is the answer not in the manual?
Questions and answers