Table of Contents
Advertisement
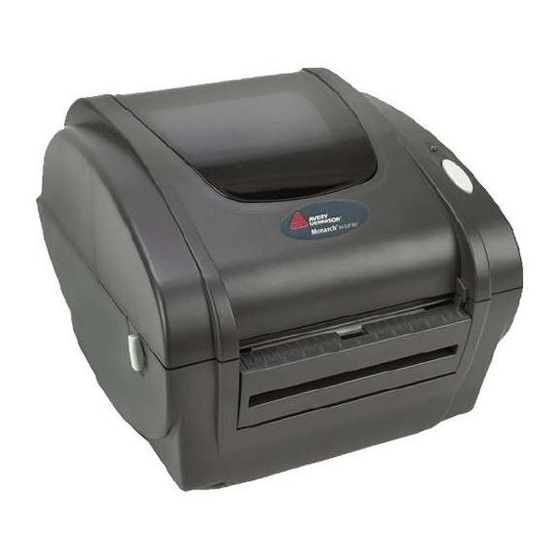
MONARCH® 9416® XL®
QUICK REFERENCE
This Quick Reference contains ribbon loading, supply loading, and
general care, maintenance, and troubleshooting procedures for the
9416® XL® Thermal Direct and 9416® XL® Thermal Transfer
printers. For more detailed information, refer to the Equipment
Manual on our Web site (www.monarch.com).
Connecting the Power Supply
1.
Turn off the printer. Press the switch on the back of the printer
to the OFF position (O).
2.
Plug the three-hole end of the AC adapter cable into the three-
pronged outlet in the power supply.
3.
Plug the round end of the power supply cable (labeled "printer")
into the socket at the back of the printer.
4.
Plug the three-pronged end of the AC adapter cable into a
grounded electrical outlet.
Warning:
TC9416QR Rev. AJ 10/09
The printer and power supply should never be
operated in a location where either one can get wet.
Personal injury could result.
2003 Avery Dennison Corp. All rights reserved.
Advertisement
Table of Contents

Related Manuals for Monarch 9416 XL


Summary of Contents for Monarch 9416 XL
-
Page 1: Quick Reference
9416® XL® Thermal Direct and 9416® XL® Thermal Transfer printers. For more detailed information, refer to the Equipment Manual on our Web site (www.monarch.com). Connecting the Power Supply Turn off the printer. Press the switch on the back of the printer to the OFF position (O). -
Page 2: Connecting The Communication Cable
Connecting the Communication Cable Turn off the printer before connecting the cable. On the back of the printer, connect the communication cable to the serial port (for serial communication) or to the parallel port (for parallel communication). 9-Pin Serial Port Parallel Port USB Port Secure the cable with the connecting screws (serial connection) -
Page 3: Reading The Indicator Light
Reading the Indicator Light The indicator light monitors the printer's status. Indicator Light Feed Button Indicator Light Description GREEN Printer is on and ready to use. FLASHING GREEN Printer is paused. Press the FEED button to resume printing. FLASHING RED Printer error condition. -
Page 4: Loading A Ribbon
Loading a Ribbon Use a ribbon when printing on thermal transfer supplies. The 9416® thermal transfer printer automatically detects if a ribbon is installed when you turn on the printer and switches to thermal transfer printing mode. Note: Make sure the ribbon window and the supply door are closed when you turn on the printer. - Page 5 Open a package of new ribbon, taking care not to wrinkle or crush the ribbon. Slide the ribbon onto the ribbon reel as far as it will go. Ribbon on Ribbon Reel Ribbon Leader Back Hub Take-up Core Attach the ribbon reel to the back hub. Peel and carefully unwind a few inches of ribbon from the bottom of the roll.
- Page 6 Lift open the supply door. The supply door support at the right- hand rear of the printer holds the supply door open. Feed the end of the ribbon under the printhead and around the take-up core. 10. Stick the leading edge of the ribbon onto the take-up core. 11.
-
Page 7: Loading Supply For Non-Peel Mode
Loading Supply for Non-Peel Mode This section describes how to load supply to print in non-peel (continuous) mode. If you have a thermal direct printer (does not require a ribbon), make sure you load thermal direct supply. If you have a thermal transfer printer (requires a ribbon), make sure you load thermal transfer supply. - Page 8 Remove the supply holder guide from one end of the supply holder. (The supply holder is normally attached with a line to the inside of the printer, not free-standing as shown below. Do not cut the line.) Supply Holder Guides 1.5-inch Suppl y Core Adapter Supply Holder...
- Page 9 Insert the ends of the supply holder into the slots in the supply roll mount. Supply Roll Mount Dial Dial IMPORTANT: Make sure the plastic line attaching the supply holder to the printer is tucked down out of the way of the supply holder and supply holder guides.
- Page 10 For thermal direct printers, feed the supply, printing side up, under the supply guides and over the platen roller. Supply Guides Thermal Direct Printer For thermal transfer printers, feed the supply, printing side up, under the white roller, under the supply guides, and over the platen roller.
- Page 11 12. Close the cover or supply door until it locks in place. For thermal transfer printers, close the supply door by lifting the supply door slightly and pulling the bottom of the supply door support forward towards the front of the printer.
-
Page 12: Loading Labels For Peel Mode
Loading Labels for Peel Mode Peel mode separates the label from the backing paper while printing. Press the release levers towards the front of the printer to release the cover or supply door. Lift open the cover or supply door. For thermal transfer printers, the supply door support at the right-hand rear of the printer holds the supply door open. - Page 13 Insert the ends of the supply holder into the slots in the supply roll mount. IMPORTANT: Make sure the plastic line attaching the supply holder to the printer is tucked down out of the way of the supply holder and supply holder guides. Otherwise, the plastic line may wrap around the supply holder or get caught on the supply holder guides.
-
Page 14: Calibrating The Supply
15. Press the FEED button. A label separates from the backing paper. Remove the peeled label and another label prints. Note: Hold the leading edge of peeled labels when printing on supply longer than six inches. 16. Calibrate the supply, if necessary. See “Calibrating the Supply,” for more information. -
Page 15: Adjusting The Black Mark/Die Cut Sensor
Adjusting the Black Mark/Die Cut Sensor The printer has a black mark/die cut sensor, which it uses to sense and properly calibrate supplies. Black mark supply has sense marks (black marks) on the back of them. Die cut supply Die Cut does not have any black marks. -
Page 16: Clearing Supply Jams
Clearing Supply Jams When you are printing and a jam occurs, the indicator light turns RED. To clear the jam: Turn off the printer. Press the switch on the back of the printer to the OFF position (O). Press the release levers towards the front of the printer to release the cover or supply door. - Page 17 Cleaning Clean the printhead whenever you notice a decline in print quality, or after using three rolls of supply. Note: You must turn off the printer’s power before cleaning the printhead. If you need to clean the printhead during a print job, you may lose your data when you turn off the printer.
-
Page 18: Troubleshooting
Allow the printhead and platen roller to dry for one minute before you close the cover or supply door and resume printing. For thermal transfer printers, close the supply door by lifting the supply door slightly and pulling the bottom of the supply door support forward towards the front of the printer. - Page 19 Problem Action Printing is faded or poor Make sure the supply is loaded quality. correctly. See “Loading Supplies,” for more information. Clean the printhead. Check the supplies and ribbon (thermal transfer printers) for damage or defects. Reload supplies or ribbon if necessary. Adjust the print speed/darkness (contrast).
-
Page 20: Printing Test Labels
Printing Test Labels Turn off the printer. Press and hold the FEED button while turning on the printer. Release the FEED button after the printer starts flashing ORANGE. The test labels print. The first label shows the printer's configuration by packet (A-F). -
Page 21: Thermal Direct Printer Specifications
Thermal Direct Printer Specifications Height: 6.6" (168 mm) Width: 8.3" (211 mm) Depth: 9.4" (239 mm) Weight: 4.1 lbs. (1.9 kg) without power supply Shipping Weight: 9 lb. (4 kg) Power: U.S.: 120 VAC ± 10%, 60Hz International: 220 VAC ± 10%, 50Hz Operating Limits: Operating Thermal Direct: 40°... -
Page 22: Supply Specifications
Supply Specifications Supply Types: Labels, tags or receipt paper Supply Widths: 0.75" (19 mm) minimum 4.25" (108 mm) maximum Supply Lengths: 0.25" (6.3 mm) minimum 10.0" (254 mm) maximum (for peel): 0.75" (19 mm) minimum 10.0" (254 mm) maximum Note: Hold the leading edge of peeled labels when printing on supply longer than six inches.
Need help?
Do you have a question about the 9416 XL and is the answer not in the manual?
Questions and answers