Table of Contents
Advertisement
Quick Links
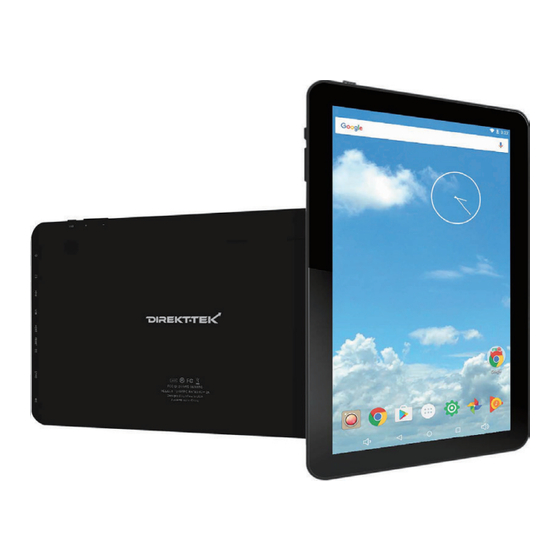
10" Tablet PC
DT101172A
User Manual
NOTE: For Spanish users, go to "Settings", then go to "Language & Input" to
change form English to Spanish Language OSD.
10.1" SupraPad Tablet PC
To assure the product to work in best status
please read the guide carefully before operation and keep it well for future use
Advertisement
Table of Contents

Subscribe to Our Youtube Channel
Related Manuals for DIREKT-TEK DT101172A


Summary of Contents for DIREKT-TEK DT101172A
-
Page 1: User Manual
10" Tablet PC DT101172A User Manual NOTE: For Spanish users, go to “Settings", then go to “Language & Input" to change form English to Spanish Language OSD. 10.1" SupraPad Tablet PC To assure the product to work in best status... - Page 2 16GB, you may store plenty of pictures, movies, and documents. Expansion storage is available via Micro Card Reader slot, up to 128GB. DIREKT-TEK-DT101172A is your all-in-one tablet that you can't live without. Notes: * This is a high-density electronic product; please do not dismantle it by yourself.
-
Page 3: Table Of Contents
Content 1. Appearance and button ..............2 2. Start-up and shut-down ..............3 3. Desktop ..................3 4. Buttons ..................4 5. Main menu operation..............5 System settings ................5 *Time / Date setting ............... 6 *Brightness ..................7 *Screen standby ................8 *Wireless &... -
Page 4: Appearance And Button
1. Appearance and button Volume- Back Camera Volume+ Power Speaker HDMI Earphone Jack Card Reader 【Note】 To power on: Press and hold the power button, the system will enter the main interface. To power off: In the main menu interface, press the power button for about 5 seconds to power off, the system will appear “power off”... -
Page 5: Start-Up And Shut-Down
2. Start-up and shut-down Startup: To press the power key and the system will enter the process of Start-up. Shutdown: Press the power key then pop-up options will be on the desktop, choose the option of Power off as shown below. Click OK to shutdown Sleep: In the normal state operation of the machine, press the power button, enter a state of dormancy, at this time, the screen will be closed. -
Page 6: Buttons
Volume- Volume+ Return View Records Menu Home Screen The status bar is used to display the network status of current system, battery power, time and other information. Quick search box is used by the typing keywords to do the Internet search. The main menu tag is in the right middle side of the screen, click it and the default menu bar can be expanded. -
Page 7: Main Menu Operation
5. Main menu operation Press the main menu tag on the main menu, as shown below: In the main menu, you can set the system, operate the existed application, install a new application, and start touch calibration, play music and video, browse webpage, play game and other operations. -
Page 8: Time/ Date Setting
Select the relevant items to do corresponding operation, for example: * Wireless & network * Date & Time * Sound & Display * The equipment and so on Time/ Date setting In the interface of the setting, select 'the time and date settings' to enter the date and time settings interface: You can choose the automatic mode by using the network time. -
Page 9: Brightness
Select “done”, if the input number is legitimate, then the operation is successful, and the system will use the new settings. Brightness In the setting of the interface to select”display settings” into the display settings interface, roll drop-down lists to select “Brightness” as appeared in the following dialogue. -
Page 10: Screen Standby
Screen standby Screen standby: You can set the time for the screen standby function to occur. After it starts it will lock the screen the screen saver appears. In the setting of the interface to select “display settings” into the display settings interface, roll drop-down lists to select 'screen standby' as appeared in the following interface. -
Page 11: Install, Unload, Run The Application
Install, unload, run the application Android installation: There are a variety of ways to install applications, for example, you can click on the Apk file directly and it will automatically be installed. In case that it is the third party programs installation the system may identify it as unsafe and will need the following procedures for installation. -
Page 12: Backup & Reset
How to uninstall? 1. Enter “setting” > “Application” > “Manage application” And then there will be installed the program list. 2. Click you want to uninstall icons. 3. Click Uninstall, then you can delete the application. Backup & reset Click on the “Settings” icon in the main menu, click on the “Backup & reset”. -
Page 13: Storage
Storage Click on the “Settings” icon in the main menu, click on the “Backup & reset”. 【Remark】: Pls touch option "delete SD card", so that can safety to romeve SD card. Language & keyboard Setting: (Language), text input and automatic error correction options; Select Language: 54 kind of national languages are available. -
Page 14: Es File Explorer
ES file explorer In the main menu interface, you can manage your files and install APK software with “ ES File Explorer ”. Tap the “ES File Explorer”, you can choose the directory from SD Card, Internal Memory, or USB disk. If you want to install application, open the directory of APK via ES File Explorer. -
Page 15: Network
Install the searched application: The user can do on-line installation through “market”, or download and install by the computer, or through a built-in browser download and install online. *Uninstall the application: You can use the third party software management tools or use the built-in Android application management software. Select “Settings”... -
Page 16: Music Playback
7. Music playback Click on the “Play Music” icon in the main menu, and then enter the music player interface. The default list system in the user data area for all audio files is shown as below:... -
Page 17: Video Playback
You can use synchronous USB to input audio file, or by inserting a Micro SD card with audio file to input audio files. You can also use the network to download the audio file. Select the corresponding tag, and check the interface as “artists”, “album”, and “song”... -
Page 18: Photo Browse
Online video: Users can use the "market" or other ways to download online video player software, online TV player software, online music software, and then install in the machine. To open the installed software, you can watch online video or online TV, and listen to online radio. -
Page 19: Wallpaper
10. Wallpaper The system supports static wallpaper, and 3D wallpaper. In the desktop interface, press down the Menu key for pop-up menu options, select "wallpaper" and "choose the wallpaper source" selection box: Or press on the screen and dialog box for the following to pop: Into the above dialog box, click on the "wallpaper"... -
Page 20: Record
11. Record Click on the "sound recorder" icon in the main menu and enter the "sound recorder" main interface as shown below: Select the "recording" button to record and after recording is completed press "stop" button. At this time you can select the "play" button to play the recorded sound. -
Page 21: E-Mail
Click on shutter in the camera 13. E-mail Click on the "e-mail" icon in the main menu to enter email client. Allocation of account information will be required the first time. As shown below: Email requires network support. Make sure that network link is normal. Here we take whhpwjh@126.com as an example:... - Page 22 In the email address bar, enter your valid email address: whhpwjh@126. com In the email address bar, enter your valid password :******** Then you can choose the "next", account type selection interface will appear as shown below: Choose POP3 account. And the receiving service settings will appear as shown below: Please according to each email provider’s information to set different parameter, such as:...
- Page 23 The POP3 server: Default is "126.com", and should be modified as "pop.126.com" The port number is "110" Then select the "next", you will enter the "inspection acceptance server settings", if set up correctly, there will be a "foreign server settings" interface as follows: In the column"name", input the name you want to display in the outgoing message, and then click "finish"...
-
Page 24: External Device
14. External device USB Connection Using USB to connect the SupraPad and PC, the default connection mode is a synchronous mode. You can drag the status bar to drop, appeared as the following interface: Click into the USB connection hints. "USB connected": It means that the external memory(SD) loading is completed, and you can see the corresponding letter in the PC terminal. -
Page 25: Features
15. Features * Screen: 10.1" Capacitive Touch Screen, 800x1280 IPS High Resolution * Processor: Quad Core, Cortex A53, 1.2GHz * OS: Android 7.0 Nougat * RAM: 1GB * Memory: 16GB * Wireless connection: WIFI 802.11 b/g/n * Build in Bluetooth 4.0 * Support Dual Camera : Front 0.3MP, Rear 2.0MP * Support Skype Video Call * Support 1080P full HD video... - Page 26 Por favor lea y revise su guía o manual de usuario atentamente antes de Usar este producto. Información sobre resolución de problemas adicional puede también encontrarse en la web: www.Direkt-Tek.com y hacer clic en "Contact” o envíenos un email a customerservice@direkt-tek.com...
- Page 28 10" Tablet PC DT101172A...
- Page 29 § 15.19 Labelling requirements. This device complies with part 15 of the FCC Rules. Operation is subject to the following two conditions: (1) This device may not cause harmful interference, and (2) this device must accept any interference received, including interference that may cause undesired operation.
Need help?
Do you have a question about the DT101172A and is the answer not in the manual?
Questions and answers