Table of Contents
Advertisement
Quick Links
Download this manual
See also:
Owner's Manual
Advertisement
Table of Contents

Subscribe to Our Youtube Channel
Related Manuals for Spirit CU900ENT


Summary of Contents for Spirit CU900ENT
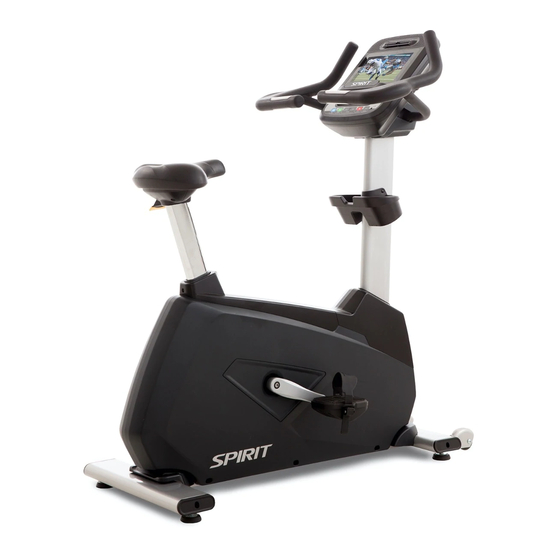
- Page 1 CU900 ENT Upright Bike OWNER’S MANUAL Please carefully read this entire manual before operating your new upright bike.
-
Page 2: Table Of Contents
TABLE OF CONTENTS Important Safety Instructions………………………………………………………………… Important Operation Instructions…………………………………………………………….. Assembly Instructions…………………………………………………………….…………… 4 Console Operation…………………………………………………………….……....Using heart rate transmitter………………………………………………………....System Maintenance Suite………………………………………………………………….. Exploded View Diagram………………………………………………………………………. Parts List..………………………………………………………………………………………. 34 SU8800-WB002_1612(SP)A... -
Page 3: Important Safety Instructions
IMPORTANT SAFETY INSTRUCTIONS WARNING - Read all instructions before using this appliance. WARNING - Heart rate monitoring systems may be inaccurate. Over exercising may result in serious injury or death. If you feel faint stop exercising immediately. Do not operate bike on deeply padded, plush or shag carpet. Damage to both carpet and bike may result. -
Page 4: Important Electrical Instructions
Important Electrical Instructions WARNING! NEVER expose this bike to rain or moisture. This product is NOT designed for use outdoors, near a pool or spa, or in any other high humidity environment. The operating temperature specification is 5 to 48 degrees Celsius (40 to 120 degrees Fahrenheit), and humidity is 95 non-condensing (no water drops forming on surfaces). -
Page 5: Assembly Instructions
ASSEMBLY INSTRUCTIONS UNPACKING 1. Cut the straps then lift the box over the unit and unpack. 2. Locate the hardware package. The hardware is separated into four steps. Remove the tools first. Remove the hardware for each step as needed to avoid confusion. The numbers in the instructions that are in parenthesis (#) are the item number from the assembly drawing for reference. - Page 6 STEP 1 #52 - M8 × 20mm #53 - Ø8.5 × Ø18 × 1.5T Socket Head Cap Bolt Flat Washer (4pcs) (4pcs) #59 - M5 ×12mm #61 - M10 × 55mm Phillips Head Screw #60 - Ø13 × 23 × Socket Head Cap Bolt (4pcs) 2.0T Flat Washer...
- Page 7 STEP 1 1. Install REAR STABILIZER (4) to MAIN FRAME (1) with 3 BOLTS (61) and 3 WASHERS (60). 2. Install SEAT (28) to SEAT POST (8) with 4 BOLTS (52) and 4 WASHERS (53). 3. Attach SEAT BRACKET COVERS (43 & 44) to SEAT POST (8) with 4 round head SCREWS (59).
- Page 8 STEP 2 1. Run the WIRING HARNESS through the CONSOLE MAST (2) and out the top. 2. Install CONSOLE MAST (2) to MAIN FRAME (1) with 6 BOLTS (52) and 6 WASHERS (112). Do not pinch any wires. 3. Connect HGP CONNECTOR CABLES (87 & 102) to CONSOLE (48). Run cables through center of console bracket and out the back.
- Page 9 STEP 3 1. Install HANDLEBARS (3) to CONSOLE MAST (2) with 4 BOLTS (56), 4 LOCK WASHERS (57), 8 WASHERS (53), and 4 NUTS (58). 4 WASHERS (53) should be installed on each side of the handlebars (3). 2. Connect HGP CONNECTOR CABLES (87 & 102) to HGP cables coming out of HANDLEBARS (3).
- Page 10 STEP 4 1. Attach CUP HOLDER (36) to CONSOLE MAST (2) using 2 SCREWS (54). 2. Attach CONSOLE MAST COVERS (37 & 38) over CONSOLE MAST (2) using 4 SELF-TAPPING SCREWS (55). 3. Install PEDALS (11) into CRANK ARMS (9 & 10).The left pedal has a reverse thread and will be screwed in counterclockwise.
-
Page 11: Console Operation
CONSOLE OPERATION Starting the operation • Plug in the power cord at the front of the bike. •When the power cord is plugged in the screen will show the initial image and then enter the ready mode which is the beginning of the bike operation. Main Home page: Begin operation by touching the icons. -
Page 12: Quick Start
Quick Start • Press Start button and the console starts the Quick Start program. Press Level up/down buttons to change the resistance level you desire. • Press first page Home button or Stop button to stop the program. Featured functions of this bike The Touch-control screen is used for operating all functions of the bike. - Page 13 Below is the instruction for touch screen operation: • First page HOME There are four selections. Usually the “Language” is the first selection. •When you press “Language” button, it enters the menu with all language selections. There are 12 languages to choose. Touch the desired language button to set and the system will return to the first page for the program operation.
- Page 14 • When TV button on the first page HOME is pressed, it enters TV interface. Now you can enjoy TV programs. If you want to workout and enjoy TV program simultaneously, press “START” button to start the bike. You can change the TV channel by using up/down buttons on the TV channel or channel remote control at bottom right to change the channel.
- Page 15 • When you touch “Internet” button on HOME page, it rapidly enters internet interface. There are 6 internet connections to choose for you to go internet while you are exercising. (internet cable connection or WIFI connection is required) Press “START” button of the bike to begin exercise.
-
Page 16: Manual Program
• When you touch “Exercise Program” button on HOME page, it enters “Menu“ interface. There are 10 program modes in Menu interface. If you want to choose Manual Program, just touch Manual button on the screen to enter the program for Manual. - Page 17 The image entering the “Profile” interface is as below. After entering the profile image which is the program you want to perform, press “ENTER” button to enter next image. If not, touch “HOME” icon at left top corner to return to the first page or press “Return”...
- Page 18 The “SIMPLE” display screen will be shown when the program begins. initial screen shown after start is “SIMPLE” display which shows all values on the bottom concerning your workout. The resistance level is at the right side and is adjustable with “UP” or “DOWN”...
- Page 19 Touch “DASHBOARD” button on the bottom to enter the dashboard interface. The operating is similar with different interface only. You can choose one of three interfaces on the bottom with your own preference. When using the first page button or “STOP” button to end the program, it enters the summary image. On the summary image, all accumulating values concerning the workout are displayed.
-
Page 20: Programmable Features
Programmable Features console offers ten preset programs, HILL, FAT BURN, CARDIO, STRENGTH, INTERVAL, HR, CUSTOM, Fitness Test, Constant Power and one Manual program. Preset Features: To choose and start preset program: • Select a program then press the ENTER key to begin customizing the program with your personal data, or just press the start key to begin the program with the default settings. -
Page 21: Hill Program
Preset program The bike has five different programs that have been designed for a variety of workout goals. These five programs have factory preset profiles for achieving these different goals. The initial built-in level of difficulty for each program is set to a relatively easy level. You may adjust the level of difficulty (Max level) for each program before beginning by following the instructions in the message window after selecting your program. - Page 22 Cardio program: The Cardio program is designed to increase your Cardio vascular function. This is exercise for your heart and lungs. It will build up your heart muscle and increase blood flow and lung capacity. This is achieved by incorporating a higher level of exertion with slight fluctuations in work. Work Profile Strength program: The Strength program is designed to increase muscular strength in your lower body.
-
Page 23: Custom Program
Custom Program: Select a Custom program then press the ENTER key to begin customizing the program with your • personal data, or just press the start key to begin the program with the default settings. The window will show the corresponding level profile, user can choose rename program by touching •... - Page 24 Workload chart for male or very fit female: 50 watts - Stage 300 kgm/min < 90 90 - 105 > 105 150 watts - 125 watts - 100 watts - Stage 900 kgm/min 750 kgm/min 600 kgm/min HR <120 120-135 HR >135 HR <120 120-135...
- Page 25 Fitness test programming: Press the Fitness-test button and press ENTER. 1. The message window will ask you to enter your gender. You may adjust the Age and Weight setting by using numeric keypads. 2. Now press START to begin the test. During the test: •...
- Page 26 What your score means: VO2max Chart for males and very fit females 18-25 26-35 36-45 46-55 56-65 years years years years years years excellent >60 >56 >51 >45 >41 >37 good 52-60 49-56 43-51 39-45 36-41 33-37 above average 47-51 43-48 39-42 35-38...
- Page 27 Heart Rate Control (HR) Program operation: To start the HR program follow the instructions below or just press the HR key then the Enter button and follow the directions in the message window. 1. Press the HR key then press the Enter key. 2.
-
Page 28: Heart Rate Training
HEART RATE TRAINING The old motto, “no pain, no gain”, is a myth that has been overpowered by the benefits of exercising comfortably. A great deal of this success has been promoted by the use of heart rate monitors. With the proper use of a heart rate monitor, many people find that their usual choice of exercise intensity was either too high or too low and exercise is much more enjoyable by maintaining their heart rate in the desired benefit range. -
Page 29: Rate Of Perceived Exertion
RATE OF PERCEIVED EXERTION Heart rate is important but listening to your body also has a lot of advantages. There are more variables involved in how hard you should workout than just heart rate. Your stress level, physical health, emotional health, temperature, humidity, the time of day, the last time you ate and what you ate, all contribute to the intensity at which you should workout. -
Page 30: Using Heart Rate Transmitter
USING HEART RATE TRANSMITTER (Optional) How to wear your wireless chest strap transmitter: 1. Attach the transmitter to the elastic strap using the locking parts. 2. Adjust the strap as tightly as possible as long as the strap is not too tight to remain comfortable. -
Page 31: System Maintenance Suite
The two most commonly used menus for setting up the exercise machine are described below; the TV Setup and Maintenance menus. For information on other sections of the Maintenance suite refer to the technical service manual or call Spirit service. TV Setup 1. - Page 32 • Machine Setup Allows you to select whether the Csafe port is used for Csafe or CAB TV Tuner. This menu also allows you to set the screen brightness. • FTP Settings is the Spirit FTP site address where Error logs and remote troubleshooting can be managed.
- Page 33 Wifi /Ethernet Setup • Press the desired button for setting up Wifi or Ethernet. Wifi Setup • Turn Wifi on and press scan for available Wifi connections. Press desired connection and follow the on-screen directions. Ethernet Setup - Press Ethernet Configuration to set up - Select DHCP to search for connection or a new connection.
-
Page 34: Exploded View Diagram
EXPLODED VIEW DIAGRAM... -
Page 35: Parts List
PARTS LIST DESCRIPTION O'TY Main Frame Console Mast 3(A) Seat Handle Bar (L) 3(B) Seat Handle Bar (R) 3(C) Handgrip Stabilizer Assembly Rear Stabilizer Idler Bracket Idler Wheel Assembly (Lower) 7~01 Release Lever 7~02 Nylon Handgrip Rail Assembly Crank Arm(L) Crank Arm(R) Pedal Shaft... - Page 36 DESCRIPTION O'TY Front Stabilizer Cover Rear Stabilizer Cover Front Seat Cover Rear Seat Cover Electronic Module Slider Sleeve,Ø40×80×23L Slider Sleeve,Ø40×80 Console Assembly Induction Brake Generator/Brake Controller 30m/m_Handpulse W/Cable Assembly M8 × P1.25 × 20L_Socket Head Cap Bolt Ø8.5 × Ø18 × 1.5T_Flat Washer M5 ×...
- Page 37 DESCRIPTION O'TY 800m/m_Handpulse Wire Connecting Cable 1350m/m_Communication Cable 1350m/m_TV Signal Cable 1350m/m_Connecting Wire 2150m/m_8P Computer Cable Power Cord 200m/m_DC Power Cord 1100m/m_Connecting Wire 400m/m_Wire Brake Coil Harness(Red) 800m/m_Sensor W/Cable Phillips Head Screw Driver 6_L Allen Wrench(6×27×120L) 100 13/15m/m_Wrench 101 800m/m_Handpulse Wire 102 150m/m_Connecting Cable 107 L Allen Wrench(M10,8×36×96L) 108 End Cap...
Need help?
Do you have a question about the CU900ENT and is the answer not in the manual?
Questions and answers