Table of Contents
Advertisement
SeGUin
Europa 7 | Europa 7 VL | Multivision 8000 Series
Super 9 | Visio 8 Plus
inStallation & USer GUiDe
4.0 inBUilt aGainSt comBUStiBle Wall
4.3 SKamol: refer to SKamotec 225 manUal
5. inBUilt into iSlanD Wall
no comBUStiBle SUrroUnDinGS
6. eXiStinG cHimney inStall
7. free StanDinG inStall
9. operation & maintenance
10. Warranty
notice to inStaller:
these instructions must be left with the owner, who should keep them for future use.
1
Advertisement
Table of Contents

Subscribe to Our Youtube Channel
Related Manuals for Sculpt Seguin Europa 7


Summary of Contents for Sculpt Seguin Europa 7
- Page 1 SeGUin Europa 7 | Europa 7 VL | Multivision 8000 Series Super 9 | Visio 8 Plus inStallation & USer GUiDe 1. SpecificationS 2. preliminary inStall GUiDe 3. componentS liSt 4.0 inBUilt aGainSt comBUStiBle Wall 4.1 maSonry BricK inStallation 4.2 HeBel inStallation 4.3 SKamol: refer to SKamotec 225 manUal 5.
- Page 2 ComplianCe plate and serial number. the instructions in this manual are recommendations only, the distributor and manufacturer bears no liability to the interpretation of these instructions.
- Page 3 Congratulations! thank you for choosing Sculpt fireplaces as your heater of choice. Your fireplace is the result of careful design, artisan engineering and safety tests. If it is properly installed, used and maintained, you may be sure that you will have an outstanding heating feature in your home for years to come.
- Page 4 all fireplaCes in this manual Conform to australian and new Zealand standards as/nZs 2918;2001 domestiC solid fuel burning applianCes & as/nZs 4012/4013(2014). iMPortant *Heating capacity of the following appliances are a guide only and refers to areas with 2.4m ceilings and 6 or more star rated buildings.
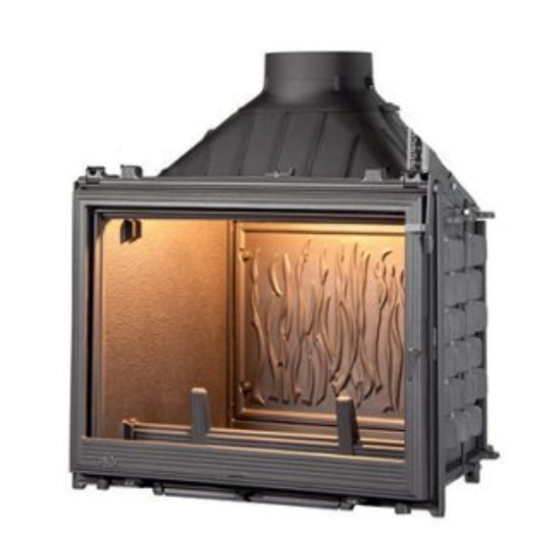
- Page 5 1. SpecificationS SeGUin eUropa 7 100% Pure cast iron, 8-12mm thickness material 17.9kW KW output Up to 150-250m2 Heating capacity* Clean frame-less design(trim options available) facade Secure swing or lift up door opening system glass door 4.5m minimum flue HeigHt...
- Page 6 SeGUin eUropa 7 Vl 100% Pure cast iron, 8-12mm thickness material 17.9kW KW output Up to 150-200m2 Heating capacity* Clean frame-less design(trim options available) facade Secure swing or lift up door opening system glass door 4.5m minimum flue HeigHt 200mm, 250mm, 300mm...
- Page 7 1. SpecificationS SeGUin ViSio 8 100% Pure cast iron, 8-12mm thickness material 27.8kW KW output Up to 240-340m2 Heating capacity* Clean frame-less design(trim options available) facade Secure swing or lift up door opening system glass door 4.5m minimum flue HeigHt 200mm, 250mm, 300mm flue sizes A duct and a register...
- Page 8 1. SpecificationS SeGUin SUper 9 100% Pure cast iron, 8-12mm thickness material 26.9kW KW output Up to 200-300m2 Heating capacity* Clean frame-less design(trim options available) facade Secure swing or lift up door opening system glass door 4.5m minimum flue HeigHt 250mm, 300mm, 350mm flue sizes A duct and a register...
- Page 9 SeGUin mUltiViSion 8000 SerieS 100% Pure cast iron, 8-12mm thickness material 25.9kW* Single sided model KW output Up to 150-200m2 Heating capacity* Clean frame-less design(trim options available) facade Secure swing or lift up door opening system (one side only) glass door 4.5m minimum flue HeigHt 250mm, 300mm, 350mm...
- Page 10 2. preliminary inStall GUiDe it is the users duty to make themselves aware of and apply all national or more restrictive local standards and instructions(aS/nZS 2918:2001). iMPortant Prior to unpacking and installation check that the appliance has not been damaged during transport. Ensure you check the glass, the door(s), the damper operation and the door locking mechanism Before any work is carried out, as per local and national regulations and laws, this appliance Must be installed by a licensed professional as per australian and new Zealand standards 2918:2001.
- Page 11 Sculpt Fireplaces & Seguin Duteriez reserves the right to change these specifications without prior notice.
- Page 12 Sculpt Fireplaces & Seguin reserves the right to change these specifications without prior notice. iMPortant: For possibly replacing the flue or for a technical intervention, the installation of an access hatch on the fireplace cavity is highly recommended.
- Page 13 2. preliminary inStall GUiDe PlEasE rEaD Prior to install fresh air inlet, reCommended for all installations the air inlet is recommended for installation and is essential for the proper function of the appliance. the fresh combustion air inlet must be a minimum 300mm2 and ideally positioned (see point a & B on diagram). Air vents False Ceiling Hot air grid...
- Page 14 4 Zero type: aluminium inner core, aluminium outer, poly insulated, minimum ri.0) by the retailer. 4.5m inbuilt triple skin flue kit - seguin europa 7 & Visio 8 Quantity...
- Page 15 3. componentS liSt Sculpt fireplace collection bears no liability to the functioning and supply of these components. additional components required for installation are the responsibility of the retailer and(or) installer. 4.5m inbuilt Chimney flue kit - seguin super 9 Quantity...
- Page 16 maSonry BricK inStallation step 1: base lay a masonry base, minimum 75mm thick (ie. Solid bricks). the base should be laid on a adequate ground capable of supporting it’s weight. **important** if using the optional outdoor air kit please leave a 125mm air gap behind the firebox.
- Page 17 maSonry BricK inStallation step 4: positioning of the unit Place the firebox into position on top of the sheet metal. Remember to leave a 25mm air gap on all sides of the firebox. (if an outdoor air-kit is to be connected please leave a 125mm air-gap at the rear of the firebox).
- Page 18 maSonry BricK inStallation step 7: layla 3 trim with lift door (if not reQuired go to step 8) **important** Trim must be fitted onto the firebox PRIOR to installing the front of the masonry enclosure. Put the trim on the front of the firebox On the side of the façade of the firebox drill two holes at 4.2mm the holes must match with the slotted holes on the trim...
- Page 19 maSonry BricK inStallation step 10: CaVity lid **important** side Vents it is highly recommended the cavity lid be installed flat to 300mm ensure sufficient air flow around the appliance if 2 vents are below used. Ceiling front Vents it is highly recommended the cavity lid be installed on an angle of 15°...
- Page 20 maSonry BricK inStallation step 13: flue installation the triple skin flue will then be continued into the roof cavity and above the roof line, as per australian & new Zealand Standard aS/nZ 2918:2001. there must be a 25mm clearance around the outer triple skin flue. the flue must extend a minimum 1m above the roof line and have a 3m diameter clearance from the top of the cowl to any objects in a horizontal direction.
- Page 21 maSonry BricK inStallation STEP 16: BAFFLE PLATE ensuring the wider end of the baffle plate is facing the inside back wall of the firebox, and the flat surfaces are positioned downwards, proceed to gently position the plate on the lugs located on the inside ceiling of the firebox.
- Page 22 HeBel inStallation liGHt WeiGHt inStallation step 1: base lay a masonry base, minimum 75mm thick (ie. solid bricks). the base should be laid on a adequate ground capable of supporting it’s weight. **important** if using the optional outdoor air kit please leave a 125mm air gap behind the firebox.
- Page 23 HeBel inStallation step 4: side walls - seCond layer & Ventilation **important** Ventilation is required on the enclosure to help with air circulation. a minimum of two air intake grills are required at the bottom and a minimum of two air out-take grills are required on top of the masonry enclosure (2X inflow 2X outflow).
- Page 24 HeBel inStallation step 7: side walls - final layer Using recommended fibretex 650 rockwool(minimum 300mm thick) place a layer on each inside wall panel. step 8: lift up door assembly (if not reQuired go to step 9) **iMPortant** refer to images on page 38. liFt uP Door assEMBly. three bolts mount the lift up door mechanism.
- Page 25 HeBel inStallation step 10: layla 3 trim with lift door (if not reQuired go to step 11) **important** Trim must be fitted onto the firebox PRIOR to installing the front of the masonry enclosure. Put the trim on the front of the firebox On the side of the façade of the firebox drill two holes at 4.2mm the holes must match with the slotted holes on the trim...
- Page 26 HeBel inStallation step 13: flue installation triple skin flue is to then be continued on top of the cavity lid. The lower end of the middle skin casing shall be close fitting against the lid and the outer casing must be ventilated. air vents on the first length of triple skin flue must be cut (please use diagram as a guide).
- Page 27 HeBel inStallation STEP 16: FRONT: FINAL LAYER place a layer of 12mm minimum thick heat resistant material on the exterior and finish. **iMPortant** Do not use Fyrchek to finish the cavity exterior step 17: hearth (floor proteCtor) the hearth must be constructed from masonry or a non combustible material, and must extend 500mm in front of the appliance, 250mm on either side of the appliance and a thickness of 75mm.
- Page 28 PlEasE notE tHat a sKaMotEC EnClosurE/Cavity is not ConsiDErED a Masonry EnClosurE/Cavity. PlEasE rEFEr to australian & nEW ZEalanD stanDarDs as/nZs 2918/2014 skamoteC can be purchased from any sculpt fireplace Collection retailer or installer. *Referenced from skamol brochure ”skamotec 225 building board for fireplace enclosures”, all rights reserved.
- Page 29 inBUilt into iSlanD Wall non comBUStiBle SUrroUnDinG step 1: base lay a masonry base, minimum 75mm thick (ie. Solid bricks). the base should be laid on a adequate ground capable of supporting it’s weight. step 2: sheet metal layer (optional step) place a piece of sheet metal on top of the masonry base, this will level the base and enable you to safely manoeuvre the firebox.
- Page 30 inBUilt into iSlanD Wall step 4: positioning of the unit & baCk frame Place the firebox into position onto the sheet metal. For structural support place a steel frame (minimum 51mm thick) on the back wall and connect to the two side steel frames, remembering to leave a 25mm air gap to all sides of the firebox.
- Page 31 inBUilt into iSlanD Wall step 7: lift up door assembly (if not reQuired go to step 9) **iMPortant** refer to images page 38. liFt uP Door assEMBly. three bolts mount the lift up door mechanism. it is recommended that you use two solid pieces of timber approximately 450mm long in order to assist in the assembly of the door.
- Page 32 inBUilt into iSlanD Wall step 10: CaVity lid 300mm **important** below side Vents Ceiling it is highly recommended the cavity lid be installed flat to ensure sufficient air flow around the appliance if 2 vents are 15° used. front Vents it is highly recommended the cavity lid be installed on an angle of 15°...
- Page 33 inBUilt into iSlanD Wall step 13: duCting the duct must be 4 Zero type(aluminium inner core, aluminium outer, poly insulated, minimum ri.0) and tested to as 4254.1-2012. outlet must be metal. this unit has been supplied with a ducting kit (consisting of one duct and one metal register), while it is highly recommended that it be installed, if not installed it will have no implication on the functioning of the unit.
- Page 34 inBUilt into iSlanD Wall STEP 16: HEARTH (FLOOR PROTECTOR) the hearth must be constructed from masonry or a non combustible material, and must extend 500mm in front of the appliance, 250mm on either side of the appliance and a thickness of 75mm. step 17: baffle plate ensuring the wider end of the baffle plate is facing the inside back wall of the firebox, and the flat surfaces are positioned...
- Page 35 eXiStinG BricK cHimney inStallation eXisting briCk Chimney installation please read all instruCtions before CommenCing installation Install unit into cavity with a sufficient amount of air flow on the back and sides (recommended 25mm air gap) of the appliance. Single skin flue must run from the spigot of the unit through to the top of the chimney, alternatively a funnel system can be custom made by a qualified trades person to the specifications of the existing brick chimney, the manufacturer and distributor bears no liability to the performance of the appliance once the custom panel has been fitted to the firebox.
- Page 36 eXiStinG BricK cHimney inStallation Ventilation options Ventilation is required on the enclosure to help with air circulation. option 1: install unit free standing recommended 100mm clearance on the sides and back of the firebox option 2: inbuilt with Vents on the bottom and top of the fireboX custom made vent facade can be made with a minimum metal vent size of 100mm x 600mm on the top of the firebox and...
- Page 37 free StanDinG step 1: hearth (floor proteCtor) Where combustible flooring is concerned, lay a masonry base. this can be made from tiles, granite, slate, concrete, hebel blocks, etc. the base must be a minimum 75mm thick and must protrude 500mm on all sides of the firebox. step 2: ClearanCes **important** the unit must maintain a 1200mm clearance horizontally in...
- Page 38 free StanDinG step 5: installing free standing flue system The first length of black double skin flue does not have a crimped end on either side of the flue piece. Place this first length on the outside of the firebox spigot , ensure the inner lugs are facing down closest to the firebox so that the second skin can’t move down and impede on the damper system.
- Page 39 lift Up Door aSSemBly lift up door assembly three bolts mount the lift up door mechanism. it is recommended that you use two solid pieces of timber approximately 450mm long in order to assist in the assembly of the door. lift the door into position and place door lift mechanism in position above fireplace door.
- Page 40 Misty or foggy weather may possibly favour back flow of the smoke, which may be a health hazard. In this case, only use the fireplace as is necessary. for safety reasons, assemblies of appliances and accessories not provided or recommended by seguin duteriez or sculpt fireplaces are not permitted. unsuitable equipment may cause dysfunctions and disorder upon use).
- Page 41 operation & maintenance iMPortant Warning storing any flammable materials (paper, linen, furniture, solvents, flammable liquids, spray containers, gas bottle, etc.) close to the fireplace is strictly forbidden. all these products should never be stored even for a short while in wood storages or recesses laid out under or near the appliance.
- Page 42 teSt reSUltS europa 7 partiCulate emissions, power output and effiCienCy test teStinG laBoratory Hrl technology manUfactUrer Seguin Duteriez moDel europa 7 evolution iSSUe Date 14.12.2015 inVeStiGatinG officer Steve marland teSt report HcmG/15/098 reSUltS the appliance particulate emissions factor was 1.2/kg of hard wood that complies to AS/NZS 4014.1 and the average efficiency of the appliance for all burn rates was 60%.
- Page 43 teSt reSUltS test reports Visio 8 applianCe power output test teStinG laBoratory Hrl technology manUfactUrer Seguin Duteriez moDel Visio 8 plus iSSUe Date 09.12.2015 inVeStiGatinG officer Steve marland reSUltS testing of the maximum power(kW) output of the Visio 8 insert solid fuel appliance was performed at the high burn rate prescribed in aSnZS4013 (2014) on the 24th of november 2015.
- Page 44 5. Any device or accessory not provided by Seguin Duteriez or Sculpt Fireplace Collection are strictly forbidden and will result in a void of all warranties by the manufacturer and distributor.
-
Page 45: Warranty Card
9. Warranty warranty Card date of purChase plaCe of purChase date of installation ComplianCe CertifiCate no. model no. name and address of purChaser phone no. email address Please include a copy of your receipt and compliance certificate email or post warranty information to info@sculptfireplaces.com.au po Box, 1232 mornington, Vic 3931 1300 851 304... - Page 46 ScUlpt fireplace collection may change or update this manual and anything described in it without notice. We will endeavour to ensure that information, materials and data on this site are complete, accurate and up-to-date.
- Page 47 Sculpt is proud to be the sole importer of Seguin, Axis and Bordelet fireplaces, with exclusive distribution rights throughout Australia and New Zealand.
Need help?
Do you have a question about the Seguin Europa 7 and is the answer not in the manual?
Questions and answers