Table of Contents
Advertisement
Quick Install Guide
Standard Power Wireless 300N
Low Profi le Access Point
Use the XAP-310 to:
Deliver Cost-effective Multi-AP
„
Wi-Fi Coverage
Create a Secure Guest Network
„
Improve Data Rates with Multi-Stream
„
Wireless 802.11n Technology
Optimize VoIP, Streaming Media and
„
Other Demanding Applications
Simplify Wi-Fi Installation while
„
Minimizing Setup Time and Costs
Minimize Unsightly Cables and Equipment
„
Simply Connected
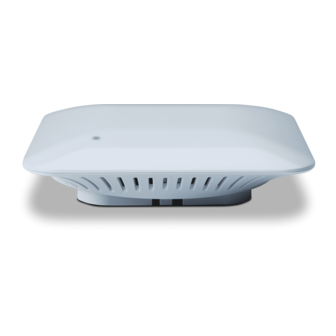
XAP-310
Advertisement
Table of Contents

Related Manuals for Luxul XAP-310


Summary of Contents for Luxul XAP-310
- Page 1 Simply Connected Quick Install Guide XAP-310 Standard Power Wireless 300N Low Profi le Access Point Use the XAP-310 to: Deliver Cost-effective Multi-AP „ Wi-Fi Coverage Create a Secure Guest Network „ Improve Data Rates with Multi-Stream „ Wireless 802.11n Technology Optimize VoIP, Streaming Media and „...
-
Page 2: Document Conventions
No part of this publication may be modified or adapted in any way, for any purposes without permission in writing from Luxul. The material in this manual is subject to change without notice. Luxul reserves the right to make changes to any product to improve reliability, function, or design. No license is granted, either expressly or by implication or otherwise under any Luxul intellectual property rights. -
Page 3: Package Contents
Name Status Function Power The XAP-310 is powered and working properly. The XAP-310 is not receiving power or the LED has been turned off in the AP’ s software interface. Blinking The XAP-310 is booting up. XAP-310 Rear Ports XAP-310 Rear Ethernet port ©... -
Page 4: Preparing For Installation
XAP-310 Coverage Pattern Ceiling and Wall Mounting The XAP-310 comes with a square mounting bracket to mount it to the wall or ceiling. Use the Mounting Pattern (Page 6-7) for mounting bracket alignment. 14203 Minuteman Drive, Suite 201, Draper, UT 84020-1685 | luxul.com | 801-822-5450... -
Page 5: Desktop Installation
Connecting to the Power Source The XAP-310 is PoE ready and supports 802.3af PoE. A PoE injector is included with the device. To apply power, simply connect the opposite end of the Ethernet cable to which the access point is already connected to the provided PoE injector or other PoE switch or injector. -
Page 6: Mounting Pattern
MOUNTING PATTERN... - Page 8 AC Power: Connect the included AC Cord to the Power Input of the Included „ Injector first and then to the AC outlet. NOTE: The XAP-310 is not a router and will need to be connected to a network with a router in order to deliver Internet access. Power XAP-310...
-
Page 9: Default Ip Address
Default user name: admin Default password: admin The Luxul XAP-310 default IP addresss is 192.168.0.10. If the IP address of your router is not set to the 192.168.0.X network, a temporary static IP address must be set on the computer being used for configuration. To do so, set the IP address of the com- puter to the 192.168.0.X range and then use the default IP address of your XAP-310... -
Page 10: Advanced Settings
„ ACCESSORIES OUT OF THE REACH OF CHILDREN! The XAP-310 may become hot when in use for extended time periods. This is normal and is not a „ malfunction. DO NOT install where it will be exposed to paper, cloth or other flammable materials. - Page 11 This transmitter must not be co-located or operating in conjunction with any other antenna or transmitter. © 2015 Luxul. All Rights Reserved. Other trademarks and registered trademarks are the property of their respective owners...
-
Page 12: Radiation Exposure Statement
RJ45 cable Hereby, Luxul, 14203 Minuteman Drive, Suite 201, Draper, Utah, 84020, declares that this Luxul XAP-310 is in compliance with the essential requirements and other relevant provisions of Directive 1995/5/EC.
Need help?
Do you have a question about the XAP-310 and is the answer not in the manual?
Questions and answers