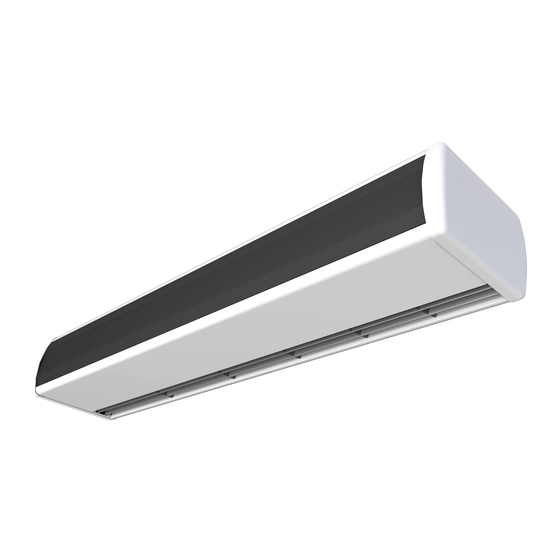
Airtecnics OPTIMA Installation, Operation And Maintenance Manual
Air curtains
Hide thumbs
Also See for OPTIMA:
- Installation, operation and maintenance manual (19 pages) ,
- Installation, operation and maintenance manual (48 pages)
Table of Contents
Advertisement
INSTALLATION, OPERATION AND MAINTENANCE MANUAL
Air Curtains OPTIMA
Please, read these instructions carefully before attempting installation
SECURITY ADVISE SYMBOLS
Attention, Danger, Safety Advice!
Danger from electric current or high voltage!
Injuries risk!
Danger! Do not stay underneath: Heavy load.
Important information.
AIRDOM05032-R13(06/04/16)
Advertisement
Table of Contents

Subscribe to Our Youtube Channel
Summary of Contents for Airtecnics OPTIMA
- Page 1 INSTALLATION, OPERATION AND MAINTENANCE MANUAL Air Curtains OPTIMA Please, read these instructions carefully before attempting installation SECURITY ADVISE SYMBOLS Attention, Danger, Safety Advice! Danger from electric current or high voltage! Injuries risk! Danger! Do not stay underneath: Heavy load. Important information.
-
Page 2: Table Of Contents
INDEX CONNECTION DIAGRAM ..........................3 INSTALLATION ..............................4 Power Supply ..............................4 PCBoard and Control ............................4 Fixing ................................5 Water coils ..............................5 Electrical elements ............................5 STORAGE AND TRANSPORT .......................... 5 WORKING INSTRUCTIONS ..........................6 Control PCBoard characteristics ........................6 Controller’s common characteristics ....................... -
Page 3: Connection Diagram
CONNECTION DIAGRAM... -
Page 4: Installation
INSTALLATION Valid for models: Optima MAX. Maximum recommended height, MIN. Minimum recommended distance (**) Removable covers Minimum recommended distance between the inlet grille and any obstacle is of 200mm. Installation work, connection, disconnection, electrical wiring, mechanical maintenance and service must be done by qualified people observing these instructions and in accordance with all applicable norms and standards. -
Page 5: Fixing
Fixing Units are provided of several external suspension points, depending on the weight and length of each model (see exact situation of the points at the air curtains characteristics page). The fixing of the air curtain should be managed according to the weights of each unit shown on the technical data page. -
Page 6: Working Instructions
WORKING INSTRUCTIONS For safety, the air curtains never have to be stopped by disconnecting them from the main supply, always through the controller and wait for 10 minutes at least to disconnect the main supply. In case to not follow these instructions, the internal parts of the air curtain can be damaged. -
Page 7: Common Characteristics To All Controllers For Electrical Heated Air Curtains
Common characteristics to all controllers for electrical heated air curtains 2 speed system with 2 different Fan Speed and Heating Stages (H1, H2). • Limited heating: for safety reasons, in references OPT/RO 1000 of 9kW the heating power is limited by the ventilation speed that we had selected, the following way: Selected speed Max. -
Page 8: Remote Control Characteristics
Warm water heated or only air with standard controller. Diagram: AIRDOE07050 • Warm water heated with HC controller (Hand Auto, D805). Diagram: AIRDOE07060 • Electrical 400Vx3 air curtain OPTIMA 1000 E6kW / 1500 E6-9kW. Diagram: AIRDOE07100 • Electrical 400Vx3 air curtain OPTIMA 1000 E9kW. Diagram: AIRDOE07200 •... -
Page 20: Datasheet
DATASHEET... -
Page 21: Maintenance Instructions
MAINTENANCE INSTRUCTIONS For safety, before any cleaning, disconnect power supply using the controller. It is forbidden to open the service door (risk of electrical discharge and being trapped in fans). Service and maintenance should be done only by introduced and qualified workers. -
Page 22: Repairs And Replacements
REPAIRS AND REPLACEMENTS Installation and electrical connections must be done by qualified workers and following these instructions. Before any repairs are undertaken, please: • Inform people that there is work in progress. • Disconnect the power supply and protect the thermal magnet (so nobody can restart it accidentally). -
Page 23: Plate Replacement
Plate replacement Open the service door and unplug the visible cables from the plate and the condenser. Unscrew the power plate through the upper external part of the air curtain to remove the plate and unplug the internal cable (just for electrical heating version) before removing and then make the necessary repairs for the inside of the air curtain. -
Page 24: Failures And Solutions
FAILURES AND SOLUTIONS More than 95% of the complaints are submitted during the start of operation of the equipment and are due to installations errors. More than 90% of the failures are solved only by checking the connections. Following the three following points, we can make sure that the installation is correct: A) RJ45 cable manipulated: The cable that connects the controller to the air curtains is an 8 lines crossed RJ45 cable. -
Page 25: Accessories
ACCESSORIES External temperature Clever Control Interface II Sensor Intelligent proactive regulation, It permits to take the Allows the connection to a advanced functions, Automatic/manual temperature from a place centralized management system working, door delay, timer, save different to the control. (BMS, PLC, etc.). -
Page 26: Declaration Of Conformity
DECLARATION OF CONFORMITY... -
Page 27: Air Curtain Identification
Air curtain identification Each air curtain is identified by a unique serial number printed in a label located inside the door service. There is also indicated the model and their technical characteristics (flow, fans technical characteristics and power heating). It is indispensable to have this number to facilitate possible replacements or technical information of the air curtain in question.


Need help?
Do you have a question about the OPTIMA and is the answer not in the manual?
Questions and answers