Table of Contents
Advertisement
Advertisement
Table of Contents

Related Manuals for Electrolux EBC54524


Summary of Contents for Electrolux EBC54524
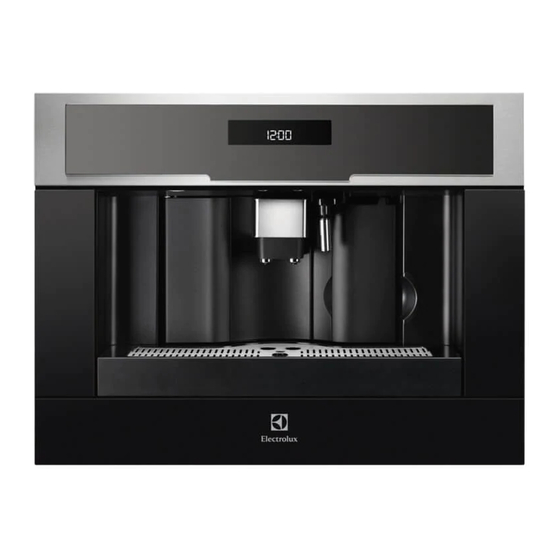
- Page 1 EBC54524 Automatic coffee maker User manual...
-
Page 2: Table Of Contents
TROUBLESHOOTING ....................23 WE’RE THINKING OF YOU Thank you for purchasing an Electrolux appliance. You’ve chosen a product that brings with it decades of professional experience and innovation. Ingenious and stylish, it has been designed with you in mind. So whenever you use it, you can be safe in the knowledge that you’ll get great results every time. -
Page 3: Introduction
ENGLISH 1. INTRODUCTION 1.1 Symbols used in these This symbol identifies important advice or information for the user. instructions Important warnings are identified by 1.2 Letters in brackets these symbols. The letters in brackets refer to the legend It is vital to respect these warnings. in the Description of the Appliance on Failure to observe the instructions could page 3. - Page 4 If the plug or power cable is damaged, it must be re- placed by customer services only to avoid all risk. For european markets only: This appliance can be used by children aged from 8 years and above if they have been given supervision or instruction concerning use of the appliance in a safe way and if they understand the hazard involved.
-
Page 5: Designated Use
ENGLISH IMPORTANT! This appliance is not suitable for com- Do not grasp the coffee maker mercial use. when it is out of the cabinet. The manufacturer is not liable for dam- Do not rest recipients containing age deriving from improper use of the liquids or inflammable or corrosive appliance. -
Page 6: Preliminary Checks
3.2 Description of the control 3.3 Description of milk panel container and accessories (page 3 - B) (page 3 - C) C1. Frothed milk regulator A light touch is enough to activate C2. Milk container handle the icon. C3. CLEAN button C4. -
Page 7: Using The Appliance For The First Time
ENGLISH 4.3 Connecting the appliance sional. To comply with safety directives, DANGER! an omnipolar switch with a mini- Check that the mains power sup- mum contact distance of 3 mm ply voltage corresponds to the must be installed. value indicated on the rating plate Do not use multiple sockets or on the bottom of the appliance. -
Page 8: Turning On And Heating Up
6. TURNING ON AND HEATING UP Each time the appliance is turned on, it When heating is complete, the message performs an automatic preheat and rinse changes to “RINSING”; cycle which cannot be interrupted. The appliance is at temperature when The appliance is ready for use only after the message “MEDIUM CUP NORMAL... -
Page 9: Changing The Quantity Of Coffee In The Cup
ENGLISH If it is removed, it will not be possible to IMPORTANT! make the coffee and the appliance will When extracting the drip tray, the display “GROUND TOO FINE ADJUST waste coffee container MUST MILL AND PRESS OK” and then “FILL always be emptied. -
Page 10: Adjusting The Coffee Mill
The • Press the icon (B6) twice to exit the progress bar shows the quantity of cof- menu. fee selected. The appliance is now reprogrammed with • Press the OK icon (B9) again to con- the new settings and is ready. firm (or the icon (B6) to cancel the operation). -
Page 11: Delivering Hot Water
ENGLISH 11. DELIVERING HOT WATER • Always make sure the appliance is To interrupt, press the icon (B13) ready. or the icon (B6). The appliance • Make sure the hot water spout is in stops delivery once the set quantity is place (fig. 21); position a container reached. under the spout (fig. 22). • Press the icon (B13) (fig. -
Page 12: Changing The Quantity Of Milk And Coffee For Cappuccino
• Remove the hot water spout and at- • Press the CLEAN button on the lid tach the milk container to the nozzle (C3) and hold down for at least 5 (fig. 17). seconds (fig. 20) to start the cleaning • Position the milk spout as shown in fig. function. 18 and then place a sufficiently large The appliance displays the message cup under the coffee and milk spouts. -
Page 13: Making A Number Of Cups Of Coffee With The Jug Function
ENGLISH displayed. tion. • Press the OK icon (B9) again. • Press the icon (B6) twice to exit the • Select the quantity of coffee required menu. by pressing the icons (B7) and (B8). The progress bar shows the quantity of coffee selected. • Press the OK icon (B9) to confirm or icon (B6) to cancel the opera- 15. -
Page 14: Changing Jug Function Parameters
16. CHANGING JUG FUNCTION PARAMETERS The jug programme is factory set with icons (B7) and (B8) until default values. “JUG LEVEL” is displayed. These can be modified to suit your per- • Press the OK icon (B9) to confirm. sonal taste and saved. • A bar representing the quantity of cof-... - Page 15 ENGLISH Before the indicator protrudes from the If necessary, remove coffee deposits cup tray, the drip tray must be emptied with a sponge. and cleaned. 2. Remove the residues with a vacuum To remove the tray: cleaner. 1. Open the service door (fig. 26). 2.
- Page 16 Clean the container each time you pre- Support pare milk as described in Note 3 in the section “Making cappuccino”. All components can be washed in a dish- washer, placing them in the top basket of the dishwasher.
-
Page 17: Changing And Setting Menu Parameters
ENGLISH 18. CHANGING AND SETTING MENU PARAMETERS When the appliance is ready, you can • When you turn the appliance on, if you use the internal menu to modify the fol- want to make a small cup of coffee lowing parameters and functions: (less than 60 cc), preheat the cup by • Choose language rinsing it with hot water. -
Page 18: Programming Coffee
(B9) to confirm. • Press the icons (B7) and (B8) to • Use the icons (B7) and (B8) to select the required coffee temperature set the minutes, then press the OK from low, medium and high. icon (B9) to confirm. • Press the OK icon (B9) to confirm the • Press the... - Page 19 ENGLISH The appliance displays: “DESCAL- FOR CAPPUCCINO”. ING”. • The descale programme automatically 18.10 Programming the jug performs a series of deliveries and For instructions on programming the pauses. jug, see the section “ CHANGING JUG • After about 30 minutes “DESCALE FUNCTION PARAMETERS”. COMPLETE PLEASE CONFIRM” is displayed.
-
Page 20: Adjusting Contrast
18.14 Statistics • Press the OK icon (B9) to confirm. • Press the (B6) icon (B6) once to This displays statistics relating to the exit the function or twice to exit the machine. To display, proceed as follows: menu. • Press the icon (B2) to enter the... -
Page 21: Turning The Appliance Off
ENGLISH 19. TURNING THE APPLIANCE OFF Each time the appliance is turned off, it If the appliance is not used for an performs an automatic rinse cycle which extended period, place the main cannot be interrupted. switch on the back of the appli- ance in the 0 position (A23). -
Page 22: Displayed Messages
21. DISPLAYED MESSAGES Displayed message Possible cause Remedy FILL TANK! The water tank is empty or Fill the tank with water and/ positioned incorrectly. or insert it correctly, push- ing it as far as it will go. GROUND TOO FINE AD-... -
Page 23: Troubleshooting
ENGLISH Displayed message Possible cause Remedy FILL BEAN CONTAINER The coffee beans have run Fill bean container out. INSERT BREWING UNIT The brewing unit has not Insert the brewing unit as been replaced after clean- described in the section ing. “Cleaning the brewing unit”. - Page 24 Problem Possible cause Remedy The coffee is delivered too The coffee is ground too Turn the grinding adjust- quickly. coarsely. ment knob one click anticlockwise towards “1” while the coffee mill is in operation. Avoid turning the grinding adjustment knob exces-...
- Page 25 ENGLISH...
- Page 26 www.electrolux.com...
- Page 27 ENGLISH...
- Page 28 electrolux.com/shop...