
Subscribe to Our Youtube Channel
Related Manuals for Trust 12440


Summary of Contents for Trust 12440
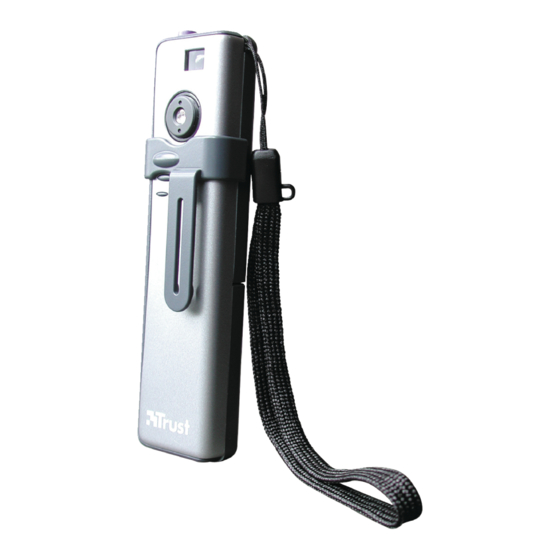
- Page 1 SPYC@M 300 User’s manual T R U S T R U S T . C O M T R U S T R U S T . C O M T . C O M T . C O M L I F E I S M O R E ! T R U S T U S...
- Page 2 SPYC@M 300 Fig. 1 Fig. 2 Fig. 3 Fig. 4 Fig. 5 Fig. 6 T R U S T R U S T . C O M T R U S T R U S T . C O M T .
- Page 3 SPYC@M 300 Fig. 7 Fig. 8 Fig. 9 Fig. 10 T R U S T R U S T . C O M T R U S T R U S T . C O M T . C O M T .
- Page 5 Thank you for your purchase. Register your product via our Internet site at www.trust.com/register, so that you will be eligible for optimal guarantee and service support. You will also be automatically informed of the development of your and other Trust products.
-
Page 6: Customer Care Centers
CUSTOMER CARE CENTERS 24 HOURS free service: www.trust.com Residents in the UK and Ireland should contact: UK Office Mon - Fri Phone +44-(0)0845-6090036 From 8:00 - 16:00 +31-(0)78-6543299 I residenti in Italia possono contattare: lun - ven Ufficio italiano 9:00 - 13:00 /... -
Page 7: General Information
Saving photographs on a computer (6.1.1) Introduction This instruction manual is for users of the TRUST SPYC@M 300. This camera can be used to take photographs and record video clips. The camera can also be used as a webcam for videoconferencing. -
Page 8: Using The Camera
TRUST SPYC@M 300 Using the camera Inserting the batteries Open the camera’s battery compartment. Insert the batteries into the camera as indicated in the battery compartment. Close the battery cover. Note: Inserting the batteries incorrectly will cause damage. Note: Only replace the batteries with the same type of alkaline or rechargeable NiMH batteries (two AAA batteries). -
Page 9: Setting The Resolution
TRUST SPYC@M 300 Description Function Number of Displays the number of photographs which photographs can still be taken in the high resolution mode. Number of Displays the number of photographs which photographs can still be taken in the low resolution mode. -
Page 10: Installing The Camera
TRUST SPYC@M 300 Recording a video clip Using the repeat function allows you to take a number of photographs one after the other whilst keeping the exposure button (2, figure 1) pressed. These photographs can then be used to make a video clip on your computer. Carry out the following to select the repeat function. -
Page 11: Checking After The Installation
The latest driver can be downloaded from www.trust.com/12440. Check whether a new driver is available and use this for the installation. The current version of the driver is included on the Trust Installation CD-ROM. Note: Make sure all other programs are closed during the installation. -
Page 12: Installing The Application Software
Photo Explorer Ulead Photo Explorer 6 is an image explorer/editing program that can be used to load and edit the photographs on your PC which you have taken using your Trust SPYC@M. Follow the instructions below to install Photo Explorer 6.0. -
Page 13: Using The Software
ISDN device, a sound card with speakers, a microphone and an Internet connection. The program is supplied on the software disc. To install NetMeeting, click on ‘NetMeeting’ in the Trust Software Installer (see figure 2). Follow the on-screen instructions to complete the installation of NetMeeting. After the installation, you can read the NetMeeting manual for instructions on how to use the program. -
Page 14: Saving A Video Clip
TRUST SPYC@M 300 Table 3 gives a description of the SpyC@m Manager’s functions when set to ‘DSC’. Use table 3 in combination with figure 3. Function Description Photo The photograph in the camera’s memory. Worksheet All the photographs in the camera’s memory are displayed here. -
Page 15: Viewing Live Images
Express 3.0 SE’. Figure 6 will appear. In the main Photo Express menu, select ‘Get’ and then select ‘Camera’. ‘TRUST SPYC@M 300’ will now be seen for ‘Select data source’ in the top left-hand corner of the window. You may have other cameras installed on your computer. -
Page 16: Live Video Images
The Ulead Photo Explorer photo editing software can be used to open the TWAIN window for the Trust SPYC@M 300. A brief description of how to use the TRUST SPYC@M 300 in Ulead Photo Explorer 6.0 is given below. For a detailed description of Photo Explorer, see the program's help function. -
Page 17: Ulead Video Studio
Internet in QuickTime MOV or RealMedia RM streaming media format. A brief description of how to use the TRUST SPYC@M 300 in Ulead Video Studio 4.0 is given below. For a detailed description of VideoStudio, see the program's Help function. - Page 18 Start: Start a new project and give the project name, file location, video format, etc, or select an existing project that you want to alter. Capture: Start new video recordings. You can also select the TRUST SPYC@M 300 and alter the video and audio settings. The video image from your connected camera will now be visible in the main window.
- Page 19 Select ‘Built-in Mail Utility’ and fill in your ‘Mail Server’ information (given to you by your ISP) and your ‘account name’. Click on 'Next' to continue. Select ‘TRUST SPYC@M 300 Video Capture’ as the ‘Video capture device’ and select the desired frames per second (fps). Click on ‘Test It?’ to compare the image.
-
Page 20: Saving A Video Recording
TRUST SPYC@M 300 Click on ‘Start – Programs – Cyberlink VideoLive Mail 4.0 – VideoLive Mail’. Video Live Mail will start. Click on the round ‘Record’ button to start recording. Click on the square ‘Stop’ button when you wish to stop the recording. -
Page 21: Webcam & Internet
This contains a description of all the functions available with NetMeeting. Webcam & Internet The TRUST SPYC@M 300 can also be used as a webcam, for example, on your Internet page. A number of informative sites about webcams are given below: http://www.camarades.com... - Page 22 ‘OK’. Your camera is now ready for use. 7.1.2 OS X Insert the Trust Installation CD-ROM into your CD-ROM drive. Double-click on the CD-ROM icon on your desktop. Next, open the ‘\Driver\MacOS X’ folder. Double-click on the file ‘product name.hqx’.
-
Page 23: Troubleshooting
TRUST SPYC@M 300 Troubleshooting Method Read the solutions given below. Check for up-to-date FAQ’s, drivers and instruction manuals on the Internet (www.trust.com/12440). Problem Cause Possible solution Windows does The computer's USB Check the settings of your USB port does not work. - Page 24 TRUST SPYC@M 300 Problem Cause Possible solution The camera must be Remove the USB cable and the The camera does not react, reset. batteries for at least 5 minutes to reset the camera. Reinsert the although the batteries into the camera. The batteries are full.
- Page 25 Troubleshooter. If you still have problems after trying these solutions, please contact one of the Trust Customer Care Centers. You can find more information at the back of this instruction manual. Please have the following information available: •...
-
Page 26: Declaration Of Conformity
: Photo Camera Type designation : SPYC@M 300 Item no. : 12440 Is herewith confirmed to comply with the requirements set in the Council Directive on the Approximation of the Laws of the Member States relating to Electro Magnetic Compatibility Directive...
Need help?
Do you have a question about the 12440 and is the answer not in the manual?
Questions and answers