Table of Contents
Advertisement
Quick Links
Vendor: S000180
ASSEMBLY INSTRUCTIONS
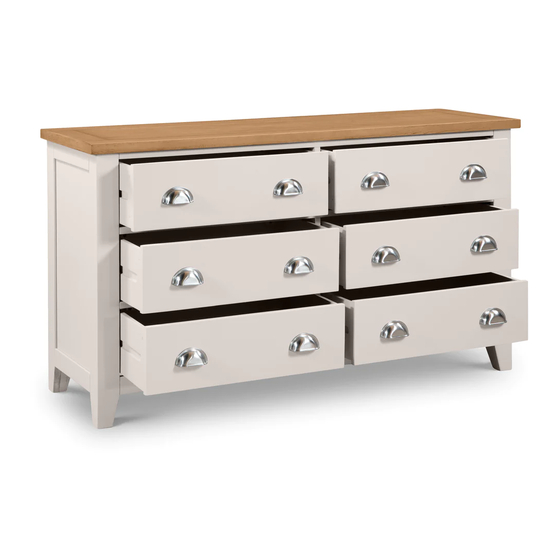
RICHMOND 6 DRAWER CHEST
IMPORTANT: READ THESE INSTRUCTIONS CAREFULLY BEFORE ATTEMPTING TO ASSEMBLE OR
USE YOUR RICHMOND 6 DRAWER CHEST
PLEASE KEEP THESE INSTRUCTIONS FOR FUTURE REFERENCE
HEALTH & SAFETY:
DO NOT use this chest if any parts are missing, damaged or worn
DO NOT use this chest unless all fixings are secured
Always use on a level, even surface
CARE & MAINTENANCE:
Assemble on a soft, clean surface to prevent damages
Periodically check all screws & fixings to ensure they are secure
DO NOT push the chest as this will damage the feet
Always lift the chest with two people to reposition
Keep any sharp objects away from the chest
www.birlea.com
Page 1 of 8
Advertisement
Table of Contents

Subscribe to Our Youtube Channel
Related Manuals for Birlea RICHMOND 6 DRAWER CHEST


Summary of Contents for Birlea RICHMOND 6 DRAWER CHEST
- Page 1 ASSEMBLY INSTRUCTIONS RICHMOND 6 DRAWER CHEST IMPORTANT: READ THESE INSTRUCTIONS CAREFULLY BEFORE ATTEMPTING TO ASSEMBLE OR USE YOUR RICHMOND 6 DRAWER CHEST PLEASE KEEP THESE INSTRUCTIONS FOR FUTURE REFERENCE HEALTH & SAFETY: DO NOT use this chest if any parts are missing, damaged or worn...
- Page 2 Vendor: S000180 Parts List Hardware List Part Description Part Description Left Panel 3.5 x 12 mm CSK Screw Right Panel 3.5 x 15 mm CSK Screw Top Panel 4.5 x 32 mm CSK Screw Lower Front Frame 4.7 x 38 mm Screw Lower Back Frame 6 x 9 mm Euro Screw Lower Front Plinth...
- Page 3 Vendor: S000180 Step 1: Insert hardware parts F, G and H as shown using hardware part S and a small mallet (not provided) DO NOT use any power tools as this may damage the frame and will invalidate any claim Step 2: Insert hardware part J as shown using a screwdriver (not provided) DO NOT use any power tools as this may damage the frame and will invalidate any claim Page 3 of 8...
- Page 4 Vendor: S000180 Step 3: Assemble the drawers as shown using hardware parts A, C, L, M, P1, P2 and S with a screwdriver (not provided) DO NOT use any power tools as this may damage the frame and will invalidate any claim Step 4: Attach the lower front plinth (6) to the lower front frame (4) using hardware parts K and S with a screwdriver (not provided) DO NOT use any power tools as this may damage the frame and will invalidate any claim...
- Page 5 Vendor: S000180 Step 5: Attach hardware parts N1 and N2 to the left side panel (1), right side panel (2) and division panel (9) using hardware part E and a screwdriver (not provided) DO NOT use any power tools as this may damage the frame and will invalidate any claim Step 6: Attach the division panel (9) to the lower back frame (5), lower front frame (4) and support block (12) using hardware part D and a screwdriver (not provided) DO NOT use any power tools as this may damage the frame and will invalidate any claim...
- Page 6 Vendor: S000180 Step 7: Attach the left side panel (1) to the left front frames (10), upper front plinth (7), lower back frame (5) and lower front frame (4) using hardware parts K and S with a screwdriver (not provided) DO NOT use any power tools as this may damage the frame and will invalidate any claim Step 8: Attach the right front frames (11) and right panel (2) using hardware parts K and S, then attach hardware part Q.
- Page 7 Vendor: S000180 Step 9: Insert the back panels (19) DO NOT use any power tools as this may damage the frame and will invalidate any claim Step 10: Attach the top panel (3) using hardware parts C, K, L and S and a screwdriver (not provided) DO NOT use any power tools as this may damage the frame and will invalidate any claim Page 7 of 8...
- Page 8 Step 12: Secure the back panels (19) using hardware parts B and S with a screwdriver (not provided) DO NOT use any power tools as this may damage the frame and will invalidate any claim For complete product information, images and dimension diagrams please visit www.birlea.com Page 8 of 8...
Need help?
Do you have a question about the RICHMOND 6 DRAWER CHEST and is the answer not in the manual?
Questions and answers