
Subscribe to Our Youtube Channel
Related Manuals for Franke FFD090X5S


Summary of Contents for Franke FFD090X5S
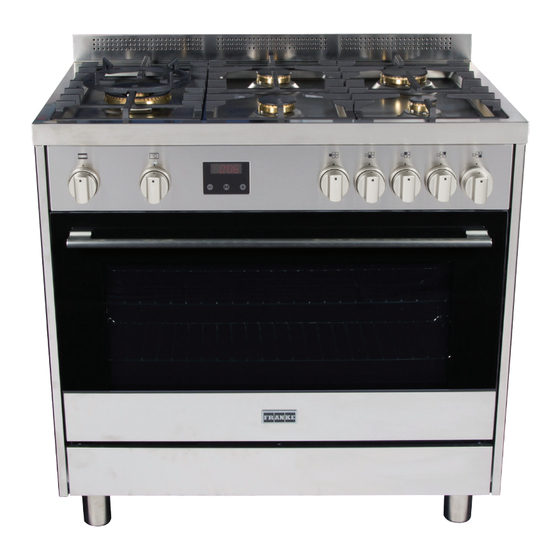
- Page 1 Welcome to your new Franke upright cooker You’re about to begin a very happy and delicious relationship. Let’s get started. This is no ordinary upright cooker. FFD090X5S - 90CM DUAL FUEL UPRIGHT COOKER...
- Page 2 Australia: 03 9700 9100 | info@prks.com.au New Zealand: 09 964 0400 | info@prks.co.nz WARRANTY Your Franke product is protected by a 2-year warranty. Should you ever need to make a warranty enquiry, simply contact our service department. Australia: 03 9700 9100 | service@prks.com.au New Zealand: 09 964 0400 | service@prks.co.nz...
-
Page 3: Table Of Contents
Chapter 2: Life with your Franke Upright cooker Functions Operating your upright cooker Using the touch clocok Chapter 3: Getting the most out of your Franke Upright cooker Cleaning and care Interior lighting Tips for using burners correctly Chapter 4: Problem, meet solution... -
Page 4: Chapter 1: Ready, Set Up, Go
CHAPTER 1 READY, SET UP, GO Your Franke upright cooker is designed to be set up quickly and easily - so you can start creating delicious masterpieces even sooner. Chapter 1 Ready, set up, go... -
Page 5: Warnings
WARNINGS 1. This appliance is not intended for use by persons (including children) with reduced physical, sensory or mental capabilities, or lack of experience or knowledge, unless they have been given supervision or instruction concerning the use of the appliance by a person responsible for their safety. - Page 6 18. Ensure that the kitchen is well ventilated or mechanical ventilation is in use while cooking on the appliance. 19. The cooktop and oven will become hot during and directly after use. Do not touch any components during this time, as they may be hot and can cause burns. To avoid burns young children should be kept away.
-
Page 7: What's In The Box
WHAT’S IN THE BOX? 1 x Franke oven 1 x Wire shelf 1 x Slider bracket 1 x Universal pan 1 x Telescopic runner 1 x Wiring/gas connectors 3 x Gas trivets 5 x Burners FINAL PREPARATION Before using the oven, remove any protective wrap from the stainless steel. All stainless steel body parts should be wiped with hot, soapy water and with a liquid stainless steel cleanser. - Page 8 LOCAL AUTHORITY REQUIREMENTS Before installation, unpack all parts from carton, remove all internal packaging and check for da mage. Check Gas Type and specifications plate placed on the rear of the unit, alternatively there is a second label supplied. All gas fitting work, service and repairs can only be performed by an authorised person in accordance with AS/NZS 5601 and local gas regulations.
- Page 9 IMPORTANT INFORMATION FOR INSTALLAING AND SERVICING THE APPLIANCE The cooker can be installed separately, as a freestanding unit, or between kitchen units or between a kitchen unit and the wall. This appliance is not connected to devices which exhaust combustion products.
- Page 10 STEP 2: SURFACE BURNERS For surface burners conversion ref to table 1 chapter ‘Adaption to various types of gas’ at page 8 and chapter ‘Conversion to different types of gas’ at page 12 STEP 3: MAIN OVEN BURNER For main oven burner conversion ref to table 1 chapter ‘Adaption to various types of gas’ at page 8 and chapter ‘Conversion to different types of gas’...
- Page 11 Location and Aeration Gas cooking appliances must always evacuate the combustion products by means of hoods connected to chimneys, flues or directly outside (Fig. 05). If a hood cannot be installed It is possible to use a fan installed on a window or directly facing outdoors, to be operated together with the appliance ( Fig. 06), provided that there is strict compliance with the ventilation regulations.
- Page 12 Using a flexible connection This appliance is approved for connection with a flexible hose, which complies with the AS/NZS 1869 (Australian Approved), 10mm ID, class B or D, between 1-1.2m long. Connection shall be in compliance with AS/NZS 5601 for a high level connection. The hose should not be subjected to abrasion, kinking or permanent deformation and should be able to be inspected along its entire length.
- Page 13 SUPPORT LEGS AND BACKGUARD INSTALLATION The cookers are supplied with four transit supports (one for each corner). Four support legs are supplied separately and are fitted on location to the four corners of the lower support frame. Each support leg is pushed over the relevant transit support until flush with the support frame. Each leg is adjusted by screwing the lowe r section in or out as required for fitting to a 900mm bench height.
- Page 14 ANTI-TILT DEVICE AND STRAIN RELIEF FLEXIBLE HOSE DEVICE ANTI-TILTING CHAIN/HOSE RESTRAINING CHAIN A chain must be fitted by the installer within 50mm of the hose connection point to prevent strain on the hose when the cooker is pulled forward. The chain should restrict the appliance movement to no more than 80% of the hose length.
- Page 15 In order to prevent the oven from tipping Right Side Left Side forward as shown on the previous page, we need to make sure both chains provided with the oven are used. On the left side of the oven a 16mm drill bit was used to drill through the cabinetry into the adjacent cabinet, as you can see the hole has not been...
- Page 16 WARNING: In order to prevent accidental tipping of the appliance, for example a child climbing onto the open oven door, the stabilising means must be installed. Ensure the chains are correctly anchored to prevent the appliance from tilting forward and to prevent strain on the hose when the cooker is pulled forward.
- Page 17 5) Burner “MINIMUM” adjustment: Work surface burner adjustment: follow the instructions below to adjust the work surface burner minimum: • Light the burner and set the knob to the MINIMUM position (small flame). • Remove the knob of the valve that is press fit on the rod of that valve. •...
- Page 18 APPLIANCE ELECTRICAL CONNECTION The electric connection must comply with the current legal standards and regulations. Before making the connection, check that: • The system electrical rating and the current outlet are adequate for the maximum power output of the appliance (see the label applied to the bottom of the casing). •...
- Page 19 INSTALLATION CHECKLIST 1. Is the range mounted on its legs? 2. Is the backguard securely connected? 3. Has the anti-tip device been properly installed? 4. Does the clearance from the side cabinets comply with the manufacturers directions? 5. Is the electricity properly grounded? 6.
-
Page 20: Setting The Time
5. Press the ‘mem.’ button to confirm the new time settings. ENVIRONMENTAL INFORMATION This Franke appliance is particularly energy efficient, however to make the most out of it, and to save even more energy make sure you adhere to the following steps: 1. -
Page 21: Chapter 2: Life With Your Franke Upright Cooker
CHAPTER 2 life with your franke upright cooker We designed this upright cooker with one thing in mind. How do we create a wonderfully simple user experience for you, our customer? Chapter 2 Life with your Franke upright cooker... -
Page 22: Functions
Convention with Fan Combination of both the heating elements and the fan. This is also the most energy efficient setting. Lightly browned on the outside, moist on the inside (ideal for roasting). Chapter 2 Life with your Franke upright cooker... -
Page 23: Operating Your Upright Cooker
After power on reset or when no key is pressed for 7 seconds, the key look function is activated. Pressing a valid key or key combination for 2 seconds or more will deactivate the key lock. Chapter 2 Life with your Franke upright cooker... -
Page 24: Chapter 3: Getting The Most Out Of Your Franke Upright Cooker
CHAPTER 3 getting the most out of your franke upright cooker Getting the most out of your Franke upright cooker. Your Franke upright cooker turns work into play, and inspires creativity every single day. Chapter 3 Getting the most out of your Franke upright cooker... -
Page 25: Cleaning And Care
CLEANING AND CARE We want your Franke Appliance to be looking this good for a long time to come. To ensure that the various surfaces are not damaged through cleaning, please observe the following: Glass: Glass cleaner and with a microfiber cloth. -
Page 26: Chapter 4: Problem, Meet Solution
CHAPTER 4 problem, meet solution We don’t expect your experience with your new Franke upright cooker to be anything but wonderful, but here’s some trouble shooting remedies just in case. Chapter 4 Problem, meet solution... -
Page 27: Trouble Shooting
TROUBLE SHOOTING You shouldn’t have any issues with your Franke Appliance, however there are some problems which can easily be fixed by trouble shooting the table below. If you can’t find your problem, or the remedy has not fixed the issue, then give our friendly customer service team a call on 03 9700 9100. -
Page 28: Chapter 5 Last But Not Least
CHAPTER 5 last but not least This section contains the warnings, precautions and legal notices to make sure everything runs smoothly. Chapter 5 Last but not least... - Page 29 UPRIGHT COOKER DOOR PRECAUTIONS Never apply pressure on the upright cooker door when it is closed or open. Never use the upright cooker door as a seator bench or apply any pressure to it while it is open. Do not place cookware or accessories on the upright cooker door.
- Page 30 REPLACING PARTS Before performing any maintenance operations, disconnect the appliance from the g a s supply and electricity network. To replace parts such as knobs and burners, just remove them from the seats without dis assembling any part of the cooker. To replace parts such as nozzle supports, valves and electric components follow the procedure described in the burner adjustment paragraph.
- Page 31 HAZARDS The following is a comprehensive list of all hazards and risks this product possesses. Risk of fire: • Any combustible items left in or near the upright cooker during operation • Be aware of baking paper coming into contact of the heating element. Risk of burns: •...
-
Page 32: Glossary
GLOSSARY Abrasive - a course and harsh substance capable of polishing or cleaning a surface by rubbing or grinding. Buzzer - a device that makes a loud noise and is used to signal something. Cabinetry - a collection of cupboards with drawers or shelves. Circuit breaker - and automatic device for stopping the flow of current in an electrical circuit for safety reasons. - Page 33 83 Bangholme Road Dandenong South VIC 3175 Australia Phone +61 3 9700 9100 +61 3 9700 9191 info@prks.com.au www.franke.com.au PR Kitchen & Washroom Systems NZ Ltd P.O Box 53171, Auckland Airport Auckland 2150 New Zealand Phone 09 964 0400 09 964 0401 info@prks.co.nz...
Need help?
Do you have a question about the FFD090X5S and is the answer not in the manual?
Questions and answers