Hills VoiceNav User Manual
Hide thumbs
Also See for VoiceNav:
- User manual (23 pages) ,
- Installation manual (13 pages) ,
- User manual (24 pages)
Table of Contents
Advertisement
Advertisement
Table of Contents

Subscribe to Our Youtube Channel
Related Manuals for Hills VoiceNav


Summary of Contents for Hills VoiceNav
- Page 1 VoiceNav User Manual VoiceNav User Manual Hills Industries® V0.3...
-
Page 2: Table Of Contents
Basic system configuration – adjust area entry / exit delay times Mute menu explained Mute menu – Adjusting volume level and microphone sensitivity Mute menu – enabling / disabling features within the mute menu Event log and service phrases Word library Zone list VoiceNav User Manual Hills Industries® V0.3... -
Page 3: Introduction
We trust that you will enjoy your VoiceNav, and we would like to thank you for choosing a Hills Security System. All users of your security system should read and follow the instructions and precautions in this manual before operating your security system. -
Page 4: Drawing
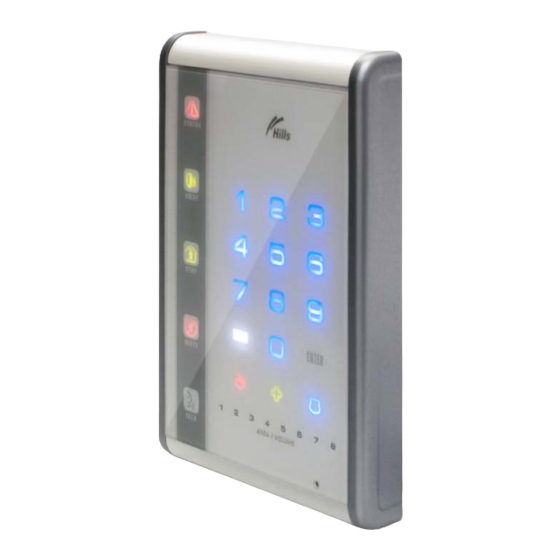
Line drawing of VoiceNav VoiceNav User Manual Hills Industries® V0.3... -
Page 5: Glossary Of Terms
An option that allows certain zones to be open when arming. A security system that is ready to be “force armed” will flash the corresponding area light green. Generally used on detection devices that cover the VoiceNav (motion sensors, front door reed switches), allowing the user to arm the security system without the need to wait for those zones to be secure. -
Page 6: Legend
If any defect appears during the warranty period return it to the place of purchase. Hills Industries assumes no liability for consequential or indirect damage, and accepts no responsibility for repairing damage to the product caused by misuse, careless handling, or where repairs have been made by others. -
Page 7: Indicators, Icons And Lights
Area / Areas are all disarmed from the away mode. Area / Areas are all armed the away mode. *If both the away and stay keys are off, this VoiceNav has multi area control Green Area / Areas are all disarmed from the stay mode. -
Page 8: Away Arming
IE: the front door may be left open and the status light would still show green, allowing you to arm your security system. Your VoiceNav will announce all zones that are not secure when armed. -
Page 9: Stay Arming
If an active zone is alarmed whilst your security system is armed in the stay mode, it will initiate an entry delay warning tone at your VoiceNav, your sirens will sound at the end of this warning. This delay warning time is predetermined by your service provider at the time of installation. -
Page 10: Disarming
Disarming Make your way to the VoiceNav through one of the designated entry / exit doors. When you are detected entering, your VoiceNav will repeat a warning message for the duration of the entry delay until a valid pin code is entered. Your sirens and communicator will activate at the end of the entry delay time if a valid pin code is not entered. -
Page 11: Multi Area Arming - Away Mode - All Areas
[MENU] To exit The area lights at the bottom of your VoiceNav (only those areas to which you have area control) will now be lit solid red, indicating away arming for those areas. Once all areas within the security system are armed, the away key will be lit red. -
Page 12: Multi Area Arming - Away Mode - Single Area
Independent area control adds an enormous amount of flexibility to your security system and your VoiceNav makes it simple to control. You may wish to arm one area in the away mode and disarm another area, whilst arming a third in the stay mode. Just follow the voice prompts and make your selection. -
Page 13: Multi Area Disarming - All Areas
Multi Area Disarming – “All Areas” Make your way to the VoiceNav through one of the designated entry / exit doors. When you are detected entering, your VoiceNav will repeat a warning message for the duration of the entry delay until a valid pin code is entered. -
Page 14: Intercom Room Calling
You are now connected with the room station you have called [TALK] Touch and hold the talk key to speak, release to listen [MUTE] Touch mute to exit Call cancelled Receiving room station will hear Call cancelled VoiceNav User Manual Hills Industries® V0.3... -
Page 15: Emergency Activation Keys
Emergency Activation Keys Three (3) emergency icons are available to be programmed into your VoiceNav to provide support in the areas of personal safety: Medical, Police (duress) and Fire alarm. You must touch these keys for two (2) seconds to activate these functions. You should only press these keys in an emergency situation that requires a response by a central station. -
Page 16: Understanding The Main Menu Structure
VoiceNav is enjoyable and easy. From the moment you touch the menu key, your VoiceNav immediately starts to instruct you on what to do next, simply select the option you wish to access and follow the voice prompts. -
Page 17: To Control Zone Bypass - Bypassing Zones
2. IE: Touch [1]-[2]-[8] [ENTER] for zone 128. • Touch status to check bypassed zones, or simply arm your security system and bypassed zones will be announced automatically. VoiceNav User Manual Hills Industries® V0.3... -
Page 18: To Control Zone Chime - Add A Zone To The Chime Group
To Control Zone Chime MENU You can programme individual zones to “beep” at the VoiceNav when tripped, this is called Chime. Chime mode must be set to on in menu option 2 for this feature to work. Chime mode does not trigger any alarms, and is only used as a low level alert such as a customer entry door. -
Page 19: To Control Zone Chime - Turn Chime On / Off
[MENU] Moves back to main menu (“Touch 1 to control zone bypass…etc……etc……) [MENU] Exits from main menu VoiceNav User Manual Hills Industries® V0.3... -
Page 20: System Event History - Alarm Memory
Exits from main menu To simplify reviewing of alarm memory or system event history, first record user names, zone names, outputs and area names in menu 8 – Recordings. Your VoiceNav will now announce all these events by name. VoiceNav User Manual Hills Industries®... -
Page 21: System Event History - 185 Internal Event Log
Touch enter for next event, touch 0 for previous event, touch menu to go back. [MENU] Moves back to alarm memory / event history selection [MENU] Moves back to main menu (“Touch 1 to control zone bypass…etc……etc……) [MENU] Exits from main menu VoiceNav User Manual Hills Industries® V0.3... -
Page 22: System Test - Sirens
[MENU] Moves back to main menu (“Touch 1 to control zone bypass…etc……etc……) [MENU] Exits from main menu VoiceNav User Manual Hills Industries® V0.3... -
Page 23: System Test - Communicator / Back Up Battery
[MENU] Moves back to main menu (“Touch 1 to control zone bypass…etc……etc……) [MENU] Exits from main menu Battery test is in progress Battery test has passed Battery test has failed. (Contact your service provider) VoiceNav User Manual Hills Industries® V0.3... -
Page 24: System Test - Walk Test / Version Number
Zone walk test, is used to test the connectivity between your alarm devices IE: movement sensors, door contacts etc, and your security system. When in walk test mode your VoiceNav will emit the chime “beep” each time a zone is activated, and chirp the outside siren. -
Page 25: User Configuration - Configure A New Pin Code
Select a new pin code followed by enter, touch zero followed by enter to disable user, touch menu to go back. Moves back to user configuration [MENU] [MENU] Moves back to main menu (“Touch 1 to control zone bypass…etc……etc……) [MENU] Exits from main menu VoiceNav User Manual Hills Industries® V0.3... -
Page 26: User Configuration - Delete A Pin Code
Select a new pin code followed by enter, touch menu to go back. [MENU] Moves back to user configuration [MENU] Moves back to main menu (“Touch 1 to control zone bypass…etc……etc……) [MENU] Exits from main menu VoiceNav User Manual Hills Industries® V0.3... -
Page 27: User Configuration - Remove Area Control
Touch the area number to change selection, touch enter for area list, touch status for selected areas, touch menu to go back. [MENU] Moves back to User Configuration [MENU] Moves back to main menu (“Touch 1 to control zone bypass…etc……etc…) [MENU] Exits from main menu VoiceNav User Manual Hills Industries® V0.3... -
Page 28: User Configuration - Configure User Authority Levels
• To enable “Area Names” and “User Names” Record them in menu 8 – recordings. • To simplify configuring users areas and pins, first record user names, zone names and area names in menu 8 – Recordings. Your VoiceNav will now announce all these events by name. -
Page 29: Phone Number Configuration
• Remember to seek permission from the owners of the phone numbers that you enter, and it is recommended that a communication test be carried out to verify connectivity. • Additional equipment required for Divert and SMS messaging, ask your service provider for further details. VoiceNav User Manual Hills Industries® V0.3... -
Page 30: Phone Number Configuration - Enter And Delete Phone Numbers
Alarm phone number one is disabled, select a new alarm phone number one, followed by enter, touch menu to go back. [MENU] Moves back to Phone number configuration. [MENU] Moves back to main menu (“Touch 1 to control zone bypass…etc…etc…) [MENU] Exits from main menu VoiceNav User Manual Hills Industries® V0.3... -
Page 31: Output Control - Turn Outputs On / Off
• You can record names for each of the 16 outputs, making it easier to identify individual outputs later on. You can record these names in option 6 under menu 8, Voice message Recordings. • Outputs can be toggled On / Off at step 3 VoiceNav User Manual Hills Industries® V0.3... - Page 32 Voice Message Recording MENU With the VoiceNav there is no more need to memorize who has what user code, or what zone number is that sensor in the lounge room. Menu 8 allows you to record names against users, zones, areas, rooms and outputs creating an extremely user friendly security system.
-
Page 33: Voice Message Recording - Exit / Entry Message Recording
[MENU] Moves back to voice message recording [MENU] Moves back to main menu (“Touch 1 to control zone bypass…etc……etc…) [MENU] Exits from main menu VoiceNav User Manual Hills Industries® V0.3... -
Page 34: Voice Message Recording - User Name Recording
[MENU] Moves back to step 4, user number selection. [MENU] Moves back to voice message recording. [MENU] Moves back to main menu (“Touch 1 to control zone bypass…etc……etc…). [MENU] Exits from main menu. VoiceNav User Manual Hills Industries® V0.3... -
Page 35: Voice Message Recording - Zone Name Recording
VoiceNav User Manual Hills Industries® V0.3... -
Page 36: Voice Message Recording - Area And Output Names
Selects output name recording. Select a output number to record or configure followed by enter, touch menu to go back. VoiceNav User Manual Hills Industries® V0.3... -
Page 37: Voice Message Recording - Room Names
Exits from main menu. How to: Record a room name Step Example To record a room name for VoiceNav 5. [MENU]-[8] Selects main menu - Option 8, Voice Message Recording. Enter your code, touch menu to exit [?]-[?]-[?]-[?] Enter your 4 or 6 digit Master user code... -
Page 38: Basic System Configuration - Resetting Latching Sensors (Smoke Detectors / Shock Sensors)
Selects rest detector in alarm Detector alarm cancel [MENU] Moves back to main menu (“Touch 1 to control zone bypass…etc……etc……) [MENU] Exits from main menu VoiceNav User Manual Hills Industries® V0.3... -
Page 39: Basic System Configuration - Resetting The Time And Date
Touch one to configure the time, touch two to configure the date, touch menu to go back. [MENU] Moves back to basic system configuration menu selection. [MENU] Moves back to main menu (“Touch 1 to control zone bypass…etc……etc…) [MENU] Exits from main menu. VoiceNav User Manual Hills Industries® V0.3... -
Page 40: Basic System Configuration - Call Back / Call Answer A Download Session
Touch one to configure the time and date, touch two to configure the area entry time, touch three to configure the area exit time, touch seven to reset detector in alarm, touch eight to call back, touch nine to call answer, touch menu to go back VoiceNav User Manual Hills Industries® V0.3... -
Page 41: Basic System Configuration - Adjust Area Entry / Exit Delay Times
[MENU] Moves back to step 4. area selection [MENU] Moves back to basic system configuration menu selection [MENU] Moves back to main menu (“Touch 1 to control zone bypass…etc……etc…) [MENU] Exits from main menu VoiceNav User Manual Hills Industries® V0.3... -
Page 42: Mute Menu Explained
• Important: When a VoiceNav is configured for intercom functionality, it is refer to as a room station. Mute Menu Selections - Explained Volume Level There are eight volume levels available. - Page 43 Sets microphone level to 6 Select from options 1 to 8 to set microphone level, touch menu to exit [MENU] Moves back to mute menu (“touch 0 to set volume level etc..etc) [MENU] Exits from mute menu VoiceNav User Manual Hills Industries® V0.3...
-
Page 44: Mute Menu - Enabling / Disabling Features Within The Mute Menu
A short circuit of an expansion devices’ power supply has occurred. Expander communication fault An auxiliary reporting device has failed to communicate. Expander trouble An expansion device or keypad is not reporting to the control panel. VoiceNav User Manual Hills Industries® V0.3... - Page 45 The main control has been shut down End download A download session has ceased First to open The first user to disarm a multi area system Last to close The last user to arm a multi area system VoiceNav User Manual Hills Industries® V0.3...
-
Page 46: Word Library
VoiceNav User Manual Hills Industries® V0.3... -
Page 47: Zone List
Programmed Phone Number 1.………………………………………... Programmed Phone Number 2………………………………………..Programmed Phone Number 3.………………………………………... ZONE LIST VoiceNav User Manual Hills Industries® V0.3...
Need help?
Do you have a question about the VoiceNav and is the answer not in the manual?
Questions and answers