Table of Contents
Advertisement
Advertisement
Chapters
Table of Contents

Related Manuals for GMC Terrain 2017


Summary of Contents for GMC Terrain 2017
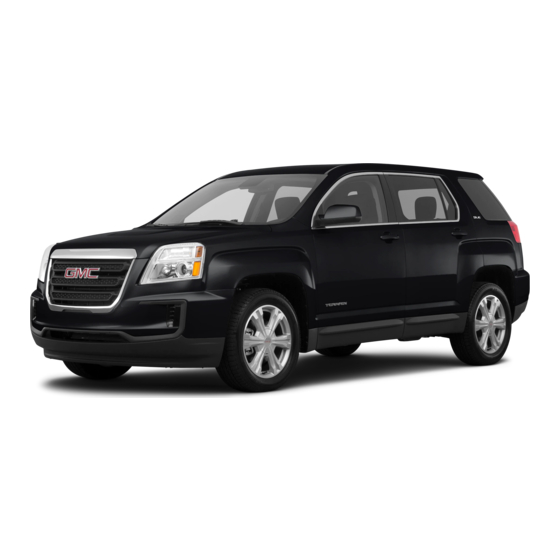
- Page 1 Terrain/Terrain Denali Owner’s Manual gmarabia.com...
-
Page 2: Table Of Contents
Contents Introduction ..... . 2 In Brief ......5 Keys, Doors, and Windows . -
Page 3: Introduction
Caution this manual including, but not limited to, GM, the GM logo, GMC, the Warning messages found on vehicle GMC Truck Emblem, TERRAIN, and labels and in this manual describe DENALI are trademarks and/or... - Page 4 Introduction Symbols : Audio Steering Wheel Controls : Under Pressure : Brake System Warning Light : Windshield Washer Fluid The vehicle has components and labels that use symbols instead of : Charging System text. Symbols are shown along with : Cruise Control the text describing the operation or information relating to a specific : Do Not Puncture...
- Page 5 Introduction NOTES...
-
Page 6: In Brief
In Brief In Brief Steering Wheel Controls ..18 Cruise Control ....19 Driver Information Center (DIC) ....19 Instrument Panel Forward Collision Alert (FCA) Instrument Panel . -
Page 7: Instrument Panel
In Brief Instrument Panel... - Page 8 In Brief 1. Air Vents 0 136. 13. Shift Lever. See Automatic 22. Data Link Connector (DLC) Transmission 0 159. (Out of View). See Malfunction 2. Turn Signal Lever. See Turn Indicator Lamp (Check Engine and Lane-Change 14. Climate Control Systems 0 131 Light) 0 101.
-
Page 9: Initial Drive Information
In Brief Initial Drive : If equipped with the power liftgate, press and hold until the Information liftgate begins to move. This section provides a brief : Press and release to initiate overview about some of the vehicle locator. Press and hold for at important features that may or may least three seconds to sound the not be on your specific vehicle. -
Page 10: Door Locks
In Brief Start the vehicle normally after To open the liftgate, press the touch entering. pad under the liftgate handle and lift up. When the vehicle starts, the parking lamps will turn on. Do not press the touch pad while closing the liftgate. -
Page 11: Windows
In Brief Choose the power liftgate mode by Seat Adjustment Eight-Way Power Seat turning the dial on the switch to Four-Way Power Seat either the 3/4 or MAX position. Press to open or close the liftgate. See Liftgate 0 31. Windows To adjust a power seat, if equipped: Move the seat forward or... - Page 12 In Brief Lumbar Adjustment Reclining Seatbacks To return the seatback to the upright position: Manual Reclining Seatbacks 1. Lift the lever fully without applying pressure to the seatback, and the seatback will return to the upright position. 2. Push and pull on the seatback to make sure it is locked.
-
Page 13: Memory Features
In Brief See Reclining Seatbacks 0 46. turned off. These automatically Indicator lights on the button show stored positions are referred to as the temperature setting. Memory Features RKE Memory positions. See Heated Front Seats 0 49. See Memory Seats 0 47 and Head Restraint Vehicle Personalization 0 118. -
Page 14: Safety Belts
In Brief Safety Belts Passenger Sensing Mirror Adjustment System Exterior The passenger sensing system will turn off the front outboard passenger frontal airbag under certain conditions. No other airbag is affected by the passenger Refer to the following sections for sensing system. -
Page 15: Steering Wheel Adjustment
In Brief Interior Steering Wheel Interior Lighting Adjustment Adjustment Reading Lamps Adjust the rearview mirror to clearly These lamps are located on the view the area behind the vehicle. overhead console. These lamps come on automatically when any Manual Rearview Mirror door is opened. -
Page 16: Exterior Lighting
In Brief For more information on interior See: INT : Move the lever up to INT for lighting, See Instrument Panel intermittent wipes, then turn the Exterior Lamp Controls 0 124. Illumination Control 0 127. INT band up for more frequent Daytime Running Lamps wipes or down for less frequent (DRL) 0 125. -
Page 17: Climate Controls
In Brief Climate Controls The vehicle's heating, cooling, defrosting, and ventilation can be controlled with these systems. ON : Press the upper portion of the button for continuous rear window wipes. OFF : The rear wiper turns off when the button is returned to the middle position. -
Page 18: Transmission
In Brief To use this feature: 1. Move the shift lever to M (Manual Mode). 2. Press the plus/minus button on the shift lever to increase or decrease the gear range available. See Manual Mode 0 161. Fuel Economy Mode Vehicles with a 2.4L engine have a Fuel Economy Mode. -
Page 19: Parking Brake
In Brief Press the eco (economy) button to To release the parking brake, hold Vehicle Features turn this feature on or off. The eco the regular brake pedal down, then light in the instrument cluster will push down momentarily on the Infotainment System come on when engaged, and a parking brake pedal until you feel... -
Page 20: Cruise Control
In Brief Cruise Control SET/ : Move the thumbwheel down : Use these buttons to scroll briefly to set the speed and activate through the items in each menu. cruise control. If cruise control is A small marker will move along the already active, use to decrease page as you scroll through the speed. -
Page 21: Lane Departure
In Brief Lane Departure Rear Vision avoiding objects while in R (Reverse). It operates at speeds Warning (LDW) Camera (RVC) less than 8 km/h (5 mph) and uses If equipped, LDW may help avoid If equipped, RVC displays a view of audible beeps to provide distance and system information. -
Page 22: Sunroof
In Brief Sunroof Slide Switch Performance and Express-Open/Express-Close : Maintenance If equipped, the sunroof switches Press and release (1) to are on the headliner above the rearview mirror. The ignition must be express-open the sunroof. Press Traction Control/ in ON/RUN or ACC/ACCESSORY, and release (1) to Electronic Stability... -
Page 23: Tire Pressure Monitor
In Brief and the appropriate DIC Loading Information label. See lower as it may result in vehicle message displays. See Ride Vehicle Load Limits 0 149. The damage and lower fuel economy. Control System warning light will remain on until the See Fuel 0 177. -
Page 24: Driving For Better Fuel
In Brief Keep vehicle tires properly inflated. 1. Turn the ignition to ON/RUN with the engine off. Combine several trips into a single trip. 2. Fully press and release the accelerator pedal three times Replace the vehicle's tires with within five seconds. the same TPC Spec number molded into the tire's sidewall See Engine Oil Life System 0 196. -
Page 25: Keys, Doors, And Windows
Keys, Doors, and Windows Keys, Doors, and Reverse Tilt Mirrors ... . 38 Keys and Locks Interior Mirrors Windows Keys Interior Rearview Mirrors ..39 Manual Rearview Mirror . - Page 26 Keys, Doors, and Windows Warning (Continued) impacted, and airbags may not deploy. To reduce the risk of unintentional rotation of the ignition key, do not change the way the ignition key and Remote Keyless Entry (RKE) transmitter, if equipped, are connected to the provided key rings.
-
Page 27: Remote Keyless Entry (Rke)
Keys, Doors, and Windows Remote Keyless Entry Other conditions can affect the performance of the transmitter. See (RKE) System Remote Keyless Entry (RKE) Do not make changes or System 0 26. modifications to the Remote Keyless Entry (RKE). This could void authorization to use this equipment. - Page 28 Keys, Doors, and Windows Battery Replacement : Press to unlock the driver door : If equipped, first press and or all doors. See Vehicle release then immediately press Replace the battery if the REPLACE Personalization 0 118. The turn BATTERY IN REMOTE KEY and hold for at least signal indicators may flash to...
-
Page 29: Remote Vehicle Start
Keys, Doors, and Windows 5. Snap the battery cover back on Other conditions can affect the The engine will shut off after to the transmitter. performance of the transmitter. See 10 minutes unless a time extension is done or the key is Remote Keyless Entry (RKE) Remote Vehicle Start System 0 26. -
Page 30: Door Locks
Keys, Doors, and Windows Canceling a Remote Start The vehicle is not in P (Park). Warning (Continued) To shut off the engine: Remote Start Ready safety belts properly and the Press and hold until the If the vehicle does not have the doors should be locked remote vehicle start feature, it may parking lamps turn off. -
Page 31: Power Door Locks
Keys, Doors, and Windows Power Door Locks The doors will lock automatically Automatic door locking can be five seconds after all doors are programmed through the Driver closed. If a door is reopened before Information Center (DIC). See that time, the five-second timer will Vehicle Personalization 0 118. -
Page 32: Doors
Keys, Doors, and Windows Manual Safety Locks To open a rear door when the safety Doors lock is on: 1. Unlock the door by activating Liftgate the inside handle, by using the power door lock switch, or by Warning using the Remote Keyless Entry (RKE) transmitter. - Page 33 Keys, Doors, and Windows Power Liftgate Warning (Continued) Warning and set the fan speed to the highest setting. See You or others could be injured if Climate Control Systems caught in the path of the power in the Index. liftgate. Make sure there is no one If the vehicle is equipped in the way of the liftgate as it is with a power liftgate, disable...
- Page 34 Keys, Doors, and Windows Manual operation of a liftgate that Press and release on the also has power operation requires liftgate next to the latch to close the more effort than a standard manual liftgate. liftgate. Press any liftgate switch or the To open or close the liftgate, select touch pad while the liftgate is MAX or 3/4 mode and then:...
- Page 35 Keys, Doors, and Windows to completion. If the vehicle is manually close the liftgate which will 2. Stop the liftgate movement at accelerated before the liftgate has allow normal power operation the desired height by pressing completed moving, the liftgate may functions to resume.
-
Page 36: Vehicle Security
Keys, Doors, and Windows The liftgate has an electric latch. Vehicle Security Caution If the battery is disconnected or has This vehicle has theft-deterrent low voltage, the liftgate will not Attempting to move the liftgate features; however, they do not make open. -
Page 37: Immobilizer Operation
Keys, Doors, and Windows On Solid : Vehicle is secured The vehicle alarm system will not To avoid setting off the alarm by during the delay to arm the system. arm if the doors are locked with accident: the key. Fast Flash : Vehicle is unsecured. -
Page 38: Exterior Mirrors
Keys, Doors, and Windows The vehicle is automatically If the engine does not start and the Exterior Mirrors immobilized when the key is security light stays on, there is a removed from the ignition. problem with the system. Turn the Convex Mirrors ignition off and try again. -
Page 39: Power Mirrors
Keys, Doors, and Windows Power Mirrors Heated Mirrors The vehicle is driven in R (Reverse) above a set speed. For vehicles with heated mirrors: To turn this feature on or off, see The heated outside rearview mirrors Vehicle Personalization 0 118. turn on when the rear window defogger is on and help to clear fog or frost from the surface of the... -
Page 40: Interior Mirrors
Keys, Doors, and Windows Interior Mirrors Windows pulsing sound when either rear window is down and the front windows are up. To reduce the Interior Rearview Mirrors Warning sound, open either a front window or the sunroof, if equipped. Adjust the rearview mirror for a clear Never leave a child, a helpless view of the area behind the vehicle. -
Page 41: Sun Visors
Keys, Doors, and Windows The express mode can be canceled Sun Visors at any time by briefly pressing, or pulling the switch. Window Lockout Pull the sun visor down to block glare. Detach the sun visor from the The power windows work when the center mount to pivot to the side ignition is in ON/RUN or ACC/ window or, if equipped, extend... -
Page 42: Roof
Keys, Doors, and Windows Roof Slide Switch conditions, it is possible to override the reversal system. To override the Express-Open/Express-Close : reversal system, close in manual Sunroof Press and release (1) to mode. To stop the movement, express-open the sunroof. Press release the switch. -
Page 43: Seats And Restraints
Seats and Restraints Seats and Airbag System Securing Child Restraints (With the Safety Belt in the Airbag System ....58 Restraints Rear Seat) ....82 Where Are the Airbags? . -
Page 44: Head Restraints
Seats and Restraints Head Restraints Front Seats The vehicle's front seats have head restraints in the outboard seating positions. Warning With head restraints that are not installed and adjusted properly, there is a greater chance that Adjust the head restraint so that the The height of the head restraint can occupants will suffer a neck/ top of the restraint is at the same... -
Page 45: Front Seats
Seats and Restraints Rear Seats Front Seats 2. Move the seat forward or rearward to adjust the seat The vehicle's rear seat has head position. Seat Adjustment restraints in the outboard seating 3. Release the handle to stop the positions that cannot be adjusted. seat from moving. -
Page 46: Lumbar Adjustment
Seats and Restraints To adjust a power seat, if equipped: To adjust a power seat, if equipped: Lumbar Adjustment Move the seat forward or Move the seat forward or Power Lumbar rearward using the handle under rearward by sliding the control the front of the seat cushion (1). -
Page 47: Reclining Seatbacks
Seats and Restraints Reclining Seatbacks Warning Sitting in a reclined position when the vehicle is in motion can be dangerous. Even when buckled up, the safety belts cannot do their job. The shoulder belt will not be against your body. Instead, it will be in front of you. -
Page 48: Memory Seats
Seats and Restraints 2. Push and pull on the seatback Memory Seats RKE Memory positions. See to make sure it is locked. Remote Keyless Entry (RKE) System Operation 0 26. Power Reclining Seatbacks Storing Button Memory Positions To save positions into Button Memory: 1. - Page 49 Seats and Restraints If something has blocked the driver Memory positions, unlock the driver position is not automatically seat while recalling a memory door with the RKE transmitter and recalling, then store your positions position, the recall may stop. open the driver door. If the driver to the other button or switch RKE Remove the obstruction;...
-
Page 50: Heated Front Seats
Seats and Restraints two seconds. Try recalling the exit Remote Start Heated Seats position again. If the exit position is When it is cold outside, the heated still not recalling, see your dealer for seats can be programmed to turn on service. -
Page 51: Rear Seats
Seats and Restraints Rear Seats Warning (Continued) Split Folding Seatbacks Always push and pull on the Either side of the rear seatback can seatbacks to be sure they are be folded down for more cargo locked. space. Folding the Seatbacks Warning Caution A safety belt that is improperly... -
Page 52: Safety Belts
Seats and Restraints 3. Make sure the rear safety belts Safety Belts Warning (Continued) are not twisted or caught This section of the manual between the seat cushion and passengers to ride in any area of describes how to use safety belts the seatback. -
Page 53: How To Wear Safety Belts
Seats and Restraints When riding in a vehicle, you travel Q: If my vehicle has airbags, why It is very important for all occupants as fast as the vehicle does. If the should I have to wear safety to buckle up. Statistics show that vehicle stops suddenly, you keep unbelted people are hurt more often belts? -
Page 54: Lap-Shoulder Belt
Seats and Restraints pelvic bones and you would be Lap-Shoulder Belt less likely to slide under the lap All seating positions in the vehicle belt. If you slid under it, the belt have a lap-shoulder belt. would apply force on your abdomen. - Page 55 Seats and Restraints 3. Push the latch plate into the 5. To make the lap part tight, pull Before a door is closed, be sure the buckle until it clicks. up on the shoulder belt. safety belt is out of the way. If a door is slammed against a safety Pull up on the latch plate to belt, damage can occur to both the...
- Page 56 Seats and Restraints belts during the early stages of a Rear Safety Belt Comfort moderate to severe frontal, near Guides frontal, or rear crash if the threshold conditions for pretensioner Warning activation are met. Safety belt pretensioners can also help tighten A safety belt that is not properly the safety belts in a side crash or a worn may not provide the...
- Page 57 Seats and Restraints To install: 3. Be sure that the belt is not twisted and it lies flat. The elastic cord must be behind the belt with the plastic guide on the front. 2. Place the guide over the belt, and insert the two edges of the 1.
-
Page 58: Safety Belt Use During
Seats and Restraints be removed from the guide. Slide The best way to protect the fetus is Safety Belt Care the guide back into its storage to protect the mother. When a safety Keep belts clean and dry. pocket on the side of the seatback. belt is worn properly, it is more likely that the fetus will not be hurt in a Safety Belt Use During... -
Page 59: Replacing Safety Belt System Parts After A Crash
Seats and Restraints Replacing Safety Belt New parts and repairs may be Airbag System necessary even if the safety belt System Parts after a The vehicle has the following system was not being used at the Crash airbags: time of the crash. A frontal airbag for the driver. - Page 60 Seats and Restraints For frontal airbags, the word Warning (Continued) Warning (Continued) AIRBAG is on the center of the steering wheel for the driver and on belts, not replace them. Also, seriously injured or killed. Do not the instrument panel for the front airbags are not designed to inflate sit unnecessarily close to any outboard passenger.
-
Page 61: Where Are The Airbags
Seats and Restraints Where Are the Airbags? The front outboard passenger Warning frontal airbag is in the passenger side instrument panel. Children who are up against, or very close to, any airbag when it inflates can be seriously injured or killed. Always secure children properly in the vehicle. -
Page 62: When Should An Airbag Inflate
Seats and Restraints Deployment thresholds are used to Warning (Continued) predict how severe a crash is likely to be in time for the airbags to inflating airbag must be kept inflate and help restrain the clear. Do not put anything occupants. -
Page 63: What Makes An Airbag
Seats and Restraints whether the object is fixed or airbags are not designed to inflate in How Does an Airbag moving, rigid or deformable, narrow rear impacts. Both roof-rail airbags Restrain? or wide. will inflate when either side of the vehicle is struck or if the sensing In moderate to severe frontal or Frontal airbags are not intended to... -
Page 64: What Will You See After An Airbag Inflates
Seats and Restraints But airbags would not help in many prevent the driver from seeing out of The feature may also activate, types of collisions, primarily the windshield or being able to steer without airbag inflation, after an because the occupant's motion is the vehicle, nor does it prevent event that exceeds a predetermined not toward those airbags. -
Page 65: Passenger Sensing System
Seats and Restraints Additional windshield breakage may Passenger Sensing The passenger sensing system also occur from the front outboard works with sensors that are part of System passenger airbag. the front outboard passenger seat. The vehicle has a passenger The sensors are designed to detect Airbags are designed to inflate the presence of a properly-seated sensing system for the front... - Page 66 Seats and Restraints The passenger sensing system is Warning (Continued) Warning (Continued) designed to turn on the front outboard passenger frontal airbag the back of the rear-facing child seat. Consider using another anytime the system senses that a restraint would be very close to vehicle to transport the child person of adult size is sitting the inflating airbag.
- Page 67 Seats and Restraints 3. Remove any additional items 6. Restart the vehicle. Warning from the seat such as blankets, The passenger sensing system cushions, seat covers, seat may or may not turn off the If the airbag readiness light ever heaters, or seat massagers.
- Page 68 Seats and Restraints because that person is not sitting A thick layer of additional material, Warning properly in the seat. Use the such as a blanket or cushion, following steps to allow the system or aftermarket equipment such as If the front outboard passenger to detect that person and enable the seat covers, seat heaters, and seat airbag is turned off for an...
-
Page 69: Servicing The Airbag-Equipped
Seats and Restraints passenger airbag while a child Servicing the Adding Equipment to the restraint or child occupant is on Airbag-Equipped Vehicle Airbag-Equipped Vehicle the seat. If the passenger airbag is turned on, the on indicator will Airbags affect how the vehicle Adding accessories that change the be lit. -
Page 70: Airbag System Check
Seats and Restraints trim is replaced with non-GM Airbag System Check Replacing Airbag System covers, upholstery, or trim; or with Parts after a Crash The airbag system does not need GM covers, upholstery, or trim regularly scheduled maintenance or designed for a different vehicle. Any replacement. -
Page 71: Child Restraints
Seats and Restraints Child Restraints Sit all the way back on the seat. Q: What is the proper way to Do the knees bend at the seat wear safety belts? edge? If yes, continue. If no, Older Children A: An older child should wear a return to the booster seat. -
Page 72: Infants And Young Children
Seats and Restraints Warning Warning Never allow more than one child Never allow a child to wear the to wear the same safety belt. The safety belt with the shoulder belt safety belt cannot properly spread behind their back. A child can be the impact forces. - Page 73 Seats and Restraints Children who are not restrained Warning (Continued) properly can strike other people, or can be thrown out of the vehicle. shoulder belt can tighten but cannot be loosened if it is locked. Warning The shoulder belt locks when it is pulled all the way out of the Never hold an infant or a child retractor.
- Page 74 Seats and Restraints For each type of child restraint, Warning there are many different models available. When purchasing a child A young child's hip bones are still restraint, be sure it is designed to be so small that the vehicle's regular used in a motor vehicle.
-
Page 75: Child Restraint Systems
Seats and Restraints Child Restraint Systems Forward-Facing Child Seat Booster Seats A forward-facing child restraint A belt-positioning booster seat is Rear-Facing Infant Seat provides restraint for the child's used for children who have A rear-facing child restraint provides body with the harness. outgrown their forward-facing child restraint with the seating surface restraint. -
Page 76: Where To Put The Restraint
Seats and Restraints Securing an Add-On Child When securing an add-on child Where to Put the restraint, refer to the instructions Restraint in the Vehicle Restraint that come with the restraint which may be on the restraint itself or in a According to accident statistics, Warning booklet, or both, and to this manual. -
Page 77: Lower Anchors And Tethers For
Seats and Restraints When securing a child restraint in a properly secure any child restraint in Warning (Continued) rear seating position, study the the vehicle even when no child is instructions that came with the child in it. front passenger airbag inflates restraint to make sure it is and the passenger seat is in a Lower Anchors and... - Page 78 Seats and Restraints Booster seats use the vehicle s See Securing Child Restraints (With Lower Anchors safety belts to secure the child in the Safety Belt in the Rear Seat) the booster seat. If the manufacturer 0 82 or Securing Child Restraints recommends that the booster seat (With the Safety Belt in the Front be secured with the LATCH system,...
- Page 79 Seats and Restraints Top Tether Anchor Some child restraints that have a The rear outboard seating positions top tether are designed for use with have exposed metal anchors in the or without the top tether being crease between the seatback and attached.
- Page 80 Seats and Restraints According to accident statistics, Warning children and infants are safer when properly restrained in a child To reduce the risk of serious or restraint system or infant restraint fatal injuries during a crash, do system secured in a rear seating not attach more than one child position.
- Page 81 Seats and Restraints seating position does not have Warning (Continued) Caution (Continued) lower anchors, secure the child restraint with the top tether and wrapped around a child s neck. Do not fold the rear seatback the safety belts. Refer to the If the shoulder belt is locked and when the seat is occupied.
- Page 82 Seats and Restraints 2.2. Route, attach and tighten restraint and route the the top tether according tether under the headrest or to your child restraint head restraint and around instructions and the the headrest or head following instructions: restraint posts. If the position you are using does not have a headrest or head restraint and you...
-
Page 83: Replacing Latch System Parts
Seats and Restraints be no more than 2.5 cm (1 in) of New parts and repairs may be the instructions that come with the movement, for proper necessary even if the LATCH child restraint say that the top strap installation. system was not being used at the must be anchored. - Page 84 Seats and Restraints 3. Push the latch plate into the 4. Pull the shoulder belt all the 5. To tighten the belt, push down buckle until it clicks. way out of the retractor to set on the child restraint, pull the the lock.
- Page 85 Seats and Restraints 6. If the child restraint has a top Warning (Continued) tether, follow the child restraint manufacturer's instructions a rear facing child restraint in the regarding the use of the top center seat position. Fasten the tether. See Lower Anchors and retaining strap onto the stowed Tethers for Children (LATCH armrest before installing a rear...
-
Page 86: Front Seat)
Seats and Restraints Securing Child Restraints Warning Warning (Continued) (With the Safety Belt in A child in a rear-facing child forward-facing child restraint in the Front Seat) restraint can be seriously injured the front outboard passenger This vehicle has airbags. A rear or killed if the front outboard seat, always move the seat as far seat is a safer place to secure a... - Page 87 Seats and Restraints 1. Move the seat as far back as it will go before securing the forward-facing child restraint. Move the seat upward or the seatback to an upright position, if needed, to get a tight installation of the child restraint.
- Page 88 Seats and Restraints 7. Before placing a child in the child restraint, make sure it is securely held in place. Push and pull the child restraint in different directions to be sure it is secure. If the airbag is off, the off indicator in the passenger airbag status indicator will come on and stay on when the vehicle is started.
-
Page 89: Storage
Storage Storage Storage Center Console Storage Compartments Storage Compartments Warning Storage Compartments ..88 Glove Box ..... 88 Do not store heavy or sharp Cupholders . -
Page 90: Additional Storage Features
Storage Additional Storage To remove the cover from the vehicle, pull both ends toward each Features other. To reinstall, place each end of the cover in the holes behind the Cargo Cover rear seat. Cargo Tie-Downs Warning An unsecured cargo cover could strike people in a sudden stop or turn, or in a crash. -
Page 91: Safety Kit
Storage Do not use the net to store heavy The safety kit is a freestanding bag Roof Rack System loads. in the cargo area. The items stored in the safety kit Warning Safety Kit bag include: If something is carried on top of 1. - Page 92 Storage of gravity higher. Avoid high speeds, Caution sudden starts, sharp turns, sudden braking, or abrupt maneuvers; Loading cargo on the roof rack otherwise it may result in loss of that weighs more than 100 kg control. If driving for a long distance, (220 lb) or hangs over the rear or on rough roads, or at high speeds, sides of the vehicle may damage...
-
Page 93: Instruments And Controls
Instruments and Controls Instruments and Malfunction Indicator Lamp Battery Voltage and Charging (Check Engine Light) ..101 Messages ....112 Controls Brake System Warning Brake System Messages . -
Page 94: Steering Wheel Adjustment
Instruments and Controls Controls Steering Wheel Controls INT : Move the lever up to INT for intermittent wipes, then turn The infotainment system can be INT band up for more Steering Wheel operated by using the steering frequent wipes or down for less Adjustment wheel controls. -
Page 95: Rear Window Wiper/Washer
Instruments and Controls If the ignition is turned to LOCK/ : Push the windshield wiper lever Warning OFF while the wipers are performing forward to spray washer fluid on the wipes due to windshield washing, rear window. The lever returns to its In freezing weather, do not use the wipers continue to run until they starting position when released. -
Page 96: Clock
Instruments and Controls Clock There are four accessory power When adding electrical equipment, outlets: inside the open storage be sure to follow the installation To set the time: area in front of the shift lever, inside instructions included with the the center console storage, on the equipment. -
Page 97: Warning Lights, Gauges, And Indicators
Instruments and Controls Warning Lights, Gauges, and Indicators Warning lights and gauges can signal that something is wrong before it becomes serious enough to cause an expensive repair or replacement. Paying attention to the warning lights and gauges could prevent injury. Some warning lights come on briefly when the engine is started to indicate they are working. -
Page 98: Instrument Cluster
Instruments and Controls Instrument Cluster... -
Page 99: Speedometer
Instruments and Controls Speedometer Fuel Gauge Here are some situations that can occur with the fuel gauge. None of The speedometer shows the these indicate a problem with the vehicle's speed in kilometers per fuel gauge. hour (km/h) or miles per hour (mph). At the service station, the fuel This vehicle is equipped with an pump shuts off before the gauge... -
Page 100: Engine Coolant Temperature
Instruments and Controls Engine Coolant above the usual operating range Safety Belt Reminders and approach the far end of the Temperature Gauge Driver Safety Belt Reminder gauge: Light stop and go driving in heavy traffic There is a driver safety belt reminder light on the instrument high speed operation in warm cluster. -
Page 101: Airbag Readiness Light
Instruments and Controls Passenger Safety Belt grocery bag, laptop, or other Warning electronic device. To turn off the Reminder Light reminder light and/or chime, remove If the airbag readiness light stays There is a passenger safety belt the object from the seat or buckle reminder light near the passenger on after the vehicle is started or the safety belt. -
Page 102: Charging System Light
Instruments and Controls problem with the lights or the The light turns off when the engine passenger sensing system. See is started. If it does not, have the your dealer for service. vehicle serviced by your dealer. If the light stays on, or comes on Warning while driving, there may be a problem with the electrical charging... - Page 103 Instruments and Controls light should come on to show that it If towing a trailer, reduce the Caution is working when the ignition is in amount of cargo being hauled as ON/RUN and the engine is not soon as possible. Modifications to the engine, running.
-
Page 104: Brake System Warning
Instruments and Controls least one full tank of the proper The vehicle may not pass circuit can still work to stop the fuel to turn the light off. See inspection if: vehicle. For normal braking Fuel 0 177. performance, both circuits need to The light is on when the engine be working If the light remains on, see your... -
Page 105: Antilock Brake System (Abs)
Instruments and Controls Antilock Brake System light is also on, the vehicle does not Warning have antilock brakes and there is a (ABS) Warning Light problem with the regular brakes. The brake system might not be See Brake System Warning working properly if the brake Light 0 103. -
Page 106: Forward Collision Alert (Fca)
Instruments and Controls This light changes to amber and Vehicle Ahead Indicator The traction off light comes on when flashes to indicate that the lane the Traction Control System (TCS) marking has been crossed without has been turned off by pressing and using a turn signal in that direction. -
Page 107: Traction Control System (Tcs)
Instruments and Controls This light comes on when the If the light is on and not flashing, the When the Light Is On Steady StabiliTrak system is turned off. TCS and potentially the StabiliTrak This indicates that one or more of If StabiliTrak is off, the Traction system have been disabled. -
Page 108: Fuel Economy Light
Instruments and Controls On some models, the oil pump will Driver Information Center (DIC) an vary engine oil pressure according ECO MODE ON message displays. to engine needs. Oil pressure may See Fuel System Messages 0 114. change quickly as the engine speed Press the button again to turn off or load varies. -
Page 109: Security Light
Instruments and Controls periodically when the vehicle is low High-Beam On Light Cruise Control Light on fuel. The light goes off when fuel is added to the fuel tank. For vehicles with a Driver Information Center (DIC), see Fuel System Messages 0 114 for more information. -
Page 110: Information Displays
Instruments and Controls Information Displays DIC Buttons Trip/Fuel Menu Items Press the MENU button until Trip/ Driver Information Fuel Information Menu is displayed. Center (DIC) Then press to scroll through the following menu items: The vehicle may have a DIC. Digital Speedometer It displays information about the vehicle and warning messages if... - Page 111 Instruments and Controls Trip 1 and Trip 2 will change as driving conditions The display provides feedback on change. The fuel economy can be how current driving behavior in the This display shows the current reset by pressing SET/CLR while bar graph affects the running distance traveled, in either the Average Fuel Economy display...
- Page 112 Instruments and Controls and 59 seconds (99:59:59) after Unit When the remaining oil life is low, which the display will return to zero. the CHANGE ENGINE OIL SOON Press SET/CLR to enter the unit To stop the timer, press SET/CLR message will appear on the display.
-
Page 113: Vehicle Messages
Instruments and Controls Vehicle Messages Battery Voltage and Brake System Messages Charging Messages BRAKE FLUID LOW Messages are displayed on the DIC to notify the driver that the status of BATTERY SAVER ACTIVE This message is displayed when the the vehicle has changed and that brake fluid level is low;... -
Page 114: Door Ajar Messages
Instruments and Controls Door Ajar Messages Engine Cooling System ENGINE OVERHEATED IDLE ENGINE Messages DOOR OPEN This message displays when the A/C OFF DUE TO HIGH A door open symbol will be engine coolant temperature is too ENGINE TEMP displayed on the DIC showing which hot. -
Page 115: Engine Oil Messages
Instruments and Controls Engine Oil Messages OIL PRESSURE LOW STOP repeatedly, the vehicle should be taken to your dealer for service as ENGINE CHANGE ENGINE OIL SOON soon as possible. This message displays if low oil This message displays when the pressure levels occur. -
Page 116: Key And Lock Messages
Instruments and Controls Key and Lock Messages activate during heavy rain or due to after continued driving, the system road spray. To clean the system, needs service. Take the vehicle to REPLACE BATTERY IN clean the outside of the windshield your dealer. -
Page 117: Ride Control System
Instruments and Controls dirt, snow, ice, or slush. This longer present and the warning SERVICE TRACTION message may also activate during message is reset. To reset the CONTROL heavy rain or due to road spray. The warning message manually, turn the This message displays when there vehicle does not need service. -
Page 118: Airbag System Messages
Instruments and Controls TRACTION CONTROL ON performance or loss of power This message also displays LEFT steering assistance is noticed, see FRONT, RIGHT FRONT, LEFT This message displays when the your dealer. REAR, or RIGHT REAR to indicate Traction Control System (TCS) is the location of the low tire. -
Page 119: Vehicle Reminder
Instruments and Controls SHIFT TO PARK TURN WIPER CONTROL TO Vehicle INTERMITTENT FIRST This message displays when the Personalization transmission needs to be shifted to This message is displayed when Use the audio system controls to P (Park). This may appear when attempting to adjust the intermittent access the personalization menus attempting to remove the key from... - Page 120 Instruments and Controls Using the Touch Screen Radio Settings Software Versions Menu Press a screen feature to: Phone Settings Auto Volume View more feature options. Navigation Settings This feature adjusts the volume to minimize the effects of unwanted Enable or disable the feature. Display Settings background noise that can result : Press to scroll up.
- Page 121 Instruments and Controls RDS Options Phone Settings Map Settings Select and the following may Select and depending on the radio Home Page Menu display: the following may display: Select and the following may Device List display: Text Scroll Freeze Pair Device Customize RDS Text Sort...
- Page 122 Instruments and Controls Rear Camera Options Climate and Air Quality prevent fogging. When high humidity is no longer detected, the For more information on Rear Select and the following may system will return to its prior Camera Options, see Rear Vision display: operation.
- Page 123 Instruments and Controls Chime Volume Select On or Off. Power Door Locks This allows the selection of the Select and depending on the radio Side Blind Zone Alert chime volume level. the following may display: This allows the Side Blind Zone Select Normal or High.
- Page 124 Instruments and Controls Delayed Door Lock Select Lights and Horn, Lights Only, Horn Only, or Off. When on, this feature will delay the locking of the doors. See Delayed Remote Door Unlock Locking 0 30. This allows selection of which doors Select to enable or disable.
-
Page 125: Lighting
Lighting Lighting Exterior Lighting Headlamp High/ Low-Beam Changer Exterior Lamp Controls : Push the turn signal lever Exterior Lighting away from you and release, to turn Exterior Lamp Controls ..124 the high beams on. To return to low Headlamp High/Low-Beam beams, push the lever again or pull Changer . -
Page 126: Daytime Running
Lighting Daytime Running When the exterior lamp control is Do not cover the light sensor on top of the instrument panel or the turned to , the low-beam Lamps (DRL) headlamps will come on when they headlamps come on. The other DRL can make it easier for others to are not needed. -
Page 127: Hazard Warning Flashers
Lighting wiper speed. When the wipers are Turn and Lane-Change If after signaling a turn or lane not operating, these lamps turn off. change, the arrow flashes rapidly or Signals does not come on, a signal bulb Move the exterior lamp control to may be burned out. -
Page 128: Interior Lighting
Lighting Interior Lighting Reading Lamps Lighting Features The reading lamps are located on Instrument Panel Entry Lighting the overhead console. These lamps Illumination Control come on automatically when any Some exterior lamps and interior door is opened. lamps turn on briefly at night, or in This control is located on the For manual operation, press the areas with limited lighting, when... -
Page 129: Battery Load Management
Lighting exterior lamps and dome lamp voltage move up or down. This is Normally, these actions occur in remain on for a set amount of time, normal. If there is a problem, an steps or levels, without being then automatically turn off. alert will be displayed. - Page 130 Lighting the battery. To restart the 10-minute timer, turn the exterior lamp control to the position and then back to position. To keep the lamps on for more than 10 minutes, the ignition must be in the ACC/ACCESSORY or ON/RUN/ START position.
-
Page 131: Infotainment System
Infotainment System Infotainment Introduction System Infotainment See the infotainment manual for information on the radio, audio Introduction players, phone, and navigation Infotainment ....130 system. -
Page 132: Climate Controls
Climate Controls Climate Controls Climate Control Systems The vehicle's heating, cooling, defrosting, and ventilation can be controlled Climate Control Systems with this system. Climate Control Systems ..131 Automatic Climate Control System ..... . 133 Air Vents Air Vents . - Page 133 Climate Controls Air Delivery Mode Control : To Do not drive the vehicle until all the To improve fuel efficiency and to change the current mode, select windows are clear. cool the vehicle faster, recirculation one of the following: may be automatically selected in If equipped with the Fuel Economy warm weather.
-
Page 134: Automatic Climate Control System
Climate Controls Automatic Climate Control System Caution The vehicle's heating, cooling, defrosting, and ventilation can be controlled Do not use a razor blade or sharp with this system. object to clear the inside rear window. Do not adhere anything to the defogger grid lines in the rear glass. - Page 135 Climate Controls setting is displayed. Functions not control. The AUTO indicator light The system allows outside air into manually set will continue to be turns off. The air delivery mode the vehicle and the air conditioning automatically controlled, even if the remains in automatic control.
- Page 136 Climate Controls Rear Window Defogger Remote Start Climate Control : Press to turn on the Operation : If equipped with the recirculation. Press to alternate REAR : Press to turn the rear remote start feature, the climate between recirculation and outside window defogger on or off.
-
Page 137: Air Vents
Climate Controls Air Vents Check with your dealer before Maintenance adding equipment to the outside of the vehicle. Center Air Vents Passenger Compartment Do not attach any devices to the Use the louvers located on the air Air Filter air vent slats. This restricts vents to change the direction of the airflow and may cause damage The filter reduces the dust, pollen,... - Page 138 Climate Controls 2. Push the stop tab upward until 6. Push the two tabs upward and the stop tab is under the release the latches holding the instrument panel assembly and service door. Lift the the glove box is released. service door.
-
Page 139: Driving And Operating
Driving and Operating Driving and Engine Exhaust Side Blind Zone Alert (SBZA) ....174 Engine Exhaust ....158 Operating Lane Departure Running the Vehicle While... -
Page 140: Driving Information
Driving and Operating Driving Information Become familiar with vehicle Refer to the infotainment manual for features before driving, such as more information on using that programming favorite radio system and the navigation system, Distracted Driving stations and adjusting climate if equipped, including pairing and control and seat settings. -
Page 141: Braking
Driving and Operating Braking Once the power assist is used up, it See specific vehicle steering can take longer to stop and the messages under Service Vehicle Braking action involves perception brake pedal will be harder to push. Messages 0 117. time and reaction time. -
Page 142: Off-Road Recovery
Driving and Operating Curve Tips Off-Road Recovery 3. Turn the steering wheel to go straight down the roadway. Take curves at a reasonable speed. Loss of Control Reduce speed before entering a Skidding curve. There are three types of skids that Maintain a reasonable steady correspond to the vehicle's three speed through the curve... -
Page 143: Off-Road Driving
Driving and Operating The vehicle may straighten out. not equipped with All Terrain (AT) or Fuel the vehicle, fill fluid levels, Be ready for a second skid if it On-Off Road (OOR) tires must not and check inflation pressure in occurs. - Page 144 Driving and Operating Loading the Vehicle for For more information about loading Warning (Continued) the vehicle, see Vehicle Load Off-Road Driving Limits 0 149. of control. Driving across hills can Warning Environmental Concerns cause a rollover. You could be injured or killed. Do not drive on Always use established trails, Unsecured cargo on the steep hills.
- Page 145 Driving and Operating Never try to turn the vehicle Warning Warning around. If the hill is steep enough to stall the vehicle, Driving to the top of a hill at high Heavy braking when going down it is steep enough to cause speed can cause an accident.
- Page 146 Driving and Operating 3.2. Stay clear of the path the If an incline must be driven braking. Drive at a reduced speed vehicle would take if it across, and the vehicle starts to and avoid sharp turns or abrupt rolled downhill. slide, turn downhill.
-
Page 147: Driving On Wet Roads
Driving and Operating water, the brakes get wet, and it of driving conditions and avoid Warning (Continued) might take longer to stop. See driving through large puddles and Driving on Wet Roads 0 146. deep-standing or flowing water. could drown. If it is only shallow After Off-Road Driving water, it can still wash away the Warning... -
Page 148: Hill And Mountain Roads
Driving and Operating Hydroplaning Hill and Mountain Roads Warning Hydroplaning is dangerous. Water Driving on steep hills or through can build up under the vehicle's Coasting downhill in N (Neutral) mountains is different than driving tires so they actually ride on the or with the ignition off is on flat or rolling terrain. -
Page 149: Winter Driving
Driving and Operating Winter Driving clear roads in shaded areas. Warning (Continued) The surface of a curve or an Driving on Snow or Ice overpass can remain icy when cannot be seen or smelled. It can the surrounding roads are clear. Snow or ice between the tires and cause unconsciousness and even Avoid sudden steering... -
Page 150: If The Vehicle Is Stuck
Driving and Operating To save fuel, run the engine for causes a rocking motion that could Warning short periods to warm the vehicle free the vehicle. If that does not get and then shut the engine off and the vehicle out after a few tries, it If the vehicle's tires spin at high partially close the window. - Page 151 Driving and Operating Tire and Loading Information cold tire inflation pressures (4). Warning (Continued) Label For more information on tires and inflation see Tires 0 219 maximum front or rear Gross and Tire Pressure 0 221. Axle Weight Rating (GAWR). This can cause systems to There is also important loading break and change the way the...
- Page 152 Driving and Operating Subtract the combined your vehicle. Consult this Subtract Occupant manual to determine how weight of the driver and Weight @ 68 kg (150 lbs) this reduces the available passengers from XXX kg or × 2 = 136 kg (300 lbs). XXX lbs.
- Page 153 Driving and Operating weight of the driver, passengers, Vehicle Weight Rating (GVWR). and cargo should never exceed The GVWR includes the weight the vehicle's capacity weight. of the vehicle, all occupants, fuel, and cargo. Certification/Tire Label The Certification/Tire label may also show the maximum weights for the front and rear axles, called the Gross Axle Weight...
-
Page 154: Starting And Operating
Driving and Operating Starting and Warning Caution (Continued) Operating Things inside the vehicle can breaking-in guideline every time you get new brake strike and injure people in a New Vehicle Break-In linings. sudden stop or turn, or in a crash. Following break-in, engine speed Caution and load can be gradually... - Page 155 Driving and Operating This is the only position from which to N (Neutral), firmly apply the Caution the key can be removed. If the key brakes and steer the vehicle to cannot be removed, make sure the a safe location. Using a tool to force the key to shift lever is in P (Park).
-
Page 156: Starting The Engine
Driving and Operating 1 (ACC/ACCESSORY) : This 3 (START) : This position starts the Caution position provides power to some of engine. When the engine starts, the electrical accessories. It unlocks release the key. The ignition switch If you add electrical parts or the steering wheel and ignition. -
Page 157: Retained Accessory
Driving and Operating not race the engine each try, to allow the cranking Power to the power windows and immediately after starting it. motor to cool. When the engine sunroof will continue to operate for Operate the engine and starts, let go of the key and up to 10 minutes or until any door is transmission gently to allow the accelerator. -
Page 158: Shifting Out Of Park
Driving and Operating To shift into P (Park): transmission. This happens when Warning (Continued) parking on a hill and shifting the 1. Hold the brake pedal down and transmission into P (Park) is not set the parking brake. Do not leave the vehicle when the done properly and then it is difficult engine is running. -
Page 159: Parking Over Things
Driving and Operating 2. Hold the brake pedal down and Engine Exhaust Warning (Continued) press the shift lever button again. There are holes or openings Warning 3. Move the shift lever. in the vehicle body from Engine exhaust contains carbon damage or aftermarket If you still cannot move the shift modifications that are not... -
Page 160: Automatic Transmission
Driving and Operating If the vehicle is left with the engine Automatic Warning (Continued) running, follow the proper steps to Transmission be sure the vehicle will not move. Do not leave the vehicle when the See Shifting Into Park 0 156 and engine is running. - Page 161 Driving and Operating R : Use this gear to back up. Going about 56 km/h (35 mph) or Warning (Continued) more, push the accelerator all the way down. Caution vehicle could move very rapidly. You could lose control and hit Shifting to R (Reverse) while the Caution people or objects.
-
Page 162: Manual Mode
Driving and Operating Operating Modes To use this feature: vehicle, then press the (Minus) button to the desired lower gear The transmission may operate in a 1. Move the shift lever to range. lower gear than normal to improve M (Manual Mode). vehicle performance. -
Page 163: Drive Systems
Driving and Operating Information Center (DIC) message Drive Systems Brakes is also displayed. See Fuel System Messages 0 114. All-Wheel Drive Antilock Brake When Fuel Economy Mode is on: System (ABS) Vehicles with this feature transfer The transmission will upshift engine power, as required, to all This vehicle has an Antilock Brake sooner and downshift later. -
Page 164: Parking Brake
Driving and Operating If driving safely on a wet road and it Using ABS To set the parking brake, hold the becomes necessary to slam on the regular brake pedal down, then Do not pump the brakes. Just hold brakes and continue braking to push the parking brake pedal down. -
Page 165: Brake Assist
Driving and Operating If you are towing a trailer and are brake pedal is released or brake Ride Control Systems parking on a hill, see Driving pedal pressure is quickly Characteristics and Towing decreased. Traction Control/ Tips 0 180. Electronic Stability Hill Start Assist (HSA) Brake Assist Control... - Page 166 Driving and Operating vehicle wheel brakes to assist the 2. Turn the engine off and wait driver in keeping the vehicle on the 15 seconds. intended path. 3. Start the engine. If cruise control is being used and Drive the vehicle. If comes on traction control or StabiliTrak begins and stays on, the vehicle may need...
-
Page 167: Cruise Control
Driving and Operating To turn off only TCS, press and Adding accessories can affect the Cruise Control vehicle performance. See release . The traction off light With cruise control, the vehicle can Accessories and displays in the instrument cluster maintain a speed of about 40 km/h Modifications 0 188. - Page 168 Driving and Operating disengage. See Traction Control/ appears in the Driver : Press to disengage cruise Electronic Stability Control 0 164. Information Center (DIC) control without erasing the set If a collision alert occurs when display. speed from memory. cruise control is activated, cruise 4.
- Page 169 Driving and Operating briefly. For each press, the Passing Another Vehicle While Ending Cruise Control vehicle goes about 1.6 km/h Using Cruise Control There are four ways to end cruise (1 mph) faster. Use the accelerator pedal to control: The speedometer reading can be increase the vehicle speed.
-
Page 170: Driver Assistance Systems
Driving and Operating Driver Assistance An image appears on the Rear Cross Traffic Alert (RCTA) infotainment screen when the On vehicles with RCTA, a triangle Systems vehicle is shifted into R (Reverse). with an arrow may display on the The infotainment screen goes to the RVC screen to warn of traffic Rear Vision previous screen after approximately... - Page 171 Driving and Operating 4. Select Rear Camera Options. Rear Vision Camera Location 5. Select Symbols or Guide Lines. The feature is on when a check mark appears next to it. RCTA can be turned on or off through vehicle personalization. See Collision Detection Systems under Vehicle Personalization 0 118.
-
Page 172: Parking Assist
Driving and Operating When the System Does Not (5 mph), and the sensors on the rear RPA operates only at speeds less bumper detect objects up to 2.5 m than 8 km/h (5 mph). Seem To Work Properly (8 ft) behind the vehicle, and at least A detected obstacle is indicated by The RVC system may not work 20 cm (8 in) off the ground. -
Page 173: Forward Collision Alert (Fca)
Driving and Operating When the System Does Not PARK ASSIST OFF : If the RPA Forward Collision Alert system does not activate due to a Seem to Work Properly (FCA) System temporary condition, the message The following messages may be displays on the DIC. - Page 174 Driving and Operating objects. FCA will not detect another Collision Alert Warning (Continued) vehicle ahead until it is completely in the driving lane. animals, signs, guardrails, bridges, construction barrels, Warning or other objects. Be ready to take action and apply the brakes. See FCA does not provide a warning Defensive Driving 0 139.
-
Page 175: Side Blind Zone
Driving and Operating Selecting the Alert Timing timing. The range of selectable alert display will light up in the timing may not be appropriate for all corresponding outside side mirror drivers and driving conditions. and will flash if the turn signal is on. Unnecessary Alerts Warning FCA may provide unnecessary... - Page 176 Driving and Operating SBZA Detection Zones unsafe to change lanes. Before If SBZA is disabled by the driver, making a lane change, check the the SBZA mirror displays will not SBZA display, check mirrors, glance light up. over your shoulder, and use the turn When the System Does Not signals.
-
Page 177: Lane Departure Warning (Ldw)
Driving and Operating SBZA may not operate when the without using a turn signal in that Warning (Continued) SBZA sensors in the left or right direction. LDW uses a camera corners of the rear bumper are sensor to detect the lane markings If LDW only detects lane covered with mud, dirt, snow, ice, at speeds of 56 km/h (35 mph) or... -
Page 178: Fuel
Driving and Operating Additionally, there will be three Fuel beeps on the right or left, depending Use the recommended fuel for on the lane departure direction. proper vehicle maintenance. When the System Does Not Use unleaded petrol with a posted Seem To Work Properly octane rating of 91 RON or higher, The system may not detect lanes as... -
Page 179: Fuel Additives
Driving and Operating fuel tank at every engine oil change Caution (Continued) Warning (Continued) or every 15 000 km (9,000 mi), whichever occurs first. (MMT), which can damage Keep children away from the emissions control the fuel pump and never let Filling the Tank system and spark plugs. -
Page 180: Filling A Portable Fuel
Driving and Operating The fuel cap is behind the fuel door Be careful not to spill fuel. Wait a Filling a Portable Fuel on the passenger side of the few seconds before removing the Container vehicle. To open the fuel door, push nozzle. -
Page 181: Trailer Towing
Driving and Operating Trailer Towing Do not tow a trailer during the Warning (Continued) first 800 km (500 miles), to prevent damage to the engine, General Towing Fill the container no more axle or other parts. than 95% full to allow for Information Then, during the first 800 km expansion. - Page 182 Driving and Operating electric brakes, start the Passing Warning (Continued) combination moving and then apply More passing distance is needed the trailer brake controller by hand when towing a trailer. Because the Do not drive with the to be sure the brakes work. rig is longer, it is necessary to go liftgate, trunk/hatch, During the trip, check occasionally...
- Page 183 Driving and Operating When turning with a trailer, make brakes might have to be used so Parking on Hills wider turns than normal so the much that they would get hot and no trailer will not strike soft shoulders, longer work well. Warning curbs, road signs, trees or other The vehicle can tow in D (Drive).
-
Page 184: Trailer Towing
Driving and Operating 5. Release the brake pedal. Engine Cooling When Trailer Maximum trailer weight is calculated assuming only the driver is in the Towing Leaving After Parking on a Hill tow vehicle and it has all the The cooling system may temporarily required trailering equipment. - Page 185 Driving and Operating Maximum Trailer GCWR* Weight with Trailer Vehicle Brakes 2.4L L4 Engine, FWD 680 kg (1,500 lbs) 2 625 kg (5,787 lbs) 2.4L L4 Engine, AWD 680 kg (1,500 lbs) 2 700 kg (5,952 lbs) 3.6L V6 Engine, FWD 1 588 kg (3,500 lbs) 3 600 kg (7,937 lbs) 3.6L V6 Engine, AWD...
-
Page 186: Towing Equipment
Driving and Operating Weight Rating). The effect of Towing Equipment Leave enough slack so the rig can additional weight may reduce the turn. Never allow safety chains to Hitches trailering capacity more than the drag on the ground. total of the additional weight. Use the correct hitch equipment. -
Page 187: Conversions And Add-Ons
Driving and Operating Conversions and Caution Add-Ons Some electrical equipment can damage the vehicle or cause Add-On Electrical components to not work and Equipment would not be covered by the When TSC is applying the brakes, vehicle warranty. Always check the TCS/StabiliTrak indicator light Warning with your dealer before adding... -
Page 188: Vehicle Care
Vehicle Care Vehicle Care All-Wheel Drive ....208 All-Season Tires ....220 Starter Switch Check ..208 Winter Tires . -
Page 189: General Information
Vehicle Care Appearance Care General Information certified parts, including control module or software modifications, is Exterior Care ....246 For service and parts needs, visit not covered under the terms of the Interior Care . -
Page 190: Vehicle Checks
Vehicle Care Vehicle Checks Caution Doing Your Own Even small amounts of contamination can cause damage Service Work to vehicle systems. Do not allow contaminants to contact the fluids, Warning reservoir caps, or dipsticks. It can be dangerous to work on your vehicle if you do not have Hood the proper knowledge, service... -
Page 191: Overview
Vehicle Care Engine Compartment Overview 2.4L L4 Engine... - Page 192 Vehicle Care 1. Engine Air Cleaner/Filter 0 197. 2. Engine Cover 0 193. 3. Engine Oil Dipstick (Out of View). See Engine Oil 0 193. 4. Engine Oil Fill Cap. See Engine Oil 0 193. 5. Brake Fluid Reservoir. See Brake Fluid 0 206.
- Page 193 Vehicle Care 3.6L V6 Engine...
-
Page 194: Engine Cover
Vehicle Care 1. Engine Air Cleaner/Filter 0 197. 12. Windshield Washer Fluid 4. Lift and remove the engine Reservoir. See Washer cover. 2. Power Steering Fluid Fluid 0 205. Reservoir (Under Engine 5. Reverse Steps 1 4 to reinstall Cover). See Power Steering engine cover. - Page 195 Vehicle Care Checking Engine Oil checking a cold engine prior to starting. Remove the dipstick Check the engine oil level regularly and check the level. (every 650 km (400 mi), especially If unable to wait two hours, the prior to a long trip. The engine oil engine must be off for at least dipstick handle is a loop.
- Page 196 Vehicle Care Specification used. An oil of this viscosity grade Caution (Continued) will provide easier cold starting for Ask for and use engine oils that the engine at extremely low meet the dexos1 specification. has so much oil that the oil level temperatures.
-
Page 197: Engine Oil Life System
Vehicle Care properly dispose of clothing or rags When the system has calculated How to Reset the Engine Oil containing used engine oil. See the that oil life has been diminished, it Life System manufacturer's warnings about the indicates that an oil change is Reset the system whenever the use and disposal of oil products. -
Page 198: Automatic Transmission
Vehicle Care The system is reset when the dealer for additional information or sure that the engine air cleaner/filter CHANGE ENGINE OIL SOON the procedure can be found in the housing and nearby components message goes off. service manual. are free of dirt and debris. Remove the engine air cleaner/filter. -
Page 199: Cooling System
Vehicle Care 2. Align the air cleaner housing Cooling System cover tabs to the air cleaner housing. 3. Install the air cleaner housing cover using the four screws. Warning Operating the engine with the air cleaner/filter off can cause you or others to be burned. -
Page 200: Engine Coolant
Vehicle Care If the coolant inside the coolant overheating, the fan should be surge tank is boiling, do not do running. If it is not, the vehicle anything else until it cools down. needs service. Turn off the engine. The vehicle should be parked on a level surface. - Page 201 Vehicle Care The following explains the cooling Use a 50/50 mixture of clean, Caution (Continued) system and how to check and add drinkable water and DEX-COOL coolant when it is low. If there is a coolant. If using this mixture, would not be covered by the problem with engine overheating, nothing else needs to be added.
- Page 202 Vehicle Care but the coolant level is not at or water and DEX-COOL coolant at the Warning above the COLD FILL line, add a coolant surge tank, but be sure the 50/50 mixture of clean, drinkable cooling system, including the Adding only plain water or some water and DEX-COOL coolant at the coolant surge tank pressure cap, is...
-
Page 203: Engine Overheating
Vehicle Care 2. Keep turning the pressure cap the coolant surge tank until the Caution slowly, and remove it. level reaches the COLD FILL line. In cold weather, water can freeze 5. Replace the pressure cap. Be and crack the engine, radiator, sure the pressure cap is heater core, and other parts. - Page 204 Vehicle Care light on the vehicle's instrument If Steam is Coming from the too serious. Sometimes the engine panel. See Engine Coolant can get a little too hot when the Engine Compartment Temperature Gauge 0 99. vehicle: The decision may be made not to lift Warning Climbs a long hill on a hot day.
-
Page 205: Engine)
Vehicle Care back on, continue to drive normally The power steering fluid reservoir is 5. Replace the cap and and have the cooling system located toward the rear of the completely tighten it. checked for proper fill and function. engine compartment on the 6. -
Page 206: Washer Fluid
Vehicle Care Washer Fluid Caution Caution (Continued) What to Use Do not use washer fluid that freezing occurs, which could When windshield washer fluid is contains any type of water damage the tank if it is needed, be sure to read the repellent coating. -
Page 207: Brake Fluid
Vehicle Care Replacing Brake System Parts Checking Brake Fluid Caution With the vehicle in P (Park) on a Always replace brake system parts level surface, the brake fluid level with new, approved replacement Continuing to drive with worn-out should be between the minimum parts. -
Page 208: Battery
Vehicle Care Warning Warning If too much brake fluid is added, it The wrong or contaminated brake can spill on the engine and burn, fluid could result in damage to the if the engine is hot enough. You brake system. This could result in or others could be burned, and the loss of braking leading to a the vehicle could be damaged. -
Page 209: All-Wheel Drive
Vehicle Care All-Wheel Drive Do not use the accelerator Warning pedal, and be ready to turn off Transfer Case the engine immediately if it Batteries have acid that can burn starts. Under normal driving conditions, you and gas that can explode. transfer case fluid does not require 3. -
Page 210: Ignition Transmission Lock
Vehicle Care 2. Apply the parking brake. Be Park Brake and P (Park) To check the P (Park) ready to apply the regular mechanism's holding ability: Mechanism Check brake immediately if the vehicle With the engine running, shift to begins to move. P (Park). - Page 211 Vehicle Care square button on the wiper 4. After wiper blade replacement, Caution (Continued) blade clicks into place with the ensure that cover hook slides into the slot in the blade wiper arm. the vehicle warranty. Do not allow assembly. 4.
-
Page 212: Headlamp Aiming
Vehicle Care Headlamp Aiming Bulb Replacement Taillamps, Turn Signal, Sidemarker, Stoplamps, Headlamp aim has been preset and For the proper type of replacement and Back-Up Lamps should need no further adjustment. bulbs, see Replacement Bulbs 0 214. If the vehicle is damaged in a crash, the headlamp aim may be affected. - Page 213 Vehicle Care 3. Remove the two screws 6. Turn the bulb socket 11. Verify that the taillamp securing the taillamp assembly. counterclockwise and pull assembly tab, located at the it out. bottom of the taillamp 4. Pull the taillamp assembly out assembly, is aligned to the of the vehicle body.
- Page 214 Vehicle Care To replace one of these lamps: 1. Open the liftgate. See Liftgate 0 31. 2. Remove the interior trim access panel. 3. Remove the five attachment 6. Turn the bulb socket nuts (1) securing the taillamp counterclockwise and pull assembly to the liftgate.
-
Page 215: License Plate Lamp
Vehicle Care 7. Reinstall the interior trim 5. Pull the bulb (2) straight out of access panel. the bulb socket (1). 6. Push the replacement bulb License Plate Lamp straight into the bulb socket and turn the bulb socket clockwise to install it into the lamp assembly. -
Page 216: Electrical System
Vehicle Care Electrical System There is a fuse puller located in the Caution engine compartment fuse block. See Engine Compartment Fuse Fuses Spilling liquid on any electrical Block 0 215. It can be used to easily component on the vehicle may remove fuses from the fuse block. - Page 217 Vehicle Care Fuses Usage Instrument panel fuse block 2 Sunroof ABS pump Instrument panel fuse block 3 Left power windows ABS module Transmission control module battery Trailer parking light AIR pump solenoid Engine control The vehicle may not be equipped module battery Fuses Usage...
- Page 218 Vehicle Care Fuses Usage Fuses Usage Fuses Usage Rear accessory Post catalytic Electric power power outlet converter O2 sensor steering Memory mirror Engine control AIR pump solenoid module module Brake booster Regulated voltage Pre-catalytic Cooling fan control battery converter O2 sensor High-beam sensor Transmission control...
-
Page 219: Block
Vehicle Care Instrument Panel Fuse Fuses Usage Block Steering wheel dimming Body control module 1 Infotainment Body control module 7 Noise control module Body control The instrument panel fuse block is module 4 located on the passenger side panel of the center console. To access the Radio fuses, open the fuse panel door from the passenger side by pulling... -
Page 220: Wheels And Tires
Vehicle Care Wheels and Tires Fuses Usage Fuses Usage Body control Amplifier Tires module 5 Discrete logic Every new GM vehicle has Rear auxiliary power ignition switch high-quality tires made by a Instrument panel/ Communications leading tire manufacturer. See Ignition integration module the warranty manual for Universal garage... -
Page 221: All-Season Tires
Vehicle Care and weather conditions. Original Warning (Continued) Warning (Continued) equipment tires designed to GM's specific tire performance criteria Underinflated tires pose Replace any tires that have a TPC specification code the same danger as have been damaged by molded onto the sidewall. Original overloaded tires. -
Page 222: Summer Tires
Vehicle Care for details regarding winter tire Summer Tires Caution (Continued) availability and proper tire selection. This vehicle may come with high Also, see Buying New Tires 0 229. use. If the tires have been performance summer tires. These With winter tires, there may be subjected to 7 °C (20 °F) or less, tires have a special tread and decreased dry road traction,... - Page 223 Vehicle Care minimum air pressure needed to the vehicle has not been driven Caution (Continued) support the vehicle's maximum for at least three hours or no load carrying capacity. See more than 1.6 km (1 mi). Tire overloading and Vehicle Load Limits 0 149. overheating which could Remove the valve cap from the lead to a blowout.
-
Page 224: Tire Pressure Monitor
Vehicle Care could be damaged and would by the vehicle manufacturer on the Please note that the TPMS is not a vehicle placard or tire inflation substitute for proper tire not be covered by the vehicle pressure label. (If your vehicle has maintenance, and it is the driver's warranty. -
Page 225: Tire Pressure Monitor
Vehicle Care Always check the TPMS malfunction The low tire pressure warning light telltale after replacing one or more may come on in cool weather when tires or wheels on your vehicle to the vehicle is first started, and then ensure that the replacement or turn off as the vehicle is driven. - Page 226 Vehicle Care corrected. Some of the conditions installed and the sensor Caution that can cause these to come matching process is performed on are: successfully. See your dealer for Tire sealant materials are not all service. One of the road tires has been the same.
- Page 227 Vehicle Care tires or replacing one or more of the 3. Use the MENU button to select sensor identification code has TPMS sensors. The TPMS sensor the Vehicle Information Menu been matched to this tire and matching process should also be in the Driver Information Center wheel position.
-
Page 228: Tire Inspection
Vehicle Care Tire Inspection Tire Rotation We recommend that the tires, Tires should be rotated at the including the spare tire, if the intervals specified in the vehicle has one, be inspected Maintenance Schedule. See for signs of wear or damage at Maintenance Schedule 0 256. -
Page 229: Tires
Vehicle Care Check that all wheel nuts are When It Is Time for New The rubber in tires ages over time. This also applies to the spare tire, properly tightened. See Wheel Tires if the vehicle has one, even if it is Nut Torque under Capacities Factors such as maintenance, never used. -
Page 230: Buying New Tires
Vehicle Care of grease, gasoline, or other vehicle, including brake system if it is necessary to replace only substances that can deteriorate performance, ride and handling, one axle set of worn tires, place rubber. traction control, and tire the new tires on the rear axle. pressure monitoring Parking for an extended period can Winter tires with the same speed... -
Page 231: Different Size Tires And Wheels
Vehicle Care load range, speed rating, and electronic systems such as antilock Warning brakes, rollover airbags, roll bars, construction (radial) as the traction control, electronic stability original tires. Mixing tires of different sizes, control, or All-Wheel Drive, the brands, or types may cause Vehicles that have a tire performance of these systems can loss of control of the vehicle,... -
Page 232: Wheel Alignment And Tire
Vehicle Care Wheel Alignment and Tire Some aluminum wheels can be Caution repaired. See your dealer if any of Balance these conditions exist. The wrong wheel can also cause The tires and wheels were aligned Your dealer will know the kind of problems with bearing life, brake and balanced at the factory to wheel that is needed. -
Page 233: Tire Chains
Vehicle Care Tire Chains straighten the vehicle. It may be Warning (Continued) very bumpy and noisy. Gently brake to a stop, well off the road, Warning only. Cables should not be if possible. installed on the spare tire or on Do not use tire chains. - Page 234 Vehicle Care Warning (Continued) Warning (Continued) appropriate safety equipment and level place to change the tire. To training. If a jack is provided with help prevent the vehicle from the vehicle, it is designed only for moving: changing a flat tire. If it is used for 1.
-
Page 235: Tire Changing
Vehicle Care Tire Changing Place the tools next to the tire Removing the Flat Tire and being changed. Installing the Spare Tire Removing the Spare Tire and 1. Do a safety check before Tools proceeding. See If a Tire Goes Flat 0 232 for more information. - Page 236 Vehicle Care 5. Place the jack notch under the Caution Warning frame rail seam. Make sure that the jack lift head Lifting a vehicle and getting under Warning is in the correct position or you it to do maintenance or repairs is may damage your vehicle.
- Page 237 Vehicle Care Warning (Continued) towel can be used; however, use a scraper or wire brush later to remove all rust or dirt. 8. Raise the vehicle by turning the 9. Remove all of the wheel nuts. jack handle clockwise. Raise 10.
- Page 238 Vehicle Care Warning Warning (Continued) Never use oil or grease on bolts nuts. See Capacities and or nuts because the nuts might Specifications 0 267 for original come loose. The vehicle's wheel equipment wheel nut torque could fall off, causing a crash. specifications.
- Page 239 Vehicle Care To store the flat tire: Caution Wheel covers will not fit on the vehicle's compact spare. If you try to put a wheel cover on the compact spare, the cover or the spare could be damaged. Storing a Flat or Spare Tire and Tools Warning 1.
-
Page 240: Compact Spare Tire
Vehicle Care 4. Pull the cable (1) through the Compact Spare Tire door striker (4) then the center of the wheel (3). Warning Driving with more than one compact spare tire at a time could result in loss of braking and handling. -
Page 241: Jump Starting
Vehicle Care repaired or replaced as soon as Jump Starting Caution convenient and return the spare tire For more information about the to the storage area. Tire chains will not fit the compact vehicle battery, see Battery 0 207. When using a compact spare tire, spare. - Page 242 Vehicle Care Warning Caution Using a match near a battery can If any accessories are left on or cause battery gas to explode. plugged in during the jump People have been hurt doing this, starting procedure, they could be and some have been blinded. damaged.
- Page 243 Vehicle Care 2. The vehicles should be close 5. The remote positive (+) 9. Connect the black negative ( ) enough for the jumper cables terminal (1) is located on the cable to the negative ( ) to reach, but the vehicles underhood fuse block, on the terminal of the good battery.
-
Page 244: Towing The Vehicle
Vehicle Care Towing the Vehicle Recreational Vehicle Caution Towing If the jumper cables are Caution Recreational vehicle towing means connected or removed in the towing the vehicle behind another Incorrectly towing a disabled wrong order, electrical shorting vehicle such as behind a motor vehicle may cause damage. - Page 245 Vehicle Care The proper towing equipment. the Discrete Logic Ignition See your dealer or trailering Switch fuse, from the professional for additional advice instrument panel fuse block and equipment and store it in a safe location. recommendations. See Instrument Panel Fuse Block 0 218.
- Page 246 Vehicle Care Once the destination is reached: Dolly Towing Caution (Front-Wheel-Drive Vehicles) 1. Set the parking brake. Use of a shield mounted in front 2. Shift the transmission to of the vehicle grille could restrict P (Park). airflow and cause damage to the 3.
-
Page 247: Appearance Care
Vehicle Care Towing the Vehicle from Appearance Care Caution the Rear Exterior Care Towing the vehicle from the rear could damage it. Also, repairs Locks would not be covered by the vehicle warranty. Never have the Locks are lubricated at the factory. vehicle towed from the rear. - Page 248 Vehicle Care have the damage assessed and Caution (Continued) Caution (Continued) repaired. Foreign materials such as calcium chloride and other salts, ice your dealer. Follow all This could cause damage that melting agents, road oil and tar, tree manufacturer directions regarding would not be covered by the sap, bird droppings, chemicals from correct product usage, necessary...
- Page 249 Vehicle Care Be sure the molding is cool to Lamp covers are made of plastic, Caution (Continued) the touch before applying any and some have a UV protective cleaning solution. coating. Do not clean or wipe them may damage it. Use only when dry.
- Page 250 Vehicle Care Replace the wiper blades if they are Caution Caution (Continued) worn or damaged. Damage can be caused by extreme dusty Using wax on low gloss black or tires. When applying a tire conditions, sand, salt, heat, sun, finish stripes can increase the dressing, always wipe off any snow, and ice.
- Page 251 Vehicle Care Steering, Suspension, and underbody. Take care to thoroughly Caution clean any areas where mud and Chassis Components other debris can collect. To avoid surface damage, do not Visually inspect steering, Do not directly power wash the use strong soaps, chemicals, suspension, and chassis transfer case and/or front/rear axle components for damaged, loose,...
-
Page 252: Interior Care
Vehicle Care corrosion. Larger areas of finish Use cleaners specifically designed A concentrated soap solution will damage can be corrected in your for the surfaces being cleaned to create streaks and attract dirt. dealer's body and paint shop. prevent permanent damage. Apply Do not use solutions that contain all cleaners directly to the cleaning strong or caustic soap. - Page 253 Vehicle Care Speaker Covers To clean: using a commercial upholstery cleaner or spot lifter. If ring 1. Saturate a clean, lint-free Vacuum around a speaker cover formation occurs, clean the entire colorfast cloth with water. gently, so that the speaker will not fabric or carpet.
- Page 254 Vehicle Care Caution Caution (Continued) Caution (Continued) Do not attach a device with a Wipe excess moisture from these the vehicle, blot immediately and suction cup to the display. This surfaces after cleaning and allow clean with a soft cloth dampened may cause damage and would them to dry naturally.
-
Page 255: Floor Mats
Vehicle Care purchased. Non-GM floor mats Removing and Replacing the Warning (Continued) may not fit properly and may Floor Mat interfere with the accelerator or rinse safety belt webbing only brake pedal. Always check that with mild soap and lukewarm the floor mats do not interfere water. -
Page 256: Service And Maintenance
Service and Maintenance Service and General Information changes and tire rotations and additional maintenance items like Maintenance Your vehicle is an important tires, brakes, batteries, and wiper investment. This section describes blades. the required maintenance for the vehicle. Follow this schedule to help General Information Caution protect against major repair... -
Page 257: Maintenance Schedule
Service and Maintenance frequent checks and services. The Used for taxi, police, or delivery Maintenance Additional Required Services - service. Schedule Normal are for vehicles that: Refer to the information in the Carry passengers and cargo Maintenance Schedule Additional Owner Checks and Services within recommended limits on Required Services - Severe chart. - Page 258 Service and Maintenance a year and the oil life system must Visually inspect windshield wiper Visually inspect fuel system for be reset. Your trained dealer blades for wear, cracking, damage or leaks. technician can perform this work. or contamination. See Exterior Visually inspect exhaust system If the engine oil life system is reset Care 0 246.
- Page 259 Service and Maintenance Check drive and accessory belts heavy traffic, areas with poor air Every 72 000 km/45,000 mi (power steering, AC compressor, quality, or areas with high dust Replace brake fluid (or every alternator). Check condition and levels. Replacement may also three years, whichever occurs check length as shown on length be needed if you notice reduced...
- Page 260 Service and Maintenance Civilian vehicles such as light Note: All vehicles with Special Application duty pick-up trucks, SUVs and rear-wheel drive change Services passenger cars that are used driveline axle oil every in military applications. 30 000 km/19,000 mi if vehicle is Severe Commercial Use used for towing purposes.
-
Page 261: Maintenance And Care
Service and Maintenance Additional To avoid break-down or failure to Trained dealer technicians have start the vehicle, maintain a access to tools and equipment Maintenance and Care battery with full cranking power. to inspect the brakes and recommend quality parts Trained dealer technicians have Your vehicle is an important engineered for the vehicle. - Page 262 Service and Maintenance Lamps of leaking, blown seals, information on how to clean and or damage, and can advise protect the vehicle s interior and Properly working headlamps, when service is needed. exterior, see Interior Care 0 251 and taillamps, and brake lamps are Exterior Care 0 246.
- Page 263 Service and Maintenance Wiper Blades Wiper blades need to be cleaned and kept in good condition to provide a clear view. Signs of wear include streaking, skipping across the windshield, and worn or split rubber. Trained dealer technicians can check the wiper blades and replace them when needed.
-
Page 264: Recommended Fluids And Lubricants
Service and Maintenance Recommended Fluids, Lubricants, and Parts Recommended Fluids and Lubricants Usage Fluid/Lubricant ® Automatic Transmission DEXRON -VI Automatic Transmission Fluid. ® Engine Coolant 50/50 mixture of clean, drinkable water and use only DEX-COOL Coolant. See Engine Coolant 0 199. Engine Oil Engine oil meeting the dexos1 specification of the proper SAE viscosity... -
Page 265: Maintenance Replacement Parts
Service and Maintenance Usage Fluid/Lubricant Windshield Washer Automotive windshield washer fluid that meets regional freeze protection requirements. Maintenance Replacement Parts Replacement parts identified below by name, part number, or specification can be obtained from your dealer. Part GM Part Number ACDelco Part Number Engine Air Cleaner/Filter 23335811... -
Page 266: Maintenance Records
Service and Maintenance Maintenance Records After the scheduled services are performed, record the date, odometer reading, who performed the service, and the type of services performed in the boxes provided. Retain all maintenance receipts. Odometer Date Serviced By Services Performed Reading... -
Page 267: Technical Data
Technical Data Technical Data Vehicle Identification Service Parts Identification Label Vehicle Identification This label, on the inside of the glove Vehicle Identification Number (VIN) box, has the following information: Vehicle Identification Vehicle Identification Number (VIN) ....266 Number (VIN). - Page 268 Technical Data Vehicle Data Capacities and Specifications Capacities Application Metric English Air Conditioning Refrigerant For the air conditioning system refrigerant type and charge amount, see the refrigerant label under the hood. See your dealer for more information. Engine Cooling System 2.4L L4 Engine 7.8 L 8.2 qt...
- Page 269 Technical Data Engine Specifications Engine VIN Code Horsepower Torque Spark Plug Gap 2.4L L4 136 kW@6700 rpm @6500 rpm 0.75 0.90 mm (0.030 (182 hp@6700 rpm) (172 lb ft@6500 rpm) 0.035 in) 3.6L V6 224 kW@4900 rpm @4800 rpm 0.95 1.10 mm (0.037 (301 hp@4900 rpm) (272 lb ft@4800 rpm) 0.043 in)
- Page 270 Technical Data Engine Drive Belt Routing 2.4L L4 Engine 3.6L V6 Engine...
-
Page 271: Customer Information
Customer Information Customer Vehicle Data Event Data Recorders Recording and Information This vehicle is equipped with an event data recorder (EDR). The Privacy main purpose of an EDR is to record, in certain crash or near The vehicle has a number of Vehicle Data Recording and crash-like situations, such as an computers that record information... - Page 272 Customer Information These data can help provide a GM will not access these data or better understanding of the share it with others except: with the circumstances in which crashes and consent of the vehicle owner or, injuries occur. if the vehicle is leased, with the consent of the lessee;...
-
Page 273: Index
Index Index Airbags Adding Equipment to the Accessories and Vehicle ......68 Modifications ....188 Passenger Status Indicator . - Page 274 Index Automatic Transmission (cont'd) Bulb Replacement (cont'd) Child Restraints (cont'd) Taillamps, Turn Signal, Lower Anchors and Tethers Shift Lock Control Function Check ..... . . 208 Sidemarker, Stoplamps, for Children .
- Page 275 Index Cooling System (cont'd) Driver Information Engine Engine Messages ... . .113 Center (DIC) ....109 Air Cleaner/Filter .
- Page 276 Index Fuel (cont'd) Filling the Tank ....178 Features Halogen Bulbs ....211 Gauge .
- Page 277 Index Lamps (cont'd) Lights (cont'd) Flash-to-Pass ....124 License Plate ....214 Ignition Positions .
- Page 278 Index Messages (cont'd) Transmission ....117 Engine ......193 Maintenance Vehicle .
- Page 279 Index Power (cont'd) Replacement Parts Mirrors ......38 Airbags ......69 Safety Belts .
- Page 280 Index Service Specifications and System Accessories and Capacities ..... 267 Forward Collision Modifications ....188 Speedometer .
- Page 281 Index Tires (cont'd) Turn Signal Warning Light When It Is Time for New Bulb Replacement ... . .211 Forward Collision Tires ......228 Alert (FCA) .