Advertisement
Advertisement
Table of Contents

Related Manuals for Northern Lights ARC-102


Summary of Contents for Northern Lights ARC-102
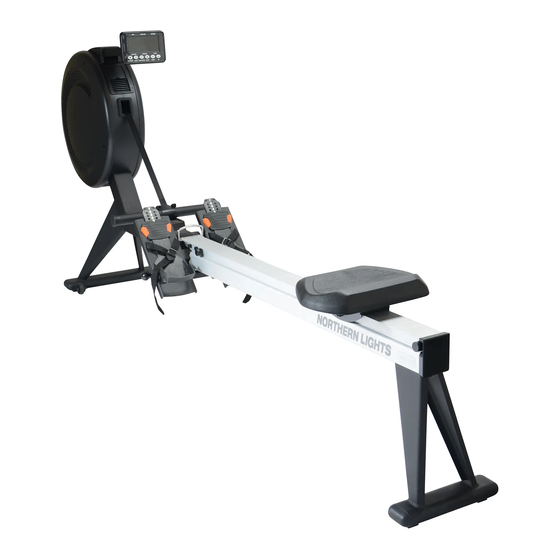
- Page 1 ARC-102 Air Rower SAVE THE INSTRUCTION - THINK SAFETY! Revision-1114...
-
Page 3: Obtaining Service
IMPORTANT Read all assembly instructions and safety precautions; reference all safety guidelines and warning labels before using this product. Please save the instructions afterward for future reference as the instructions are written for your safety and to protect the unit. SAFETY Properly warm up and stretch before exercising. -
Page 4: Important Safety Instructions & Warning
Important Safety Instructions & Warnings WARNING To reduce the risk of burns, fire of burns, fire, electric shock, or injury to persons, read the following precautions before assembling or using your new product. Read all instructions and enclosed literature carefully. Understand the assembly and operation before using the equipment. -
Page 5: Table Of Contents
Table of Contents Important Safety, Obtaining Service………………………………………………......Important Safety Instructions & Warning………………………………………………………..Table of Contents……………………………………………………………………………………… Parts for Assembly……………………………………………………………………....... Assembly Instructions…………………………………………………………………………………. Console Operation Instructions……………………………………………………………………..9-13 User ' s Manual ………………………………………………………………………......14-16 Parts Diagram……………………………………………………………………........ Parts List……………………………………………………………………………......18-19 Assembly Guide and Owner’s Manual Page 3... -
Page 6: Parts For Assembly
Parts for Assembly Tools Required: 8 MM 6 MM Wrench Allen Wrench Allen Wrench Page 4 Assembly Guide and Owner’s Manual... -
Page 7: Assembly Instructions
Assembly Instructions Step 1 *Before assembling the Air Rower, distinguish a proper and appropriate location for the unit. *Clear a big enough working space before unpacking the box. *Separate all of the parts after opening the box and verify that all parts are accounted for and have no damage. - Page 8 Assembly Instructions Step 3 With additional assistance, carefully turn the Air Rower around to the upright position as shown below. Remove the preassembled 6- M8 x 16mm Cap Head Screws (B4) and 2- M8 x 25mm Cap Head Screws (E8) and 6- M8x16 Flat Washers (B12) from the Main Frame Assembly with the 6mm Allen Wrench.
- Page 9 Assembly Instructions Step 5 With the supplied M14 Wrench, tighten the Pull Pin (A5) into the Main Frame Assembly as shown below. Step 6 Remove the preassembled 6- M8x16mm Cap Head Screws (B4) and 6- M8 Flat Washers (B12) from the Main Frame Assembly with 6mm Allen Wrench. Gently slide the Rail (B1) into the Main Frame Assembly (A1), then use the same 6 screws and flat washers to secure the Rail to the Main Frame Assembly.
-
Page 10: Assembly Instructions
Lift up the rail handle until hear a "clicking" sound, make sure the pin is locked in the hole of Pviot Assembly. The Computer Arm (F1) or the Computer (F2) can be adjusted to the desired position. Assembly for the ARC-102 Air Rower is complete. Page 8 Assembly Guide and Owner’s Manual... -
Page 11: Console Operation Instructions
Console Operation Instructions Please read the console operation instruction thoroughly and familiarize yourself with the console layout before choosing a workout. Make sure the Rower is powered up before you start using the console. This unit is powered by AC Adaptor. Console Layout Program Selection Window Data Display Window... - Page 12 Console Operation Instructions 2. How to Adjust Time and Date When the power is connected, the computer will turn on automatically, and starts segment tests with a beep, then it enters the Time and Date Adjustment as shown below. Note: The "Time and Date" wording on the console only indicates where to adjust the Time and Date, it is not embedded in.
- Page 13 Console Operation Instructions 1. Ke y s : Th er e ar e 6 function k e y s f o r p r o g r am o p er at i o n . UP or DOWN: To press these two buttons through available selection. adjust the function value upward and downward.
- Page 14 Console Operation Instructions 3. PROGRAMS 3-1. MANUAL PROGRAM A. Enter into this function, “L1” will display on the matrix profile window for resistance setting, you can set the target resistance from L1 to L16 by pressing UP or DOWN and then ENTER button. After pressing the ENTER, you can set target value for TIME, DISTANCE, STROKES, Each Data Display window will blink to input the data.
-
Page 15: Console Operation Instructions
Console Operation Instructions 3-3. H.R.C. You can preset the target percentage for heart rate control in this function. A. Enter into this function, the monitor will blink “AGE 25”, press UP or DOWN and then ENTER button to set your age. After confirmed , you can select the percentage of heart rate 55%, 75%, 90%, and TAG blinking in pulse display window. - Page 16 Console Operation Instructions 3-4. RACE Enter into the RACE , the TIME/500M displays 8:00. You can p ress UP or DOWN and then ENTER button to set difficulty level of L1 ~ L15 which y ou want to race with monitor immediately, then press ENTER to confirm.
-
Page 17: User's Manual
User's Manual Air Vent Adjustment The Air Rower's flywheel fan generates an air flow that can be directed with sliding the flip upward to open the vent or shut it down, as shown below. Heel Support Adjustment Press down 2 buttons in the foot rest tread with 2 fingers at the same time as shown below. and slide the heel support to the desired fitting position. -
Page 18: User ' S Manual
User's Manual Important: For Safety, while Folding or Unfolding the Air Rower, make sure there are no other persons, children, pets around the machine. Folding the Air Rower Pull out the Pull Pin (A5) and carefully lift up the Rail (B1) to the upright position, until hear a "clicking"... - Page 19 User's Manual Important: For Safety, while Folding or Unfolding the Air Rower, make sure there are no other persons, children, pets around the machine. Un-folding the Air Rower One Hand Holds the Rail (B1), and the other hand pulls out the Pull Pin (A5). Release the Pull Pin, slowly and carefully place the Rail with both hands down to the floor.
- Page 20 Page 18 Assembly Guide and Owner’s Manual...
-
Page 21: Parts List
PARTS LIST Description Q'TY Description Q'TY Main Frame Assembly Bearing Spacer Flywheel Fan Plastic Strap Drum Motor Spring Cover Handle Holder Spring Holder Pull Pin Steel Washer Wheel Aa10 Grommet M8 Acorn Nut Aa11 Ball Bearing6201 Cap Head Socket Screw M10×16mm Aa12 Single way Bearing Phillip Head Screw M5×10mm Aa13 Needle Bearing... -
Page 22: Parts List
PARTS LIST Description Q'TY Description Q'TY Computer Arm Front Stabilizer Computer Flat Oval End Cap 40×80 Computer Back Cover Foot Pad 40×32mm Spacer Φ8.3×Φ25×3T Cap Head Socket Screw M10×16mm Round Head Phillip Screw M5×10mm Pan Head Socket Screw M8×40mm Cable-1, 2P, 400mm M8 Lower Acorn Nut Cable -2, 3P, 400mm M10 Flat Washer...
Need help?
Do you have a question about the ARC-102 and is the answer not in the manual?
Questions and answers