Table of Contents

Subscribe to Our Youtube Channel
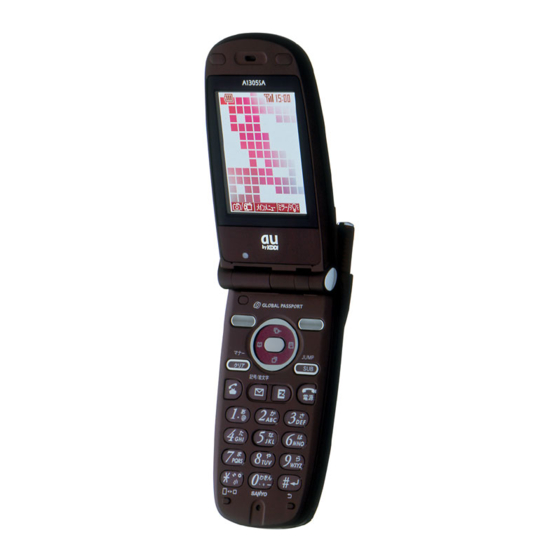
Related Manuals for KDDI A1305SA


Summary of Contents for KDDI A1305SA
- Page 1 Preparation Placing/ Answering a Call Using Overseas Using the Address Book Using Mail Features Using the Camera Using the EZweb Service Entering Characters Troubleshooting Other Features • INDEX Basic Operation Guide/A1305SA...
- Page 2 Thank you very much for purchasing the A1305SA. Carefully read the Manual and Basic Operation Guide to ensure proper operation before using the A1305SA. Keep these manuals handy so that you can refer to them at any time after reading.
-
Page 3: Manners For Using Mobile Phones
Manners for Using Mobile Phones ■A mobile phone always generates weak electric waves while its power is ON. ■Be considerate of the people and environment around you, and have fun using your mobile phone safely. ● There are places where the use ●... -
Page 4: Basics Of The Mobile Phone
Basics of the Mobile Phone What You Can Do with the A1305SA Phone Calls Using Overseas Your mobile phone has many useful You can place or answer functions including the Address calls while overseas the Book, history management, and the same way as in Japan. -
Page 5: Useful Manner Mode And Answer Phone
Useful Manner Mode and Answer Phone ■Manner Mode - For turning sound OFF In the Manner Mode, the Ringer does not sound so as not to bother the people around you. Press and hold for over a second in the Standby Screen. →... -
Page 6: Check The Power, Reception And Battery
Check the Power, Reception and Battery ■Keep the "power" ON for usual use. Keep the power ON to place or answer calls. Press and hold for over a second. → Page 13 ■You cannot talk on the phone if the "electric waves"... -
Page 7: Watch Out For Malicious Mails And One Ring Calls
Watch Out for Malicious Mails and One Ring Calls! ■If you receive malicious mails... Using the mail filter function, reject particular mail or mail including " 未承諾広告※ (Unsolicited Ad mail)" in the title, which is mostly malicious mail. The following mail functions are available for preventing arrival of malicious mails: •... -
Page 8: Table Of Contents
Contents Manners for Using Mobile Phones ........1 Basics of the What You Can Do with the A1305SA ........2 Mobile Phone Useful Manner Mode and Answer Phone ......3 Check the Power, Reception and Battery ......4 Watch Out for Malicious Mails and One Ring Calls! ....5... - Page 9 Using Mail Features Using E-Mail Features ............45 Changing Your E-Mail Address ..........46 Creating and Sending E-Mail ..........48 Reading Received E-Mail ............ 51 Reading E-Mail from the Inbox ..........52 Countermeasures for Malicious Mail ........53 Replying to Received E-Mail ..........54 Using C-Mail Features ............
-
Page 10: Preparation
Preparation Confirming the Packed Contents The A1305SA main unit and accessories are included in the package. A1305SA Main Unit Battery Pack SANYO AC Adapter 02 Desktop Holder Warranty Basic Operation Guide (Japanese) Manual (Japanese) 目次 ご利用 いただく前に 準備する 電話を かける... -
Page 11: How To Read This Manual
How to Read This Manual Title Contents of operation Key layout Registering Data from the Incoming/Outgoing Calls Operation O.C IncomingCalls Press in the 01 15:15 10/ 9 number Cathy Johnes Standby Screen. 02 16:22 10/ 7 Robin Smith Operation 03 22:35 10/ 6 The Incoming Calls or Outgoing Calls 0900001XXXX results appears. -
Page 12: Names Of Each Part
Names of Each Part Receiver (Earpiece) Main Display Center Key Flexible Key Cursor Key Clear/Manner Key Sub Menu/Jump Key Mail Key Power/End Key Start Key EZ Key Dial Key External Connector Microphone Antenna Speaker Incoming Illuminator Built-in Camera Flash (Side Key) Sub Display (Back-panel) Earphone-... -
Page 13: Charging The Battery Pack
Connect the SANYO AC Adapter 02 to the Desktop Holder. Plug the power plug of the SANYO AC Adapter 02 into an AC outlet. Attach the A1305SA on which the Battery Pack is installed to the Desktop Holder. To detach, hold down the Desktop Holder and detach it. -
Page 14: Extending The Antenna
Extending the Antenna Hold the tip of the antenna and pull out until it stops. ●Extending the antenna ●Retracting the antenna ② ① ● To retract the antenna, hold the lower part of the antenna and push straight down ( ① ), then hold the upper part of the antenna and push straight down ( ②... -
Page 15: Turning The Power On
Turning the Power ON Roaming Area Press and hold for over a Japan second. Change Area − Go to GlobalFunc./ Roam.Area Setup When the power is turned ON, the specified country name is displayed <Standby Screen> and the Standby Screen appears. 10:10 10:10 10:10 Sun Oct 10 Sun Oct 10 Check the battery level. -
Page 16: Initializing
" 自動設定 (Auto-Setup)" and press Setting is made as default, and the メ インメニュー (MainMenu) appears. 選択 切替 About Initial Settings When purchased, A1305SA is configured with the following initial settings. LockNo. 1234 Font Size Standard Entry Size Mail Display... -
Page 17: Switching The Screen Display To English
Switching the Screen Display to English Menus, messages and other screen displays can be switched to either Japanese or English. Press ) in the メインメニュー Standby Screen. The メインメニュー (Main Menu) appears. 選択 切替 基本設定 to select " 基本設定 M0フ゜ロフィール M1通話/料金... - Page 18 M57Set Language to select "Set 日本語 English Language" and press 選択 The Set Language setup screen appears. to select "English" and press The screen display is set to English.
-
Page 19: Understanding Basic Usage Of The Phone
Understanding Basic Usage of the Phone ■Basic operation Various functions and settings of the A1305SA can be accessed from the MainMenu. Use the Cursor Key ( ) on the MainMenu to select the item, then press the Center Key ( ) to determine and access the selected function. - Page 20 ■Flexible key Use for operate items indicated in the lower part of the Main Display. The items displayed may differ depending on the screen. As in the figure on the left, this MainMenu document indicates MainMenu , the left and the right Also, is indicated as ■How to use the keys...
-
Page 21: Icon Display
While the Answer Phone is being set 10:10 10:10 While in the Manner Mode Sun Oct 10 Sun Oct 10 ※ Roaming When the area setting (see page 34) is set to any country other than "Japan" for using the A1305SA overseas, it is called roaming. -
Page 22: Initializing E-Mail And Ezweb Functions
Initializing E-Mail and EZweb Functions A subscription for the EZweb (Internet) service is required to use the E-Mail and EZweb (Internet) services. Please contact an au Customer Service Center or an au shop if you did not subscribe for the service at the time of purchase. Be sure to perform initialization before using the E-Mail and EZweb services. - Page 23 Press E−Mail Menu EZ Menu E-Mail Menu appears after 1Create New 1Top Menu pressing . EZ Menu appears 2Inbox 2Favorite Site 3Outbox 3URL Input after pressing in Step 1. 4Check New Mail 4Previous Disp. 5Batch Send 5Data Folder 6Data Folder 6Screen Memo 7E−Mail Setup 7Clr.BrowserRec 8EZ Setup C-mail Select Select When press When press Information Be sure to set the Area Setting (see page 34) to Japan.
-
Page 24: Confirming Your Phone Number And E-Mail Address
Confirming Your Phone Number and E-Mail Address Press ) in the MainMenu Standby Screen. Select Switch Personal Info to select "Personal 1Profile 2Address Book Info" and press Select 3Calendar 4Memo 5Dial−Memo The Personal Info Screen appears. 6Confirm Memory 7Calls Select Profile to select "Profile" and My #... -
Page 25: Placing/Answering A Call
Placing/Answering a Call Placing a Call Use the to enter the receiver's phone number and press 0900001XXXX Placing a call to a landline telephone Enter the phone number starting with the area code. Add'l# Reg. P/− Placing a call to a mobile phone, car phone, or PHS Always enter the whole (11-digit) phone number. - Page 26 Answering a Call Incoming Press during incoming call Cathy Johnes and answer it. 0900001XXXX When the caller's phone number is displayed Reject The caller is setting the phone number to be displayed. Incoming ID Unsent The caller's name is also displayed when the caller's information is registered in the Address Book.
-
Page 27: Calling Back (Outgoing Calls/Incoming Calls)
Incoming Calls history. Receivers who call back will access programs for which they must pay. ■ Icon as a countermeasure for One Ring Calls With the A1305SA, one-ring calls are indicated with an orange icon O.C IncomingCalls 01 22:35 10/ 6 in the Incoming Calls history. Be careful if you are not familiar 0900001XXXX... -
Page 28: Adjusting Ringer Volume
Adjusting Ringer Volume Press ) in the MainMenu Standby Screen. The MainMenu appears. Select Switch Basic Setup to select "Basic Setup" M0Profile M1Call/Toll and press Select M2Sounds/Vibes M3Screen M4Privacy The Basic Setup screen appears. M5User Support M6Ans.Ph/Manner M7Clock Select M2 Sounds/Vibes to select "Sounds/ 1Speaker Vol.... - Page 29 M211Call Notice to select "Call Notice" and press Select The Call Notice setting screen appears. STEP Set STEP to adjust volume and press Pressing raises the volume. Pressing lowers the volume. There are 5 levels for ringer volume. Gradually raises/lowers "Step ↑ " / "Step ↓ " or no ringer sounds "OFF"...
-
Page 30: Setting The Manner Mode
Setting the Manner Mode The sound such as Ringer does not sound when the Manner Mode is set to ON. The A1305SA notifies you of the incoming call by vibrate (Vibrator). 10:10 Press and hold for over a 10:10 10:10... -
Page 31: Changing Ringer Type
Changing Ringer Type Press ) in the MainMenu Standby Screen. The MainMenu appears. Select Switch Basic Setup to select "Basic Setup" M0Profile M1Call/Toll and press Select M2Sounds/Vibes M3Screen M4Privacy The Basic Setup screen appears. M5User Support M6Ans.Ph/Manner M7Clock Select M2 Sounds/Vibes to select "Sounds/ 1Speaker Vol.... - Page 32 M221Call Notice to select "Call Notice" Pineapple Rag Water Mist and press Select OFF Prior Data The Call Notice setting screen appears. Preview Preview Pressing ) on the left plays back the selected ringer. Call Ringer to select " " and Original XXXX press The folder selection screen appears. Only "Original"...
-
Page 33: Recording Messages When You Are Unable To Answer A Call
Recording Messages When You Are Unable to Answer a Call Press and hold the Side Key 10:10 10:10 Sun Oct 10 Sun Oct 10 ) for over a second in the Standby Screen. The Answer Phone is set and " " MainMenu appears on the screen. To release the Answer Phone Press and hold the Side Key ( ) for over a second in the Standby... -
Page 34: Playing Back/Erasing Recorded Messages
Playing Back/Erasing Recorded Messages Memo Menu Press the Side Key ( ) in 1VoiceData Opr. 2Memo the Standby Screen. 3Dial−Memo The Memo Menu appears. Select Voice Data Opr. to select "VoiceData 1Record MyVoice 2Rec.Phone Memo Opr." and press Select 3Ans.Ph/Ph.Memo 4MyVoice Folder The Voice Data Opr. selection screen appears. - Page 35 1 Erase One to select the played- 2 Erase All back message and press ) on the left. Erase to select "Erase One" and press The message is erased. Information If an Answer Phone message is recorded for an incoming call you Confirm could not answer, pressing ) displays the Incoming Missed Call...
-
Page 36: Using Overseas
Information For details on the international roaming feature, refer to the "GLOBAL PASSPORT Owner's Manual". Setting Area An area (country name) can be selected where you will use the A1305SA. Press ) in the MainMenu Standby Screen. - Page 37 to select an area and press The area is set.
-
Page 38: Calling Japan From Overseas
Japan (81) are 81900001XXXX added. Add'l# Reg. P/− Press Information " " appears when A1305SA is enabled for roaming use. For details on how to place a call or on charges, refer to the "GLOBAL PASSPORT Owner’s Manual". -
Page 39: Calling Overseas From Japan
Calling Overseas from Japan The international access number and the area code (country code) of the receiver can be added to the phone number (international prefix) when placing a call overseas from Japan. Example: Calling to South Korea Enter the receiver's phone number. -
Page 40: Using The Address Book
Using the Address Book The receiver's phone number can be loaded and a call is placed easily by saving frequently called phone numbers in the Address book. Saving in the Address Book Up to 500 phone numbers and E-Mail addresses can be saved. Address Book... - Page 41 Classify Phone # Enter a phone number and press Other Mobile PHS Home The Classify Phone # selection Work FAX screen appears. Select Enter the area code when saving a landline telephone number. Be sure to enter an 11-digit phone number when saving a mobile phone or PHS number. to select classify and Address Book...
- Page 42 Classify E−Mail Enter an E-Mail address and Other Mobile press PHS Home School The Classify E-Mail selection screen Work appears. Select For the method of entering E-Mail addresses, see page 79. Address Book to select classify and 000 Margaret Watso press Select MargaretWatson 0900001XXXX...
- Page 43 Placing a Call to a Saved Phone Number Adrs.Bk.List Press in the Standby ア カ サ タ ナ ハ マ 愛川めぐみ Screen. 秋山昇 伊藤次郎 井上知子 The Address Book screen appears. 植田佳子 江田さつき 小川浩二 Mode Detail New Adrs.Bk.List to switch between ナ...
-
Page 44: Editing The Address Book Data
Editing the Address Book Data Example: To change a phone number Adrs.Bk.List Press in the Standby ア カ サ タ ナ ハ マ 愛川めぐみ Screen. 秋山昇 伊藤次郎 井上知子 The Address Book screen appears. 植田佳子 江田さつき 小川浩二 Mode Detail New Adrs.Bk.List to switch between ナ... - Page 45 to select " " and 0900001XXXX press Select XX/XX Add'l# P/− Classify Phone # Edit data and press Other Mobile PHS Home Pressing erases the saved Work FAX characters. Press and holding for over a second Select erases all characters. to select a classification Address Book...
-
Page 46: Registering Data From The Incoming/Outgoing Calls
Registering Data from the Incoming/Outgoing Calls O.C IncomingCalls Press in the 01 15:15 10/ 9 Cathy Johnes Standby Screen. 02 16:22 10/ 7 Robin Smith 03 22:35 10/ 6 The Incoming Calls or Outgoing Calls 0900001XXXX appears. 04 0:14 10/ 3 0900002XXXX Add'l# Detail MailRec. Incoming Calls to select the phone 1 Dial 2 Reg.to Adrs.Bk. 3 IncomingRej.Reg number to register and press 4 Reject Calls... -
Page 47: Using Mail Features
Using Mail Features A subscription for the EZweb (Internet) service is required to use the E-Mail service. Please contact an au Customer Service Center or an au shop if you did not subscribe for the service at the time of purchase. Be sure to perform initialization before using the E-Mail and EZweb services. -
Page 48: Changing Your E-Mail Address
Changing Your E-Mail Address E-Mail address Example: △△△ @ezweb.ne.jp Changeable part Domain E−Mail Menu Press in the Standby Screen. 1Create New 2Inbox 3Outbox The E-Mail Menu appears. 4Check New Mail 5Batch Send 6Data Folder 7E−Mail Setup C-mail Select E−Mail Setup to select "E-Mail 1Receive/Disp. 2Send/Create Setup" and press Select 3Other Setup... - Page 49 Eメールアト゛レスを変更しま to select " 承諾する す。ご希望の Eメールアト゛レスを入力して (Agree)" after checking the ください。 cautions, and press ※入力時の注意※ 1.半角英数小文字で [@ezweb.ne.jp]より左 Select 側のみご入力ください 。 Entry to select the entering area and press Edit と最後には利用できま Enter an E-Mail address and せん。最後に数字の [0]を使用することは press できません。 For the method of entering @ezweb.ne.jp...
-
Page 50: Creating And Sending E-Mail
Creating and Sending E-Mail Let's create a new E-Mail and send it. E−Mail Menu Press in the Standby Screen. 1Create New 2Inbox 3Outbox The E-Mail Menu appears. 4Check New Mail 5Batch Send 6Data Folder 7E−Mail Setup C-mail Select Create Mail to select "Create New" and press Select The Create Mail screen appears. Icons : "To"... - Page 51 Address List Enter the address and press XXX/640 △△△@□□□.ne.jp The Address List screen returns. For the method of entering E-Mail addresses, see Complete Select Group page 79. Press to enter an address from the Address Book, Sent Records, or Received Records also. Create Mail...
- Page 52 Body to select " " (body) and press Select The Body input screen appears. :Pastel Menu XXXXX/10000 Char. Create Mail Enter the body sentences and △△△@□□□.ne.jp Notice about press The Create Mail screen returns. I would like to inform you that the meeting sche duled at 17:00 h For the method of entering characters, see page 76. Save Select Send...
-
Page 53: Reading Received E-Mail
Reading Received E-Mail The message "New E-Mail X" appears when receive new E-Mail. The received E-Mail is stored in the Inbox. When you receive E-Mail New E−Mail A message appears on the Standby Screen. XXX 10:10 10/10 Confirm Switch Inbox Press Confirm Unread XXX/XXX... -
Page 54: Reading E-Mail From The Inbox
Reading E-Mail from the Inbox Read E-Mail can be read from the Inbox when you read any now-read mail. E−Mail Menu Press in the Standby Screen. 1Create New 2Inbox XXX 3Outbox The E-Mail Menu appears. 4Check New Mail Icons 5Batch Send 6Data Folder : Indicates that "Unread Mail" exists. The number on the 7E−Mail Setup... -
Page 55: Countermeasures For Malicious Mail
Countermeasures for Malicious Mail Malicious mail can be rejected with the mail filter feature. Press in the Standby Screen. to select "E-Mail Setup" and press Select to select "Other Setup" and press Select to select " メールフィルター (Mail Filter)" and press Select Enter your PIN number and select "... -
Page 56: Replying To Received E-Mail
Replying to Received E-Mail E−Mail Menu Press in the Standby Screen. 1Create New 2Inbox XXX The E-Mail Menu appears. 3Outbox 4Check New Mail 5Batch Send 6Data Folder 7E−Mail Setup C-mail Select Inbox to select "Inbox" and Unread XXX/XXX メインフォルタ゛ : X press Select フォルタ゛1 フォルタ゛2 フォルタ゛3 The Inbox appears. フォルタ゛4 フォルタ゛5 フォルタ゛6... - Page 57 Body to select " " (body) >I am looking fo and press Select rward to have a dinner with you. The Body input screen appears. ::Pastel Menu XXXXX/10000 Char. Highlight Create Mail Enter the body sentences and Robin Smith Re:Happy Bir press The Create Mail screen appears. Me too! Tell Me if you have some thing to eat. For the method of entering characters, see page 76. >I am looking fo...
-
Page 58: Using C-Mail Features
Using C-Mail Features C-Mail is a service that send/receive mail to/from C-Mail compatible au mobile phones via phone numbers. Up to 50 2-byte characters can be sent. キャラクターイラス ト 未 Information • For customers in Kanto and Chubu regions, C-Mail service can be used with no subscriptions. -
Page 59: Creating And Sending C-Mail
Creating and Sending C-Mail C−Mail Menu Press and hold for over a 1Create New 2Inbox second in the Standby Screen. 3Outbox 4Chat Records 5C−Mail Setup The C-Mail Menu appears. E-mail Select Body to select "Create New" and press Select The Body input screen appears. Create Mail... - Page 60 Phone Number to select "Usual" and press Select The Phone Number input screen appears. XX/XX Create Mail Enter the Phone Number and 0900002XXXX Usual press I am sorry. I ca The Create Mail screen returns. nnot go to the s tation on time. Shall we get to The phone number can be loaded and entered from gether at ABC ho...
-
Page 61: Reading Received C-Mail
Reading Received C-Mail The message "New C-Mail X" appears when receive new C-Mail. The received C-Mail is stored in the Inbox. When you receive C-Mail A message appears on the Standby Screen. New C−Mail X 10:10 10/10 Confirm Switch Inbox Press Confirm Unread XXX/XXX... -
Page 62: Reading C-Mail From The Inbox
Reading C-Mail from the Inbox C-Mail can be read from the Standby Screen when any now-read mail read again. C−Mail Menu Press and hold for over a 1Create New 2Inbox XXX second in the Standby Screen. 3Outbox 4Chat Records 5C−Mail Setup The C-Mail Menu appears. Icons E-mail Select... -
Page 63: Using The Camera
Using the Camera Still images (photos) can be taken and moving images (movies) can be recorded by using the A1305SA camera feature. The saved photos or movies can be attached to E-Mail and sent. Taking a Still Image (Photo) Use the Standby Screen as a monitor for taking a photo, and direct the lens to the object. -
Page 64: Recording A Moving Image (Movie)
Recording a Moving Image (Movie) Use the Standby Screen as a monitor for recording a movie, and direct the lens to the object. Press and hold ) on the left for over a second in the Standby Screen. The image is displayed on the main display. 5sec... - Page 65 Press Save A message appears that the saving operation is in progress, and the movie is saved. Information • Movies are saved in the "MyMovie" folder of the Data folder. • The title of the movie is saved in the form of "S_recording date _recording time˜consecutive numbers".
-
Page 66: Viewing Taken/Recorded Images
Viewing Taken/Recorded Images 1 Frame Press ) on the left in 2 Special Effect 3 Self Timer ON 4 Scene−Select the Standby Screen and press 5 Sequential Mode 6 Date Stamp Press and hold ) on the left for over a second in the Standby Screen to display the movie. MyPhoto... -
Page 67: Attaching The Taken/Recorded Image To An E-Mail And Sending It
Attaching the Taken/Recorded Image to an E-Mail and Sending Perform Steps 1and 2 on pages 61 or 62 to take/record images. Create Mail Press ) on the right, E-mail immediately after taking/ (9k)041010 _ 1 recording the image. The Mail Create screen appears with the image attached. -
Page 68: Using The Ezweb Service
Using the EZweb Service A subscription is required to use the EZweb (internet) service. Please contact an au Customer Service Center or an au shop if you did not subscribe for the service at the time of purchase. Be sure to perform initialization before using the E-Mail and EZweb services. If you have not performed initialization yet, see page 20. -
Page 69: Understanding Basic Operations
Understanding Basic Operations Let's access the EZ Top Menu which allows entrance to the Internet. EZ Menu Press in the Standby Screen. 1Top Menu 2Favorite Site 3URL Input The EZ Menu appears. 4Previous Disp. 5Data Folder 6Screen Memo 7Clr.BrowserRec 8EZ Setup Select EZトッフ゜メニュー to select "Top オフィシャる?au △△△△△△△△△ Menu"... -
Page 70: Press And Hold
■Accessing informational sites to select the informational site and press Select EZトッフ゜メニュー EZトッフ゜メニュー オフィシャる?au オフィシャる?au △△△△△△△△△ △△△△△△△△△ おトク・知っトク おトク・知っトク ケータイ・ツカエル機能 ケータイ・ツカエル機能 □□□□□□□□□ □□□□□□□□□ カテコ゛リで探す(EZインターネット) カテコ゛リで探す(EZインターネット) 音・画像をケ゛ット 音・画像をケ゛ット 最新情報をチェック 最新情報をチェック 生活情報を調べる 生活情報を調べる Select Select 着うた EZトッフ゜メニュー 音・画像をケ゛ット オフィシャる?au △△□□サウンド オフィシャる?au 着うた ○○音楽... -
Page 71: Viewing An Informational Site
Viewing an Informational Site The EZweb (Internet) can be accessed from the EZトップメニュー (EZ Top Menu). Many useful and entertaining informational sites (programs) can be accessed via the EZweb. オフィシャる?au (Official? au) Provides useful au information, such as the latest news on the EZweb. -
Page 72: Downloading Ringers
Downloading Ringers Example: Download the latest Ringer melodies and set them to the Ringer. EZ Menu Press in the Standby Screen. 1Top Menu 2Favorite Site 3URL Input The EZ Menu appears. 4Previous Disp. 5Data Folder 6Screen Memo 7Clr.BrowserRec 8EZ Setup Select EZトッフ゜メニュー to select "Top オフィシャる?au △△△△△△△△△ Menu" and press おトク・知っトク... - Page 73 to select the site and <メロテ゛ィハ゜ーク> 新着 ランキンク゛ press Jホ゜ッフ゜ Select クラシック Back △△△ to select the Ringer Saved in Data Folder Play? melody and download. Download following screen instructions. EZ password is require to use the information site Play which charges information fee. Perform EZ password setting when using it for the first time.
- Page 74 to select "Call Notice" Data is Already Set to the Items. Rewrite? and press 1 YES Select 2 NO to select "YES" and press The Ringer is set. Information The layout and contents of the screen are examples and may be changed.
-
Page 75: Saving Frequently-Accessed Sites
Saving Frequently-Accessed Sites Up to 100 frequently-accessed URLs can be saved. New bookmark Display the site to save and Save Items Take snapshot press Reload Bookmark(s) View snapshots Go To URL The Browser menu appears. Current Certificate Title: to select "New EZmark URL: bookmark" and press http://www.△△△.ne.jp... -
Page 76: Accessing Sites Saved As Bookmarks
Accessing Sites Saved as Bookmarks EZ Menu Press in the Standby Screen. 1Top Menu 2Favorite Site The EZ Menu appears. 3URL Input 4Previous Disp. 5Data Folder 6Screen Memo 7Clr.BrowserRec 8EZ Setup Select to select "Favorite 1 お気に入り 2 フ゜ロ野球速報 3 今日のMLB Site" and press Select 4 サッカーニュース The bookmarks appear. Menu to select the site and press The selected site appears. -
Page 77: Confirming Charges
Confirming Charges Calls and transmission charges can be confirmed from the EZweb. EZ Menu Press in the Standby Screen. 1Top Menu 2Favorite Site 3URL Input The EZ Menu appears. 4Previous Disp. 5Data Folder 6Screen Memo 7Clr.BrowserRec 8EZ Setup Select EZトッフ゜メニュー to select "Top Menu" オフィシャる?au △△△△△△△△△ and press Select おトク・知っトク... -
Page 78: Entering Characters Switching Over The Input Mode
Entering Characters Switching Over the Input Mode On the character entry screen, press ) on the left to Char. display the input mode selection screen. to select an input mode and press Entering Kana corresponds to " あ行 ", dial keys can be used to enter Kana characters. to "... - Page 79 ■Entering same key character continually After entering the first character, press then the next key. Example: Entering " あい " Memo Memo Memo あ あい あ Press once. Press Press twice. ■Entering "゛ " and "゜ " Enter the character to which to add " ゛ " or " ゜ ", then press Example: Entering "...
-
Page 80: Entering Kanji
Entering Kanji The Predict feature can be used for converting entered Kana characters into Kanji characters. It is frequently-used words that are memorized, and the word can be entered without pressing all the character keys. Example: To enter " 中川 " as a name for the address book Name... -
Page 81: Entering E-Mail Addresses
Entering E-Mail Addresses can be used for entering characters and numbers. Example: Entering "taro@ezweb.ne.jp" To(Must) Enter "taro". taro t : Press once. a : Press once. r : Press 3 times. XXX/XXX Char. o : Press 3 times. Press 1 Use 2... - Page 82 ■Keys available for E-Mail addresses The character displays as shown in the following table when each time a key is pressed. Lowercase letter input mode Uppercase letter input mode Number of pressing times Number of pressing times 1 1 2 2...
-
Page 83: Entering Pictographs
Entering Pictographs Summary Press ) on the left in Char. Wow the Character input screen. The Enter Mode selection screen appears. Char. Pictograph Entry to select " " and Picto.List 1/13 press The Pictograph input screen appears. XX/XX Next Press ) on the right to switch to the next Cont. -
Page 84: Inputting Fixed Expressions
Inputting Fixed Expressions Press on the character 1 Use 2 Paste Data 3イFormat entry screen. 4 Font Size Setup Entry Method # Predict OFF Format Category to select "Format", and 1Internet 2Greeting press 3Message 4Reply 5Business The Format Category screen appears. 6Free Format Select Internet to select a category, 0TEL0900001XXXX... -
Page 85: Troubleshooting
Troubleshooting Symptom Confirmation Correction Page Cannot turn the power Is the Battery Pack ●Attach the Battery Pack properly. − attached properly? Is the Battery Pack ●Charge the Battery Pack. charged? ●Press and hold Did you press and hold for over a second. for over a second? ●Extend the antenna and try to make Cannot make a call. -
Page 86: Other Features
Used for selecting colors and patterns for the Incoming Illuminator during incoming calls or while receiving mail. Pocket Light The A1305SA can be used as jacklight to light up outdoor garages, campgrounds or the keyhole at the entrance of your house at night. with Donald! The Wall Paper, Ringers and Call Images can be changed into the Donald mode. -
Page 87: Index
INDEX E-Mail address ........22,46 Enter the E-Mail Address ....... 79 Accessories ..........8 Change the E-Mail Address ....46 Address Book ..........38 E-Mail ............45 Edit ............42 Attach the image (photo or movie) to an Place a call ..........41 E-Mail and send it ...... - Page 88 Malicious Mail .......... 5,53 Roaming ............19 Manner Mode ........3,19,28 Manner ............1 Movies SANYO AC Adapter 02 ......8,11 Attach to E-Mail ........65 Set Language ..........15 Record ........... 62 Site View ............64 Access to Bookmark ......74 Moving Image Save the Bookmark ........
- Page 90 157 area code not required (toll free) Pressing "zero" will connect you to an operator, after calling "157" on your au cellphone. Sales:KDDI CORPORATION• OKINAWA CELLULAR TELEPHONE COMPANY SANYO Electric Co., Ltd. Manufactured by: Cellphone and PHS operators collect and recycle unused...
Need help?
Do you have a question about the A1305SA and is the answer not in the manual?
Questions and answers