Table of Contents
Advertisement
Quick Links
サトー取説_E 04.8.17 6:21 PM ページ a
Safety precautions
This chapter describes safety measures in using the printer.
Please read carefully before using the printer.
▲About the pictograms
This instruction manual uses various pictograms so that you can operate the printer safely, and prevent
damage or injury. The indications and meanings are as follows. Please understand the description
before reading the instruction.
Warning
Caution
Examples of the indications
The
in the sign (the sign on the left cautions for electric shock).
This
near the sign (the sign on the left prohibits disassembly).
The
(the sign on the left tells you to pull out the plug from the outlet).
■Do not put it in an unstable place
• Do not put it in unstable places such as
shaky table, slanting or vibrating place.
It may cause the equipment to drop or
fall, leading to injuries.
■Do not put containers holding water, etc.
• Do not put containers such as a vase or
glass, holding water or chemicals, or small
metals around the printer. In case water
should be spilled or a metal should fall
inside, immediately turn off the power,
pull out the plug of the power cable from
the outlet, and contact a sales outlet,
dealer, or service center. In this case,
continued use of the printer may cause a
fire or electric shocks..
First edition: August 1, 2004 Q00937000
2004 Sato Corporation
C
It indicates a case where neglecting this indication and erroneous use may
lead to death or serious injuries.
It indicates a case where neglecting this indication and erroneous use may
lead to injuries or only to property damage.
sign means "what to be careful about." Specific point to be careful about is described
sign means "what must not be done." The specific prohibited point is described in or
sign means "what must be done." The specific point to heed is described in the sign
Warning
■Do not put foreign objects inside
• Do not insert or drop anything metallic or
flammable into the openings of the printer
(the cable outlet or mounting hole of the
memory cartridge). In case a foreign
object should get inside, immediately turn
off the power, pull out the plug of the
power cable from the outlet, and contact a
sales outlet, dealer, or service center. In
this case, continued use of the printer may
cause a fire or electric shocks.
■Use it only in the specified voltage
• Do not use any other voltage but the
specified power voltage (AC240V).
Otherwise, it may cause a fire or electric
shocks.
Advertisement
Table of Contents

Related Manuals for SATO GT4e


Summary of Contents for SATO GT4e
-
Page 1: Safety Precautions
In this case, specified power voltage (AC240V). continued use of the printer may cause a Otherwise, it may cause a fire or electric fire or electric shocks.. shocks. First edition: August 1, 2004 Q00937000 2004 Sato Corporation... - Page 2 サトー取説_E 04.8.17 6:21 PM ページ b Warning ■Be sure to ground ■Do not use the printer when it is in trouble • Be sure to connect the ground cable to the • If abnormality such as smoke or peculiar ground of the printer. If the ground cable smell from the printer should occur, is not connected, the printer may cause continued use of the printer may cause a...
- Page 3 サトー取説_E 04.8.17 6:21 PM ページ c Caution ■Power supply ■Opening/closing the printer head • Do not operate the power switch or • When opening/closing the printer head, handle the power cable with a wet hand. be careful not to catch any other foreign Operating or handling with a wet hand objects but paper.
-
Page 4: Power Supply
サトー取説_E 04.8.17 6:21 PM ページ d Notes on installation and handling When installing and handling the printer, note the following points. ▲Installation Tips Do not place it near cranes or When installing this product, note the following points. compressors Equipment using large capacity of electricity, such Place the printer in a level place as cranes and pressing machines, may cause If installed in a rough... -
Page 5: Unpacking The Printer
サトー取説_E 04.8.17 6:21 PM ページ 1 Unpacking the printer This section describes the contents of the product. First, unpack the printer and check the contents. Accessory box Printer Cushion * The shape of cushioning material (cushion holding the printer) may be different. -
Page 6: Included Accessories
サトー取説_E 04.8.17 6:21 PM ページ 2 Included Accessories When opening the box, check if the following accessories are complete. If there is anything lacking, please inquire the sales outlet or dealer you bought the product from. Global warranty documents Cleaning set Labels and ribbon for testing Attached when the ribbon is paper tube winding type (optional). -
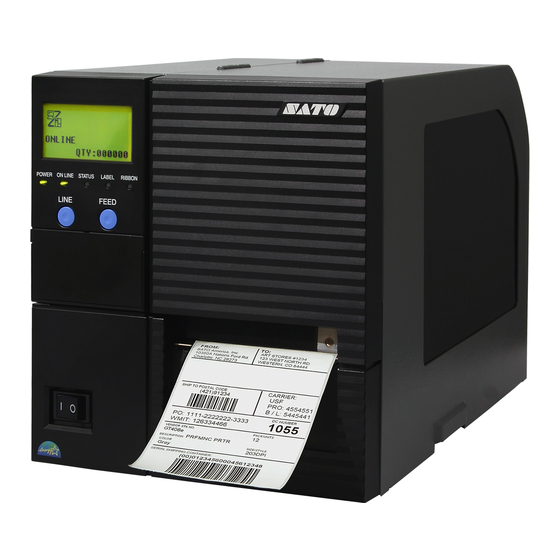
Page 7: Names Of Various Parts
サトー取説_E 04.8.17 6:21 PM ページ 3 Names of various parts ▲Printer main body Operation panel Main cover There are a display to show messages, two buttons for operation, and five LEDs Operation panel cover showing the condition of There are various operation the printer. - Page 8 サトー取説_E 04.8.17 6:21 PM ページ 4 Mini LAN interface card (optional) Interface card (optional) Select one from IEEE 1284, fast RS-232C, USB, LAN, and wireless LAN. EXT connector (optional) External signal interface AC input power terminal Power cable hook (Power supply connector) A groove for hooking the power cable.
- Page 9 サトー取説_E 04.8.17 6:21 PM ページ 5 Memory cartridge Tilt the knob of the memory cartridge cover inside and remove the memory cartridge cover. For details, see “Attaching and removing the memory cartridge.” → Page 88 Label damper stopper Paper sensor Label guide handle Label damper Head open lever...
-
Page 10: Operation Panel
サトー取説_E 04.8.17 6:21 PM ページ 6 ▲Operation panel Icons, operation messages, and error messages are displayed. Display Icons, operation messages, and error messages are displayed. FEED button For feeding of paper. When it is pressed once, equivalent of a sheet of paper is sent out. *There are times when the paper is not aligned to the proper position, such as when the power is turned on or the paper is set. -
Page 11: Setting The Paper
サトー取説_E 04.8.17 6:21 PM ページ 7 Setting the paper This printer can print on roll paper and fanfold paper. The method of setting paper is different with roll paper and fanfold paper. This printer provides appropriate printing by detecting the I-mark. For printing with this printer, please use our products. -
Page 12: Setting Roll Paper
サトー取説_E 04.8.17 6:21 PM ページ 8 Setting roll paper Lift up the main cover. Main cover Caution When opening the main cover, open it fully to the top so that it will not close after it is opened half way. Lower the head-open lever (purple)( The printer head will open. - Page 13 サトー取説_E 04.8.17 6:22 PM ページ 9 Loosen the label guide knob and set it forward. Pull up the label damper. Label guide knob Label damper Label damper Pass the paper under the label guide and paper sensor. When the knob of the label damper is pulled forward, the label damper will return to the original position.
- Page 14 サトー取説_E 04.8.17 6:22 PM ページ 10 Loosen the label guide knob, and adjust the slide guide so that it lightly touches the edge of the paper, and fasten the label guide knob tightly. Label guide knob Label guide Turn the head close lever (purple / CLOSE ) in the direction of the arrow, and close...
- Page 15 サトー取説_E 04.8.17 6:22 PM ページ 11 ▲Adjusting for the paper width Basically, this printer is adjusted so that quality printing is obtained with no adjustment, but depending on the width of the paper to use, there may be cases where quality printing is not obtained. How to adjust for the paper width Adjust by turning the head pressure knob to the scale marks of the head pressure balance for the paper width.
- Page 16 サトー取説_E 04.8.17 6:22 PM ページ 12 Setting fanfold paper When placing the fanfold paper behind the printer Lift up the main cover. Do as described in Step 1 of “Setting roll paper.” Remove the screw to the back cover. Keep the screw so that it will not be lost.
- Page 17 サトー取説_E 04.8.17 6:22 PM ページ 13 Lower the head open lever (purple / OPEN). The printer head will open. Printer head Head open lever (purple) Pass the paper from behind to the roll paper feeder. Adjust the roll guide so that it slightly touches the side of the paper and that the paper will not move.
- Page 18 サトー取説_E 04.8.17 6:22 PM ページ 14 Pass the paper under the label guide and paper sensor. When the knob of the label damper is pulled forward, the label damper will return to the original position. Paper sensor Label guide Label damper Caution •...
- Page 19 サトー取説_E 04.8.17 6:22 PM ページ 15 Close the main cover. Do as described in Step 8 of “Setting roll paper.” Caution When closing the main cover, be careful not to have your fingers caught. When placing the fanfold paper under the printer Lift up the main cover.
- Page 20 サトー取説_E 04.8.17 6:22 PM ページ 16 Set the stack of fanfold paper straight to the fanfold loading slot. Fanfold paper Fanfold paper Pass the paper through the fanfold loading slot. Loosen the label guide knob and set it forward. Pull up the label damper. Label guide knob Label damper...
- Page 21 サトー取説_E 04.8.17 6:22 PM ページ 17 Pass the paper under the label guide and paper sensor. Pull the label damper knob, and the label damper will return to its original position. Label guide Label damper Caution • Immediately after printing, the printer head and the surrounding area are hot. When you replace the paper immediately after printing, be careful not to burn yourself.
-
Page 22: Setting Carbon Ribbon
サトー取説_E 04.8.17 6:22 PM ページ 18 Close the main cover. Do as described in Step 8 of “Setting roll paper.” Caution When closing the main cover, be careful not to have your fingers caught. For the carbon ribbon for this printer, please use our genuine products. Setting carbon ribbon Do not use other carbon ribbons than the international standards. - Page 23 サトー取説_E 04.8.17 6:22 PM ページ 19 Check that the knob of the ribbon winding unit is pushed to the back. Knob Pass the carbon ribbon from the ribbon feeder under the printer head to the ribbon winding unit. Affix the carbon ribbon directly to the grip sheet that is on the ribbon winding unit, and wind it several times in the direction of the arrow.
- Page 24 サトー取説_E 04.8.17 6:22 PM ページ 20 Turn the head close lever (purple / CLOSE ) in the direction of the arrow, and close the printer head. Close the printer head tightly until it locks. Head close lever Printer head Close the main cover. Do as described in 8 of “Setting roll paper.”...
- Page 25 サトー取説_E 04.8.17 6:22 PM ページ 21 Paper tube winding (factory option) For paper tube winding, the ribbon-winding shaft must be replaced (charged). Lift up the main cover. Do as described in Step 1 of “Setting roll paper.” Lower the head open lever (purple / CLOSE ).
- Page 26 サトー取説_E 04.8.17 6:22 PM ページ 22 Pass the carbon ribbon from the ribbon feeder under the printer head to the ribbon winding unit. Affix the carbon ribbon to the ribbon core with tape, wind it several times in the direction of the arrow. Check from sideways that the carbon ribbon is set according to the figure below.
- Page 27 サトー取説_E 04.8.17 6:22 PM ページ 23 Close the main cover. Do as described in Step 8 of “Setting roll paper.” Caution When closing the main cover, be careful not to have your fingers caught. Adjusting paper sensor Basically, adjustment is not necessary. Open the main cover.
Need help?
Do you have a question about the GT4e and is the answer not in the manual?
Questions and answers