Xerox FaxCentre 2121 Service Manual
Hide thumbs
Also See for FaxCentre 2121:
- User manual (146 pages) ,
- Specifications (2 pages) ,
- Quick reference manual (2 pages)
Table of Contents
Advertisement
Quick Links
Advertisement
Chapters
Table of Contents

Related Manuals for Xerox FaxCentre 2121


Summary of Contents for Xerox FaxCentre 2121
- Page 1 Service Manual 708P88662 FaxCentre 2121/2121L 708P88662 11/06...
- Page 2 Xerox service documentation is intended for use by certified, product trained service per- sonnel only. Xerox does not warrant or represent that it will notify or provide to such customer any future change to this documentation. Customer performed service of equipment, or modules, components or parts of such equipment may affect whether Xerox is responsible to fix machine defects under the warranty offered by Xerox with respect to such equipment.
-
Page 3: Table Of Contents
3. Image Quality Section Contents ........................3-1 4. Repairs and Adjustments Section Contents ........................4-1 5. Parts List Section Contents ........................5-1 6. General Procedures and Information Section Contents ........................6-1 7. Wiring Data Section Contents ........................7-1 FaxCentre 2121/2121L 11/06... - Page 4 Introduction Service Manual Formats Table 1: Service Manual Formats Part number Format 708P88661 Hardcopy 708P88662 PDF on CD 11/06 FaxCentre 2121/2121L...
-
Page 5: General Precautions
Used to call the CSE’s attention to what is graphically represented inside the marking (including a warning). Used to prohibit the CSE from doing what is graphically represented inside the marking. Used to instruct the CSE to do what is graphically represented inside the marking. FaxCentre 2121/2121L 11/06... -
Page 6: Warnings
Do not work with wet hands. • Do not unplug or plug in the power cord, or perform any kind of service or inspec- tion with wet hands. Doing so could result in an electric shock. Do not touch a high-temperature part. 11/06 FaxCentre 2121/2121L... - Page 7 To promote safety, make sure that all tubing and other insulating materials are returned to their original positions. Make sure that floating components mounted on the circuit boards are at their correct distance and position off the boards. FaxCentre 2121/2121L 11/06...
-
Page 8: Cautions
• Avoid dusty locations and places exposed to oil or steam. • Avoid working positions that may block the ventilation ports of the product. Precautions for the Laser Beam. 11/06 FaxCentre 2121/2121L... -
Page 9: Other Precautions
Are there any cracks or scrapes in the cord? • Has the power plug been inserted fully into the outlet? • Does anything, including the machine itself, sit on the power cord? • Use an outlet with a rating of 110V - 127V, 15A minimum. FaxCentre 2121/2121L 11/06... -
Page 10: Precautions For Use
Never disturb the LAN by breaking or making a network connection, altering termination, installing or removing networking hardware or software, or shutting down networked devices without the knowledge and express permission of the network administrator or the user. viii 11/06 FaxCentre 2121/2121L... -
Page 11: Troubleshooting
During transportation/storage • During transportation or when in storage, new PWB’s must not be indiscriminately removed from their protective conductive bags. • Do not store or place PWB’s in a location exposed to direct sunlight and high temperature. FaxCentre 2121/2121L 11/06... - Page 12 Use care not to contaminate the surface of the drum with oil-base solvent, fingerprints, and other foreign matter. • Do not scratch the surface of the drum. • Do not attempt to wipe clean the surface of the drum. 11/06 FaxCentre 2121/2121L...
-
Page 13: Safety Information
Do not remove parts labelled as shown in Figure 1, until the power cord has been discon- nected. Figure 1 FaxCentre 2121/2121L 11/06... - Page 14 This product employs a Class 3b laser diode that emits an invisible laser beam. The laser diode and the scanning polygon mirror are incorporated in the ROS unit. WARNING The ROS unit is NOT A FIELD SERVICE ITEM. Therefore, the ROS unit should not be opened under any circumstances. Figure 2 11/06 FaxCentre 2121/2121L...
-
Page 15: Toner Cartridge Service
A laser safety label is attached to the machine as shown below. Figure 3 Toner Cartridge Service Only toner cartridges supplied by Xerox should be used. Printing defects or set damage caused by the use of non-approved print cartridges or un-licensed toner refills are not covered by the guar- antee. -
Page 16: Handling Of Consumables
Do not burn, bury in the ground, or throw into the water any consumables. • Do not store consumables in a place which: • Is hot and humid. • Is subject to direct sunlight. • Has an open flame nearby. 11/06 FaxCentre 2121/2121L... - Page 17 (equipment and materials) at customer locations. II. Scope Xerox Corporation and subsidiaries worldwide. III. Objective To enable prompt resolution of health and safety incidents involving Xerox products and to ensure Xerox regulatory compliance. IV. Definitions Incident An event or condition occurring in a customer account that has resulted in injury, illness or prop- erty damage.
- Page 18 Fund all field retrofits. 1. Field Service Operations shall: a. Preserve the Xerox product involved and the scene of the incident inclusive of any associ- ated equipment located in the vicinity of the incident. b. Return any affected equipment/part(s) to the location designated by Xerox EH&S and/or the Business Division.
- Page 19 Service Call Procedures 1. Service Call Procedures SCP 1 Service Call Actions ..................... 3 SCP 2 Preventive Maintenance ....................4 SCP 3 HSFI Schedule ......................7 SCP 4 Final Actions ....................... 8 FaxCentre 2121/2121L 11/06...
-
Page 20: Service Call Procedures
Service Call Procedures Page intentionally blank 11/06 FaxCentre 2121/2121L... -
Page 21: Scp 1 Service Call Actions
All cables are connected correctly. 4. If available, check the machine service log book for any previous actions that may be relevant to the call. 5. Review any defective print or copy samples. 6. Perform ‘1. Initial Checks RAP’. FaxCentre 2121/2121L 11/06... -
Page 22: Scp 2 Preventive Maintenance
2. Open the control panel/scanner by actuating the cover release latch located on the left of the machine. CAUTION The opening is limited to approx 60° by stops. Do not try to force the panel any further. 11/06 FaxCentre 2121/2121L... - Page 23 3. Wipe the scanner window with a lint-free cloth moistened with film remover, or with antistatic paper tissues as used for cleaning optical glass. Note: The recommended interval is to be defined depending on utilization. After cleaning, it is advised to make a local copy to check the cleanliness of the window. FaxCentre 2121/2121L 11/06...
- Page 24 2. Clean the top of the control panel and the keys with a cloth dampened with water. Perform when required. Cleaning the Covers • It is advisable to clean all covers during a service call. • It is recommended to wipe covers with a cloth dampened with water during a service call. 11/06 FaxCentre 2121/2121L...
-
Page 25: Scp 3 Hsfi Schedule
Note: The drum cartridge and toner cartridge are usually replaced by the user. Note: The contents of the Maintenance List are subject to change without notice. Note: For the part numbers, see Parts Manual and Parts Modification Notice. FaxCentre 2121/2121L 11/06... -
Page 26: Scp 4 Final Actions
Complete the machine service log book (GP 23). • Remove and destroy any copies of test patterns. • Ensure the machine and service area are clean before leaving the customer premises. • Provide customer training if required. 11/06 FaxCentre 2121/2121L... - Page 27 10 Abnormally High Fuser Temperature RAP ............... 12 11 High Voltage Failure RAP ....................13 12 Controller Related Malfunctions RAP ................14 13 Power Supply Failure RAP ....................15 14 Noise from Paper Tray RAP ..................... 16 FaxCentre 2121/2121L 11/06...
-
Page 28: Status Indicator Raps
Status Indicator RAPs Page intentionally blank 11/06 FaxCentre 2121/2121L... -
Page 29: Initial Checks Rap
Only use paper which is of suitable quality, weight and size. See the User Guide. 4. Check the overall condition of the machine • Clean the paper transport areas. Any rollers with dirty surfaces should be cleaned. If neces- sary, install new rollers. FaxCentre 2121/2121L 11/06... -
Page 30: Paper Misfeed Initial Actions Rap
7. Does the paper feed switch operate cor- 7. Correct or Install a new switch. rectly when checked? Note: Reset the misfeed condition by opening and closing the front door after the misfeed has been cleared. 11/06 FaxCentre 2121/2121L... -
Page 31: Paper Transport Jam Rap
Diagram 1). 4. Install a new Main PBA (PL 5). 5. If the JAM still occurs, install a new CPU (PL 4. Are the stripper fingers dirty, deformed, 4. Install a new fuser (PL 10). worn? FaxCentre 2121/2121L 11/06... -
Page 32: Fuser/Exit Misfeed Rap
2. Check the exit sensor (PL 10, Wiring Dia- 2. Install a new exit sensor (PL 10). gram 1). 3. Install a new Main PBA (PL 5). 4. If the fuser/exit misfeed still occurs, Install a new CPU (PL 5). 11/06 FaxCentre 2121/2121L... -
Page 33: Polygon Motor Malfunction Rap
2. Check ROS (PL 11, Wiring Diagram 2). 2. Install a new ROS (PL 11). 3. Install a new Main PBA (PL 5). 4. If the Polygon Motor Malfunction still occurs, Install a new CPU (PL 5). FaxCentre 2121/2121L 11/06... -
Page 34: Laser Malfunction Rap
2. Check the ROS (PL 11, Wiring Diagram 2). 2. Install a new ROS (PL 11). 3. Install a new Main PBA (PL 5). 4. If the Laser Malfunction still occurs, Install a new CPU (PL 5). 11/06 FaxCentre 2121/2121L... -
Page 35: Fuser Fan Malfunction Rap
2. Check the fuser fan (PL 9, Wiring Diagram 2. Install a new fuser fan (PL 9). 3) for possible overload. 3. If the fuser fan malfunction still occurs, Install a new Main PBA (PL 5). FaxCentre 2121/2121L 11/06... -
Page 36: Warm-Up Failure Rap
1. Install a new fuser (PL 10). remain low during the warm-up cycle. 2. Install a new Main PBA (PL 5). 3. Install a new LVPS (PL 11). 2. Check the thermostat. 3. Check the fuser. 2-10 11/06 FaxCentre 2121/2121L... -
Page 37: Abnormally Low Fuser Temperature Rap
Solutions 1. Check the thermistor. 1. Install a new fuser unit (PL 10). 2. Install a new Main PBA (PL 5). 2. Check the thermostat. 3. Install a new LVPS (PL 11). 3. Check the fuser. FaxCentre 2121/2121L 11/06 2-11... -
Page 38: Abnormally High Fuser Temperature Rap
Checks and Causes Solutions 1. Check the thermistor. 1. Install a new fuser (PL 10). 2. Install a new Main PBA (PL 5). 2. Check the thermostat. 3. Install a new LVPS (PL 11). 3. Check the fuser. 2-12 11/06 FaxCentre 2121/2121L... -
Page 39: High Voltage Failure Rap
The Image Transfer Voltage Monitor signal (T_MON_V) and Image Transfer Current Monitor signal (T_MON_I) fall outside a corresponding predetermined range. Table 10: High Voltage Failure Checks and Causes Solutions 1. Check the HVPS. 1. If a High Voltage Failure still occurs, install a new HVPS (PL 11). FaxCentre 2121/2121L 11/06 2-13... -
Page 40: Controller Related Malfunctions Rap
2. Check the harness between PJ1 on the 2. Tighten if the connection is loose, or correct Main PBAand PJ4201 in the CPU (Wiring as necessary. Diagram 1). 3. If Malfunctions still occur, Install a new CPU (PL 5). 2-14 11/06 FaxCentre 2121/2121L... -
Page 41: Power Supply Failure Rap
4. Check if the power switch is turned ON. 3. Turn ON the power switch. 5. Check the fuses on the LVPS are not con- 4. Install a new LVPS (PL 11). ducting. 5. Install a new Main PBA (PL 5). FaxCentre 2121/2121L 11/06 2-15... -
Page 42: Noise From Paper Tray Rap
Noise from the paper tray when the machine is feeding paper. Procedure 1. Apply plastislip grease (PL 13) to the pivot points of the paper lift plate. Refer to Figure 1 and Figure 2. Figure 1 Figure 2 2-16 11/06 FaxCentre 2121/2121L... - Page 43 IQ 5 Background RAP ......................8 IQ 6 White Lines and White Streaks RAP ................9 IQ 7 Black Lines and Black Streaks RAP ................10 IQ 8 Ghost Images RAP ......................11 IQS 1 Copy Density ....................... 12 FaxCentre 2121/2121L 11/06...
-
Page 44: Image Quality
Image Quality Page intentionally blank 11/06 FaxCentre 2121/2121L... -
Page 45: Iq 1 Blank Print And Black Print Rap
3. Check, clean, or correct contact point. drum ground contact point of the drum car- tridge properly connected? 5. Is the HVPS (PL 11) connector connected 4. Connect it properly. properly? 6. Outgoing fax page is completely black. 5. Run a shading calibration. FaxCentre 2121/2121L 11/06... - Page 46 7. Is the problem eliminated when step 4 was 6. Install a new HVPS (PL 11). checked? 7. Install a new Main PBA (PL 5). 8. If the problem still occurs, Install a new CPU (PL 5). 9. Install a new ROS (PL 11). 11/06 FaxCentre 2121/2121L...
-
Page 47: Iq 2 Deletions Rap
4. Is there foreign matter in paper path? 3. Remove foreign matter. 5. Is BTR dirty or scratched? 4. Install a new BTR (PL 12). 5. Install a new HVPS (PL 11). 6. Install a new Main PBA (PL 5). FaxCentre 2121/2121L 11/06... -
Page 48: Iq 3 Contamination On Back Of Page Rap
1. Is there foreign matter in the paper path? 1. Remove foreign matter. 2. Is fuser roll dirty or scratched? 2. Install a new Fuser Assembly (PL 10). 3. Is BTR dirty or scratched? 3. Install a new BTR (PL 12). 11/06 FaxCentre 2121/2121L... -
Page 49: Iq 4 Light Image Rap
5. Install a new HVPS (PL 11). 6. Install a new Main PBA (PL 5). 7. Is image transfer faulty? 7. Install a new Transfer Unit (PL 12). 8. Install a new HVPS (PL 11). 9. Install a new Main PBA (PL 5). FaxCentre 2121/2121L 11/06... -
Page 50: Iq 5 Background Rap
3. Clean contact terminal or check terminal position. 4. Is the problem eliminated after checks have 4. Install a new HVPS (PL 11). been made up to step 3? 5. Install a new Main PBA (PL 5). 11/06 FaxCentre 2121/2121L... -
Page 51: Iq 6 White Lines And White Streaks Rap
3. Install a new Fuser Assembly (PL 10). 4. Is ROS window dirty? 4. Clean ROS window. 5. Is the problem eliminated after checks have 5. Install a new Main PBA (PL 5). been made up to step 4? FaxCentre 2121/2121L 11/06... -
Page 52: Iq 7 Black Lines And Black Streaks Rap
3. Install a new Fuser Assembly (PL 10). 4. Is the CIS window dirty? 4. Clean the CIS window. 5. Is the problem eliminated after checks have 5. Install a new Main PBA (PL 5). been made up to step 4? 3-10 11/06 FaxCentre 2121/2121L... -
Page 53: Iq 8 Ghost Images Rap
4. Drum is scratched or dirty. 4. Install a new Drum Car- image and the ghost image is 5. Fuser roll is scratched or tridge (PL 13). 94.2 mm. dirty. 5. Install a new Fuser Assem- bly (PL 10). FaxCentre 2121/2121L 11/06 3-11... -
Page 54: Iqs 1 Copy Density
The density of 4.1 line pair must be as dark or darker than the original. • The density of the 3.0 line must be as dark as the original. • The 3.3 blue area must be black. • The 2.0, 2.2 and 2.4 areas must be black. Figure 1 3-12 11/06 FaxCentre 2121/2121L... - Page 55 REP 20 CIS Flat Cable ......................41 REP 21 Motor Drive ......................43 REP 22 Control Panel, Flat Cable and Chassis ..............44 REP 23 Dis-Assembling the Scanner ..................45 REP 24 Left Cover ........................ 47 REP 25 Right Cover ......................49 FaxCentre 2121/2121L 11/06...
-
Page 56: Repairs/Adjustments
Repairs/Adjustments Page intentionally blank 11/06 FaxCentre 2121/2121L... -
Page 57: General Repairs And Adjustments Information
(phone line, LAN, parallel port and power cord). Remove the document trays and the paper feed tray. Tools • Phillips screwdriver. • Torx hex screwdriver (Torx10). Refer to PL 13. • Flat screwdriver (medium size). FaxCentre 2121/2121L 11/06... -
Page 58: Rep 1 Cleaning The Paper Feed Roll
Removal 1. Remove the imaging cartridge. Note: The Imaging Cartridge is the Drum Cartridge, to which the Toner Cartridge is mounted. 2. Using a soft cloth, wipe the surface of the paper feed roll. Figure 1 11/06 FaxCentre 2121/2121L... -
Page 59: Rep 2 Paper Feed Roll
Electricity can cause death or injury. Moving parts can cause injury. Removal 1. Remove the imaging cartridge. Note: The Imaging Cartridge is the Drum Cartridge, to which the Toner Cartridge is mounted. 2. Remove the paper feed roll. Figure 1 FaxCentre 2121/2121L 11/06... -
Page 60: Rep 3 Bias Transfer Roller (Btr)
BTR adversely affect the quality of the printed image. When handling the BTR, hold onto the shaft and bushings of the roller. To avoid contaminating the new BTR, always place it on a new, clean sheet of paper. Figure 2 11/06 FaxCentre 2121/2121L... - Page 61 Repairs and Adjustments Replacement 1. Insert the new BTR into the BTR holder. 2. Rotate the locking tabs into the original up right position. Figure 3 FaxCentre 2121/2121L 11/06...
-
Page 62: Rep 4 Toner Cartridge
Switch off the electricity to the machine. Disconnect the power cord from the customer supply while performing tasks that do not need electricity. Electricity can cause death or injury. Moving parts can cause injury. Removal 1. Open the front door. Figure 1 2. Remove the imaging cartridge. Figure 2 11/06 FaxCentre 2121/2121L... - Page 63 1. Take out a new toner cartridge and shake it in the horizontal direction sufficiently so that toner is agitated. Note: Placing the Toner Cartridge in an upright position or shaking it vigorously will spill toner. Figure 4 FaxCentre 2121/2121L 11/06...
- Page 64 Toner Cartridge is not tilted when inserted. Figure 5 3. Install the imaging cartridge in the machine. Note: Insert the Imaging Cartridge along the guide provided on the machine frame. Figure 6 4. Close the front door. 4-10 11/06 FaxCentre 2121/2121L...
-
Page 65: Rep 5 Drum Cartridge
Note: The Imaging Cartridge is the Drum Cartridge, to which the Toner Cartridge is mounted. Figure 1 2. Pull the lever of the toner cartridge in the direction shown in the illustration and disconnect the drum cartridge. Figure 2 FaxCentre 2121/2121L 11/06 4-11... - Page 66 Toner Cartridge is not tilted when inserted. 2. Install the imaging cartridge in the machine. Note: Insert the Imaging Cartridge along the guide provided on the machine frame. Figure 3 3. Close the front door. 4-12 11/06 FaxCentre 2121/2121L...
-
Page 67: Rep 6 Fuser Assembly
4. Remove two screws and two washers. Then, remove the fuser protective cover. Figure 1 5. Remove the upper transport cover. Remove two screws, unplug three connectors, and remove the fuser. Figure 2 6. Remove the fuser exit guide assembly from the fuser. FaxCentre 2121/2121L 11/06 4-13... - Page 68 4. Mount the fuser in the machine and secure it in position by tightening the two screws. 5. Connect connectors B and C. Note: When installing the Fuser, route the harness as shown in Figure 3. Do not trap the harness between the Fuser and Machine. 6. Reinstall the fuser protective cover. 4-14 11/06 FaxCentre 2121/2121L...
-
Page 69: Rep 7 Main Pba
4. Disconnect all connectors and the flat cable from the Main PBA. CAUTION Use utmost care not to snap off the flat cable. 5. Remove four screws then the Main PBA. Main PBA Figure 1 Replacement 1. The replacement is the reverse of the removal procedure. FaxCentre 2121/2121L 11/06 4-15... -
Page 70: Rep 8 Lvps And Hvps
4. Disconnect PJ7 from the Main PBA. 5. Remove five screws, disconnect two ground harnesses, disconnect CN1 from the HVPS and CN3 on the LVPS, then remove the power unit assembly as shown in Figure 2. Figure 2 4-16 11/06 FaxCentre 2121/2121L... - Page 71 6. Remove four screws then the LVPS as shown in figure 3. Figure 3 7. Remove one screw then the HVPS as shown in the figure 4. Figure 4 Replacement 1. The replacement is the reverse of the removal procedure. FaxCentre 2121/2121L 11/06 4-17...
-
Page 72: Rep 9 Ros
Note: Use utmost care not to snap off the flat cable. Figure 1 5. Remove three screws and the ROS. Note: When reinstalling the ROS, tighten the screws in the numerical order shown in the illustration. Figure 2 4-18 11/06 FaxCentre 2121/2121L... - Page 73 Repairs and Adjustments Replacement 1. The replacement is the reverse of the removal procedure. CAUTION Do not touch the window on the under side of the ROS. A dirty window can cause image quality problems. Figure 3 FaxCentre 2121/2121L 11/06 4-19...
-
Page 74: Rep 10 Main Motor
Removal 1. Remove the left cover (REP 24). 2. Disconnect one connector. 3. Remove two screws, two washers, then the main motor. Figure 1 Replacement 1. The replacement is the reverse of the removal procedure. 4-20 11/06 FaxCentre 2121/2121L... -
Page 75: Rep 11 Paper Empty Sensor
4. Remove the CPU metal cage (REP 18, steps 3 to 5). 5. Disconnect PJ12 and PJ14 from the Main PBA. 6. Unhook two tabs, disconnect one connector. Remove the paper feed upper guide assembly. Figure 1 7. Unhook two tabs and remove the tray. Figure 2 FaxCentre 2121/2121L 11/06 4-21... - Page 76 Repairs and Adjustments 8. Disconnect one connector and remove the paper empty sensor. Figure 3 Replacement 1. The replacement is the reverse of the removal procedure. 4-22 11/06 FaxCentre 2121/2121L...
-
Page 77: Rep 12 Paper Feed Solenoid
1. Remove the left cover (REP 24). 2. Disconnect the paper feed solenoid inline connector. Figure 1 3. Remove one screw, then the paper feed solenoid. Figure 2 Replacement 1. Mount the paper feed solenoid and tighten one screw. FaxCentre 2121/2121L 11/06 4-23... - Page 78 Repairs and Adjustments 2. Turn the gear in the direction of the arrow shown below so that the arm of the paper feed solenoid catches the gear. Figure 3 4-24 11/06 FaxCentre 2121/2121L...
-
Page 79: Rep 13 Paper Feed Clutch
3. Remove the Paper Feed Upper Guide Assembly (REP 11, steps 1 to 6). 4. Disconnect one connector and remove the Cooling Fan Motor, PL 9 item 2. 5. Remove the Main Motor. Figure 1 6. Remove the Paper Lifting Plate Assembly. Figure 2 FaxCentre 2121/2121L 11/06 4-25... - Page 80 7. Disconnect the Paper Feed Solenoid inline connector. Remove four screws, then carefully release the Left Frame. Figure 3 8. Remove one screw, then the Paper Feed Solenoid. Figure 4 9. Remove one screw, then the Paper Feed Clutch. Figure 5 4-26 11/06 FaxCentre 2121/2121L...
- Page 81 Repairs and Adjustments Replacement 1. The replacement is the reverse of the removal procedure. CAUTION Take care when re-installing the left frame. Make sure all components are correctly aligned before installing the screws. FaxCentre 2121/2121L 11/06 4-27...
-
Page 82: Rep 14 Wrap Spring Feed Clutch
When the Wrap Spring Feed Clutch is replaced, adjust the set position of the Coupling Gear so that the Feed Roller is correctly positioned. The procedure is as follows. 1. Assemble the Paper Feed Clutch. 2. Re-install the Paper Feed Solenoid. 4-28 11/06 FaxCentre 2121/2121L... - Page 83 A (refer to Figure 2). Figure 4 5. If the Feed Roller is biased counter-clockwise (Figure 5), move the coupling gear in the direc- tion of B (refer to Figure 2). Figure 5 FaxCentre 2121/2121L 11/06 4-29...
-
Page 84: Rep 15 White Roller
1. Unpack the new white roller and inspect it visually. Fit the bearings and gear on the new roller. 2. Place the equipped white roller in end housing B, oriented the same way as during removal. 4-30 11/06 FaxCentre 2121/2121L... - Page 85 Repairs and Adjustments 3. Press on the latch and place the other end of the white roller in end housing A. 4. Press on the latch and close the control panel, letting the stop lock behind the latch. FaxCentre 2121/2121L 11/06 4-31...
-
Page 86: Rep 16 Scanner Retard Pad
Make sure the parts are oriented cor- rectly. Insert the mounting screw and tighten it. 3. Press on the latch and close the control panel, letting the stop lock behind the latch. 4-32 11/06 FaxCentre 2121/2121L... -
Page 87: Rep 17 Control Panel/Circuit Board/Key Pad/Display/Glass/Top Cover With Loudspeaker
Use a flat screwdriver as a lever at the four locations shown in Figure 1 to unclip and remove the top cover of the control panel, then close the chassis again. Top cover fixing clips Control panel Figure 1 3. Stand in front of the machine. FaxCentre 2121/2121L 11/06 4-33... - Page 88 Screw in and tighten the eight mounting screws. 3. Connect the connectors of the loudspeaker and of the display. 4. Connect the CIS flat cable to the connector on the control panel board. 4-34 11/06 FaxCentre 2121/2121L...
- Page 89 5. Position the lower part of the control panel on the chassis and clip it in place. Press down on the upper part of the control panel to complete the assembly. Mounting screws Control panel Key pad Display Display window Top cover Figure 3 FaxCentre 2121/2121L 11/06 4-35...
-
Page 90: Rep 18 Cpu Board
3. Remove the right hand cover (REP 25). 4. Disconnect all external connectors to the CPU board. 5. Remove two screws, then the CPU metal cage. CPU board EPROM Figure 1 6. Remove the five mounting screws, then the CPU board. 4-36 11/06 FaxCentre 2121/2121L... - Page 91 Note: It is essential that the E2PROM memory “stays” with the machine, because this memory contains: - The consumables counters. - The counters of the number of printed pages. - The remote readout counters. - The network options (FSI, GDF, kit LAN). FaxCentre 2121/2121L 11/06 4-37...
-
Page 92: Rep 19 Control Panel/Scanner Chassis Assembly
1. Remove the document trays from the machine. 2. Open the front door. 3. Remove the left cover, (REP 24). 4. Remove the two screws shown in Figure 1. Figure 1 5. Remove the right cover (REP 25). 4-38 11/06 FaxCentre 2121/2121L... - Page 93 6. Remove the two screws shown in Figure 2. Figure 2 7. Disconnect the cables shown in figure 3. Figure 3 CAUTION Take note of the blue reinforcing tape on the flat cables. The cables must be reconnected in the same orientation. FaxCentre 2121/2121L 11/06 4-39...
- Page 94 1. The replacement is the reverse of the removal procedure. 2. Perform a scanner calibration (MENU 8 0). 3. Print out a gray scale sample. Press # (make sure SOS1, Bit 8 is set to 1). 4-40 11/06 FaxCentre 2121/2121L...
-
Page 95: Rep 20 Cis Flat Cable
2. Turn the scanner up side down. Remove the three screws show in Figure 1. Figure 1 3. Remove the two cover screws shown in Figure 2. Figure 2 4. Remove the scanner lower cover. CAUTION Take care not to damage the CIS assembly ribbon cable. FaxCentre 2121/2121L 11/06 4-41... - Page 96 5. Remove the CIS securing screw, then the CIS assembly, Figure 3. Figure 3 6. Disconnect the CIS flat cable from the CIS. Remove the CIS flat cable. Replacement 1. The replacement is the reverse of the removal procedure. 4-42 11/06 FaxCentre 2121/2121L...
-
Page 97: Rep 21 Motor Drive
1. Unpack and visually inspect the new parts. 2. Attach the 44/18 gear on the motor drive. 3. Pass the wires in the wire guide. Connect the grounding screw in the original location. 4. Screw in and tighten the two mounting screws. FaxCentre 2121/2121L 11/06 4-43... -
Page 98: Rep 22 Control Panel, Flat Cable And Chassis
3. Press on the latch and close the control panel, letting the stop lock behind the latch. 4-44 11/06 FaxCentre 2121/2121L... -
Page 99: Rep 23 Dis-Assembling The Scanner
3. Remove the screw on the right side of the scanner beside the alignment pin as shown in Fig- ure 2. Figure 2 4. Release the catch on the left of the Control Panel/Scanner Chassis Assembly, Figure 3. FaxCentre 2121/2121L 11/06 4-45... - Page 100 5. Release the right catch located underneath the right side of the Control Panel/Scanner Chas- sis Assembly, Figure 4. Right catch Figure 4 6. Separate the Control Panel/Scanner Chassis from the lower scanner frame. Replacement 1. The replacement is the reverse of the removal procedure. 4-46 11/06 FaxCentre 2121/2121L...
-
Page 101: Rep 24 Left Cover
1. Remove the screw located on the rear of the machine, above the power cord connection. Figure 1 2. Release the rear of the cover, then remove the cover toward the front of the machine. Figure 2 FaxCentre 2121/2121L 11/06 4-47... - Page 102 Repairs and Adjustments Replacement 1. Slide the cover in place. Fit the cover by firmly pushing into place as indicated in Figure 3. Figure 3 2. Reinstall the screw on the rear. 4-48 11/06 FaxCentre 2121/2121L...
-
Page 103: Rep 25 Right Cover
Removal 1. Remove the screw located at the rear of the right cover. Figure 1 2. Release the rear of the cover, then remove the cover toward the front of the machine. Figure 2 FaxCentre 2121/2121L 11/06 4-49... - Page 104 Repairs and Adjustments Replacement 1. Slide the cover in place. Fit the cover by firmly pushing into place as indicated in Figure 3. Figure 3 2. Reinstall the screw on the rear. 4-50 11/06 FaxCentre 2121/2121L...
- Page 105 Spare Parts List 5. Spare Parts List PL 1 FaxCentre 2121 Assemblies and Trays ................. 2 PL 2 Machine Assembly ......................4 PL 3 Control Panel and Scanner .................... 6 PL 4 Retard Pad and White Roller Assemblies ............... 8 PL 5 Printer Unit Assembly ....................
-
Page 106: Pl 1 Faxcentre 2121 Assemblies And Trays
Spare Parts List PL 1 FaxCentre 2121 Assemblies and Trays 11/06 FaxCentre 2121/2121L... - Page 107 Spare Parts List PL 1 FaxCentre 2121 Assemblies and Trays Item Part Number Description Remark Machine Not spared MF de base 050N00509 Document input tray Introducteur scanner assemblé 117N01773 AC Power cord Cordon d’alimentation secteur 117N01774 Telephone line cord Cordon ligne téléphonique...
-
Page 108: Pl 2 Machine Assembly
Spare Parts List PL 2 Machine Assembly 11/06 FaxCentre 2121/2121L... - Page 109 Refer to PL 4, REP 23 Scanner assemblé 002N02656 Right cover REP 25 Capot droit 050N00515 Paper tray 2 (optional) Bac supplémentaire 500 feuilles (selon modèle ou option Printer assembly Not spared Imprimante assemblée ROHS 002N02657 Left cover REP 24 Capot gauche FaxCentre 2121/2121L 11/06...
-
Page 110: Pl 3 Control Panel And Scanner
Spare Parts List PL 3 Control Panel and Scanner 11/06 FaxCentre 2121/2121L... - Page 111 PL 3 Control Panel and Scanner Item Part Number Description Remark Control panel-scanner chassis assembly Refer to PL 4 Ensemble pupitre-châssis scanner Mounting screws for printer/control panel-scan- Part of PL 13 item 1 Vis de fixation imprimante pupitre-scanner FaxCentre 2121/2121L 11/06...
-
Page 112: Pl 4 Retard Pad And White Roller Assemblies
Spare Parts List PL 4 Retard Pad and White Roller Assemblies 11/06 FaxCentre 2121/2121L... - Page 113 REP 16 Kit déliasseur 101N01412 Scanner chassis assembly Ensemble châssis scanner 007N01574 37-29 pinion gear Pignon 37-29 013N13869 Bearing Palier 022N02313 White roller REP 15 Rouleau blanc 013N13870 Bearing Palier 022N02314 Feed roll assembly Ensemble rouleau chargeur FaxCentre 2121/2121L 11/06...
-
Page 114: Pl 5 Printer Unit Assembly
Spare Parts List PL 5 Printer Unit Assembly 5-10 11/06 FaxCentre 2121/2121L... - Page 115 Tôle UC 002N02663 Front right cover Fixation avant droite 002N02664 Front left cover Fixation avant gauche 140N63253 Main PBA REP 7 EPROM Not spared Mounting screws for the top cover assembly Part of PL 13 item 1 FaxCentre 2121/2121L 11/06 5-11...
-
Page 116: Pl 6 Control Panel Assembly
Spare Parts List PL 6 Control Panel Assembly 5-12 11/06 FaxCentre 2121/2121L... - Page 117 Key pad REP 17 Elastomère 140N63254 UI Control board REP 17 Cartre pupitre Mounting screws for control panel board Part of PL 13 item 1 Vis de fixation carte pupitre 117N01775 Control panel flat cable Nappe pupitre FaxCentre 2121/2121L 11/06 5-13...
-
Page 118: Pl 7 Paper Tray
Spare Parts List PL 7 Paper Tray 5-14 11/06 FaxCentre 2121/2121L... - Page 119 Spare Parts List PL 7 Paper Tray Item Part Number Description Remark Paper tray assembly Refer to PL 1 Tiroir papier 002N02665 Cover Couvercle FaxCentre 2121/2121L 11/06 5-15...
-
Page 120: Pl 8 Cis Support And Motor Drive Assemblies
Spare Parts List PL 8 CIS Support and Motor Drive Assemblies 5-16 11/06 FaxCentre 2121/2121L... - Page 121 Nappe CIS 127N07532 CIS Motor assembly REP 21 Motorisation 007N01575 44/18 pinion gear Pignon 44/18 Mounting screws for motor drive Part of PL 13 item 1 Vis de fixation motorisation 117N01777 Ground wire Fil de masse FaxCentre 2121/2121L 11/06 5-17...
-
Page 122: Pl 9 Drive/Transfer Unit
Spare Parts List PL 9 Drive/Transfer Unit 5-18 11/06 FaxCentre 2121/2121L... - Page 123 127N07541 Main drive motor REP 10 Moteur Drive gear assembly Not spared Support assemblé Drive gear assembly Not spared Platine assemblée 038N00510 Paper feed guide Guide papier assemblé Right frame assembly Not spared Structure droite assemblée FaxCentre 2121/2121L 11/06 5-19...
-
Page 124: Pl 10 Fuser Assembly
Spare Parts List PL 10 Fuser Assembly 5-20 11/06 FaxCentre 2121/2121L... - Page 125 Spare Parts List PL 10 Fuser Assembly Item Part Number Description Remark 032N00483 Transport assembly Guide assemblée 126N00278 Fuser assembly REP 6 Four FaxCentre 2121/2121L 11/06 5-21...
-
Page 126: Pl 11 Power Supplies And Ros Unit
Spare Parts List PL 11 Power Supplies and ROS Unit 5-22 11/06 FaxCentre 2121/2121L... - Page 127 Spare Parts List PL 11 Power Supplies and ROS Unit Item Part Number Description Remark 105N02133 LVPS REP 8 Carte alimentation 112N00226 HVPS REP 8 Carte HT 062N00277 ROS assembly REP 9 Tête d’impression assemblé FaxCentre 2121/2121L 11/06 5-23...
-
Page 128: Pl 12 Paper Feed Section
Spare Parts List PL 12 Paper Feed Section 5-24 11/06 FaxCentre 2121/2121L... - Page 129 Tray empty sensor Capteur 019N00930 Sensor mounting bracket Support 110N01419 Registration switch Capteur 038N00512 Paper guide Support 121N01152 Feed solenoid REP 12 Electro-aimant 022N02328 Bias transfer roll (BTR) 120N00515 Tray empty sensor actuator 130N01502 Toner empty sensor FaxCentre 2121/2121L 11/06 5-25...
-
Page 130: Pl 13 Consumables, Tools And Kits
Spare Parts List PL 13 Consumables, Tools and Kits 5-26 11/06 FaxCentre 2121/2121L... - Page 131 095N99318 Packaging box with inserts Toner cartridge Refer to the User Guide for the part number. Drum cartridge Refer to the User Guide for the part number. 043E00550 Plastislip grease 600T41300 Torx bit kit with handle FaxCentre 2121/2121L 11/06 5-27...
- Page 132 Spare Parts List Page intentionally blank 5-28 11/06 FaxCentre 2121/2121L...
- Page 133 GP 18 Functioning ......................... 67 GP 19 Operating Sequence ....................68 GP 20 Scanning and Communication Error Codes ............... 69 GP 21 Video Check ....................... 72 GP 22 Machine Components Layout ..................73 GP 23 Service Log ....................... 74 FaxCentre 2121/2121L 11/06...
- Page 134 General Procedures and Information Page intentionally blank 11/06 FaxCentre 2121/2121L...
-
Page 135: General Procedures And Information
General Procedures and Information GP 1 Product Specifications Operating and Storage Specifications Table 1: Operating And Storage Specifications FaxCentre 2121 Operating Supply 220-240V, 50Hz (110-127V, 60Hz) Power Consumption (Standby) Less than or equal to15W Power Consumption (Printing) 850W Temperature 10°C to 32°C (50°F to 89°F) Temperature changes Less than or equal to 10 °C/hour... - Page 136 General Procedures and Information Table 3: Scanner Specifications Item FaxCentre 2121 Paper size Format A4 (210 x 297mm)/ Letter(8.5 x 11 inch) Maximum width 216mm (8.5 inch) Minimum width Guided: 209mm (8.2 inch) Not guided: 180mm (7 inch) Maximum length 1000mm (39.37 inch)
- Page 137 General Procedures and Information Printer Technical Specifications Table 4: Printer Technical Specifications Item FaxCentre 2121 Type B/W laser Resolution (dpi) 600 x 600 (1200 dpi in half speed mode) Max paper Size A4 (210 x 297mm)/ Letter (8.5 x 11 inch)
- Page 138 General Procedures and Information Table 5: Printer General Specifications Item FaxCentre 2121 First Printing Time At 600 × 600dpi 3 sec (A4L/Letter L) At 1200 × 600dpi 21 sec or less (A4L/Letter L) At 1200 × 1200dpi 21 sec or less (A4L/Letter L)
- Page 139 General Procedures and Information Controller Specifications Table 6: Controller Specifications Item FaxCentre 2121 Control Panel LED × 1, SW × 1 ASIC N1-Chips (Naltec Original ASIC) Memory Configuration Standard ROM 64 KB (in ASIC) EEPROM 1 Kilobit Flash ROM 2 Megabits (250 KB) 8 MB (64-Megabit SDRAM: 64 Megabits ×...
- Page 140 General Procedures and Information Data-Modem Specifications Table 9: Data-Modem Specifications Item FaxCentre 2121 Type PSTN-V90 V90 Maximum speed (bps) 56000 V34Fax capacity (bps) 28000 to 56000 Incrementation (bps) 1333 V34plus capacity (bps) 2400 to 33600 Incrementation (bps) 2400 V32bis capacity (bps)
- Page 141 General Procedures and Information LAN Access Specifications Table 12: LAN Access Specifications Item FaxCentre 2121 Type Ethernet 10/100 base-T Plug and Play configuration DHCP & BOOTP Internet protocol TCP/IP 2 DNS servers access E-mail and Fax Communication Specifications Table 13: E-mail and Fax Communication Specifications...
- Page 142 The values of the consumable counters are updated regularly in the flash memory. At each power on, the machine the counters are read from the flash memory. Furthermore, it is essential to initialize the new consumables with the smart card supplied with the consumable (refer to the User Guide). 6-10 11/06 FaxCentre 2121/2121L...
-
Page 143: Gp 2 Machine Components
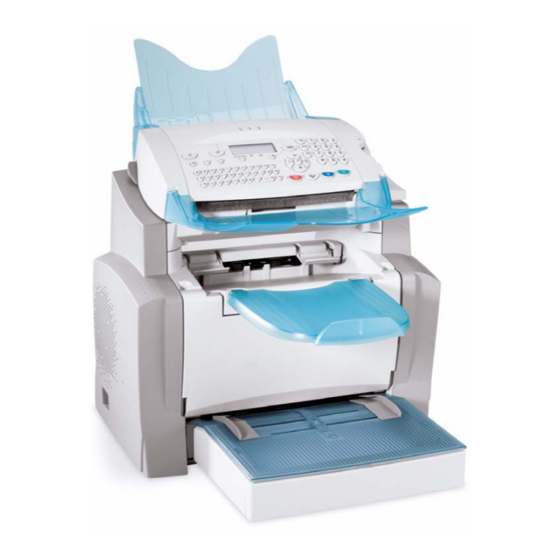
Printer output tray Printer On/Off switch Printer paper Second cassette feed tray paper tray (500 pages) Second paper cassette (option) Smart card reader AC power connector Telephone line connector Phone cord AC power cord Figure 1 FaxCentre 2121/2121L 11/06 6-11... -
Page 144: General Description
(from CPU PWB) to the new machine so as to keep the usage counters valid. When replacing the consumables, perform the installation procedure for the new consumable item(s) (refer to the User Guide). 6-12 11/06 FaxCentre 2121/2121L... -
Page 145: Gp 3 Machine Dimensions And Installation Instructions
General Procedures and Information GP 3 Machine Dimensions and Installation Instructions Machine Dimensions Figure 1 Note: Figure 1 shows the overall dimensions of the machine, optional accessories not included. FaxCentre 2121/2121L 11/06 6-13... -
Page 146: Environmental Conditions
Avoid locations where frequent vibrations occur. • Avoid locations where water or other products might be splashed on the machine. • The machine should not be installed directly on the floor. • Place the machine on a flat horizontal support. 6-14 11/06 FaxCentre 2121/2121L... - Page 147 (the types of connector may vary depending on the country). • Set the on/off switch to the <I> position (On). After a few seconds, as soon as the warm-up of the machine is finished, the date and the time are displayed. FaxCentre 2121/2121L 11/06 6-15...
-
Page 148: Paper Supply
• Using the left and right tabs of the printer as a guide, carefully push in the tray until it stops (as shown in the Figure 3). Figure 3 • Put the tray cover in place. 6-16 11/06 FaxCentre 2121/2121L... - Page 149 Installing an additional paper tray (option) Refer to the User Guide. Figure 4 Installing the Trays Document input tray Install the tray by inserting the two tabs in the corresponding openings at the back of the machine. Figure 5 FaxCentre 2121/2121L 11/06 6-17...
-
Page 150: Installing The Consumables
With both hands, slightly bend the centre part of the tray upwards in order to insert its tabs into the notches located on the upper part of the printer. Figure 7 Installing the Consumables Refer to the User Guide. 6-18 11/06 FaxCentre 2121/2121L... -
Page 151: Gp 4 Start-Up And Software Configuration
When the display shows the date and the time, you can access the softswitch settings by means of the key sequence: MENU * # The description of these parameters can be found below. They are modified in the same manner as all other parameters. FaxCentre 2121/2121L 11/06 6-19... - Page 152 Reserved Keyboard beep on/off Values: # 0 (Beep on)1 (no beep) Reserved Reserved Reserved SOS-COPLOC: Restriction on local copies Values: # 0 (No)1 (Yes) SOS-TIMKONIKA: Timed memorizing of photocopier resolution/ contrast/settings Values: # 0 enabled1 disabled 6-20 11/06 FaxCentre 2121/2121L...
- Page 153 SOS-LGINF: Maximum length of scan, printing, communication Values: # 0 (1 meters)1 (3 meters) SOS-ECM: Restricted ECM Values: 0 (No)# 1 (Yes) Soft-switch 5: Voice/Loudspeaker configuration Table 5: Voice/Loudspeaker configuration Default Value Naming Reserved Reserved Reserved Reserved FaxCentre 2121/2121L 11/06 6-21...
- Page 154 Soft-switch 8: Remote readout/internal answering machine/modem Table 8: Remote readout/internal answering machine/modem Default Value Naming SOS-TLR: Remote readout enable (ATTENTION!) Values: # 0 (No remote readout) 1 (Remote readout enabled) Reserved Reserved Reserved Reserved Reserved Reserved Reserved 6-22 11/06 FaxCentre 2121/2121L...
- Page 155 Reserved SOS-SONREA: Access to redialing parameters (screen /printer) Values: # 0 (No access)1 (With access) Reserved Soft-switch 11: Retransmissions/Logs Table 11: Retransmission/Logs Default Value Naming Reserved Reserved Reserved Reserved Reserved Reserved Reserved Reserved FaxCentre 2121/2121L 11/06 6-23...
- Page 156 01 (MR encoding) 10 (MMR encoding) SOS-BRIDINET: Internet functional restrictions Values: # 0 (No restriction) 1 (Internet functions restricted (no access to the menu)) SOS-CHAP: CHAP restrictions, password encoding Values: 0 (CHAP not used) # 1 (Use CHAP) 6-24 11/06 FaxCentre 2121/2121L...
- Page 157 Values: # 0 (Printout) 1 (No printout) Reserved Reserved SOS-ACTREEM: Enable/disable rerouting Values: # 0 (Rerouting disabled) 1 (Rerouting/transfer enabled) SOS-IMP-MAILTXT: Double printout of mail text in translation Values: # 0 (Double impression) 1 (Single printout but unlimited reception impossible) Reserved Reserved FaxCentre 2121/2121L 11/06 6-25...
- Page 158 Soft-switch 19: Miscellaneous software functions Table 19: Miscellaneous software functions Default Value Naming Reserved Reserved SOS-GROUPE: Restriction on groups (or distribution list) Values: # 0 (No groups)1 (Groups accepted) SOS-REGULREC: T30 reception control inhibited Values: # 0 (No) 1 (Yes) 6-26 11/06 FaxCentre 2121/2121L...
- Page 159 Attention: Taken into account only after reboot of the CPU Reserved SOS-DETECT OCCUP: Inhibition of engaged tone detect Values: # 0 (No)1 (Yes) Reserved Soft-switch 22: Miscellaneous Table 22: Miscellaneous Default Value Naming SOS-DUREE-2100: Transmission time of the 2100 modified for V34 reception FaxCentre 2121/2121L 11/06 6-27...
- Page 160 Values: # 0 (Download disabled) 1 (Download enabled) SOS-POINT-FINAL-SEUL: Final DATA_SMTP point on its own in the TCP frame ("Peltex"problem) Values: # 0 (Disabled)1 (Enabled) SOS-PDF: Transmission and reception of PDF document via e- mail. Values: 0 (Disabled) 1 (Enabled) 6-28 11/06 FaxCentre 2121/2121L...
- Page 161 # 0: Switches to FAX reception 1: No FAX reception SOS-TXADTERMINAL: Transmit the terminal address in the server number # 0: No 1: Yes SOS-RXADTERMINAL: Receive the terminal address in the server number # 0: No 1: Yes FaxCentre 2121/2121L 11/06 6-29...
- Page 162 1: No extinction Soft-switch 27: Miscellaneous Table 27: Miscellaneous Default Value Naming Size of remote readout serial number #1000: 8 digits remote readout serial number 1111: 15 digits remote readout serial number (only for EGT for now) 6-30 11/06 FaxCentre 2121/2121L...
- Page 163 #0: With 1: Without Recall protection #0: With 1: Without Soft-switch 29: Miscellaneous Table 29: Miscellaneous Default Value Naming Numbers of SMS centres menus #0: Present 1: Missing Activation of the Notification menu #0: Enabled 1: Disabled FaxCentre 2121/2121L 11/06 6-31...
- Page 164 Restriction on ECP driver for dumping without menu* D #0: ECP enabled 1: Disabled Restriction on Modem presence #0: Modem present 1: Modem missing Reserved Reserved Soft-switch 30: Miscellaneous Table 30: Miscellaneous Default Value Naming Reserved Reserved Reserved Reserved Reserved Reserved Reserved Reserved 6-32 11/06 FaxCentre 2121/2121L...
-
Page 165: Gp 5 Software Download
GP 5 Software Download The machine software can be updated by means of a link to a PC. Download Via PC Link Use the Firmware Download Tool provided on the CD in the product training kit. FaxCentre 2121/2121L 11/06 6-33... -
Page 166: Gp 6 Remote Readout
(as shown in the remote readout report). If, for in- stance, the initial number of pages for the consumable is 8000 and the threshold is set to 2000 6-34 11/06 FaxCentre 2121/2121L... - Page 167 Char/Num Manual Entry TVERS_TLR 0x00 char TNO_23MIL 0x01 char* TNO_SERIE 0x02 char* TNO_CLIENT 0x03 char* TNO_VERSION 0x04 char* TINDICATIF 0x05 char* TIDENTIFIANT 0x06 char* TNO_SERVEUR 0x08 char* TCAUSE_EMIS 0x09 uchar TNOMRESP 0x10 char[15] TSOCIETE 0x11 char[15] FaxCentre 2121/2121L 11/06 6-35...
- Page 168 Table 2: Values Field Values Manual send Toner Drum Revision The initial values of the page counters for new consumables are: • 2 000 pages for the toner (T_INIT_NOIR) • 4 000 pages for the drum (T_INIT_OPC) 6-36 11/06 FaxCentre 2121/2121L...
- Page 169 • Serial number (TNO_SERIE): The identification of the terminal, entered by the installer. • Client account number (TNO_CLIENT): The identification of the contract, entered by the installer. • Release number (TNO_VERSION): Generated automatically (software version). FaxCentre 2121/2121L 11/06 6-37...
- Page 170 (or 0 if there has not been any previous remote readout). • Last replacement (T_DATE_CHG_NOIR): date of the last replacement of the toner cartridge. Drum • Estimated number of pages (T_INIT_OPC): theoretical capacity of the drum estimated in average pages. 6-38 11/06 FaxCentre 2121/2121L...
- Page 171 Remote Readout transmission should be performed, if the state of the machine allows it. If this transmission is not possible for any reason, print out the Remote Readout parameters or display the copy counter and note these values on the service call report. FaxCentre 2121/2121L 11/06 6-39...
-
Page 172: Gp 7 Saving Data On The Directory Card
Fax Communication parameters • Type of STN network. • Transmission mode. • Transmission report printout mode. • Fax transmission/reception rate. • Number of rings. • Header (LIC) transmission and printing. Internet/LAN communication parameters • Data rate. 6-40 11/06 FaxCentre 2121/2121L... - Page 173 Internet rerouting mode. • LAN configuration mode (manual/automatic). • Internet provider connection/mail service/servers/authentication parameters des providersin- ternet. • LAN mail service/server/authentication parameters. • If a machine is to be cloned, record the bios names of both machines. FaxCentre 2121/2121L 11/06 6-41...
-
Page 174: Gp 8 Packaging And Transport Of The Machine
3. Pack the document and paper trays in their original plastic bags and packing boxes. Pack the machine in its original styrofoam and place it in the original packing box together with the accessories (trays, documentation, etc.). 4. Seal the packing box with adhesive tape. Figure 1 6-42 11/06 FaxCentre 2121/2121L... -
Page 175: Gp 9 Functions Of The Service Provider
This procedure will erase options GDF, FSI and kit LAN. MENU Note: To see the initialization message, switch the machine off, then on. • Re-initialize the flash memory data (complete erase): open the scanner cover, then: MENU • Erase mailboxes (internal) only: MENU FaxCentre 2121/2121L 11/06 6-43... -
Page 176: Other Functions
Printout of all parameters (including installation and technical parameters): MENU • Switch to forced standby mode, independently of the clock: MENU • Switch to “software download by phone” mode: MENU • Switch to “software download by PC link” mode: MENU 6-44 11/06 FaxCentre 2121/2121L... - Page 177 Note: Refer to GP 21 for more information regarding scanner calibration. • Display main software version: MENU • Display modem type: MENU • Display boot software version: MENU • Enter serial number: MENU • Display LAN rate: MENU FaxCentre 2121/2121L 11/06 6-45...
- Page 178 Manually reboot the machine (with SOS 1 bit 8 set to 1): MENU • Display PCL/SG Script fonts checksum: MENU • Retransmission of faxes to print to rerouting mail: MENU • Activation of dump RAM server: MENU • Accept soft download via internet or Intranet: MENU 6-46 11/06 FaxCentre 2121/2121L...
-
Page 179: Gp 10 Paper Path
The paper taken up and fed in by the paper feed roll is transported through the machine by the BTR, fuser roller, and exit rolls and fed out of the machine face down onto the exit tray. Figure 1 FaxCentre 2121/2121L 11/06 6-47... -
Page 180: Gp 11 Paper Feed Section
(or through which the paper moves past the switch) and the system speed. It is then determined whether or not the actual length matches the paper length specified on the controller Figure 1 Figure 2 6-48 11/06 FaxCentre 2121/2121L... - Page 181 To reduce the number of paper misfeeds as a result of a paper feed failure, a paper feed retry sequence is carried if the paper feed switch is not actuated and deactuated within a predeter- mined period of time. • This function is provided for paper feed from any printer paper tray. FaxCentre 2121/2121L 11/06 6-49...
-
Page 182: Gp 12 Drum Charge
The pre-charge film supplies a preliminary charge to the drum prior to charging by the drum charge brush, thereby increasing charging efficiency. Construction Figure 1 Figure 2 1. Drum Charge Brush. 2. PC Drum. 3. Ground. 4. Drum Charge Brush Voltage. 6-50 11/06 FaxCentre 2121/2121L... -
Page 183: Gp 13 Ros Unit
Laser Exposure Process • The laser beam light emitted from the ROS is used to create an electrostatic latent image on the surface of the drum. • The following control is provided to correctly time image printing: FaxCentre 2121/2121L 11/06 6-51... - Page 184 G1 lens, and the SOS mirror to eventually hit the SOS sensor, which generates an SOS signal. • The SOS signal determines the laser emission timing for each line in the main scanning direction. 6-52 11/06 FaxCentre 2121/2121L...
- Page 185 CPU and the length of the paper. • The laser emission area is determined by the paper size. Areas with a width of 4 mm on both the leading and trailing edges are not, however, printed. FaxCentre 2121/2121L 11/06 6-53...
- Page 186 General Procedures and Information Figure 1 Cooling of the Machine Interior The Fuser Fan is used to discharge heat generated from the ROS out of the machine, thereby preventing the ROS from overheating. 6-54 11/06 FaxCentre 2121/2121L...
- Page 187 General Procedures and Information Figure 1 FaxCentre 2121/2121L 11/06 6-55...
-
Page 188: Gp 14 Imaging Cartridge Section
• The illustration below shows the construction of the toner cartridge and the developing unit. Figure 1 Figure 2 6-56 11/06 FaxCentre 2121/2121L... - Page 189 Therefore, always wrap the drum in the drum cloth or a soft cloth immediately after it has been removed from the printer. Use utmost care to prevent the sur- face of the Drum from being dirtied. FaxCentre 2121/2121L 11/06 6-57...
- Page 190 The potential on the surface of the drum exposed to the laser beam is then grounded through the ground plate, shaft, and set pin to the frame of the printer. 6-58 11/06 FaxCentre 2121/2121L...
- Page 191 A bias voltage, reversed from the developing bias, is applied before a print command is issued, before predrive, and during predrive, to prevent toner from transferring to the surface of the drum. FaxCentre 2121/2121L 11/06 6-59...
- Page 192 ON, and the front door is opened and closed. The detection is made electrically Detection of a new toner cartridge • The IC chip (CSIC) built into the toner cartridge detects a new toner cartridge only when it is first installed. 6-60 11/06 FaxCentre 2121/2121L...
- Page 193 The counter counts down when the amount of toner equivalent to Letter(A4), B/W 5% is con- sumed and the corresponding data is stored in the CSIC board. • A toner near empty condition and a toner empty condition are detected when the counter reads the corresponding predetermined count. Figure 9 FaxCentre 2121/2121L 11/06 6-61...
-
Page 194: Gp 15 Image Transfer
The cleaning sequence is carried out when the printer is started, a print command is issued, a print cycle is completed, and when the printer is started after a misfeed has been cleared. • There is the charge neutralizing needle installed for neutralizing the paper after image trans- fer. Figure 1 6-62 11/06 FaxCentre 2121/2121L... -
Page 195: Gp 16 Fuser Assembly
A heated roller system is used as the fusing system. The paper, to which the toner image has been transferred, is fed between the fusing roll heated by the heat roll lamp and the pressure roll. This permanently fuses the toner image to the paper. Figure 1 FaxCentre 2121/2121L 11/06 6-63... - Page 196 The warm-up control is performed when the power is turned ON, the front door is opened and closed, and the pause mode is cancelled. • During the standby state, the fuser temperature is kept lower (130°C) than during printing so as to economize on power consumption. 6-64 11/06 FaxCentre 2121/2121L...
- Page 197 195°C-185°C 185°C (383°F to 365°F) (365°F) 1200 Plain paper 160°C (320°F) 160°C-155°C 155°C (311°F) (320°F to 311°F) Thick paper, envelope, post- 165°C-170°C (329°F to 338°F) card OHP transparencies 155°C (311°F) 155°C-150°C 150°C (302°F) (311°F to 302°F) FaxCentre 2121/2121L 11/06 6-65...
-
Page 198: Gp 17 Paper Exit
GP 17 Paper Exit Paper Exit Mechanism • The paper exit mechanism transports the fused paper onto the exit roll. • The exit sensor detects not only a paper misfeed but also an open upper cover. Figure 1 6-66 11/06 FaxCentre 2121/2121L... -
Page 199: Gp 18 Functioning
Before performing any service on the CPU board, disconnect the phone lead. Before performing any service on the CPU electronic circuit board, it is also preferable to: • Set the power switch to the OFF position. • Disconnect all external interconnect leads (LAN, ECP). • Unplug the power cord. FaxCentre 2121/2121L 11/06 6-67... -
Page 200: Gp 19 Operating Sequence
General Procedures and Information GP 19 Operating Sequence Print Start Sequence Figure 1 Figure 2 6-68 11/06 FaxCentre 2121/2121L... -
Page 201: Gp 20 Scanning And Communication Error Codes
Code 0C - Received document faulty Ask the correspondent who calls you to check the length of his document (it is too long to be re- ceived in its entirety). FaxCentre 2121/2121L 11/06 6-69... - Page 202 Transmission has not started: the phone line is too noisy. Code 1B - Document transmission fault In the case of a transmission: restart the transmission. In the case of a reception: ask your correspondent to retransmit his document. 6-70 11/06 FaxCentre 2121/2121L...
- Page 203 To verify the internet parameters, print them out by entering the key sequence MENU, 9, 4, 5 fol- lowed by the OK key. Code 50 - Server Error Verify the parameters SMS server number or a communication error occurred during data trans- fer. FaxCentre 2121/2121L 11/06 6-71...
-
Page 204: Gp 21 Video Check
7. To further evaluate the image quality, run a dark dusting. 8. Ensure that SOS1, Bit 8 is set to 1. 9. Press the # key to print the shading pattern, then check for any defects. 6-72 11/06 FaxCentre 2121/2121L... -
Page 205: Gp 22 Machine Components Layout
General Procedures and Information GP 22 Machine Components Layout Figure 1 1. ROS Assembly 2. Exit Roller 3. Fusing Unit Image Transfer Section Multipurpose (MP) Tray Toner Cartridge 7. Drum Cartridge FaxCentre 2121/2121L 11/06 6-73... -
Page 206: Gp 23 Service Log
General Procedures and Information GP 23 Service Log 6-74 11/06 FaxCentre 2121/2121L... - Page 207 WD 1 Connection Diagram (1 of 5) ..................14 WD 2 Connection Diagram (2 of 5) ..................15 WD 3 Connection Diagram (3 of 5) ..................16 WD 4 Connection Diagram (4 of 5) ..................17 WD 5 Connection Diagram (5 of 5) ..................18 FaxCentre 2121/2121L 11/06...
- Page 208 Wiring Diagrams Page intentionally blank 11/06 FaxCentre 2121/2121L...
-
Page 209: Control Panel Board
PSF: sheet present, detects the insertion of a sheet to be scanned. • DA: start of scan, used to position the sheet relative to the CIS. • OUV: cover open, detects the opening of the scanner cover: the motor is then stopped auto- matically. FaxCentre 2121/2121L 11/06... - Page 210 CSPUP Micro controller chip select VEILLE Not used REVEIL Not used STSC Start of scan sensor Sheet present sensor OUVCAP Cover open sensor P3V3 3.3V VALIM ALIMCOUPE Differential LF signal to loudspeaker Differential LF signal to loudspeaker 11/06 FaxCentre 2121/2121L...
-
Page 211: Cpu Board
Before printing, the documents to be printed are stored as bitmaps in SDRAM. The SDRAM is also used as the working memory for the Digicolor2. Block Diagram of Electronics Architecture Figure 1 : Block Diagram of Electronic Architecture FaxCentre 2121/2121L 11/06... - Page 212 Printer status (serial data transmitted by printer) TXIMP CPU command (serial data transmitted to printer) CBSY Controller status busy SCLKIMP Serial link clock printer sync VIDEO Printer video 17-20-21 Ground 22-25 Not connected linked to 10 5 V supply 5 V supply 11/06 FaxCentre 2121/2121L...
- Page 213 Ground ALIMCIS 5V Supply VREFCIS CIS reference voltage SPCIS CIS start pulse (line sync) CLKCIS CIS pixel clock (point sync) ALIMLED LED supply (current) GNDLEDB Blue LED cathode GNDLEDV Green LED cathode GNDLEDR Red LED cathode Ground FaxCentre 2121/2121L 11/06...
- Page 214 Mode select ERREUR Proprietary 17-19 Ground Ground Ground Ground Ground Ground Ground 26-27-28-29-30 Ground 15-33-34-35 Not Connected USB: USB Interface Table 6: USB Interface Signal Input/Output VBUS_USB Supply from master USBN Differential pair USBP Differential pair Ground 11/06 FaxCentre 2121/2121L...
- Page 215 Not connected Network reception differential pair Not connected Not connected STN: Switched Telephone Network Interface Table 8: Switched Telephone Network Interface Signal Input/Output Not connected Loopback L1 Telephone line pair Telephone line pair Loopback L2 Not connected FaxCentre 2121/2121L 11/06...
-
Page 216: Voltage Checks
Supply Voltages: Connections between power supply board and CPU board Table 1: Supply Voltages CPU Board pin Value Function +5 V 5 V Supply Ground 5 V Supply +24V 24 V Note: The power input of the supply is protected by a fuse. 7-10 11/06 FaxCentre 2121/2121L... -
Page 217: Lvps
R4044 and R4045 5 V regulator Z113 ANAVCC vcc ana Regulator Resistors Z4376 R4395 // R4397 ALIMCIS 3,3V command + 5 V : VCC 3.3 V regulator + 3,3 V : P3V3 Z4050 Figure 1 : Supply FaxCentre 2121/2121L 11/06 7-11... -
Page 218: Electrical Components Layout
Table 1: Electrical Components Layout Symbol Component Symbol Component Main Motor Interlock Fuser Fan Paper Empty Sensor Fuser Heat Lamp Exit Sensor Thermistor SL-1 Paper Feed Solenoid Thermostat PU-1 LVPS HV-1 HVPS Paper Feed Switch PWB-P Main PWB 7-12 11/06 FaxCentre 2121/2121L... -
Page 219: Main Pba And Cpu Pj Locations
Wiring Diagrams Main PBA and CPU PJ Locations Figure 1 FaxCentre 2121/2121L 11/06 7-13... -
Page 220: Wd 1 Connection Diagram (1 Of 5)
Wiring Diagrams WD 1 Connection Diagram (1 of 5) Figure 1 7-14 11/06 FaxCentre 2121/2121L... -
Page 221: Wd 2 Connection Diagram (2 Of 5)
Wiring Diagrams WD 2 Connection Diagram (2 of 5) Figure 1 FaxCentre 2121/2121L 11/06 7-15... -
Page 222: Wd 3 Connection Diagram (3 Of 5)
Wiring Diagrams WD 3 Connection Diagram (3 of 5) Figure 1 7-16 11/06 FaxCentre 2121/2121L... -
Page 223: Wd 4 Connection Diagram (4 Of 5)
Wiring Diagrams WD 4 Connection Diagram (4 of 5) Figure 1 FaxCentre 2121/2121L 11/06 7-17... -
Page 224: Wd 5 Connection Diagram (5 Of 5)
Wiring Diagrams WD 5 Connection Diagram (5 of 5) Figure 1 7-18 11/06 FaxCentre 2121/2121L... - Page 225 Page 1 of 2 APPENDIX A: Health & Safety Incident Report Involving a Xerox Product Customer Identification Customer Name: Name of Customer Contact Person: Address: E-mail: Telephone : Fax : Customer Service Engineer Identification Name: Employee : Pager : Location:...
- Page 226 Mailing Address: Date Report Submitted: Instructions: E-mail or fax this completed form to EH&S: ž For incidents in Xerox Europe and Developing Markets East (Middle East, Africa, India, China, and Hong Kong) please e-mail: or fax: +44 (0) 1707 35 3914 [intelnet 8*668 3914] Elaine.Grange@gbr.xerox.com...