Table of Contents
Advertisement
Advertisement
Table of Contents

Subscribe to Our Youtube Channel
Related Manuals for stex S25T


Summary of Contents for stex S25T
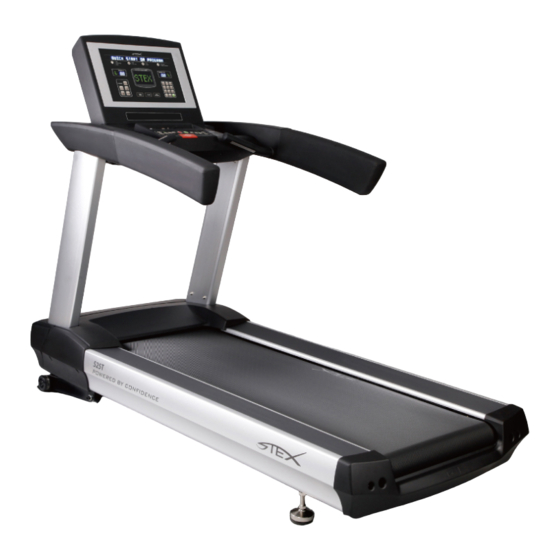
- Page 1 S25T Treadmill Customer Support Services Service manual...
- Page 2 General Contents General General General Contents Contents Contents 1. Introduction 2. Component identification 3. Parts manual 4. Assembly instructions Sectional Sectional Sectional Sectional Contents Contents Contents Contents < 2 >...
- Page 3 4. 4. 4. 4. If If If If you you have have have have any any problem problem problem problem If you have any problem for STEX treadmill S25T series, Please contact our sales dealer or our service ce nter by < 3 >...
- Page 4 Report in the last page. It would be appreciated if you fill out the form like the sample. Then we will pro ceed your claim quickly. 3. 3. 3. 3. Part Part Part manual manual Part manual manual 3-1 Total assembly - S25T, S25TX 3-1 Description Parts No. Parts Q’TY Remark S25T S25TX Master main frame 1 ea...
- Page 5 Hexagon socket head 33W1-1N820 14 ea M8 x 20L (SEMS) 3-2 Assembly Main Frame (#1) 3-2 Description Parts No. Parts Q’TY Remark S25T S25TX 1’st main frame assembly 1 ea 21MF-TSA01 21MF-TSC01 Front motor cover 32M3-TS011 1 ea Top motor cover...
- Page 6 M8 x 20L (SEMS), ②, ⑥ Hexagon socket head 33W1-1B820 4 ea Φ 5 x 12L, ④ Tapping truss head 33U6-6Z512 4 ea M5 x 12L, ③ Machine pan head 33T6-1B512 4 ea 3-3-1 Assembly Main Frame (#2) – S25T < 6 >...
- Page 7 3-3-1 Description Parts Parts No. Q’TY Remark 2’nd main frame assembly 21MF-TSB01 1 ea Incline motor 33S1-IS021 1 ea Incline front fix shaft 32M2-T80W1 1 ea Split pin 33N5-P0540 1 ea Incline bushing 32M2-TS401 1 ea Hexagon head 33T1-4BA45 1 ea M10 x 45L Lock nut 33N1-L1000...
- Page 8 Front terminal assembly 21FT-TSP01 1 ea Hexagon socket head 33W1-1B820 2 ea M8 x 20L(SEMS) Partition assembly 21PA-TSQ01 1 ea Hexagon socket head 33W1-1B820 2 ea M8 x 20L(SEMS) 3-3-2 Assembly Main Frame (#2) – S25TX < 8 >...
- Page 9 3-3-2 Description Parts Parts No. Q’TY Remark 2’nd main frame assembly 21MF-TSB01 1 ea Incline motor 33S1-IS021 1 ea Incline front fix shaft 32M2-T80W1 1 ea Split pin 33N5-P0540 1 ea Incline bushing 32M2-TS401 1 ea Hexagon head 33T1-4BA45 1 ea M10 x 45L Lock nut 33N1-L1000...
- Page 10 Partition assembly 21PA-TSQ01 1 ea Hexagon socket head 33W1-1B820 2 ea M8 x 20L(SEMS) Adapter bracket 33M1-TSR01 1 ea Adapter fix bracket 32M1-TWT11 1 ea Adapter 3B802P005 1 ea 3-4 Assembly Auto Tensioner (#3) 3-4 Description Parts Parts No. Q’TY Remark Tensioner bracket 01 32M1-TS011...
- Page 11 Snap ring - C type 33N1-H4200 1 ea Φ42 Ball bearing 33N2-Z6004 2 ea #6004ZZ Hexagon socket head 33W1-1B855 1 ea M8 x 55L(SEMS) Nut-nylon insert lock 33N1-L0800 1 ea Tensioner spring 32M2-T80T1 1 ea Hexagon socket head 33W1-1B815 2 ea M8 x 15L(SEMS) 3-5 Assembly Rear Roller (#4) 3-5 Description...
- Page 12 3-6 Assembly Front Roller (#5) 3-6 Description Parts Parts No. Q’TY Remark Front roller pipe 32M2-TW801 1 ea Front roller shaft 32M2-TWB01 1 ea Ball bearing 33N2-D6305 2 ea #6305DD Snap ring - C type 33N1-S2500 2 ea Φ25 Snap ring - C type 33N1-R6200 2 ea Φ62...
- Page 13 3-7 Assembly Partition (#6) 3-7 Description Parts Parts No. Q’TY Remark Partition plate 32M1-TSQ11 1 ea Antistatic 32M2-T80P1 1 ea Machine pan head 33T6-1B510 3 ea M5x10L(SEMS) < 13 >...
- Page 14 32M1-TSL03 1 ea Front wheel for S25T 33N5-M0160 2 ea Hexagon socket head 33W1-1B815 2 ea M8 x 15L(SEMS) Oil less bearing for S25T 32N2-O2040 2 ea Leg washer 32M1-T80V1 2 ea Bearing shaft for S25T 32M2-TSL20 2 ea Washer-split lock...
- Page 15 6 ea M8 x 15L(SEMS) Tracking bush 32M2-TS301 2 ea 3-9 Assembly Display Frame (#1) 3-9 Description Parts No. Parts Q’TY Remark S25T S25TX Display console assembly 21DC-TSA01 1 ea Display top assembly 1 ea 21DC-TSB01 21DC-TSC01 Hexagon socket head 33W1-1B850...
- Page 16 3-10 Assembly Display Frame (#2) 3-10 Description Parts Parts No. Q’TY Remark 1’st Display console assembly 21DC-TSA11 1 ea Bottom case assembly 21DC-TSB11 1 ea Tapping pan head 33U5-6B516 10 ea Φ5 x 16L Machine pan head 33T6-1B512 2 ea M5 x 12L(SEMS) <...
- Page 17 3-11 Assembly Display Frame (#3) 3-11 Description Parts Parts No. Q’TY Remark Display bottom case 32M3-TS141 1 ea COMM board 22BD-TS15D 1 ea COMM fix bracket 32M1-TSV01 1 ea Φ5 x 16L Machine pan head 33T6-1B408 2 ea M4 x 8L(SEMS) Tapping truss head 33U6-6Z512 2 ea...
- Page 18 3-12 Assembly Display Frame (#4) 3-12 Description Parts Parts No. Q’TY Remark Console assembly 21DC-TSA31 1 ea Middle case assembly 21DC-STA41 1 ea Tapping truss head 33U6-6Z512 10 ea M5 x 12L(SEMS) < 18 >...
- Page 19 3-13 Assembly Display Frame (#5) 3-13 Description Parts Parts No. Q’TY Remark Display middle case 32M3-TS131 1 ea Emergency switch 32M3-TS161 1 ea Emergency fix bracket 32M3-TS151 1 ea Micro switch 33H1-TS011 1 ea Tapping truss head 33U6-6Z520 2 ea Φ5 x 20L Tapping truss head 33U6-6Z516...
- Page 20 Multi fixer plate 32M1-TSAU1 1 ea Machine pan head 33T6-1B408 4 ea M4 x 8L(SEMS) Fast track board 22BD-TS13A 1 ea Tapping truss head 33U6-6B410 2 ea Φ4 x 10L Membrane switch(fast track) 32P5-TS021 1 ea Emergency wire 32Q1-TSEW1 1 ea 3-14 Assembly Display Frame (#6) 3-14 Description Parts...
- Page 21 3-15 Assembly Display Frame (#7) 3-15 Description Parts Parts No. Q’TY Remark Heart rate pipe assembly 32M1-TSA21 1 ea Heart rate rubber 32M3-TST31 1 ea Heart rate mold top 32M3-TS181 1 ea Heart rate mold bottom 32M3-TS191 1 ea Tapping pan head 33U5-6B410 2 ea Φ4 x 10L...
- Page 22 3-16-1 Assembly Display Frame – S25T (#8) 3-16-1 Description Parts Parts No. Q’TY Remark 1’st display top assembly 21DC-TSB11 1 ea Display top bottom case 32M3-TS091 1 ea Tapping pan head 33U5-6B516 4 ea Φ5 x 16L Display top back cover...
- Page 23 3-16-2 Assembly Display Frame – S25TX (#8) 3-16-2 Description Parts Parts No. Q’TY Remark 1’st display top assembly 21DC-TSC11 1 ea Display top bottom case 32M3-TS091 1 ea Tapping pan head 33U5-6B516 4 ea Φ5 x 16L Display top back cover 32M3-TS111 1 ea Display top back upper cover...
- Page 24 3-17-1 Assembly Display Frame – S25T (#9) 3-17-1 Description Parts Parts No. Q’TY Remark Top assembly 32M1-TSX04 1 ea Top front panel assembly 21DC-TSB21 1 ea Machine pan head 33T6-1B512 6 ea M5 x 12L(SEMS) Display top middle case 32M3-TS081...
- Page 25 3-17-2 Assembly Display Frame – S25TX (#9) 3-17-2 Description Parts Parts No. Q’TY Remark Top front panel assembly 21DC-TSC21 1 ea Display top middle case 32M3-TS081 1 ea Tapping truss head 33U6-6Z512 8 ea Φ5 x 12L Top assembly 32M1-TSX01 1 ea <...
- Page 26 Machine pan head 33T6-1B512 4 ea M5 x 12L(SEMS) Tapping truss head 33U6-6Z512 4 ea Φ5 x 12L 3-18-1 Assembly Display Frame – S25T (#10) 3-18-1 Description Parts Parts No. Q’TY Remark Display top front panel (Basic) 32M3-TS071 1 ea...
- Page 27 3-18-2 Assembly Display Frame – S25TX (#10) 3-18-2 Description Parts Parts No. Q’TY Remark Display top front panel (15” LCD) 32M3-TSX71 1 ea 15” LCD panel 33F3-L0151 1 ea LCD guide panel (15”) 32M2-TS0U1 1 ea 15” bracket 32M1-TSX32 1 ea LCD back plate _ LH(RH) 32M1-TSXC1/D1 1 set...
- Page 28 6 ea Machine pan head 33T6-1B512 4 ea M5 x 12L(SEMS) Machine pan head 33T6-1Z308 13 ea M3 x 8L 3-19-1 Main Circuit Diagram – S25T 3-19-1 Description Parts Parts No. Q’TY Remark Power cable 33S2-P0011 1 ea Ferrite core (BNF-14)
- Page 29 Break resistor 33S2-R0002 1 ea TM5 Driving motor 32Q1-T81D1 1 ea Driving motor assembly 21DM-TW003 1 ea Incline motor 33S1-IS021 1 ea Ferrite core (BNF-14) 32FC-TS011 1 ea S_LAN cable 1.5 32Q1-TS1B3 1 ea EXT. Input board 22BD-TS16D 1 ea Option S_CSAFE cable _ L 32Q1-TS1A2...
- Page 30 3-19-2 Description Parts Parts No. Q’TY Remark Power cable 33S2-P0011 1 ea Ferrite core (BNF-14) 32FC-TS011 1 ea Circuit breaker 33S2-S0004 1 ea Power L cable 33Q1-TS1G4 1 ea Ferrite core (BNF-27) 32FC-TS021 1 ea Noise filter 33S2-F0002 1 ea S_TM5_Power cable 32Q1-TS1E2 1 ea...
- Page 31 3-20-1 Display Circuit Diagram – S25T 3-20-1 Description Parts Parts No. Q’TY Remark Interface board 22BD-TS12K 1 ea S _ IPOD _ Comm cable 32Q1-TS153 1 ea IPOD cable 32Q1-TS1M1 1 ea Front board 22BD-TS14E 1 ea S _ LAN cable 0.3...
- Page 32 Fast track board 22BD-TS13B 1 ea S _ Fast key cable 32Q1-TS164 1 ea S _ HR Combi cable 32Q1-TS113 1 ea S _ HR cable 32Q1-TS123 2 ea Heart rate cell 32M1-TST31 4 ea S _ Emergency cable 32Q1-TS133 1 ea Emergency switch 32M3-TS161...
- Page 33 3-20-2 Description Parts Parts No. Q’TY Remark Interface board 22BD-TS12K 1 ea S _ IPOD _ Comm cable 32Q1-TS153 1 ea IPOD cable 32Q1-TS1M1 1 ea Front board 22BD-TS14E 1 ea S _ LAN cable 0.3 32Q1-TS1C3 1 ea S _ CSAFE cable _ H 32Q1-TS192 1 ea Option...
- Page 34 3-21-1 Top Circuit Diagram – S25T 3-21-1 Description Parts Parts No. Q’TY Remark < 34 >...
- Page 35 Display board 22BD-TS11E 1 ea S _ Display data cable 32Q1-TS181 1 ea S _ Display key cable 32Q1-TS171 1 ea Membrane overlay 32P5-TS011 1 ea 3-21-2 Top Circuit Diagram – S25TX 3-21-2 Description Parts Parts No. Q’TY Remark LCD monitor 33F3-LS001 1 ea <...
-
Page 36: Assembly Instructions
DO verify the contents of the delivery prior to setting the machine. If there are any missing parts, con tact STEX(Sales dealer or our service center) at the number listed in the operation manual. Keep the ship ping cartons in case of returning. - Page 37 Accompanying parts Models Parts Q’TY S25T S25TX S25TXi ○ ○ ○ Master main frame ○ ○ ○ Display support R ○ ○ ○ Display support L ○ ○ ○ Hexagon socket head // (SEMS)M8x20L ○ ○ ○ Display console assembly ○...
- Page 38 Assembly procedures � S25T 1. Check the contents//Accompanying parts, required tools, & others… 2. Disjoint the FRONT COVER and TOP MOTOR COVER ① Unfasten the 2 bolts(M8×20mm) from the FRONT COVER with 6mm L-wrench.(1) ② Unfasten the 4 bolts(M5×12mm) from the TOP MOTOR COVER with Screw driver.(2)
- Page 39 ① Unwrap the cables. Lead the cables through the DISPLAY SUPPORT R and Pull out the cables to the DIS PLAY SUPPORT R end.(1) 1) Main cable - S25T, S25TX 2) RF cable - S25TX 3) Adapter cable - S25TX...
- Page 40 m) with 6mm L-wrench.(2) 4. Secure the FRONT COVER and TOP MOTOR COVER ① Position the TOP MOTOR COVER as shown. ② Assemble the TOP MOTOR COVER with MASTER MAIN FRAME. Fasten the 4 bolts(M5×12mm) to four holes of the TOP MOTOR COVER with Screw driver.(1) ③...
- Page 41 5. Secure the DISPLAY CONSOLE ASSEMBLY ① Connect the cables between the DISPLAY CONSOLE ASSEMBLY and DISPLAY SUPPORT as shown.(1) 1) Main cable - S25T, S25TX - Connect the Main cable(+) and Main cable(-). 2) RF cable - S25TX - Connect the RF cables(+) with Gender.
- Page 42 6. Secure the DISPLAY TOP ASSEMBLY - S25T ① Connect the cables between the DISPLAY CONSOLE ASSEMBLY and DISPLAY TOP ASSEMBLY as sh own.(1) 1) Data cable - S25T - Connect the Data cable with the INTERFACE BOARD of the DISPLAY CONSOLE ASSEMBLY.
- Page 43 Assembly procedures � S25TX, S25TXi 1. Check the contents//Accompanying parts, required tools, & others… 2. Disjoint the FRONT COVER and TOP MOTOR COVER ① Unfasten the 2 bolts(M8×20mm) from the FRONT COVER with 6mm L-wrench.(1) ② Unfasten the 4 bolts(M5×12mm) from the TOP MOTOR COVER with Screw driver.(2) <...
- Page 44 ① Unwrap the cables. Lead the cables through the DISPLAY SUPPORT R and Pull out the cables to the DIS PLAY SUPPORT R end.(1) 1) Main cable - S25T, S25TX 2) RF cable - S25TX 3) Adapter cable - S25TX...
- Page 45 with 6mm L-wrench.(2) ③ Slide the DISPLAY SUPPORT L down over the DISPLAY SUPPORT L BRK and Fasten 5 bolts(M8×20m m) with 6mm L-wrench.(2) 4. Secure the FRONT COVER and TOP MOTOR COVER ① Position the TOP MOTOR COVER as shown. ②...
- Page 46 5. Secure the DISPLAY CONSOLE ASSEMBLY ① Connect the cables between the DISPLAY CONSOLE ASSEMBLY and DISPLAY SUPPORT as shown.(1) 1) Main cable - S25T, S25TX - Connect the Main cable(+) and Main cable(-). 2) RF cable - S25TX - Connect the RF cables(+) with Gender.
- Page 47 1) Scaler comm cable - S25TX - Connect the Scaler comm cable with the INTERFACE BOARD of the DISPLAY CONSOLE ASSEMBLY. 2) Key cable - S25T, S25TX - Connect the Key cable with the INTERFACE BOARD of the DISPLAY CONSOLE ASSEMBLY.
- Page 48 - Connect the HDMI cable as shown. 5) Earphone cable - S25TX - Connect the Earphone cable as shown. 6) I POD OUTPUT cable - S25TX - Connect the I POD OUTPUT cable as shown. RF cable - S25TX - Connect the RF cable with as shown. 8) USB cable - S25TX - Connect the USB cable as shown.
Need help?
Do you have a question about the S25T and is the answer not in the manual?
Questions and answers